1、搭建NDK环境
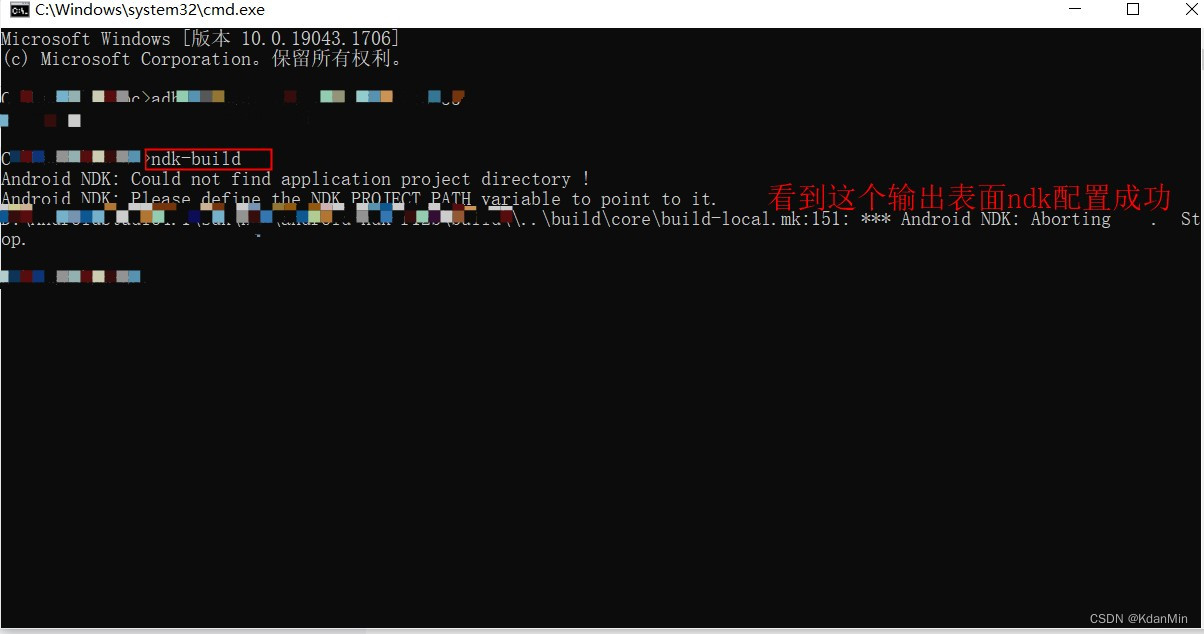
1.1首先配置ndk环境变量如下图输出 如何配置ndk环境变量这里不再赘述 请自行百度
1.2.如果没有ndk环境需要在AndroidStudio中下载如下图

?1.3通过这里下载NDK下载?选择自己对应电脑系统位数下载即可 比如32bit或者64bit 这里不再赘述如下图所示 下载好解压默认一般放在Android sdk根目录

1.4 NDK版本选择
?

2、添加c++支持库
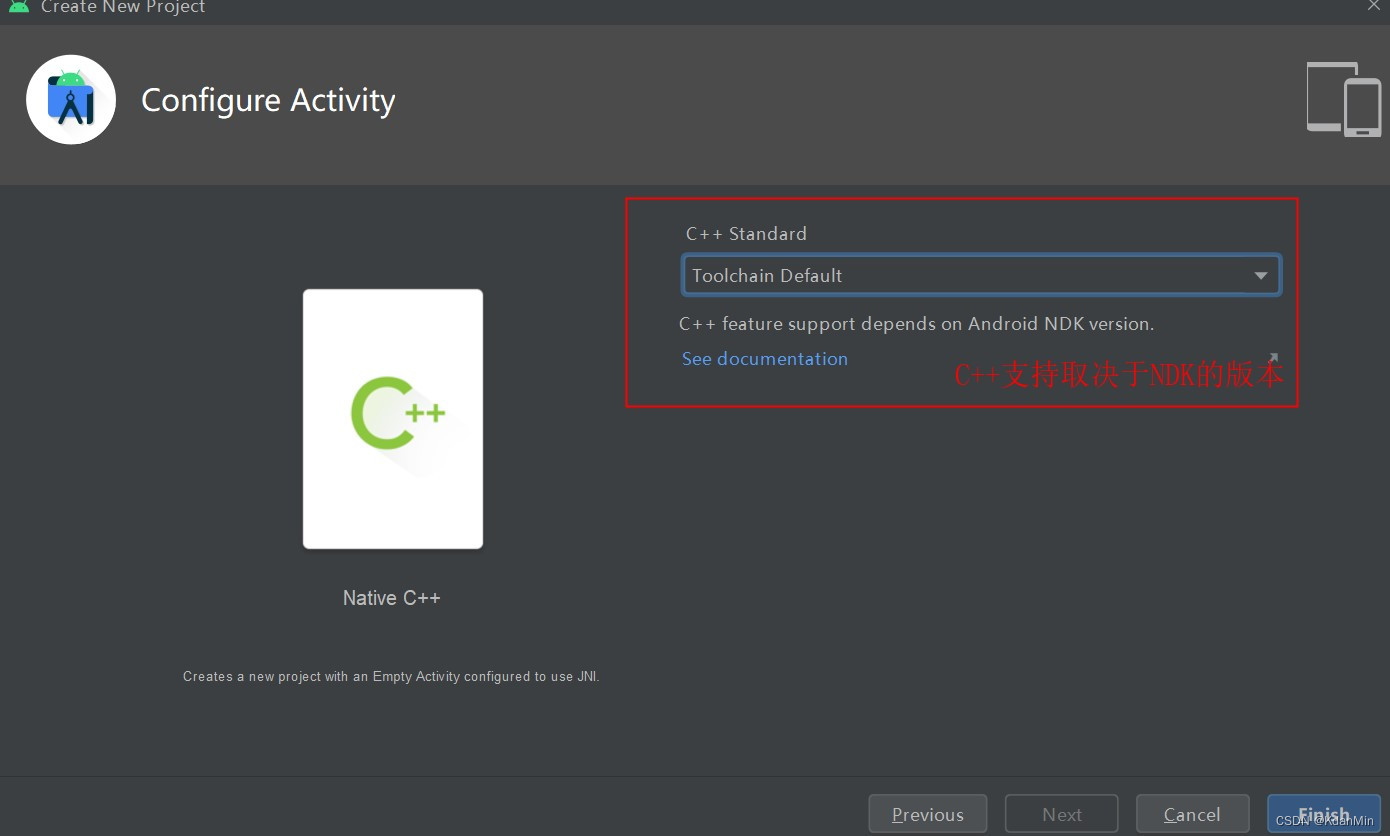
新建一个Project工程 选择c++ 然后选择对应的版本 这里需要注意是你的c++Standard支持库与ndk版本一致 否则会出现编译异常 点击finish就会开始构建项目
3、配置app/build.gradle文件
配置app build.gradle 主要配置ndk的 path 和 ndk版本号 以及abiFilters 芯片支持类型
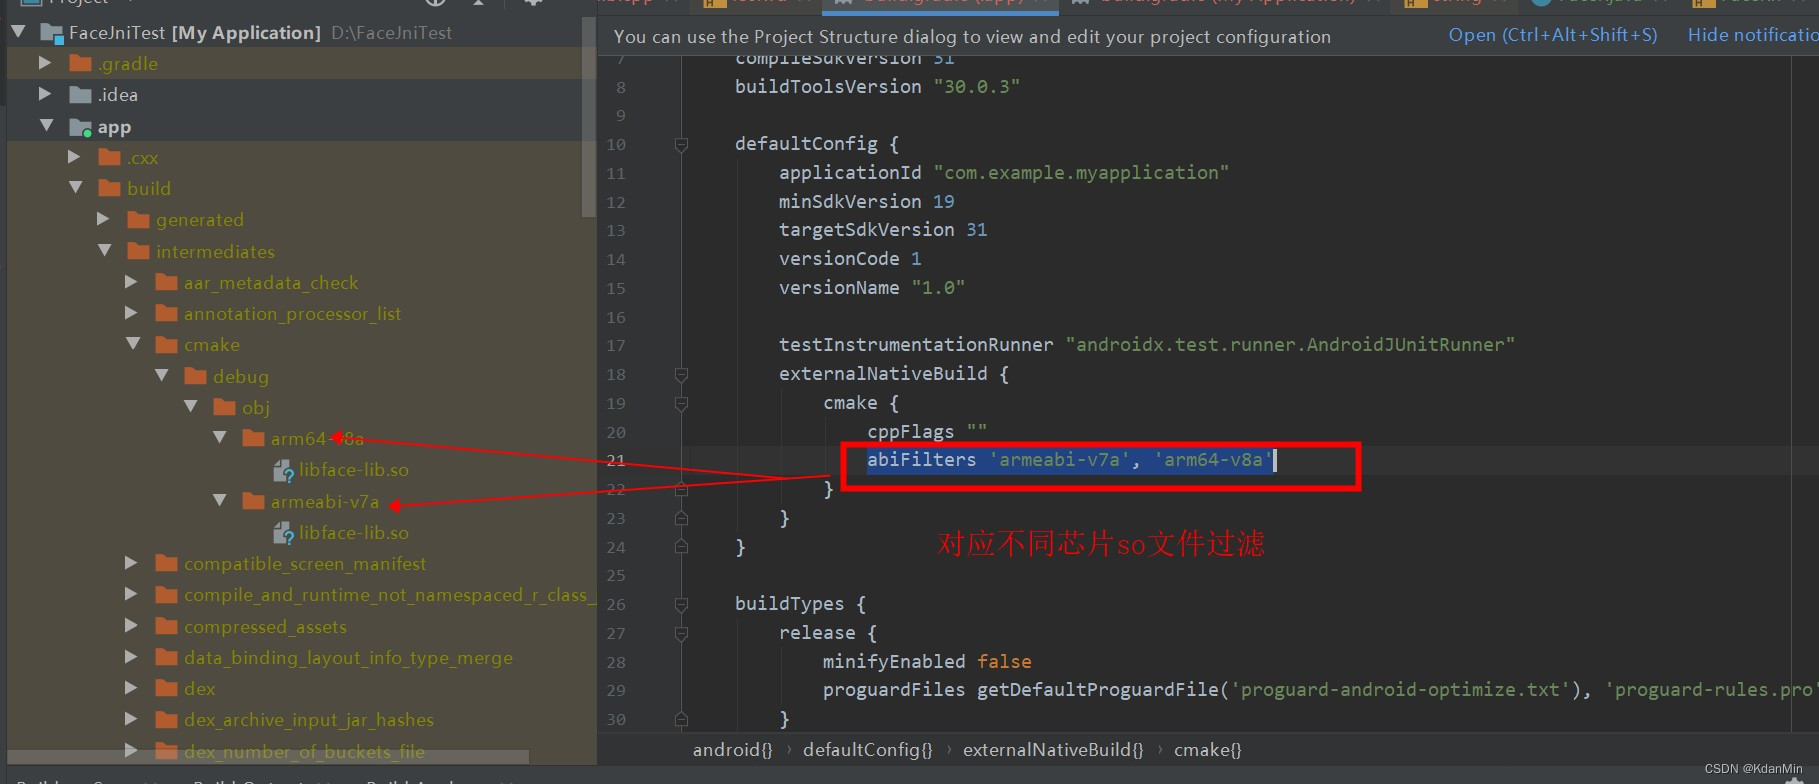
abiFilters 'armeabi-v7a', 'arm64-v8a'
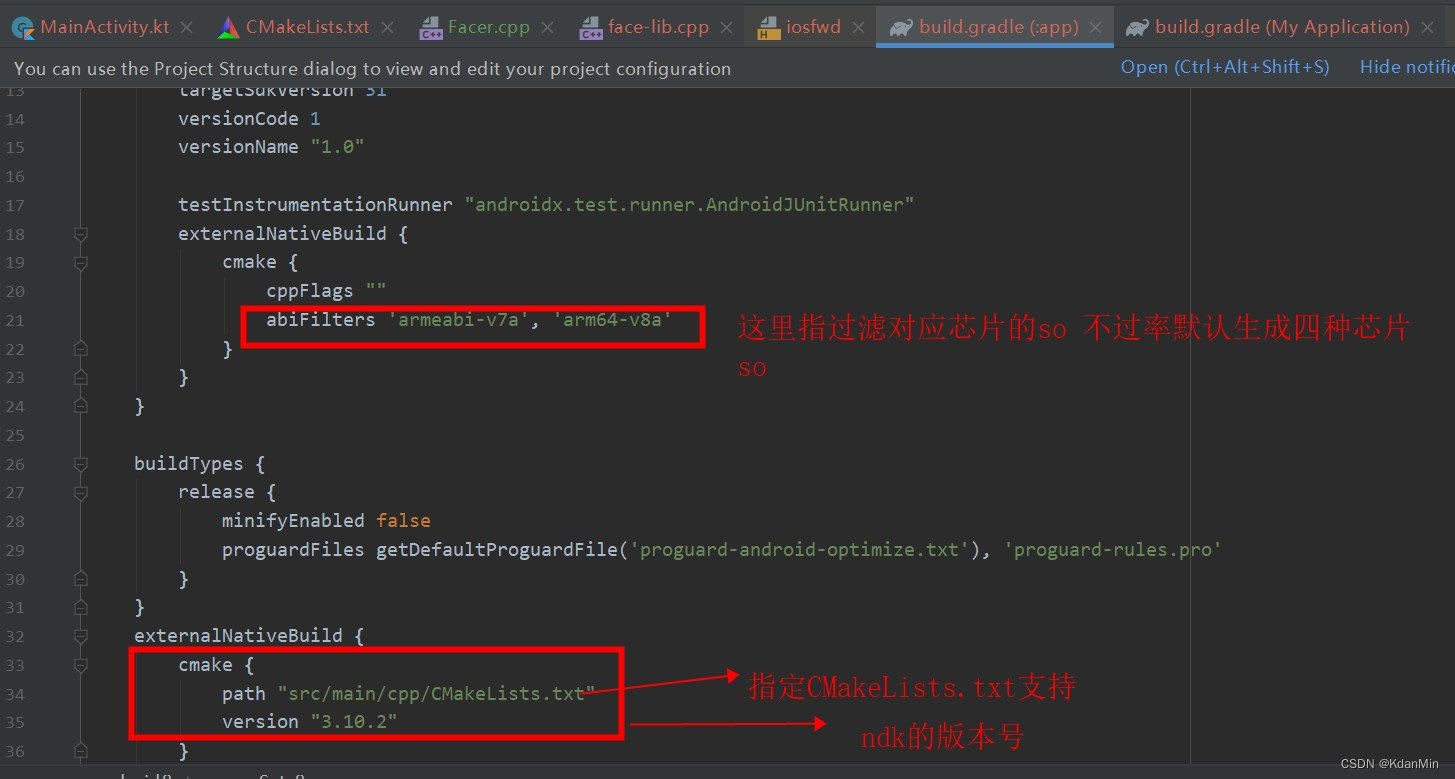
?3.1选择对应cmake版本

??3.2CmakeLists.txt文件
# For more information about using CMake with Android Studio, read the
# documentation: https://d.android.com/studio/projects/add-native-code.html

# Sets the minimum version of CMake required to build the native library.

cmake_minimum_required(VERSION 3.10.2) 对应cmake版本号

# Declares and names the project.

project("myapplication") 项目名称


# Creates and names a library, sets it as either STATIC
# or SHARED, and provides the relative paths to its source code.
# You can define multiple libraries, and CMake builds them for you.
# Gradle automatically packages shared libraries with your APK.

add_library( # Sets the name of the library.
             face-lib

             # Sets the library as a shared library.
             SHARED

             # Provides a relative path to your source file(s).
        face-lib.cpp Facer.h Facer.cpp)
#这里指添加cpp文件 h头文件你的加载库文件
# Searches for a specified prebuilt library and stores the path as a
# variable. Because CMake includes system libraries in the search path by
# default, you only need to specify the name of the public NDK library
# you want to add. CMake verifies that the library exists before
# completing its build.

find_library( # Sets the name of the path variable.
              log-lib

              # Specifies the name of the NDK library that
              # you want CMake to locate.
              log )
//这里指找到cmake库名字

# Specifies libraries CMake should link to your target library. You
# can link multiple libraries, such as libraries you define in this
# build script, prebuilt third-party libraries, or system libraries.

target_link_libraries( # Specifies the target library.
                       face-lib

                       # Links the target library to the log library
                       # included in the NDK.
                       ${log-lib} )
//关联ndk动态链接so库
4、编写jni代码 cpp文件
#include <jni.h>  导入jni头文件
#include <string>  导入字符串库
#include "Facer.h"  导入Facer.h头文件

extern "C" JNIEXPORT jstring JNICALL
//这里必须全路径否则就会找不到对应的类 包名+类名+方法名
Java_com_example_myapplication_Facer_getFacer(JNIEnv *env, jclass clazz, jstring top,
                                              jstring bottom, jstring right,jstring brow,jstring eyes,
                                          jstring hand) {
    Facer facer(//使用 env->GetStringUTFChars将jstring转化为string
            env->GetStringUTFChars(top, 0),
            env->GetStringUTFChars(bottom, 0),
            env->GetStringUTFChars(right,0),
            env->GetStringUTFChars(brow, 0),
            env->GetStringUTFChars(eyes, 0),
            env->GetStringUTFChars(hand, 0)
    );

    return env->NewStringUTF(facer.getFace().c_str());//返回对应字符串
}
5、添加头文件
//
// Created by zm-pc on 2022/7/2.
//

#include <iostream>

using namespace std;

#ifndef MY_APPLICATION_FACE_H
#define MY_APPLICATION_FACE_H


class Facer {
public:
    Facer(const string &top="-",const  string &bottom="-",const  string &right="%",
          const string &brow="~", const string &eyes=".",const string &hand="$");

    ~Facer();

public:
    string top;
    string bottom;
    string right;
    string brow;
    string eyes;
    string hand;
public:
    void printFace();
    string getFace();


};


#endif //MY_APPLICATION_FACE_H
6、编译so库
6.1Build->MakeProject(Window快捷键Ctrl+F9) 然后去build->intermediates->cmake->debug->obj对应不同芯片so

6.2配置多平台交叉编译so
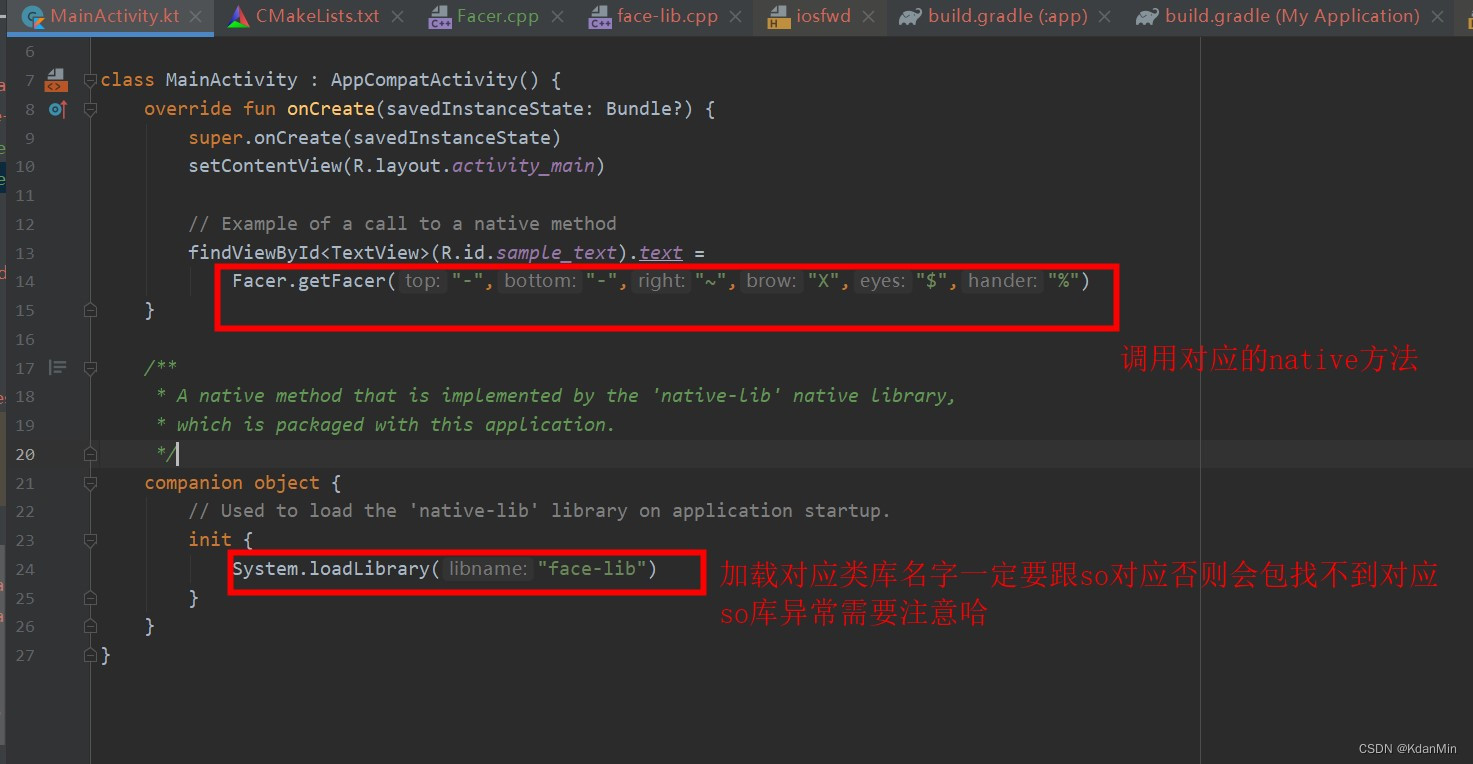
7、加载so库 调用native方法
?这里只是简单演示 主要属性ndk开发流程以及配置

8、结束总结
? ? ?8.1 NDK版本与c++ standrad库要对应
? ? ?8.2 cmake要与android studio ndk也要对应
? ? ?8.3 需要配置NDK环境变量?
? ? ?8.4 最好不要选最新cmake或者ndk环境
? ? ?8.5编译出现问题一定要细心检查 不要慌 仔细检查配置
? ? ?转载请注明出处 谢谢!Android ndk开发入门集锦一_KdanMin的博客-CSDN博客