目录
一、提出要求
点击一次切换一次颜色
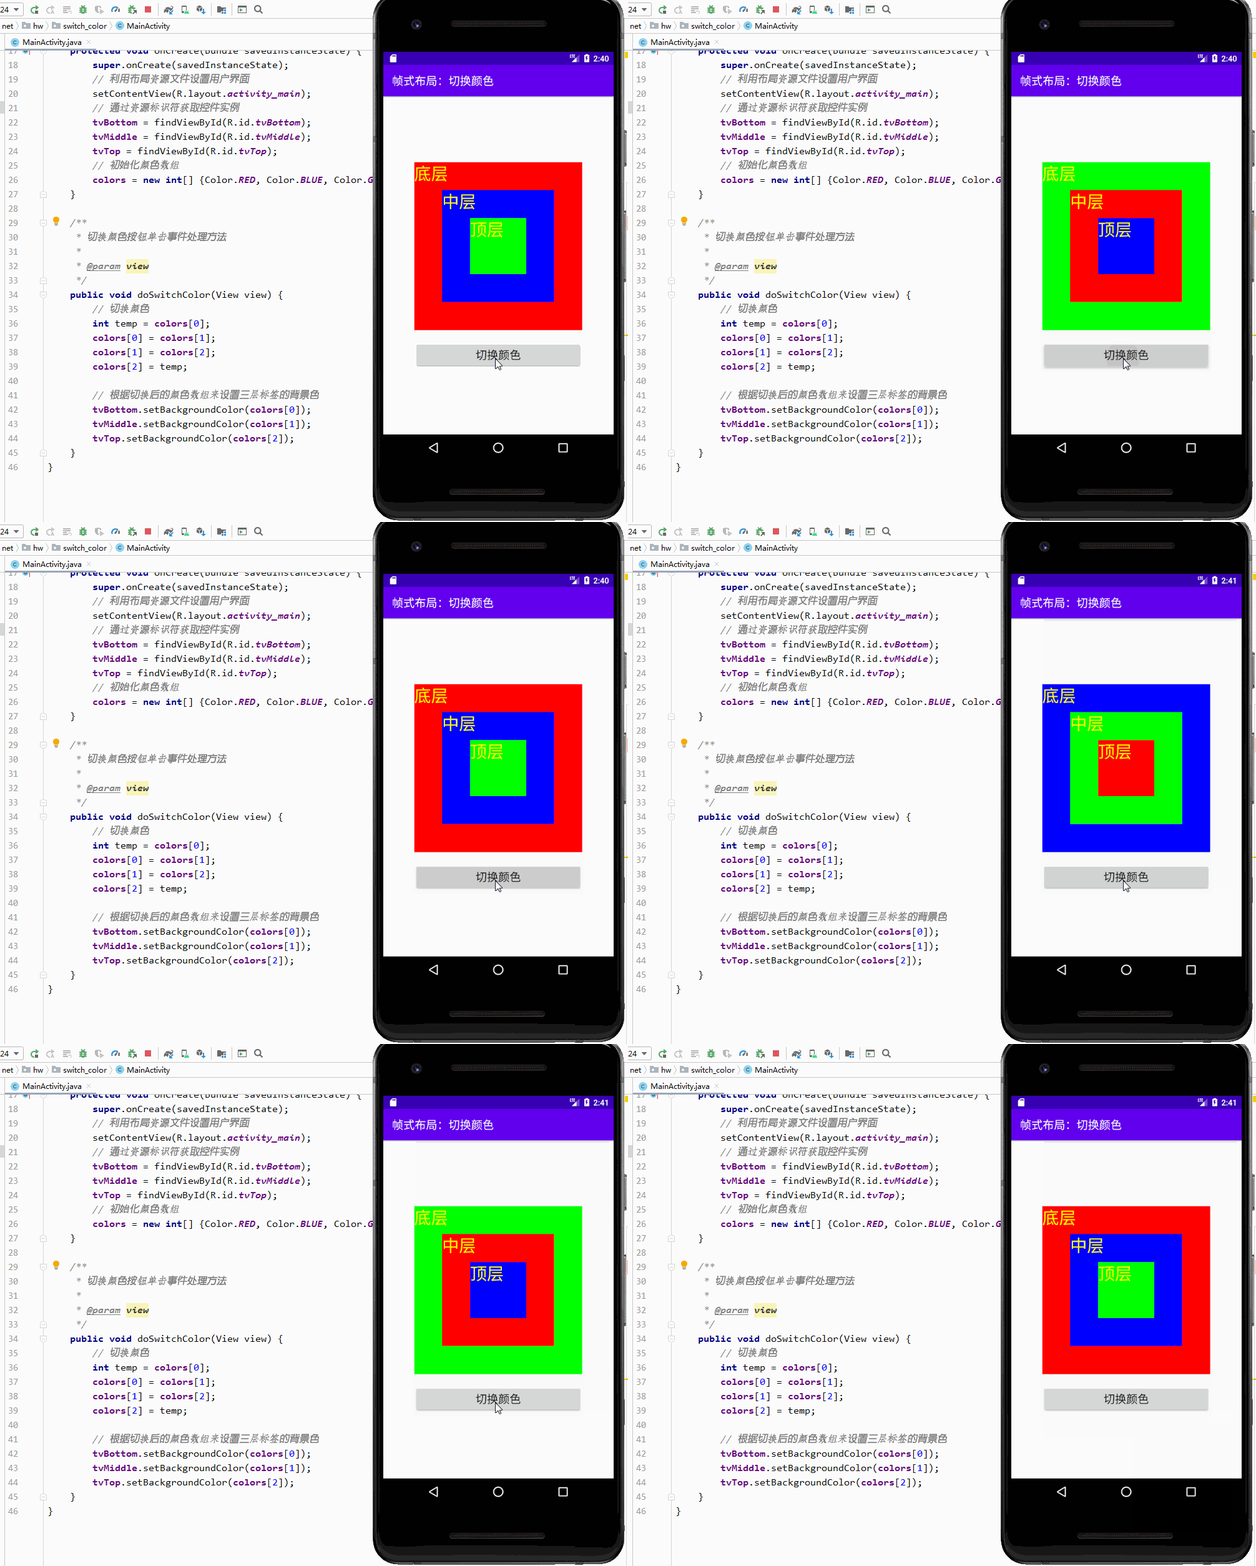
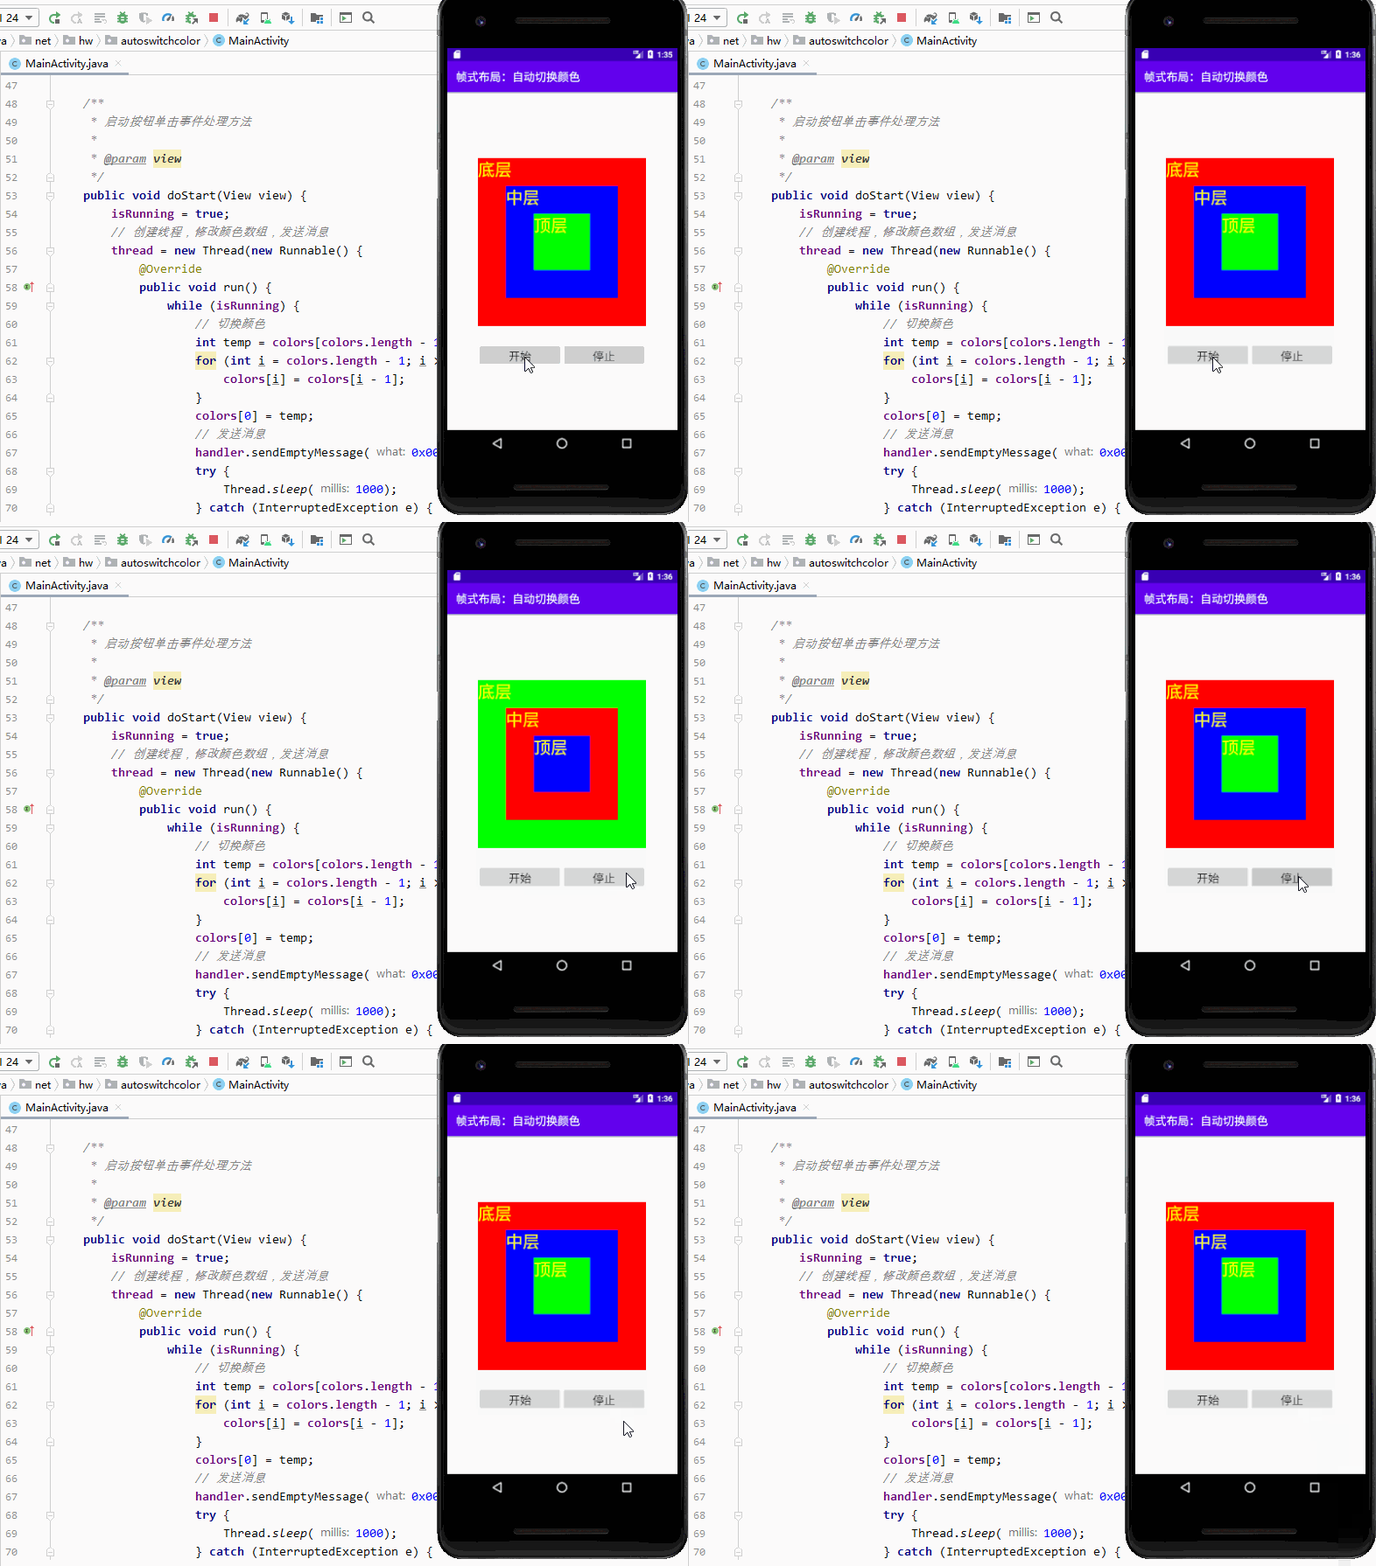
单击开始后颜色发生循环跳转,再次点击颜色切换加快,单击停止后颜色停止跳转
二、实现过程?
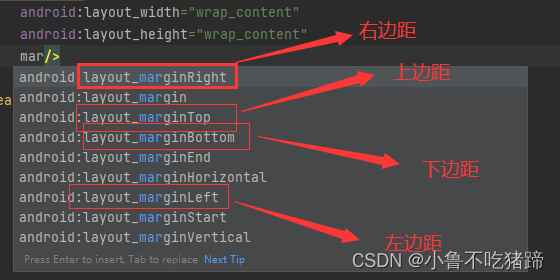
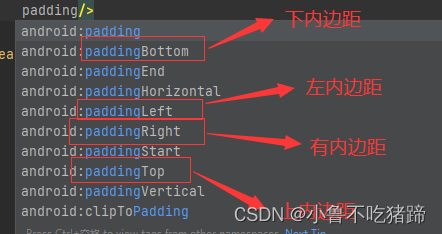
1.帧式布局常用的属性
scrollbars 滚动条 vertical|none|horizontal background 背景
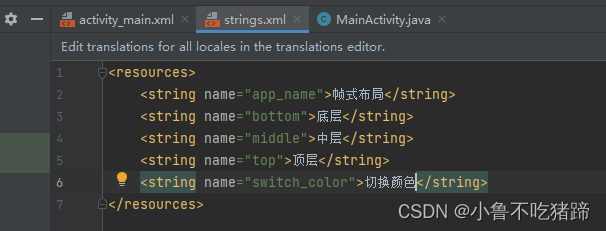
2.字符串资源文件
3.主布局资源文件
<?xml version="1.0" encoding="utf-8"?>
<LinearLayout xmlns:android="http://schemas.android.com/apk/res/android"
    xmlns:tools="http://schemas.android.com/tools"
    android:layout_width="match_parent"
    android:layout_height="match_parent"
    android:gravity="center"
    android:orientation="vertical"
    tools:context=".MainActivity">

    <FrameLayout
        android:layout_width="wrap_content"
        android:layout_height="wrap_content"/>

        <TextView
            android:id="@+id/tvBottom"
            android:layout_width="300dp"
            android:layout_height="300dp"
            android:layout_gravity="center"
            android:background="#ff0000"
            android:text="@string/bottom"
            android:textColor="#ffff00"
            android:textSize="30sp"/>

    <TextView
        android:id="@+id/tvMiddle"
        android:layout_width="200dp"
        android:layout_height="200dp"
        android:layout_gravity="center"
        android:background="#00ff00"
        android:text="@string/middle"
        android:textColor="#ffff00"
        android:textSize="30sp"/>

    <TextView
        android:id="@+id/tvTop"
        android:layout_width="100dp"
        android:layout_height="100dp"
        android:layout_gravity="center"
        android:background="#0000ff"
        android:text="@string/top"
        android:textColor="#ffff00"
        android:textSize="30sp"/>

    <Button
        android:id="@+id/btnSwitchColor"
        android:layout_width="300dp"
        android:layout_height="wrap_content"
        android:layout_marginTop="20dp"
        android:onClick="doSwitch_color"
        android:text="@string/switch_color"
        android:textSize="20sp"/>
</LinearLayout>
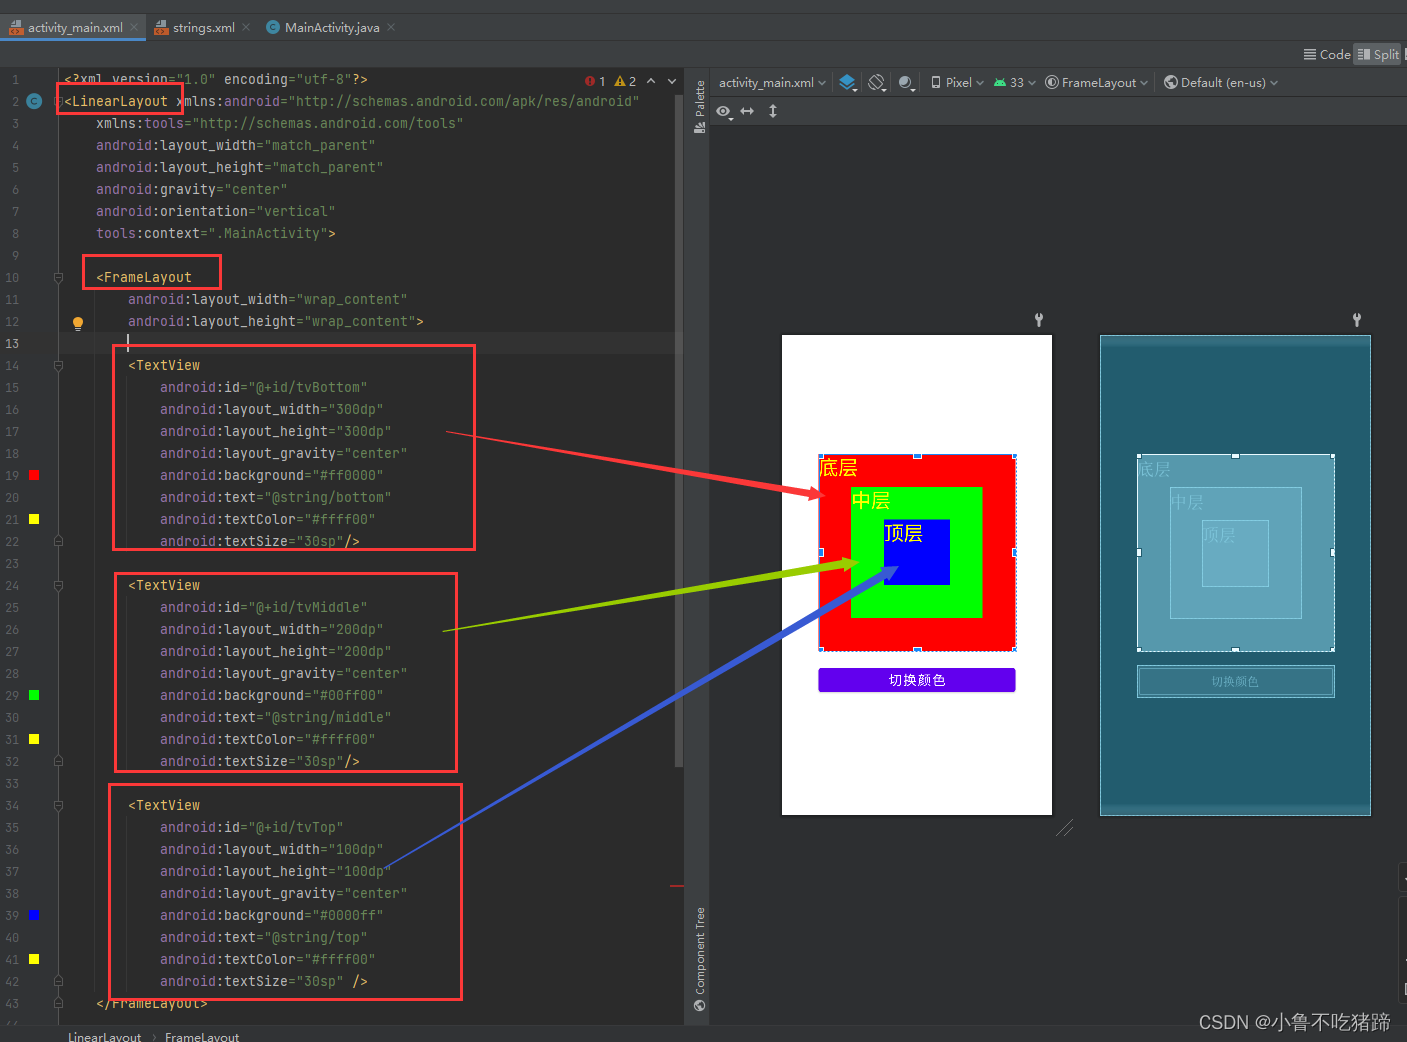
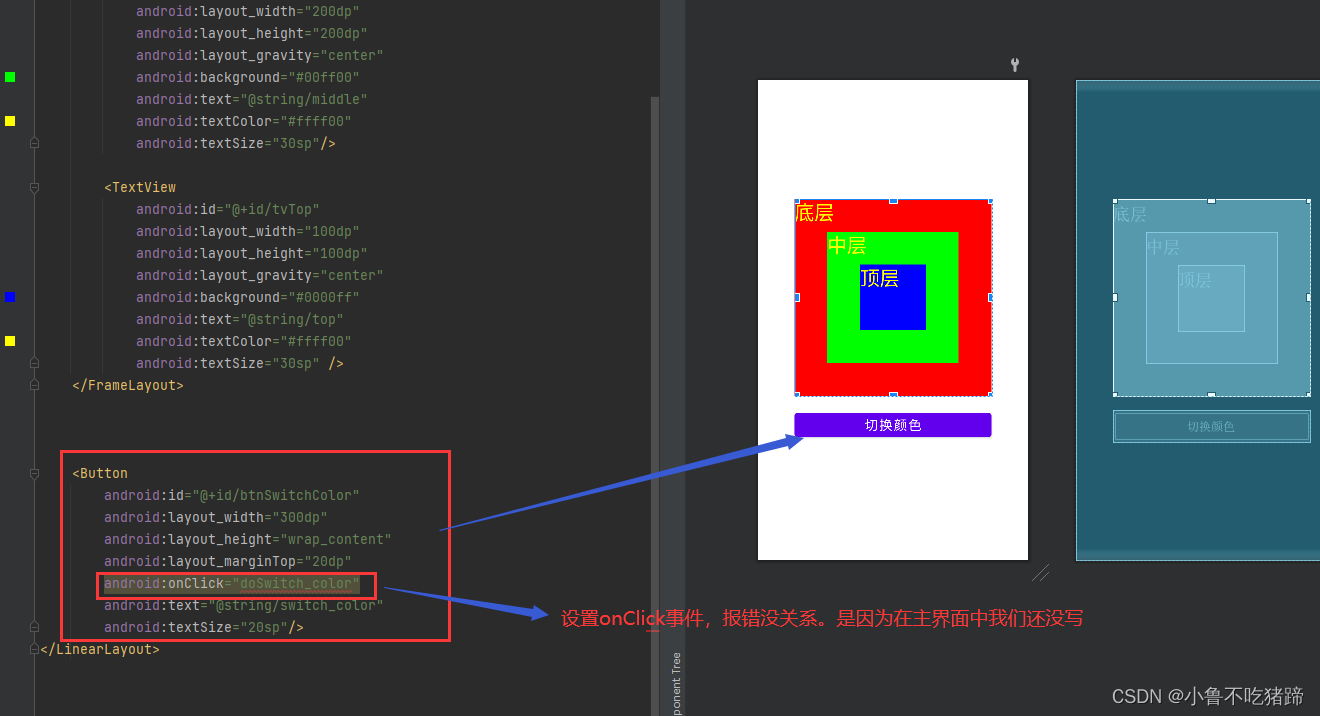
首先将改成线性布局LinearLayout
然后写一个帧式布局FrameLayout的标签
4.主界面
通过switch-case来设置点击不同的次数跳动不同的颜色
package net.lzt.framelayout;

import androidx.appcompat.app.AppCompatActivity;

import android.graphics.Color;
import android.os.Bundle;
import android.view.View;
import android.widget.TextView;

public class MainActivity extends AppCompatActivity {
    //声明变量
    private TextView tvBottom;
    private TextView tvMiddle;
    private TextView tvTop;
    private int clickCount;
    private int[] colors;

    @Override
    protected void onCreate(Bundle savedInstanceState) {
        super.onCreate(savedInstanceState);
        //利用布局资源文件设置用户界面
        setContentView(R.layout.activity_main);
        //通过资源标识符获取控件实例
        tvBottom = findViewById(R.id.tvBottom);
        tvMiddle = findViewById(R.id.tvMiddle);
        tvTop = findViewById(R.id.tvTop);
    }

    //单击切换颜色处理事件
    public void doSwitch_color(View view) {
        //累加按钮单击次数
        clickCount++;
        //单击次数三次求余
        clickCount = clickCount % 3;
        //判断次数是0、1、2
        switch (clickCount) {
            case 0:
                //红-禄-蓝
                colors = new int[]{Color.RED, Color.GREEN, Color.BLUE};
                break;
            case 1:
                //绿-蓝-红
                colors = new int[]{Color.GREEN, Color.BLUE, Color.RED};
                break;
            case 2:
                //蓝-红-绿
                colors = new int[]{Color.BLUE, Color.RED, Color.GREEN};
                break;
        }

        //根据切换后的颜色数组来设置三层标签的颜色
        tvBottom.setBackgroundColor(colors[0]);
        tvMiddle.setBackgroundColor(colors[1]);
        tvTop.setBackgroundColor(colors[2]);
    }
}
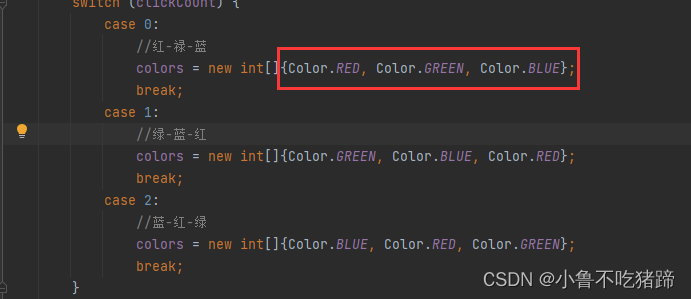
注:这里的Color是内部方法直接调用就是
5.实现结果
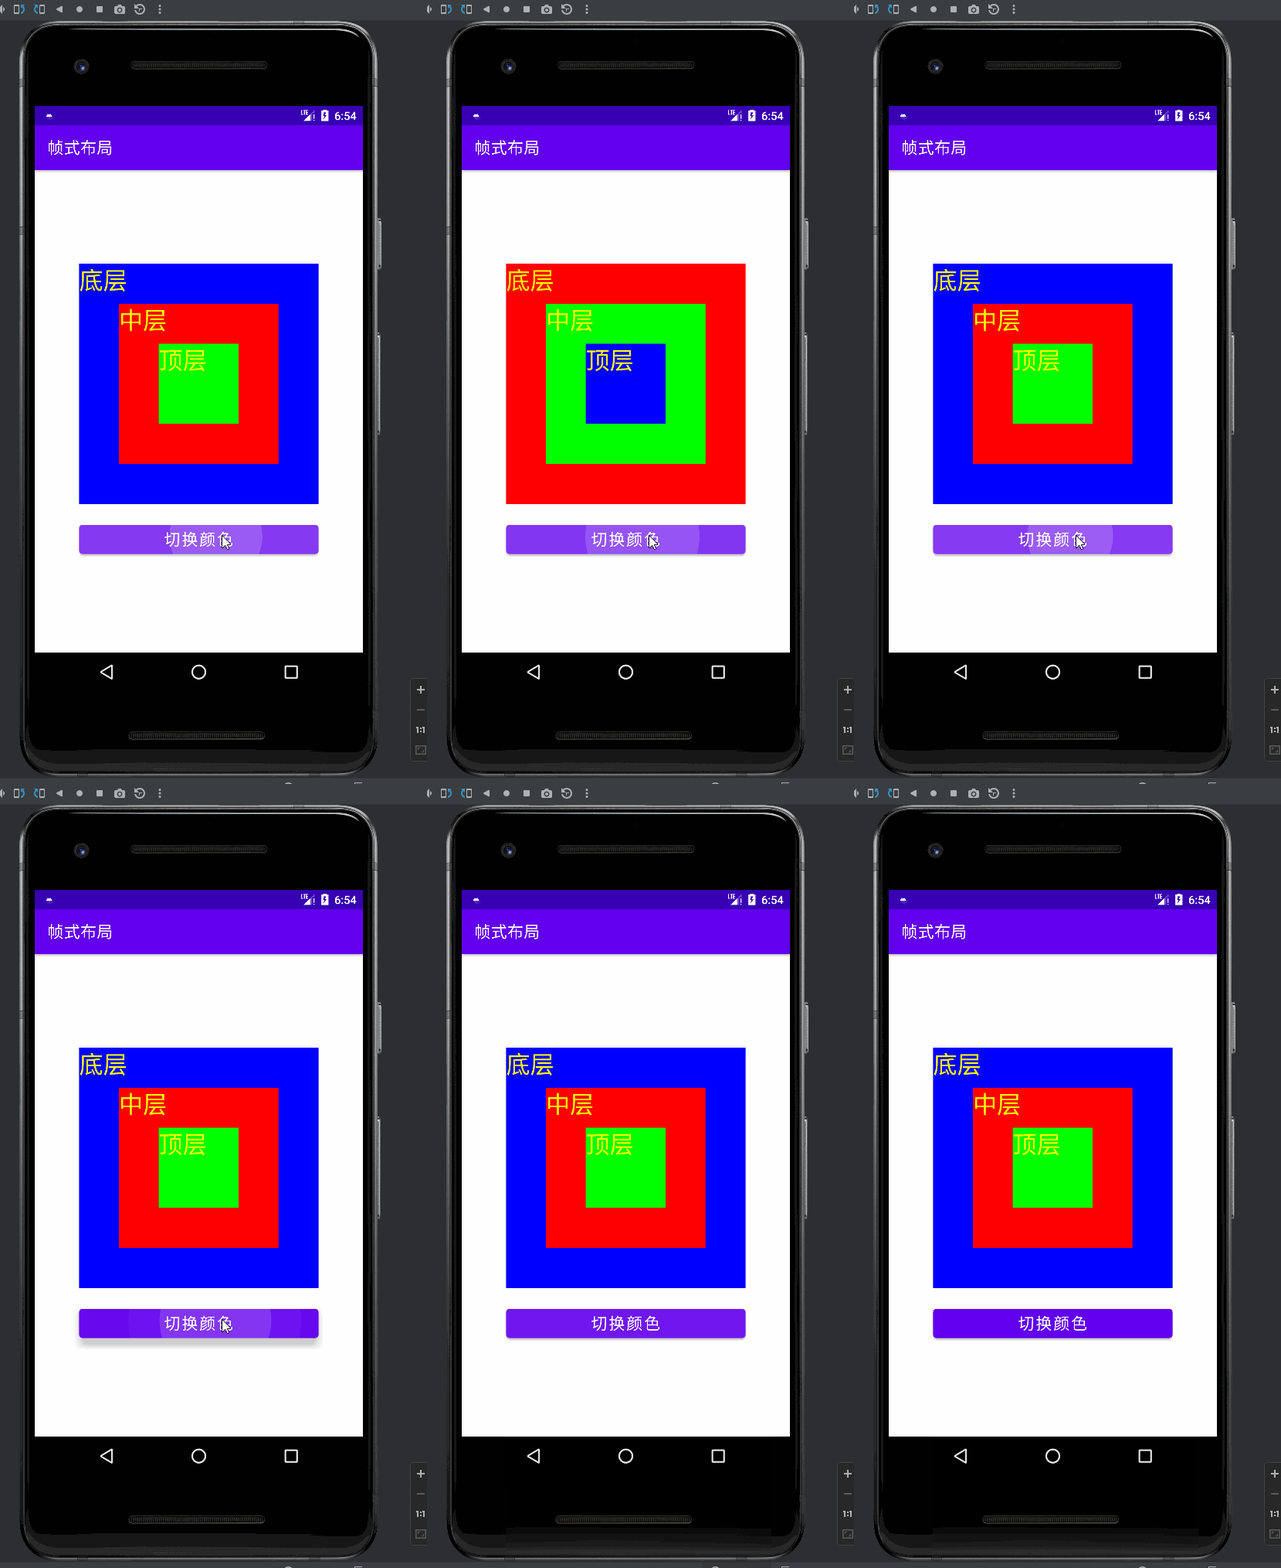
显然上面的方法使用switch-case有些冗杂
就可以对主界面关于切换颜色的代码进行修改
import androidx.appcompat.app.AppCompatActivity;
import android.graphics.Color;
import android.os.Bundle;
import android.view.View;
import android.widget.TextView;
public class MainActivity extends AppCompatActivity {
//声明变量
private TextView tvBottom;
private TextView tvMiddle;
private TextView tvTop;
private int clickCount;
private int[] colors;
@Override
protected void onCreate(Bundle savedInstanceState) {
super.onCreate(savedInstanceState);
//利用布局资源文件设置用户界面
setContentView(R.layout.activity_main);
//通过资源标识符获取控件实例
tvBottom = findViewById(R.id.tvBottom);
tvMiddle = findViewById(R.id.tvMiddle);
tvTop = findViewById(R.id.tvTop);
//切换颜色初始数组
colors = new int[]{Color.RED, Color.GREEN, Color.BLUE};
}
//单击切换颜色处理事件
public void doSwitch_color(View view) {
//切换颜色
int temp = colors[0];
colors[0] = colors[1];
colors[1] = colors[2];
colors[2] = temp;
//根据切换后的颜色数组来设置三层标签的颜色
tvBottom.setBackgroundColor(colors[0]);
tvMiddle.setBackgroundColor(colors[1]);
tvTop.setBackgroundColor(colors[2]);
}
}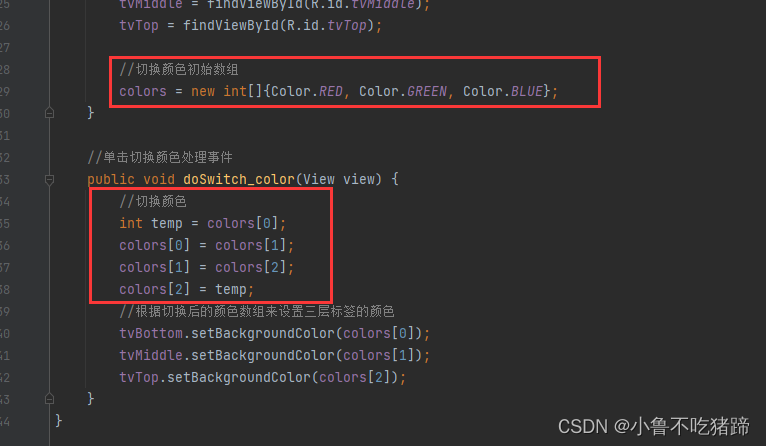 ?实现的效果是相同的但是这样写代码量就更少?
在此还可以利用for循环进行重写
import androidx.appcompat.app.AppCompatActivity;

import android.graphics.Color;
import android.os.Bundle;
import android.view.View;
import android.widget.TextView;

public class MainActivity extends AppCompatActivity {
    //声明变量
    private TextView tvBottom;
    private TextView tvMiddle;
    private TextView tvTop;
    private int clickCount;
    private int[] colors;

    @Override
    protected void onCreate(Bundle savedInstanceState) {
        super.onCreate(savedInstanceState);
        //利用布局资源文件设置用户界面
        setContentView(R.layout.activity_main);
        //通过资源标识符获取控件实例
        tvBottom = findViewById(R.id.tvBottom);
        tvMiddle = findViewById(R.id.tvMiddle);
        tvTop = findViewById(R.id.tvTop);

        //切换颜色初始数组
        colors = new int[]{Color.RED, Color.GREEN, Color.BLUE};
    }

    //单击切换颜色处理事件
    public void doSwitch_color(View view) {
        //切换颜色
        int temp = colors[0];
        for (int i = 0; i < colors.length - 1; i++) {
            colors[i] = colors[i + 1];
        }
        //循环完成过后返回最开始的
        colors[colors.length - 1] = temp;

        //根据切换后的颜色数组来设置三层标签的颜色
        tvBottom.setBackgroundColor(colors[0]);
        tvMiddle.setBackgroundColor(colors[1]);
        tvTop.setBackgroundColor(colors[2]);
    }
}
这里将刚刚的替换成了for循环来运行,实现的效果也是相同的
6.实现自动跳转
(1)修改主布局资源文件
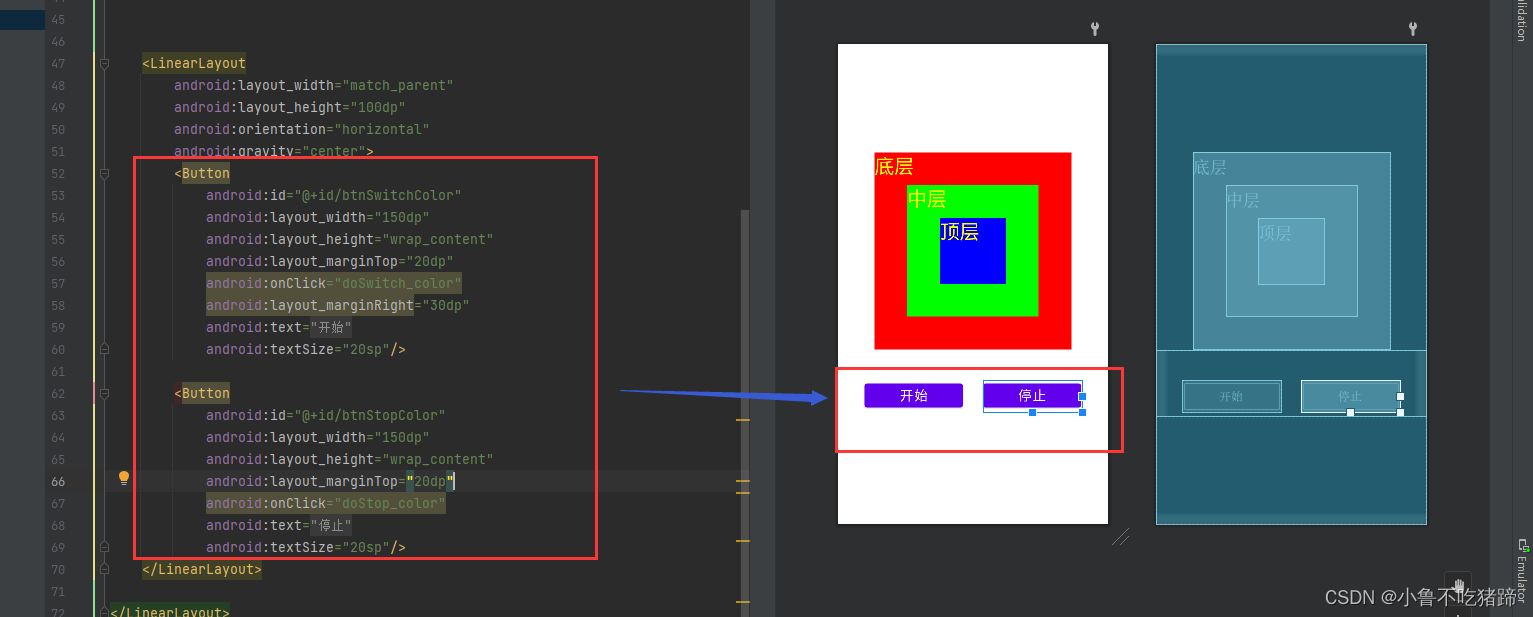
这里不需要发生大的更改,只需要再添加一个按钮,并将两个按钮进行水平分布就可以了
(2) 修改主界面代码
在单击开始按钮的处理事件中实现单击实现颜色自动跳转
创建线程的两种方式:1.继承Thread对象 重写run方法 2.继承Runnable接口,实现run方法
(关于多线程的相关内容后面我也会发出来)
在单击停止按钮的处理事件中实现单击停止颜色跳转
我们这里采用的是第二种方式,运用Runnable接口:
import androidx.appcompat.app.AppCompatActivity;

import android.graphics.Color;
import android.os.Bundle;
import android.view.View;
import android.widget.TextView;

public class MainActivity extends AppCompatActivity {
    //声明变量
    private TextView tvBottom;
    private TextView tvMiddle;
    private TextView tvTop;
    private int clickCount;
    private int[] colors;
    private boolean isRunning;
    private Thread thread;


    @Override
    protected void onCreate(Bundle savedInstanceState) {
        super.onCreate(savedInstanceState);
        //利用布局资源文件设置用户界面
        setContentView(R.layout.activity_main);
        //通过资源标识符获取控件实例
        tvBottom = findViewById(R.id.tvBottom);
        tvMiddle = findViewById(R.id.tvMiddle);
        tvTop = findViewById(R.id.tvTop);

        //切换颜色初始数组
        colors = new int[]{Color.RED, Color.GREEN, Color.BLUE};
    }


    //单击切换颜色处理事件
    public void doSwitch_color(View view) {
        isRunning = true;
        //创建线程,修改颜色数组,发送消息
        MyThread myThread = new MyThread();
        thread = new Thread(myThread);

        thread.start();
    }


    class MyThread implements Runnable {

        @Override
        public void run() {
            while (isRunning) {
                //切换颜色
                int temp = colors[0];
                for (int i = 0; i < colors.length - 1; i++) {
                    colors[i] = colors[i + 1];
                }
                colors[colors.length - 1] = temp;

                tvBottom.setBackgroundColor(colors[0]);
                tvMiddle.setBackgroundColor(colors[1]);
                tvTop.setBackgroundColor(colors[2]);
            }
        }
    }

    public void doStop_color(View view) {
        isRunning = false;
    }
}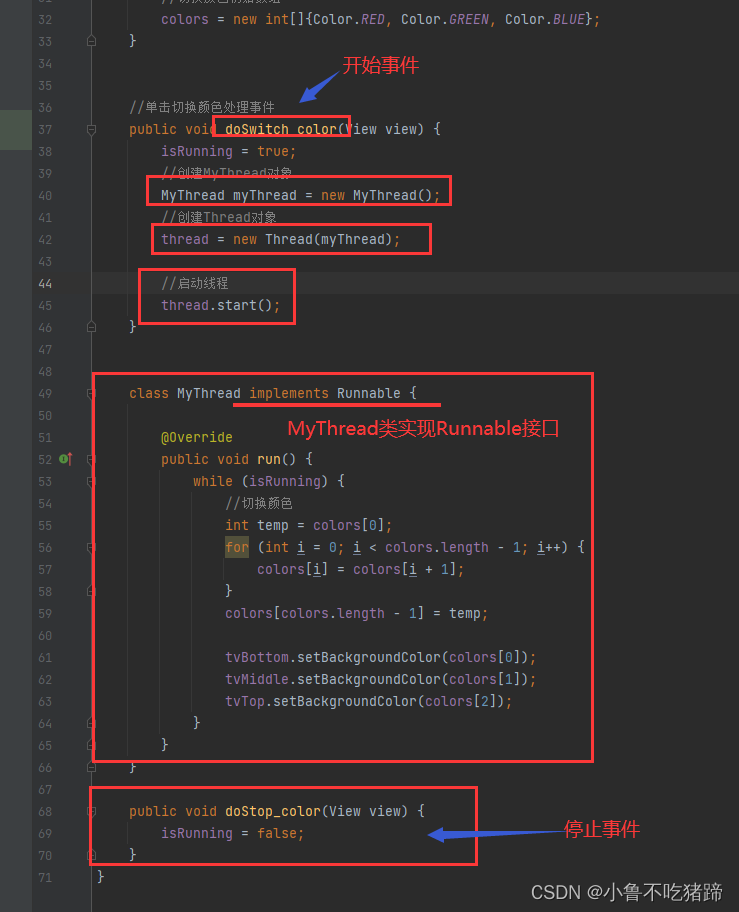
这里是可以实现颜色发生自动跳转的,但是,如果连续点两次开始按钮程序就会出错
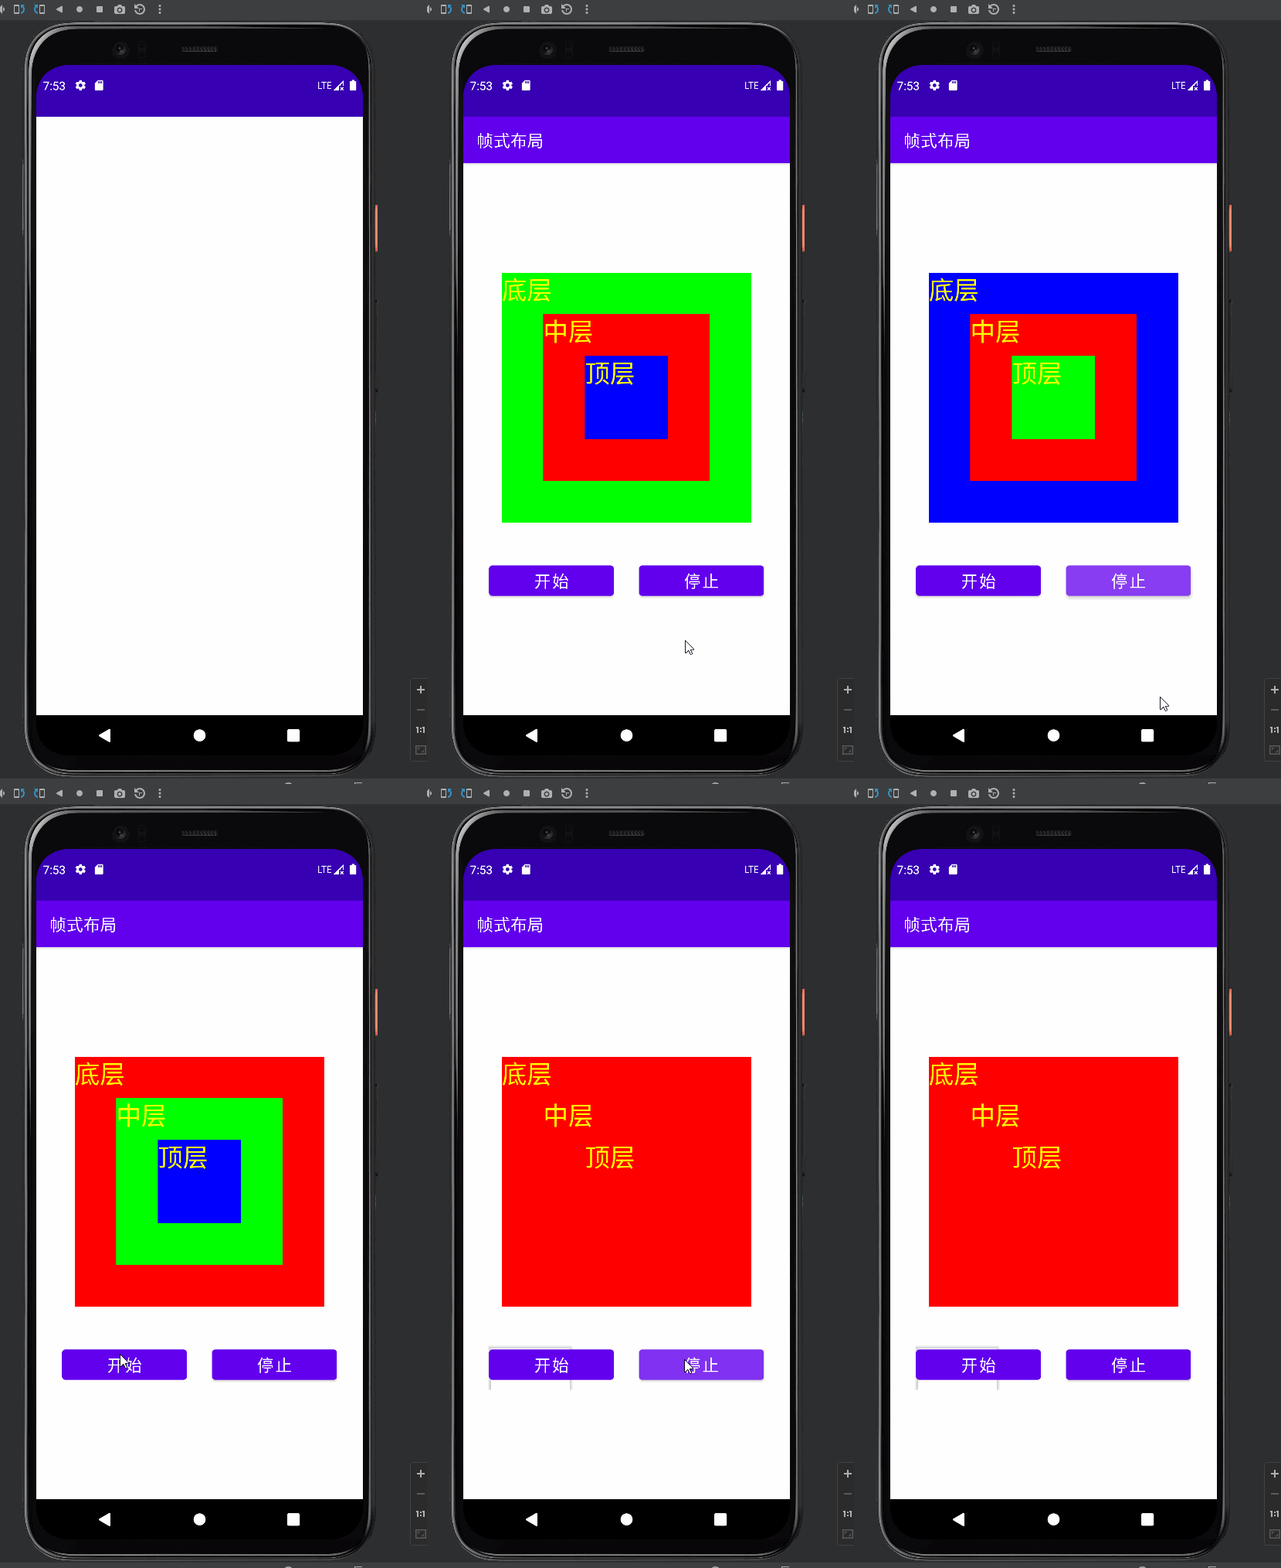
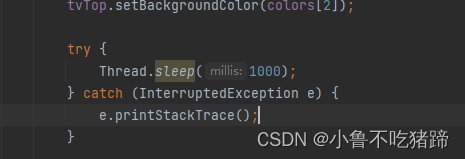
加上异常处理 ,设置休眠时间
?
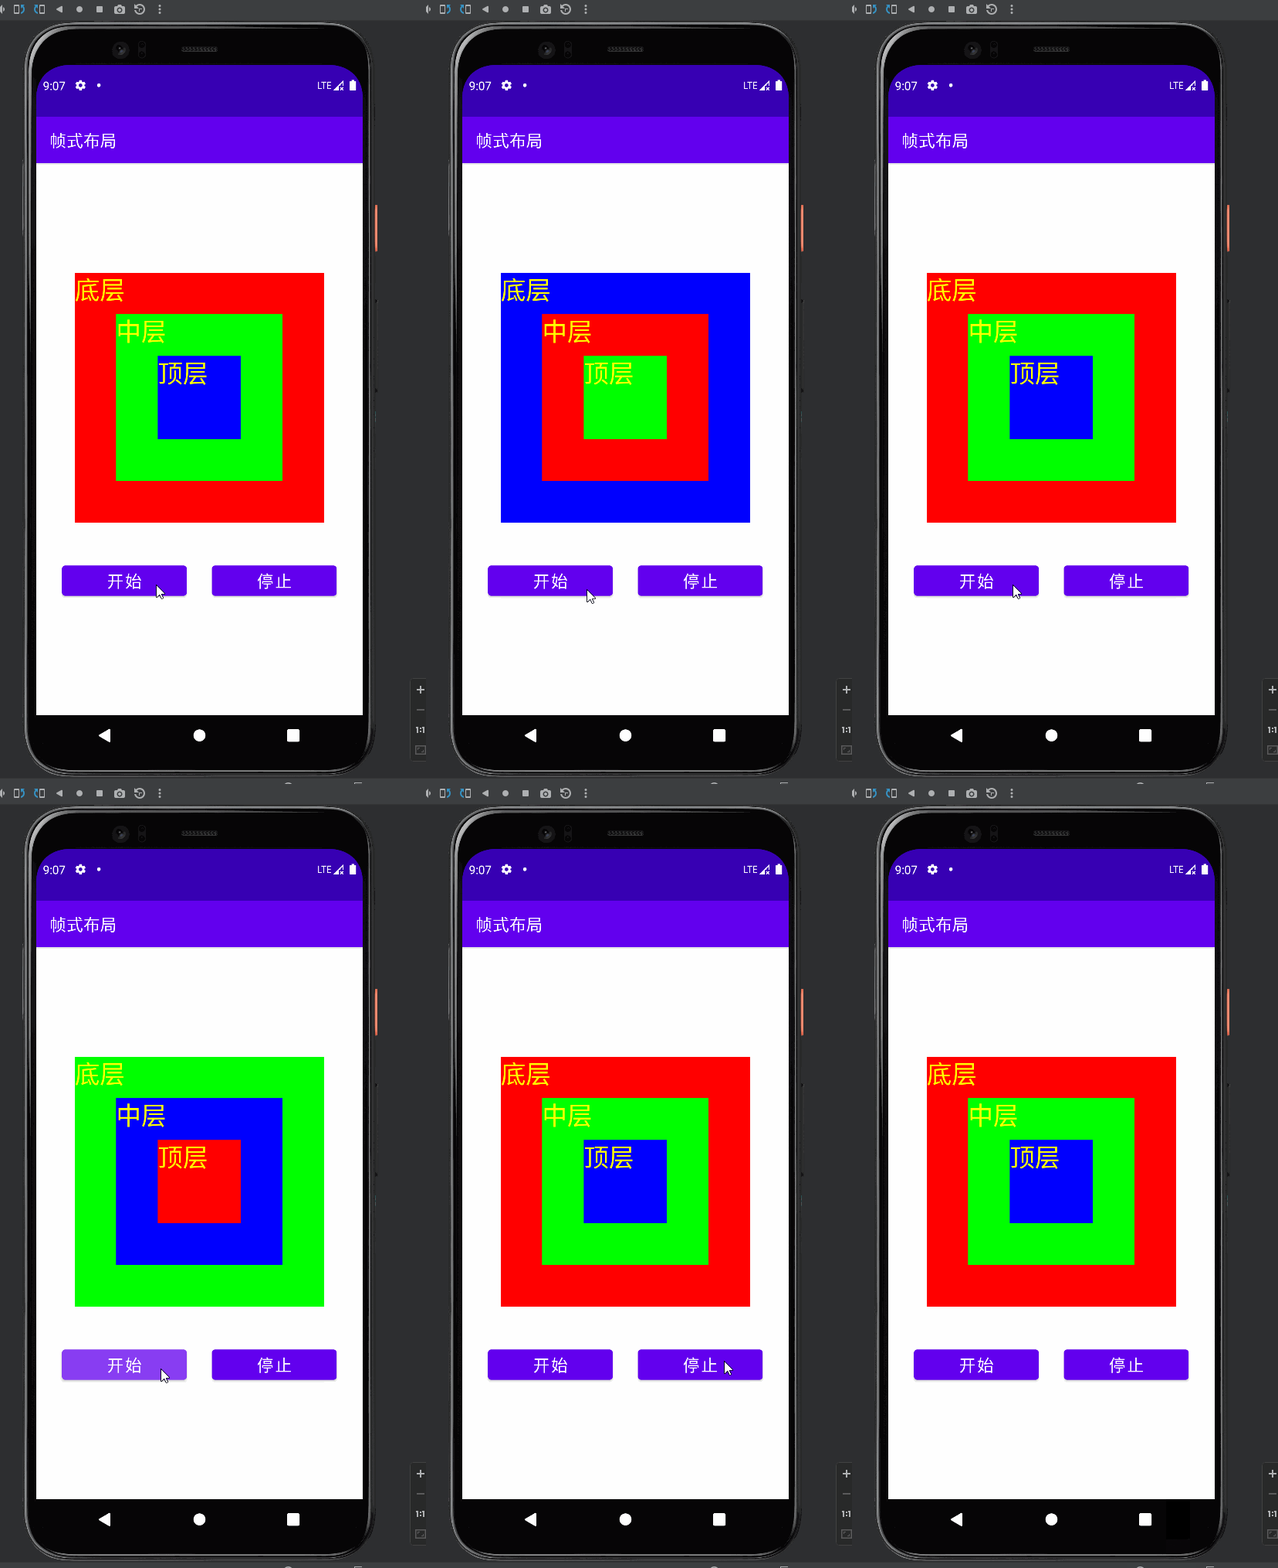
实现效果:
?主界面的所有代码:
package net.lzt.framelayout;

import androidx.appcompat.app.AppCompatActivity;

import android.graphics.Color;
import android.os.Bundle;
import android.os.Handler;
import android.view.View;
import android.widget.TextView;

public class MainActivity extends AppCompatActivity {
    //声明变量
    private TextView tvBottom;
    private TextView tvMiddle;
    private TextView tvTop;
    private int clickCount;
    private int[] colors;
    private boolean isRunning;
    private Thread thread;


    @Override
    protected void onCreate(Bundle savedInstanceState) {
        super.onCreate(savedInstanceState);
        //利用布局资源文件设置用户界面
        setContentView(R.layout.activity_main);
        //通过资源标识符获取控件实例
        tvBottom = findViewById(R.id.tvBottom);
        tvMiddle = findViewById(R.id.tvMiddle);
        tvTop = findViewById(R.id.tvTop);

        //切换颜色初始数组
        colors = new int[]{Color.RED, Color.GREEN, Color.BLUE};
    }


    //单击切换颜色处理事件
    public void doSwitch_color(View view) {
        isRunning = true;
        //创建MyThread对象
        MyThread myThread = new MyThread();
        //创建Thread对象
        thread = new Thread(myThread);

        //启动线程
        thread.start();
    }

    class MyThread implements Runnable {

        @Override
        public void run() {
            while (isRunning) {
                //切换颜色
                int temp = colors[0];
                for (int i = 0; i < colors.length - 1; i++) {
                    colors[i] = colors[i + 1];
                }
                colors[colors.length - 1] = temp;

                tvBottom.setBackgroundColor(colors[0]);
                tvMiddle.setBackgroundColor(colors[1]);
                tvTop.setBackgroundColor(colors[2]);

                try {
                    Thread.sleep(100);
                } catch (InterruptedException e) {
                    e.printStackTrace();
                }

            }
        }
    }

    public void doStop_color(View view) {
        isRunning = false;
    }
}