系列文章目录
- Android: Jetpack Compose如何禁用涟漪(水波纹)效果
- Android:使用Jetpack Compose 实现Text控件跑马灯效果
- Android:使用Jetpack Compose实现自动轮播Banner
前言
想要用Compose实现一个跑马灯效果的文本,在官网和Text源码中找了一圈没有找到api,貌似官方压根就没提供,之前我们在xml中使用TextView 实现文字跑马灯效果很简单,Compose现在既然没有,那我们就自己动手,丰衣足食!
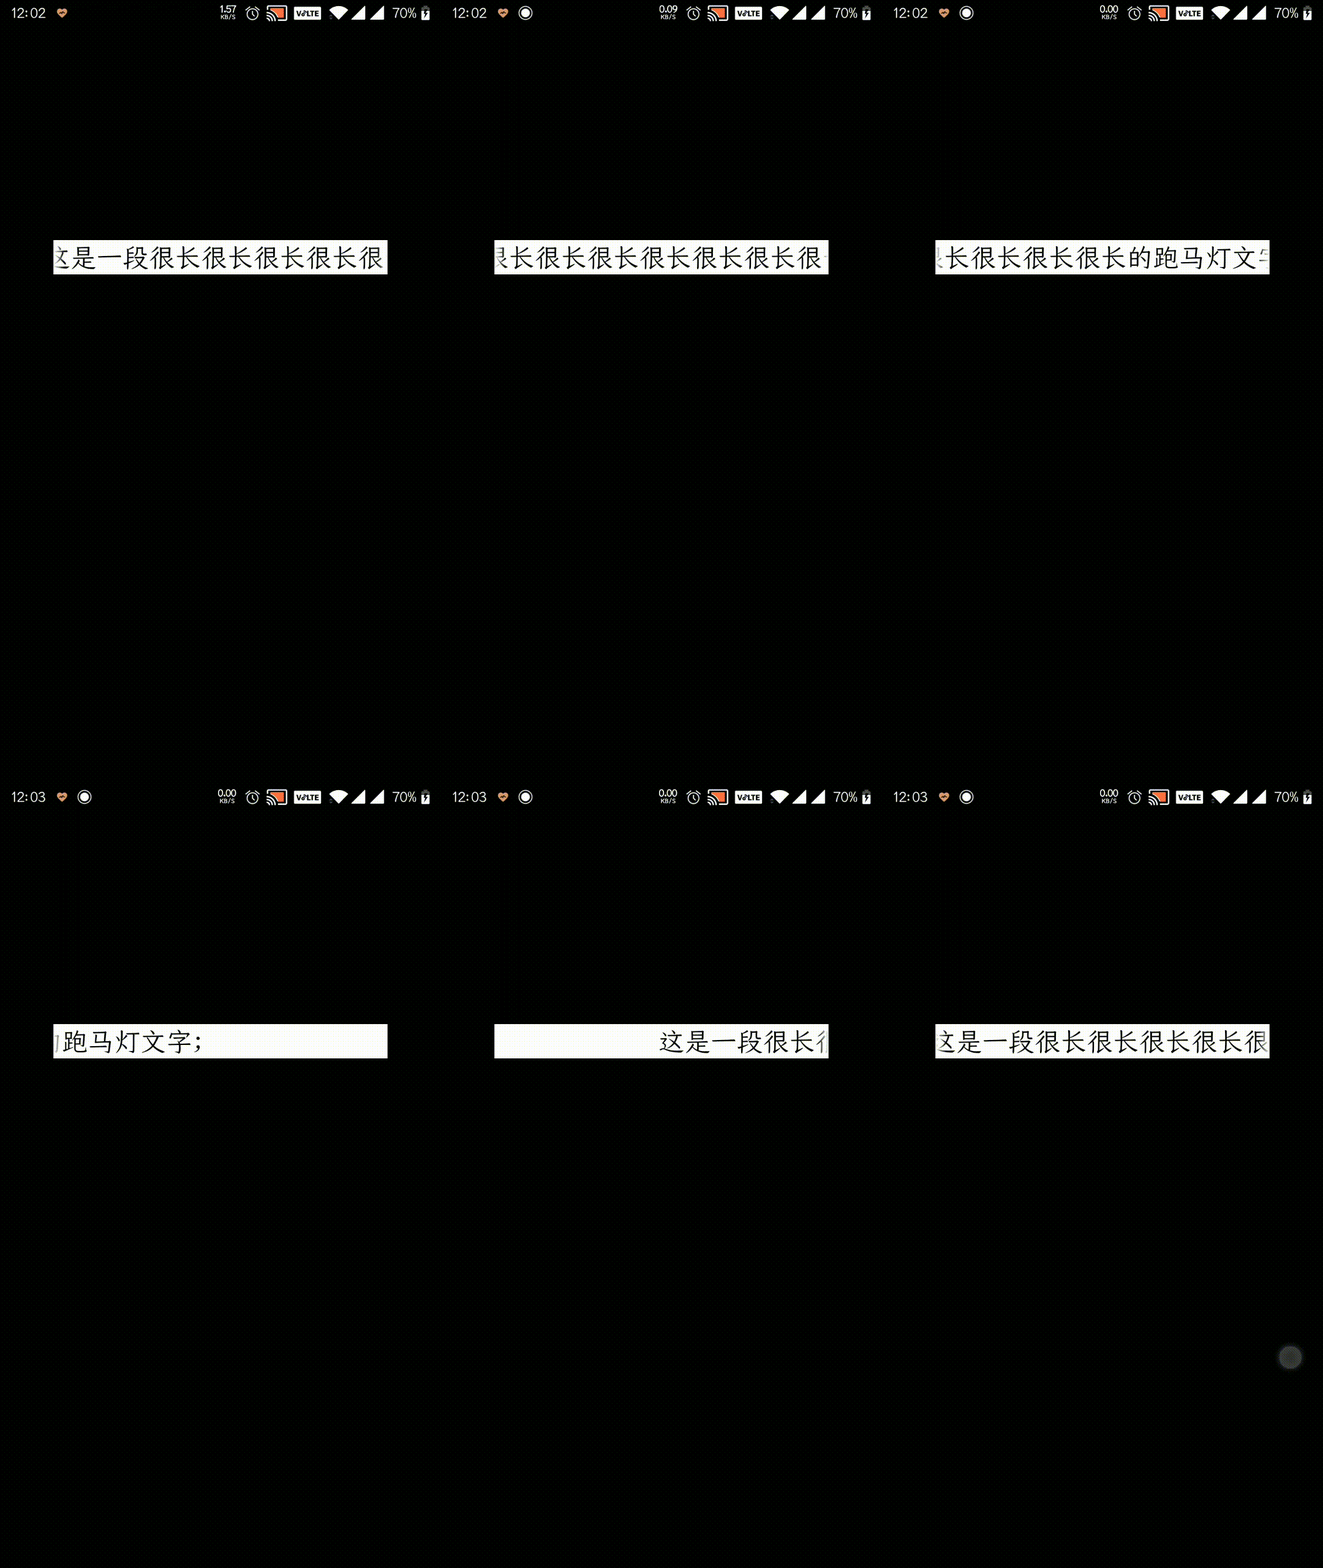
一、先看效果

二、XML方式实现
如果用Xml画界面,官方SDK是提供了属性android:ellipsize=“marquee”,实现起来很简单,代码如下:
	<TextView
        android:id="@+id/tv_marquee"
        ...
        android:singleLine="true"
        android:ellipsize="marquee"
        android:focusable="true"
        android:focusableInTouchMode="true"
        android:marqueeRepeatLimit="-1"
        android:text="这是一段很长很长很长很长很长很长很长很长很长很长的跑马灯文字;"/>
三、Compose方式实现
1、动画效果使用TargetBasedAnimation来创建,原因是方便自定义动画的执行时间。
2、通过SubcomposeLayout可以自定义子组件之间的测量顺序,并布局绘制。跟之前用Layout自定义控件类似。
代码如下,其中加了注释,方便理解:
import androidx.compose.animation.core.*
import androidx.compose.foundation.background
import androidx.compose.foundation.layout.*
import androidx.compose.material3.LocalTextStyle
import androidx.compose.material3.Text
import androidx.compose.runtime.*
import androidx.compose.ui.Modifier
import androidx.compose.ui.draw.clipToBounds
import androidx.compose.ui.graphics.Brush
import androidx.compose.ui.graphics.Color
import androidx.compose.ui.layout.Placeable
import androidx.compose.ui.layout.SubcomposeLayout
import androidx.compose.ui.text.TextLayoutResult
import androidx.compose.ui.text.TextStyle
import androidx.compose.ui.text.font.FontFamily
import androidx.compose.ui.text.font.FontStyle
import androidx.compose.ui.text.font.FontWeight
import androidx.compose.ui.text.style.TextAlign
import androidx.compose.ui.text.style.TextDecoration
import androidx.compose.ui.text.style.TextOverflow
import androidx.compose.ui.unit.TextUnit
import androidx.compose.ui.unit.dp
import kotlinx.coroutines.delay

/**
 * 循环滚动跑马灯Text控件
 *
 * @param text 文字内容
 * @param modifier 控件修饰器
 * @param textModifier 文字修饰器
 * @param gradientEdgeColor 左右边界渐变透明色,默认白色渐变。
 * @param color 文字颜色
 * @param letterSpacing 字符间距
 * @param textDecoration 文字装饰
 */
@Composable
fun MarqueeText(
    text: String,
    modifier: Modifier = Modifier,
    textModifier: Modifier = Modifier,
    gradientEdgeColor: Color = Color.White,
    color: Color = Color.Unspecified,
    fontSize: TextUnit = TextUnit.Unspecified,
    fontStyle: FontStyle? = null,
    fontWeight: FontWeight? = null,
    fontFamily: FontFamily? = null,
    letterSpacing: TextUnit = TextUnit.Unspecified,
    textDecoration: TextDecoration? = null,
    textAlign: TextAlign? = null,
    lineHeight: TextUnit = TextUnit.Unspecified,
    overflow: TextOverflow = TextOverflow.Clip,
    softWrap: Boolean = true,
    onTextLayout: (TextLayoutResult) -> Unit = {},
    style: TextStyle = LocalTextStyle.current,
) {
    // 创建Text控件方法,相当于@Composable fun createText(localModifier: Modifier)
    val createText = @Composable { localModifier: Modifier ->
        Text(
            text,
            textAlign = textAlign,
            modifier = localModifier,
            color = color,
            fontSize = fontSize,
            fontStyle = fontStyle,
            fontWeight = fontWeight,
            fontFamily = fontFamily,
            letterSpacing = letterSpacing,
            textDecoration = textDecoration,
            lineHeight = lineHeight,
            overflow = overflow,
            softWrap = softWrap,
            maxLines = 1,
            onTextLayout = onTextLayout,
            style = style,
        )
    }

    var offset by remember { mutableStateOf(0) }
    val textLayoutInfoState = remember { mutableStateOf<TextLayoutInfo?>(null) }
    LaunchedEffect(textLayoutInfoState.value) {
        val textLayoutInfo = textLayoutInfoState.value ?: return@LaunchedEffect
        if (textLayoutInfo.textWidth <= textLayoutInfo.containerWidth) return@LaunchedEffect
        if(textLayoutInfo.containerWidth == 0) return@LaunchedEffect
        // 计算播放一遍的总时间
        val duration = 7500 * textLayoutInfo.textWidth / textLayoutInfo.containerWidth// 父层不要有其他元素,不然这句很容易发生Error java.lang.ArithmeticException: divide by zero(除以零)
        // 动画间隔时间
        val delay = 1000L

        do {
            // 定义动画,文字偏移量从0到-文本宽度
            val animation = TargetBasedAnimation(
                animationSpec = infiniteRepeatable(
                    animation = tween(
                        durationMillis = duration,
                        delayMillis = 1000,
                        easing = LinearEasing,
                    ),
                    repeatMode = RepeatMode.Restart
                ),
                typeConverter = Int.VectorConverter,
                initialValue = 0,
                targetValue = -textLayoutInfo.textWidth
            )
            // 根据动画帧时间,获取偏移量值。
            // 起始帧时间
            val startTime = withFrameNanos { it }
            do {
                val playTime = withFrameNanos { it } - startTime
                offset = animation.getValueFromNanos(playTime)
            } while (!animation.isFinishedFromNanos(playTime))
            // 延迟重新播放
            delay(delay)
        } while (true)
    }

    SubcomposeLayout(
        modifier = modifier.clipToBounds()
    ) { constraints ->
        // 测量文本总宽度
        val infiniteWidthConstraints = constraints.copy(maxWidth = Int.MAX_VALUE)
        var mainText = subcompose(MarqueeLayers.MainText) {
            createText(textModifier)
        }.first().measure(infiniteWidthConstraints)

        var gradient: Placeable? = null

        var secondPlaceableWithOffset: Pair<Placeable, Int>? = null
        if (mainText.width <= constraints.maxWidth) {// 文本宽度小于容器最大宽度, 则无需跑马灯动画
            mainText = subcompose(MarqueeLayers.SecondaryText) {
                createText(textModifier.fillMaxWidth())
            }.first().measure(constraints)
            textLayoutInfoState.value = null
        } else {
            // 循环文本增加间隔
            val spacing = constraints.maxWidth * 2 / 3
            textLayoutInfoState.value = TextLayoutInfo(
                textWidth = mainText.width + spacing,
                containerWidth = constraints.maxWidth
            )
            // 第二遍文本偏移量
            val secondTextOffset = mainText.width + offset + spacing
            val secondTextSpace = constraints.maxWidth - secondTextOffset
            if (secondTextSpace > 0) {
                secondPlaceableWithOffset = subcompose(MarqueeLayers.SecondaryText) {
                    createText(textModifier)
                }.first().measure(infiniteWidthConstraints) to secondTextOffset
            }
            // 测量左右两边渐变控件
            gradient = subcompose(MarqueeLayers.EdgesGradient) {
                Row {
                    GradientEdge(gradientEdgeColor, Color.Transparent)
                    Spacer(Modifier.weight(1f))
                    GradientEdge(Color.Transparent, gradientEdgeColor)
                }
            }.first().measure(constraints.copy(maxHeight = mainText.height))
        }

        // 将文本、渐变控件 进行位置布局
        layout(
            width = constraints.maxWidth,
            height = mainText.height
        ) {
            mainText.place(offset, 0)
            secondPlaceableWithOffset?.let {
                it.first.place(it.second, 0)
            }
            gradient?.place(0, 0)
        }
    }
}

/**
 * 渐变侧边
 */
@Composable
private fun GradientEdge(
    startColor: Color, endColor: Color,
) {
    Box(
        modifier = Modifier
            .width(10.dp)
            .fillMaxHeight()
            .background(
                brush = Brush.horizontalGradient(
                    0f to startColor, 1f to endColor,
                )
            )
    )
}

private enum class MarqueeLayers { MainText, SecondaryText, EdgesGradient }

/**
 * 文字布局信息
 * @param textWidth 文本宽度
 * @param containerWidth 容器宽度
 */
private data class TextLayoutInfo(val textWidth: Int, val containerWidth: Int)
四、使用示例
@Composable
fun TestScreen() {
    val content = "这是一段很长很长很长很长很长很长很长很长很长很长的跑马灯文字;"
    Column(modifier = Modifier.padding(top = 200.dp)) {
        MarqueeText(
            text = content,
            color = Color.Black,
            fontSize = 24.sp,
            modifier = Modifier
                .padding(start = 50.dp, end = 50.dp)
                .background(Color.White)
        )
    }
}
总结
以上就是今天要讲的内容,本文已将源码全部贴了出来,有需要的童鞋,可以直接拿去用。