1. build.gradle 添加引用库
    implementation 'androidx.navigation:navigation-fragment:2.5.1'
    implementation 'androidx.navigation:navigation-ui:2.5.1'
2. 创建资源文件
? 2.1 ic_baseline_looks_one_24.xml
<vector xmlns:android="http://schemas.android.com/apk/res/android"
    android:width="24dp"
    android:height="24dp"
    android:tint="#000000"
    android:viewportWidth="24"
    android:viewportHeight="24">
    <path
        android:fillColor="@android:color/white"
        android:pathData="M19,3L5,3c-1.1,0 -2,0.9 -2,2v14c0,1.1 0.9,2 2,2h14c1.1,0 2,-0.9 2,-2L21,5c0,-1.1 -0.9,-2 -2,-2zM14,17h-2L12,9h-2L10,7h4v10z" />
</vector>
? 2.2 ic_baseline_looks_two_24.xml
  <vector xmlns:android="http://schemas.android.com/apk/res/android"
    android:width="24dp"
    android:height="24dp"
    android:tint="#000000"
    android:viewportWidth="24"
    android:viewportHeight="24">
    <path
        android:fillColor="@android:color/white"
        android:pathData="M19,3L5,3c-1.1,0 -2,0.9 -2,2v14c0,1.1 0.9,2 2,2h14c1.1,0 2,-0.9 2,-2L21,5c0,-1.1 -0.9,-2 -2,-2zM15,11c0,1.11 -0.9,2 -2,2h-2v2h4v2L9,17v-4c0,-1.11 0.9,-2 2,-2h2L13,9L9,9L9,7h4c1.1,0 2,0.89 2,2v2z" />
</vector>
? 2.3 ic_baseline_looks_three_24.xml
<vector xmlns:android="http://schemas.android.com/apk/res/android"
    android:width="24dp"
    android:height="24dp"
    android:tint="#000000"
    android:viewportWidth="24"
    android:viewportHeight="24">
    <path
        android:fillColor="@android:color/white"
        android:pathData="M19.01,3h-14c-1.1,0 -2,0.9 -2,2v14c0,1.1 0.9,2 2,2h14c1.1,0 2,-0.9 2,-2L21.01,5c0,-1.1 -0.9,-2 -2,-2zM15.01,10.5c0,0.83 -0.67,1.5 -1.5,1.5 0.83,0 1.5,0.67 1.5,1.5L15.01,15c0,1.11 -0.9,2 -2,2h-4v-2h4v-2h-2v-2h2L13.01,9h-4L9.01,7h4c1.1,0 2,0.89 2,2v1.5z" />
</vector>
? 2.4 表情图标?ic_baseline_insert_emoticon_24.xml
<vector xmlns:android="http://schemas.android.com/apk/res/android"
    android:width="24dp"
    android:height="24dp"
    android:tint="#0E856F"
    android:viewportWidth="24"
    android:viewportHeight="24">
    <path
        android:fillColor="@android:color/white"
        android:pathData="M11.99,2C6.47,2 2,6.48 2,12s4.47,10 9.99,10C17.52,22 22,17.52 22,12S17.52,2 11.99,2zM12,20c-4.42,0 -8,-3.58 -8,-8s3.58,-8 8,-8 8,3.58 8,8 -3.58,8 -8,8zM15.5,11c0.83,0 1.5,-0.67 1.5,-1.5S16.33,8 15.5,8 14,8.67 14,9.5s0.67,1.5 1.5,1.5zM8.5,11c0.83,0 1.5,-0.67 1.5,-1.5S9.33,8 8.5,8 7,8.67 7,9.5 7.67,11 8.5,11zM12,17.5c2.33,0 4.31,-1.46 5.11,-3.5L6.89,14c0.8,2.04 2.78,3.5 5.11,3.5z" />
</vector>
3. 创建菜单文件 menu 目录下 menu.xml
<?xml version="1.0" encoding="utf-8"?>
<menu xmlns:android="http://schemas.android.com/apk/res/android">

    <item
        android:id="@+id/first_fragment"
        android:icon="@drawable/ic_baseline_looks_one_24"
        android:title="旋转" />
    <item
        android:id="@+id/second_fragment"
        android:icon="@drawable/ic_baseline_looks_two_24"
        android:title="缩放" />
    <item
        android:id="@+id/third_fragment"
        android:icon="@drawable/ic_baseline_looks_three_24"
        android:title="移动" />
</menu>
4. 创建First页 Fragment,ViewModel 及布局文件
? 4.1 FirstFragment.java
public class FirstFragment extends Fragment {
    private FirstViewModel mViewModel;
    private ImageView imageView;

    public static FirstFragment newInstance() {
        return new FirstFragment();
    }

    @Override
    public View onCreateView(@NonNull LayoutInflater inflater, @Nullable ViewGroup container,
                             @Nullable Bundle savedInstanceState) {
        View view = inflater.inflate(R.layout.fragment_first, container, false);
        imageView = view.findViewById(R.id.imageView);
        return view;
    }

    @Override
    public void onViewCreated(@NonNull View view, @Nullable Bundle savedInstanceState) {
        super.onViewCreated(view, savedInstanceState);
        mViewModel = new ViewModelProvider(this).get(FirstViewModel.class);
        imageView.setRotation(mViewModel.rotationPosition);
        ObjectAnimator objectAnimator = ObjectAnimator.ofFloat(imageView, "rotation", 0, 0);
        objectAnimator.setDuration(500);
        imageView.setOnClickListener(new View.OnClickListener() {
            @Override
            public void onClick(View view) {
                if (!objectAnimator.isRunning()) {
                    objectAnimator.setFloatValues(imageView.getRotation(), imageView.getRotation() + 100);
                    mViewModel.rotationPosition += 100;
                    objectAnimator.start();
                }
            }
        });
    }
}
? 4.2 FirstViewModel.java
public class FirstViewModel extends ViewModel {
    float rotationPosition = 0;
}
? 4.3 fragment_first.xml
<?xml version="1.0" encoding="utf-8"?>
<FrameLayout xmlns:android="http://schemas.android.com/apk/res/android"
    xmlns:app="http://schemas.android.com/apk/res-auto"
    xmlns:tools="http://schemas.android.com/tools"
    android:layout_width="match_parent"
    android:layout_height="match_parent"
    tools:context=".FirstFragment">

    <ImageView
        android:id="@+id/imageView"
        android:layout_width="100dp"
        android:layout_height="100dp"
        android:layout_gravity="center"
        android:src="@drawable/ic_baseline_insert_emoticon_24" />
</FrameLayout>
5. 创建Second页 Fragment,ViewModel 及布局文件
? 5.1 SecondFragment.java
public class SecondFragment extends Fragment {
    private SecondViewModel mViewModel;
    private ImageView imageView;

    @Override
    public View onCreateView(@NonNull LayoutInflater inflater, @Nullable ViewGroup container, @Nullable Bundle savedInstanceState) {
        return inflater.inflate(R.layout.fragment_second, container, false);
    }

    @Override
    public void onViewCreated(@NonNull View view, @Nullable Bundle savedInstanceState) {
        super.onViewCreated(view, savedInstanceState);
        mViewModel = new ViewModelProvider(this).get(SecondViewModel.class);
        imageView = view.findViewById(R.id.imageView);
        imageView.setScaleX(mViewModel.scaleFactor);
        imageView.setScaleY(mViewModel.scaleFactor);
        ObjectAnimator objectAnimatorX = ObjectAnimator.ofFloat(imageView, "scaleX", 0, 0);
        ObjectAnimator objectAnimatorY = ObjectAnimator.ofFloat(imageView, "scaleY", 0, 0);
        objectAnimatorX.setDuration(500);
        objectAnimatorY.setDuration(500);
        imageView.setOnClickListener(new View.OnClickListener() {
            @Override
            public void onClick(View view) {
                if (!objectAnimatorX.isRunning()) {
                    objectAnimatorX.setFloatValues(imageView.getScaleX() + 1.0f);
                    objectAnimatorY.setFloatValues(imageView.getScaleY() + 1.0f);
                    mViewModel.scaleFactor += 1.0f;
                    objectAnimatorX.start();
                    objectAnimatorY.start();
                }
            }
        });
    }
}
? 5.2 SecondViewModel.java
public class SecondViewModel extends ViewModel {
   float scaleFactor = 1;
}
? 5.3 fragment_second.xml
<?xml version="1.0" encoding="utf-8"?>
<FrameLayout xmlns:android="http://schemas.android.com/apk/res/android"
    xmlns:app="http://schemas.android.com/apk/res-auto"
    xmlns:tools="http://schemas.android.com/tools"
    android:layout_width="match_parent"
    android:layout_height="match_parent"
    tools:context=".SecondFragment">

    <ImageView
        android:id="@+id/imageView"
        android:layout_width="100dp"
        android:layout_height="100dp"
        android:layout_gravity="center"
        android:src="@drawable/ic_baseline_insert_emoticon_24" />
</FrameLayout>
6. 创建 Third 页 Fragment,ViewModel,xml文件
? 6.1 ThirdFragment.java
public class ThirdFragment extends Fragment {
    private ThirdViewModel mViewModel;
    private ImageView imageView;

    @Override
    public View onCreateView(@NonNull LayoutInflater inflater, @Nullable ViewGroup container, @Nullable Bundle savedInstanceState) {
        View view = inflater.inflate(R.layout.fragment_third, container, false);
        imageView = view.findViewById(R.id.imageView);
        return view;
    }

    @Override
    public void onViewCreated(@NonNull View view, @Nullable Bundle savedInstanceState) {
        super.onViewCreated(view, savedInstanceState);
        mViewModel = new ViewModelProvider(this).get(ThirdViewModel.class);
        imageView.setX(imageView.getX() + mViewModel.dx);
        ObjectAnimator objectAnimator = ObjectAnimator.ofFloat(imageView, "x", 0, 0);
        objectAnimator.setDuration(500);
        imageView.setOnClickListener(new View.OnClickListener() {
            @Override
            public void onClick(View view) {
                if (!objectAnimator.isRunning()) {
                    float dx = new Random().nextBoolean() ? 100 : -100;
                    objectAnimator.setFloatValues(imageView.getX(), imageView.getX() + dx);
                    mViewModel.dx += dx;
                    objectAnimator.start();
                }
            }
        });
    }
}
? 6.2 ThirdViewModel.java
public class ThirdViewModel extends ViewModel {
    float dx;
}
? 6.3 fragment_third.xml
<?xml version="1.0" encoding="utf-8"?>
<FrameLayout xmlns:android="http://schemas.android.com/apk/res/android"
    xmlns:app="http://schemas.android.com/apk/res-auto"
    xmlns:tools="http://schemas.android.com/tools"
    android:layout_width="match_parent"
    android:layout_height="match_parent"
    tools:context=".ThirdFragment">

    <ImageView
        android:id="@+id/imageView"
        android:layout_width="100dp"
        android:layout_height="100dp"
        android:layout_gravity="center"
        android:src="@drawable/ic_baseline_insert_emoticon_24" />
</FrameLayout>
7. 创建 navigation.xml 文件, 在 navigation 目录下
<?xml version="1.0" encoding="utf-8"?>
<navigation xmlns:android="http://schemas.android.com/apk/res/android"
    xmlns:app="http://schemas.android.com/apk/res-auto"
    xmlns:tools="http://schemas.android.com/tools"
    android:id="@+id/navigation"
    app:startDestination="@id/first_fragment">

    <fragment
        android:id="@+id/first_fragment"
        android:name="com.example.bottomnavigationdemo.FirstFragment"
        android:label="旋转"
        tools:layout="@layout/fragment_first" />
    <fragment
        android:id="@+id/second_fragment"
        android:name="com.example.bottomnavigationdemo.SecondFragment"
        android:label="缩放"
        tools:layout="@layout/fragment_second" />
    <fragment
        android:id="@+id/third_fragment"
        android:name="com.example.bottomnavigationdemo.ThirdFragment"
        android:label="移动"
        tools:layout="@layout/fragment_third" />
</navigation>
8. 测试文件 Main 页
? 8.1 MainActivity.java
public class MainActivity extends AppCompatActivity {
    @Override
    protected void onCreate(Bundle savedInstanceState) {
        super.onCreate(savedInstanceState);
        setContentView(R.layout.activity_main);
        BottomNavigationView bottomNavigationView = findViewById(R.id.bottomNavigationView);
        NavHostFragment navHostFragment = (NavHostFragment) getSupportFragmentManager().findFragmentById(R.id.fragmentContainerView);
        NavController navController = navHostFragment.getNavController();
        // navController.getGraph() //R.id.first_fragment,R.id.second_fragment,R.id.third_fragment
        AppBarConfiguration configuration = new AppBarConfiguration.Builder(bottomNavigationView.getMenu()).build();
        NavigationUI.setupActionBarWithNavController(this, navController, configuration);
        NavigationUI.setupWithNavController(bottomNavigationView,navController);
    }
}
? 8.2 activity_main.xml
<?xml version="1.0" encoding="utf-8"?>
<androidx.constraintlayout.widget.ConstraintLayout xmlns:android="http://schemas.android.com/apk/res/android"
    xmlns:app="http://schemas.android.com/apk/res-auto"
    xmlns:tools="http://schemas.android.com/tools"
    android:layout_width="match_parent"
    android:layout_height="match_parent"
    tools:context=".MainActivity">

    <com.google.android.material.bottomnavigation.BottomNavigationView
        android:id="@+id/bottomNavigationView"
        android:layout_width="match_parent"
        android:layout_height="wrap_content"
        app:layout_constraintBottom_toBottomOf="parent"
        app:layout_constraintEnd_toEndOf="parent"
        app:layout_constraintStart_toStartOf="parent"
        app:menu="@menu/menu" />

    <androidx.fragment.app.FragmentContainerView
        android:id="@+id/fragmentContainerView"
        android:name="androidx.navigation.fragment.NavHostFragment"
        android:layout_width="match_parent"
        android:layout_height="0dp"
        app:defaultNavHost="true"
        app:layout_constraintBottom_toTopOf="@+id/bottomNavigationView"
        app:layout_constraintEnd_toEndOf="parent"
        app:layout_constraintStart_toStartOf="parent"
        app:layout_constraintTop_toTopOf="parent"
        app:navGraph="@navigation/navigation" />
</androidx.constraintlayout.widget.ConstraintLayout>
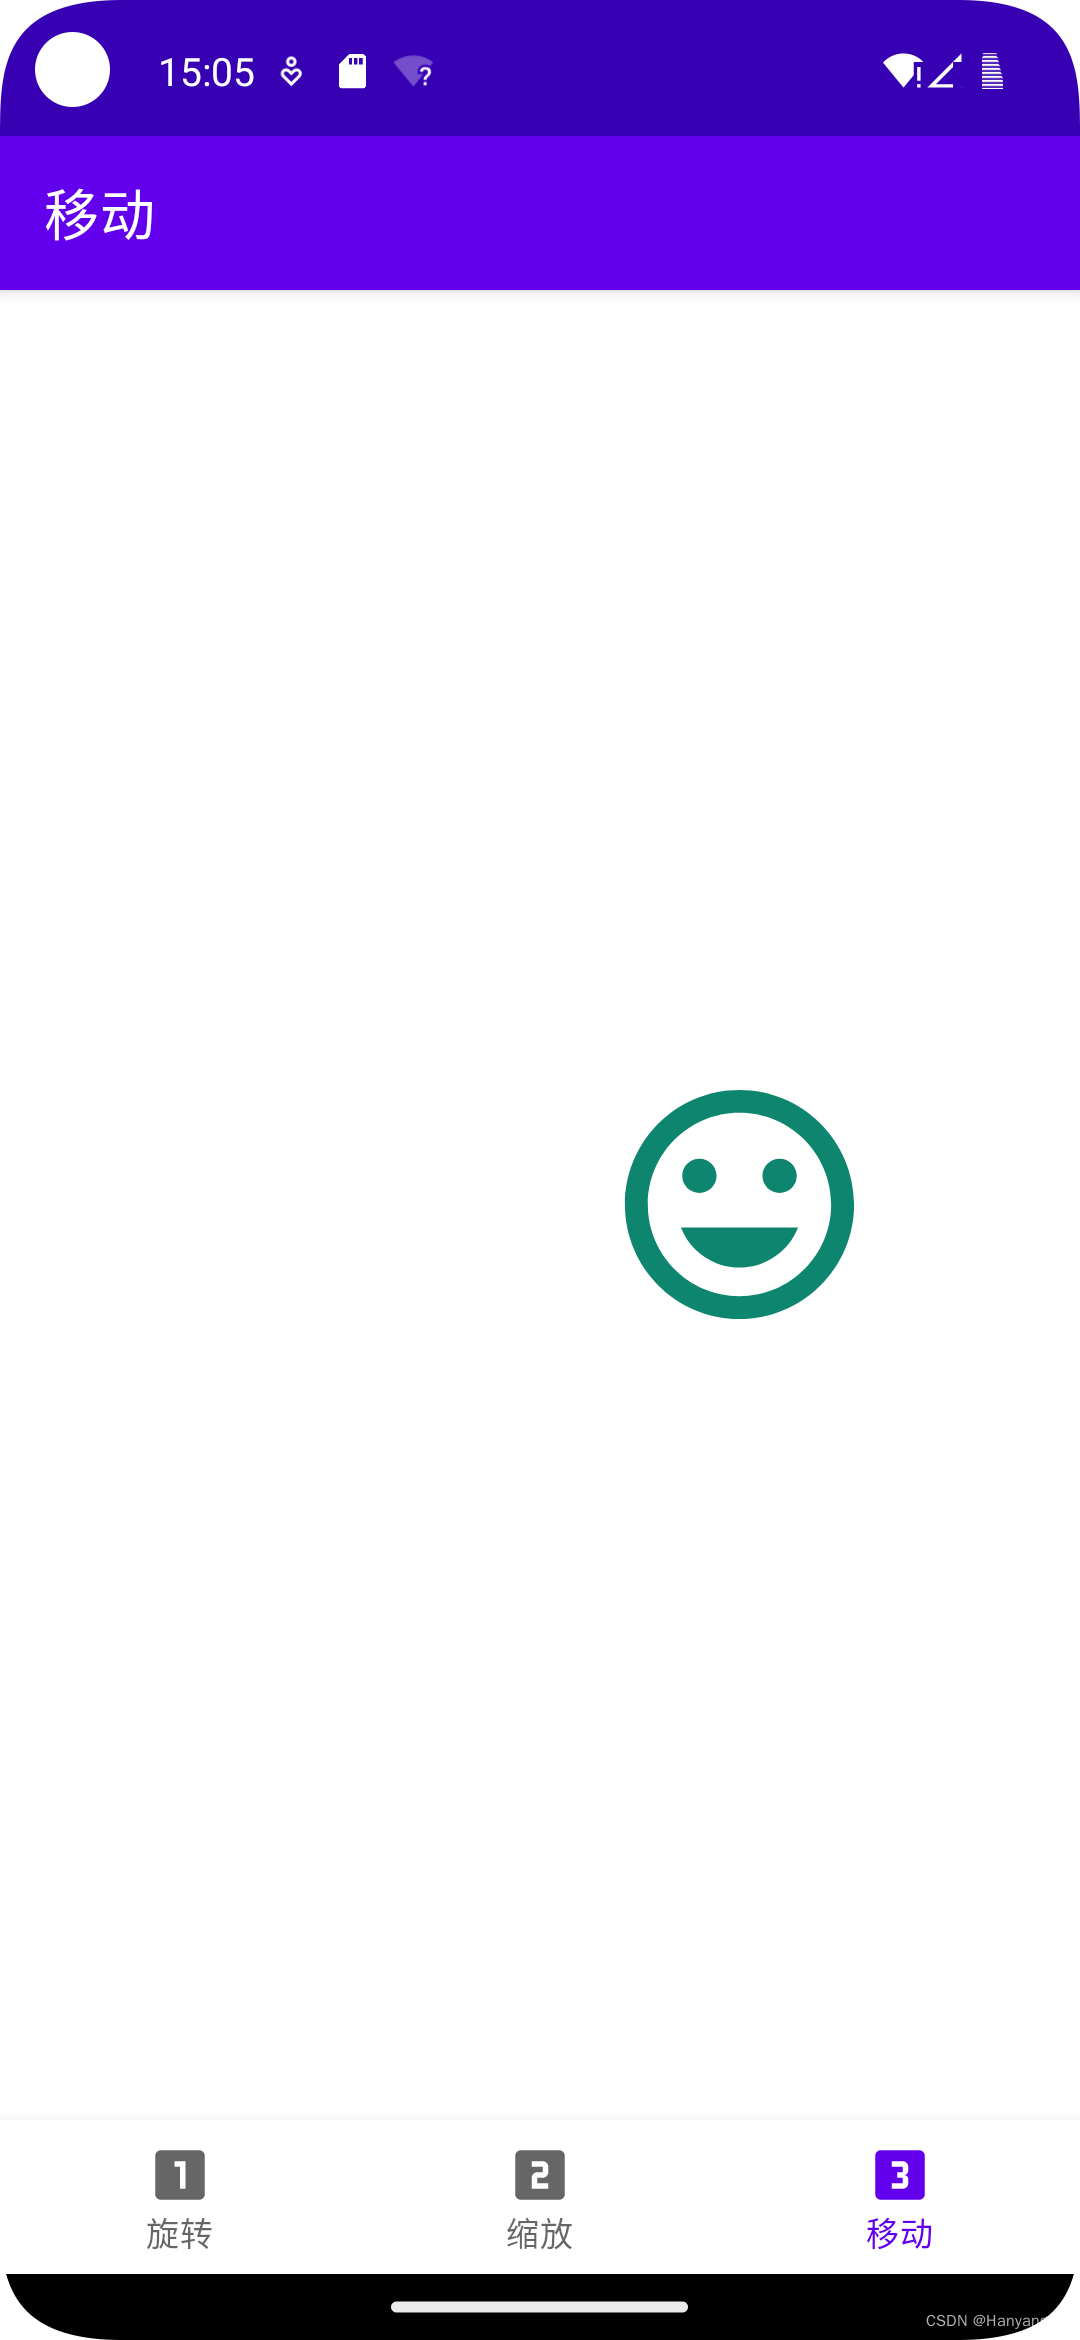
9. 效果图
 ??
?? ??
??