基于阿里云平台的esp8266实现空调红外远程控制
开发环境
概述
开发需要的环境包括:硬件ESP8266WIFI模块,红外接收器,红外发射管,面包板,杜邦线,安卓手机,软件包括arduino,阿里云
硬件
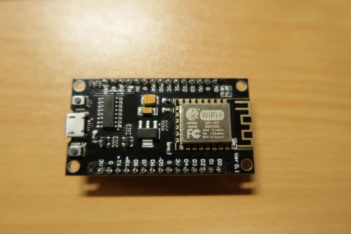
ESP8266WIFI模块
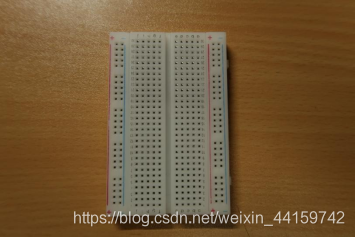
面包板
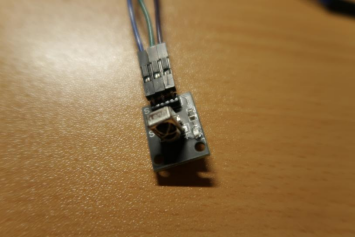
红外接收器
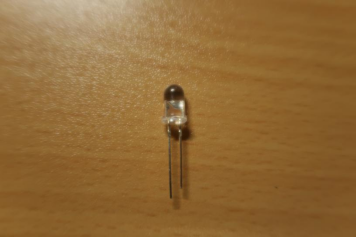
红外发射管
若干杜邦线
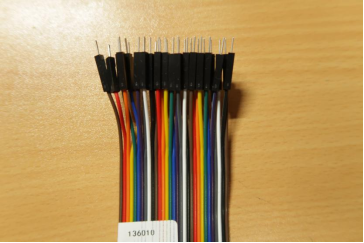
软件
Arduino的安装
安装地址:https://www.arduino.cc/en/Main/Software
·安装ESP8266扩展
-
启动Arduino并打开“首选项”窗口。
-
输入https://arduino.esp8266.com/stable/package_esp8266com_index.json

图2.3.1.1 arduino首选项
- 从工具>主板菜单打开Boards Manager并安装esp8266平台(安装后不要忘记从工具>主板菜单中选择ESP8266主板)

? 图2.3.1.2 ESP8266平台安装
·安装库
一共需要安装7个库,以****IRremoteESP8266库****为例
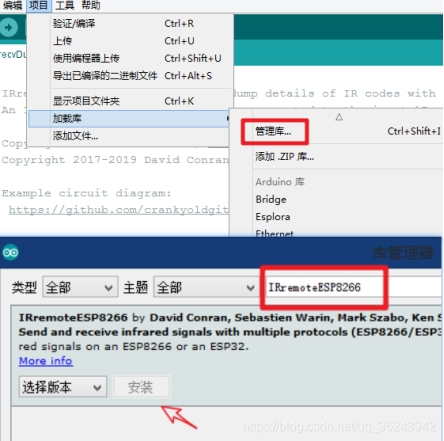
图2.3.1.3 ESP8266红外接收库安装
按照上面的方法,继续安装
AliyunIoTSDK库,
ArduinoJson库,
AWS-SDK-ESP8266库,
Crypto库,
EspMQTTClient库,
PubSubClient库。
阿里云iot studio的开通
进入阿里云官方网站,登录或者注册账号,进入个人主页-物联网平台,开通物联网平台功能即可。开通后会赠送2个月的免费试用套餐,包含100万分钟的连接时长和100万分钟的消息通信条数。到期后需要花钱购买相关功能才能继续使用。
项目文件简介
本次实验一共2个源码文件,分别为IRrecvDumpV2.ino,RED_shoot.ino
IRrecvDumpV2.ino
这个文件是负责控制ESP8266连接红外接收器接收红外线,并将红外线解码成空调红外键值。
/*
 * IRremoteESP8266: IRrecvDumpV2 - dump details of IR codes with IRrecv
 * An IR detector/demodulator must be connected to the input kRecvPin.
 *
 * Copyright 2009 Ken Shirriff, http://arcfn.com
 * Copyright 2017-2019 David Conran
 *
 * Example circuit diagram:
 *  https://github.com/crankyoldgit/IRremoteESP8266/wiki#ir-receiving
 *
 * Changes:
 *   Version 1.2 October, 2020
 *     - Enable easy setting of the decoding tolerance value.
 *   Version 1.0 October, 2019
 *     - Internationalisation (i18n) support.
 *     - Stop displaying the legacy raw timing info.
 *   Version 0.5 June, 2019
 *     - Move A/C description to IRac.cpp.
 *   Version 0.4 July, 2018
 *     - Minor improvements and more A/C unit support.
 *   Version 0.3 November, 2017
 *     - Support for A/C decoding for some protocols.
 *   Version 0.2 April, 2017
 *     - Decode from a copy of the data so we can start capturing faster thus
 *       reduce the likelihood of miscaptures.
 * Based on Ken Shirriff's IrsendDemo Version 0.1 July, 2009,
 */

#include <Arduino.h>
#include <assert.h>
#include <IRrecv.h>
#include <IRremoteESP8266.h>
#include <IRac.h>
#include <IRtext.h>
#include <IRutils.h>

// ==================== start of TUNEABLE PARAMETERS ====================
// An IR detector/demodulator is connected to GPIO pin 14
// e.g. D5 on a NodeMCU board.
// Note: GPIO 16 won't work on the ESP8266 as it does not have interrupts.
const uint16_t kRecvPin = 14;

// The Serial connection baud rate.
// i.e. Status message will be sent to the PC at this baud rate.
// Try to avoid slow speeds like 9600, as you will miss messages and
// cause other problems. 115200 (or faster) is recommended.
// NOTE: Make sure you set your Serial Monitor to the same speed.
const uint32_t kBaudRate = 115200;

// As this program is a special purpose capture/decoder, let us use a larger
// than normal buffer so we can handle Air Conditioner remote codes.
const uint16_t kCaptureBufferSize = 1024;

// kTimeout is the Nr. of milli-Seconds of no-more-data before we consider a
// message ended.
// This parameter is an interesting trade-off. The longer the timeout, the more
// complex a message it can capture. e.g. Some device protocols will send
// multiple message packets in quick succession, like Air Conditioner remotes.
// Air Coniditioner protocols often have a considerable gap (20-40+ms) between
// packets.
// The downside of a large timeout value is a lot of less complex protocols
// send multiple messages when the remote's button is held down. The gap between
// them is often also around 20+ms. This can result in the raw data be 2-3+
// times larger than needed as it has captured 2-3+ messages in a single
// capture. Setting a low timeout value can resolve this.
// So, choosing the best kTimeout value for your use particular case is
// quite nuanced. Good luck and happy hunting.
// NOTE: Don't exceed kMaxTimeoutMs. Typically 130ms.
#if DECODE_AC
// Some A/C units have gaps in their protocols of ~40ms. e.g. Kelvinator
// A value this large may swallow repeats of some protocols
const uint8_t kTimeout = 50;
#else   // DECODE_AC
// Suits most messages, while not swallowing many repeats.
const uint8_t kTimeout = 15;
#endif  // DECODE_AC
// Alternatives:
// const uint8_t kTimeout = 90;
// Suits messages with big gaps like XMP-1 & some aircon units, but can
// accidentally swallow repeated messages in the rawData[] output.
//
// const uint8_t kTimeout = kMaxTimeoutMs;
// This will set it to our currently allowed maximum.
// Values this high are problematic because it is roughly the typical boundary
// where most messages repeat.
// e.g. It will stop decoding a message and start sending it to serial at
//      precisely the time when the next message is likely to be transmitted,
//      and may miss it.

// Set the smallest sized "UNKNOWN" message packets we actually care about.
// This value helps reduce the false-positive detection rate of IR background
// noise as real messages. The chances of background IR noise getting detected
// as a message increases with the length of the kTimeout value. (See above)
// The downside of setting this message too large is you can miss some valid
// short messages for protocols that this library doesn't yet decode.
//
// Set higher if you get lots of random short UNKNOWN messages when nothing
// should be sending a message.
// Set lower if you are sure your setup is working, but it doesn't see messages
// from your device. (e.g. Other IR remotes work.)
// NOTE: Set this value very high to effectively turn off UNKNOWN detection.
const uint16_t kMinUnknownSize = 12;

// How much percentage lee way do we give to incoming signals in order to match
// it?
// e.g. +/- 25% (default) to an expected value of 500 would mean matching a
//      value between 375 & 625 inclusive.
// Note: Default is 25(%). Going to a value >= 50(%) will cause some protocols
//       to no longer match correctly. In normal situations you probably do not
//       need to adjust this value. Typically that's when the library detects
//       your remote's message some of the time, but not all of the time.
const uint8_t kTolerancePercentage = kTolerance;  // kTolerance is normally 25%

// Legacy (No longer supported!)
//
// Change to `true` if you miss/need the old "Raw Timing[]" display.
#define LEGACY_TIMING_INFO false
// ==================== end of TUNEABLE PARAMETERS ====================

// Use turn on the save buffer feature for more complete capture coverage.
IRrecv irrecv(kRecvPin, kCaptureBufferSize, kTimeout, true);
decode_results results;  // Somewhere to store the results

// This section of code runs only once at start-up.
void setup() {
#if defined(ESP8266)
  Serial.begin(kBaudRate, SERIAL_8N1, SERIAL_TX_ONLY);
#else  // ESP8266
  Serial.begin(kBaudRate, SERIAL_8N1);
#endif  // ESP8266
  while (!Serial)  // Wait for the serial connection to be establised.
    delay(50);
  // Perform a low level sanity checks that the compiler performs bit field
  // packing as we expect and Endianness is as we expect.
  assert(irutils::lowLevelSanityCheck() == 0);

  Serial.printf("\n" D_STR_IRRECVDUMP_STARTUP "\n", kRecvPin);
#if DECODE_HASH
  // Ignore messages with less than minimum on or off pulses.
  irrecv.setUnknownThreshold(kMinUnknownSize);
#endif  // DECODE_HASH
  irrecv.setTolerance(kTolerancePercentage);  // Override the default tolerance.
  irrecv.enableIRIn();  // Start the receiver
}

// The repeating section of the code
void loop() {
  // Check if the IR code has been received.
  if (irrecv.decode(&results)) {
    // Display a crude timestamp.
    uint32_t now = millis();
    Serial.printf(D_STR_TIMESTAMP " : %06u.%03u\n", now / 1000, now % 1000);
    // Check if we got an IR message that was to big for our capture buffer.
    if (results.overflow)
      Serial.printf(D_WARN_BUFFERFULL "\n", kCaptureBufferSize);
    // Display the library version the message was captured with.
    Serial.println(D_STR_LIBRARY "   : v" _IRREMOTEESP8266_VERSION_ "\n");
    // Display the tolerance percentage if it has been change from the default.
    if (kTolerancePercentage != kTolerance)
      Serial.printf(D_STR_TOLERANCE " : %d%%\n", kTolerancePercentage);
    // Display the basic output of what we found.
    Serial.print(resultToHumanReadableBasic(&results));
    // Display any extra A/C info if we have it.
    String description = IRAcUtils::resultAcToString(&results);
    if (description.length()) Serial.println(D_STR_MESGDESC ": " + description);
    yield();  // Feed the WDT as the text output can take a while to print.
#if LEGACY_TIMING_INFO
    // Output legacy RAW timing info of the result.
    Serial.println(resultToTimingInfo(&results));
    yield();  // Feed the WDT (again)
#endif  // LEGACY_TIMING_INFO
    // Output the results as source code
    Serial.println(resultToSourceCode(&results));
    Serial.println();    // Blank line between entries
    yield();             // Feed the WDT (again)
  }
}
RED_shoot.ino
这个文件是负责利用阿里云平台,ESP8266连接红外发射管,实现针对不同按钮的操作,发射不同键值的红外射线的功能。
#include <ESP8266WiFi.h>//安装esp8266arduino开发环境
static WiFiClient espClient;

#include <AliyunIoTSDK.h>//引入阿里云 IoT SDK
#define BLINKER_PRINT Serial
#define BLINKER_WIFI
#include <IRremoteESP8266.h>
#include <IRsend.h>
//需要安装crypto库、PubSubClient库

//设置产品和设备的信息,从阿里云设备信息里查看
#define PRODUCT_KEY     "XXXX"//替换自己的PRODUCT_KEY
#define DEVICE_NAME     "XXXXXXXX"//替换自己的DEVICE_NAME
#define DEVICE_SECRET   "XXXXXXXXXX"//替换自己的DEVICE_SECRET
#define REGION_ID       "cn-shanghai"//默认cn-shanghai

#define WIFI_SSID       "XXXXXX"//替换自己的WIFI
#define WIFI_PASSWD     "XXXXX"//替换自己的WIFI

unsigned long lastMsMain = 0;
//定义红外发射的管脚
const uint16_t kIrLed = 4;  // ESP8266 GPIO pin to use. Recommended: 4 (D2).
IRsend irsend(kIrLed);  // Set the GPIO to be used to sending the message.

//空调开:25度
uint16_t power_on[229] = {3118, 3000,  3096, 4402,  658, 1566,  656, 460,  652, 1572,  656, 464,  650, 478,  630, 1596,  630, 1572,  652, 482,  630, 1596,  634, 478,  602, 510,  658, 1566,  660, 458,  654, 478,  632, 1570,  656, 480,  632, 480,  602, 512,  656, 462,  654, 476,  632, 480,  604, 512,  654, 456,  658, 480,  632, 478,  602, 512,  656, 462,  654, 476,  632, 480,  602, 512,  658, 454,  656, 482,  632, 478,  604, 1622,  604, 508,  658, 460,  652, 484,  632, 478,  602, 510,  604, 512,  654, 464,  624, 1600,  650, 480,  630, 482,  602, 512,  654, 464,  650, 460,  654, 478,  602, 510,  654, 464,  652, 480,  630, 482,  602, 510,  654, 464,  648, 464,  648, 484,  602, 510,  656, 460,  650, 1572,  628, 492,  646, 484,  602, 510,  658, 454,  654, 466,  648, 482,  628, 484,  628, 486,  654, 464,  648, 482,  604, 508,  628, 484,  626, 492,  650, 482,  630, 482,  600, 512,  654, 464,  648, 484,  628, 484,  624, 488,  600, 518,  646, 484,  604, 510,  600, 514,  628, 492,  644, 486,  626, 486,  600, 512,  598, 518,  646, 486,  602, 512,  600, 514,  626, 494,  618, 512,  600, 514,  596, 536,  576, 538,  600, 1622,  602, 512,  598, 536,  576, 538,  600, 514,  598, 1624,  600, 512,  600, 1626,  572, 540,  598, 1628,  594, 518,  594, 1630,  594, 1634,  592, 1656,  568, 520,  592, 1632,  568};  // HAIER_AC_YRW02
//空调关
uint16_t power_off[229] = {3138, 3000,  3094, 4404,  658, 1566,  656, 460,  652, 1570,  656, 464,  648, 480,  604, 1622,  630, 1574,  652, 480,  630, 1596,  630, 482,  604, 510,  654, 1570,  658, 460,  650, 482,  630, 482,  634, 478,  630, 486,  656, 464,  648, 480,  604, 508,  654, 462,  654, 482,  630, 482,  634, 478,  628, 488,  654, 464,  650, 478,  604, 508,  630, 488,  652, 484,  632, 462,  650, 478,  602, 512,  654, 466,  652, 478,  630, 482,  628, 488,  652, 466,  650, 460,  652, 478,  602, 512,  658, 1566,  658, 460,  652, 482,  634, 478,  602, 510,  662, 450,  658, 464,  650, 480,  604, 508,  636, 480,  654, 480,  634, 478,  602, 510,  656, 456,  656, 464,  650, 480,  604, 506,  630, 1596,  626, 488,  656, 464,  650, 480,  630, 482,  628, 482,  658, 460,  652, 480,  628, 484,  602, 510,  654, 464,  650, 480,  632, 480,  630, 482,  656, 462,  652, 480,  628, 484,  602, 510,  656, 462,  648, 484,  628, 484,  628, 482,  654, 462,  650, 484,  628, 484,  600, 510,  656, 462,  650, 482,  628, 484,  628, 482,  628, 488,  654, 466,  646, 482,  600, 512,  652, 464,  652, 480,  630, 482,  630, 482,  624, 1600,  600, 512,  652, 468,  646, 486,  602, 510,  598, 1626,  598, 512,  600, 1608,  620, 510,  626, 486,  624, 490,  626, 1598,  626, 1598,  626, 494,  620, 1618,  604, 1600,  602};  // HAIER_AC_YRW02
//制冷
uint16_t cold[229] =  {3156, 2984,  3098, 4400,  658, 1566,  628, 488,  666, 1558,  666, 454,  682, 446,  638, 1588,  666, 1538,  668, 466,  638, 1586,  648, 466,  554, 558,  662, 1560,  632, 488,  686, 446,  664, 1538,  672, 464,  664, 448,  556, 558,  668, 452,  684, 446,  638, 474,  604, 512,  664, 446,  666, 472,  666, 446,  556, 556,  662, 458,  662, 468,  642, 470,  578, 538,  666, 444,  664, 474,  642, 470,  582, 1644,  636, 476,  628, 488,  662, 472,  664, 448,  606, 506,  634, 480,  666, 454,  672, 1550,  686, 446,  664, 448,  556, 558,  666, 452,  668, 442,  668, 462,  608, 504,  630, 488,  662, 470,  650, 464,  554, 558,  662, 458,  660, 450,  662, 470,  632, 480,  628, 488,  662, 1562,  664, 456,  656, 472,  622, 490,  626, 486,  602, 518,  656, 476,  636, 476,  598, 514,  660, 476,  636, 478,  630, 482,  602, 510,  600, 518,  654, 478,  630, 482,  574, 538,  652, 466,  648, 484,  632, 480,  600, 512,  600, 518,  648, 482,  630, 484,  600, 514,  626, 510,  626, 510,  602, 508,  576, 536,  576, 538,  602, 510,  602, 536,  574, 538,  600, 514,  600, 536,  576, 538,  574, 538,  572, 540,  598, 1626,  598, 540,  568, 544,  568, 544,  592, 522,  592, 1632,  594, 1654,  544, 546,  592, 544,  568, 1656,  570, 544,  568, 1656,  568, 1658,  568, 1658,  568, 1656,  568, 544,  568};  // UNKNOWN C05FDF44
//制热
uint16_t warm[229] =  {3160, 2980,  3098, 4400,  656, 1568,  658, 460,  660, 1564,  656, 462,  658, 472,  638, 1586,  634, 1568,  654, 480,  636, 1588,  632, 480,  578, 1648,  604, 510,  656, 1566,  632, 486,  662, 1558,  602, 514,  660, 474,  642, 470,  582, 530,  658, 460,  686, 446,  666, 446,  556, 556,  580, 536,  664, 472,  664, 446,  608, 504,  630, 488,  686, 448,  664, 446,  580, 534,  606, 508,  670, 1552,  666, 1558,  660, 460,  662, 470,  664, 448,  556, 556,  662, 450,  656, 466,  682, 1540,  686, 444,  640, 1586,  640, 474,  554, 558,  664, 456,  684, 428,  684, 446,  608, 504,  630, 488,  662, 472,  664, 446,  580, 534,  660, 460,  684, 426,  664, 468,  636, 1588,  632, 480,  602, 514,  672, 446,  682, 448,  636, 476,  628, 484,  602, 518,  668, 462,  642, 470,  576, 538,  666, 454,  658, 472,  636, 476,  602, 510,  576, 542,  658, 476,  636, 476,  576, 538,  656, 464,  652, 478,  636, 478,  600, 512,  598, 518,  654, 478,  632, 482,  576, 536,  628, 490,  650, 482,  628, 484,  600, 514,  600, 516,  650, 482,  628, 486,  600, 514,  624, 494,  646, 484,  602, 534,  576, 536,  576, 536,  604, 1620,  604, 510,  600, 536,  576, 536,  574, 540,  600, 1624,  600, 1626,  572, 540,  598, 1628,  594, 522,  590, 1634,  592, 1656,  570, 544,  568, 1656,  568, 1656,  568, 522,  590};  // UNKNOWN CE4D8E3E
void setup()
{
  Serial.begin(115200);

  //连接到wifi
  wifiInit(WIFI_SSID, WIFI_PASSWD);

  //初始化 iot,需传入 wifi 的 client,和设备产品信息
  AliyunIoTSDK::begin(espClient, PRODUCT_KEY, DEVICE_NAME, DEVICE_SECRET, REGION_ID);

  //绑定一个设备属性回调,当远程修改此属性,会触发LED函数
  AliyunIoTSDK::bindData("AIR", AIR);
  AliyunIoTSDK::bindData("TEM", TEM);
    //红外初始化
  irsend.begin();
}

void loop()
{
  AliyunIoTSDK::loop();//必要函数

  if (millis() - lastMsMain >= 2000)//每2秒发送一次
  {
    lastMsMain = millis();

    //发送LED状态到云平台(高电平:1;低电平:0)
    //AliyunIoTSDK::send("AIRPIN", Serial.println(AIR));
  }
}

//wifi 连接
void wifiInit(const char *ssid, const char *passphrase)
{
  WiFi.mode(WIFI_STA);
  WiFi.begin(ssid, passphrase);
  while (WiFi.status() != WL_CONNECTED)
  {
    delay(1000);
    Serial.println("WiFi not Connect");
  }
  Serial.println("Connected to AP");
}

//开启关闭的属性修改的回调函数
void AIR(JsonVariant L)//固定格式,修改参数l
{
  int AIR = L["AIR"];//参数l
  if (AIR == 0)
  {
    irsend.sendRaw(power_off, 299, 38);  // Send a raw data capture at 38kHz.
  }
  else if(AIR == 1)
  {
    //发送红外指令
    irsend.sendRaw(power_on, 299, 38);  // Send a raw data capture at 38kHz.
  }
  Serial.printf("收到的AIR是:"); Serial.println(AIR);
}
//制冷制热的属性修改的回调函数
void TEM(JsonVariant L)//固定格式,修改参数l
{
  int TEM = L["TEM"];//参数l
  if (TEM == 0)
  {
    irsend.sendRaw(cold, 299, 38);  // Send a raw data capture at 38kHz.
  }
  else if(TEM == 1)
  {
    //发送红外指令
    irsend.sendRaw(warm, 299, 38);  // Send a raw data capture at 38kHz.
  }
  Serial.printf("收到的TEM是:"); Serial.println(TEM);
}
项目实现
思路
要实现远程遥控,我们小组的思路是电脑端或手机端按下按钮,基于阿里云平台,向ESP8266WIFI模块进行通信,ESP8266WIFI模块连接红外发射管,根据接收的信息发射空调关闭,启动,制冷,制热等红外线,实现对空调的遥控功能。要实现此功能,首先要取得空调遥控板的红外键值,ESP8266利用红外接收器取得空调红外键值,并将这些红外键值烧录进ESP8266WIFI模块,然后ESP8266连接红外发射管,登陆阿里云物联网平台,将三元组写入程序,烧录进ESP8266,实现阿里云与ESP8266通信,最后在阿里云平台设计web页面或者移动web界面,实现按键通信功能,完成远程遥控功能。
解码空调红外键值
本次实验以早湖6号楼寝室的空调为例,空调的品牌为海尔

? 图4.2.2.1 寝室空调图
遥控器也是海尔品牌

? 图4.2.2.2 寝室空调遥控板图
本次实验对空调遥控器的电源键,制冷键,制热键进行解码,实现空调的开启,关闭,制冷,制热功能。
将ESP8266WIFI模块与红外接收器连接,选择D5口为连接口,与红外接收器的输入口相连接,然后按照图中的指示连接,连接图如下:

? 图4.2.2.3 红外接收系统连接图
连接完成后,打开arduino,点击文件/示例/IRremoteESP8266/IRrecvDumpV2

? 图4.2.2.4 红外接收程序图
这是解码空调红外键值的程序,14号口就是ESP8266的D5口

用microUSB线将ESP8266与电脑相连,然后点击上传,将程序烧录进ESP8266中
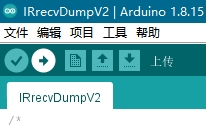
图4.2.2.5 上传
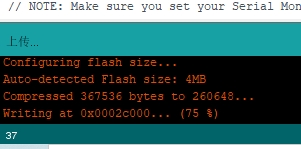
? 图4.2.2.6 程序上传进度
显示上传成功后,打开右上角的串口监视器
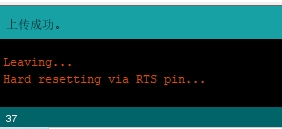
图4.2.2.7 程序上传成功

图4.2.2.8 打开串口监视器

? 图4.2.2.9 串口监视器界面
将空调遥控板对准红外接收器,按下电源键

? 图4.2.2.10 接收红外信号操作
然后观察串口监视器
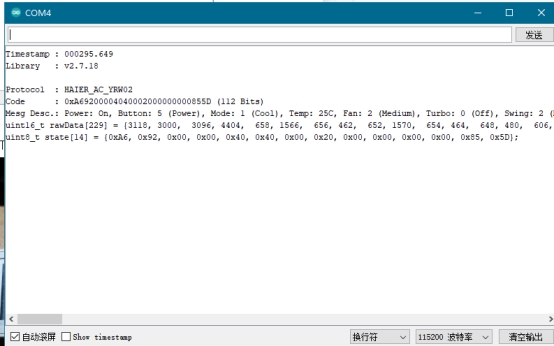
? 图4.2.2.11 红外键值解码显示
将uint16_t rawData那排数据备份,默认为25℃,5power风,制冷
然后分别对****开启****,****关闭****,****制冷****,****制热****键进行解码

? 图4.2.2.12 红外键值保存
登录阿里云平台创建产品和设备
登录阿里云官网,进入物联网平台
地址:https://iot.console.aliyun.com/lk/summary/new
点击公共实例,进入公共实例界面

? 图4.2.3.1 公共实例进入
点击创建产品,输入产品名称,并选择自定义品类,然后点击确认
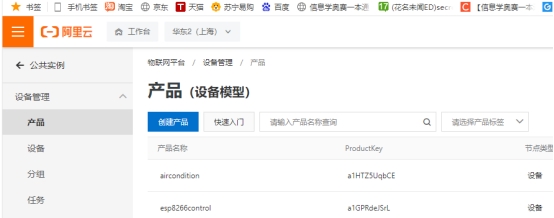
? 图4.2.3.2 产品界面

? 图4.2.3.3 新建产品界面

? 图4.2.3.4 产品创建成功界面
点击添加设备,输入DeviceName

? 图4.2.3.5 设备界面

? 图4.2.3.6 添加设备界面

? 图4.2.3.7 设备添加成功界面
然后点击一键复制设备证书,将三元组的数据保存下来

? 图4.2.3.8 保存三元组
然后回到设备界面,点击功能定义
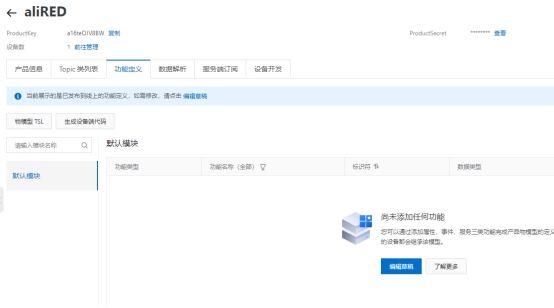
? 图4.2.3.9 产品功能定义界面
选择编辑草稿,然后点击增加自定义功能,添加开关的功能
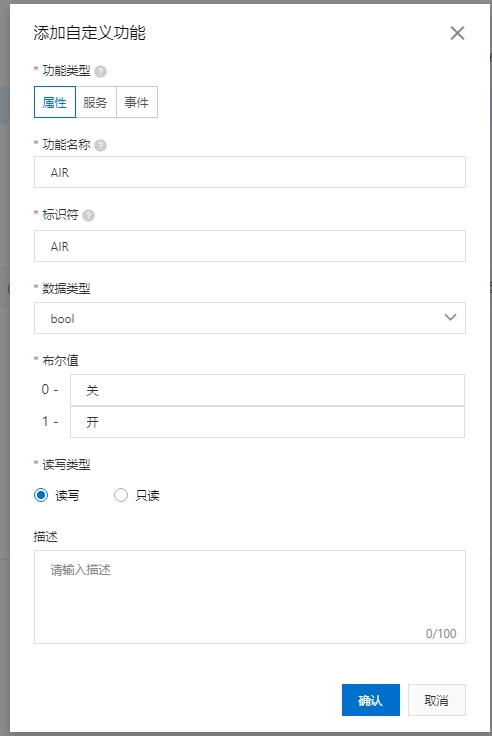
? 图4.2.3.10 添加自定义功能界面(AIR)
点击确定后,再创建一个自定义功能,添加制冷制热的功能

? 图4.2.3.11 添加自定义功能界面(TEM)

? 图4.2.3.12 功能定义界面
点击发布上线

? 图4.2.3.13 发布上线操作

? 图4.2.3.14 确认发布上线操作

? 图4.2.3.15 发布成功图
物联网应用开发
进入阿里云物联网应用开发界面
地址:
https://studio.iot.aliyun.com/?spm=5176.cniotstudio.0.0.6f75bec6C1jgOH
点击项目管理
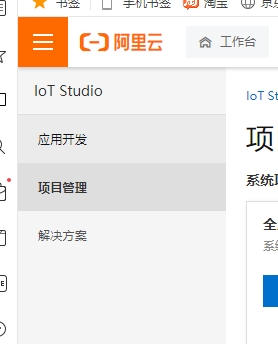
图4.2.4.1 项目管理
点击创建普通项目

? 图4.2.4.2 新建项目操作
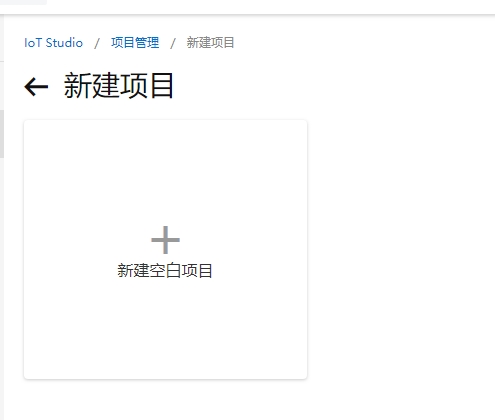
? 图4.2.4.3 新建空白项目操作
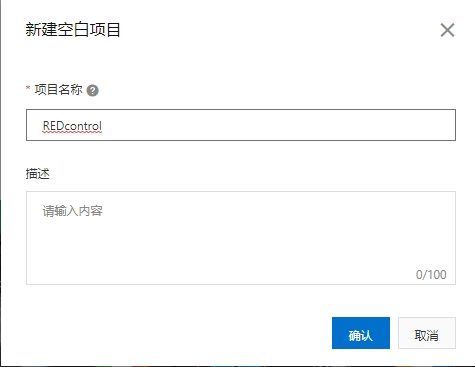
? 图4.2.4.4 空白项目新建界面
进入界面后,点击产品旁边的关联
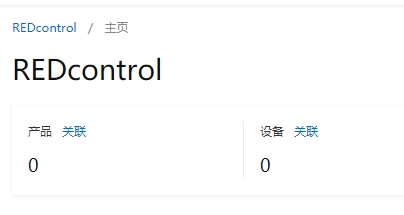
? 图4.2.4.5 设置关联操作
将之前创建的产品关联进项目

? 图4.2.4.6 关联产品操作
同时点击设备旁的关联,将之前创建的设备关联进项目
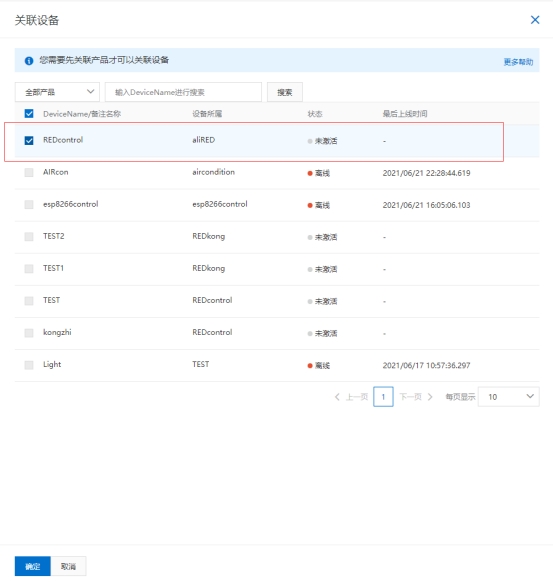
? 图4.2.4.7 关联设备操作
返回应用开发主页,点击移动可视化开发

? 图4.2.4.8 进入可视化开发界面
点击新建空白应用,创建移动应用

? 图4.2.4.9 新建可视化移动应用
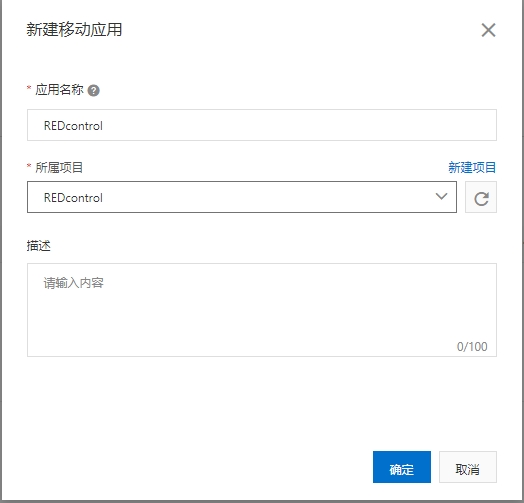
? 图4.2.4.10 新建移动应用界面
进入设计界面

? 图4.2.4.11 移动应用开发界面
在左边添加4个按钮和2个指示灯
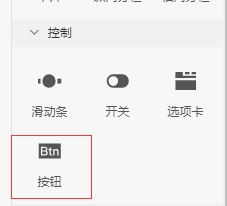
图4.2.4.12 控件界面(部分)

? 图4.2.4.13 设计界面
然后再右边修改按钮的样式

图4.2.4.14 设计界面2
接着点击开始按钮,在右边点击交互,选择新增交互

? 图4.2.4.15 新增交互操作
选择配置设备
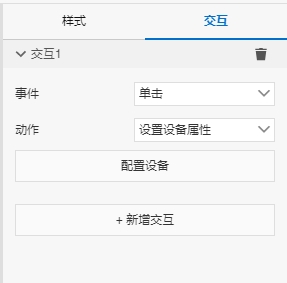
图4.2.4.16 交互设置界面
配置设备
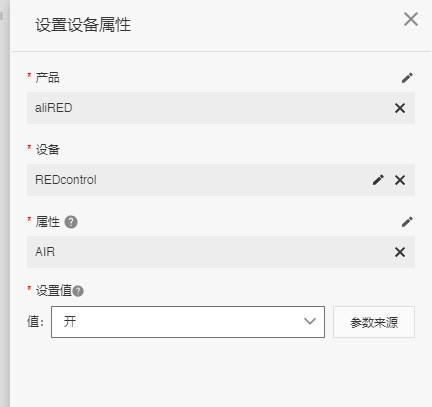
? 图4.2.4.17 配置设备界面
以此类推,将关闭,制冷,制热也配置设备

图4.2.4.18 配置设备界面2
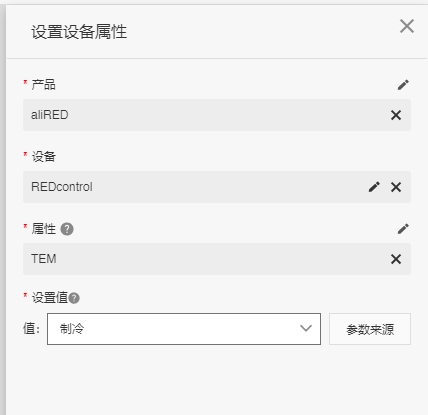
图4.2.4.19 配置设备界面3

? 图4.2.4.20 配置设备界面4
指示灯右边选择配置数据源
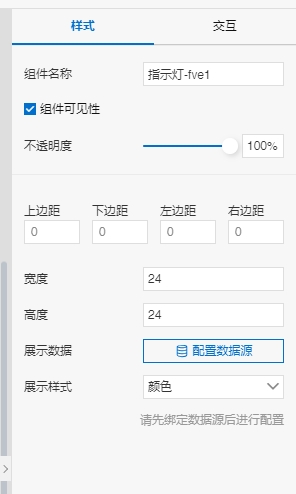
? 图4.2.4.21 样式界面

? 图4.2.4.22 数据源配置界面

? 图4.2.4.23 配置数据源界面2
烧录程序连接阿里云
打开arduino,编写红外遥控的程序,将之前复制的三元组写入程序,并且写入WIFI的账户和密码

? 图4.2.5.1 三元组和WIFI配置
设定4号口为输出口,也就是ESP8266上的D2口

图4.2.5.2 发射管脚设置
接着将之前解码的红外键值写入程序
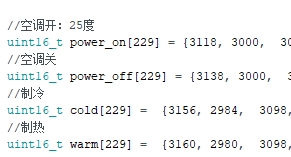
图4.2.5.3 解码值设置
将ESP8266与红外发射管进行连接

? 图4.2.5.4 红外发射系统连接图
然后用数据线连接电脑,打开arduino点击上传烧录程序进ESP8266
图4.2.5.5 程序上传
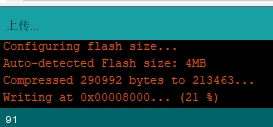
图4.2.5.6 程序上传加载
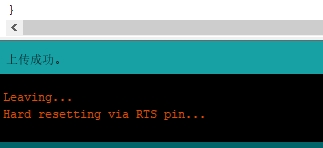
图4.2.5.7 程序上传成功
打开串口监视器,显示连接上WIFI
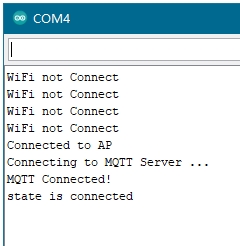
图4.2.5.8 显示连接成功
打开阿里云物联网平台,设备已显示在线

? 图4.2.5.9 设备显示在线图
进入移动可视化开发

? 图4.2.5.10 可视化开发操作
打开之前创建的设计
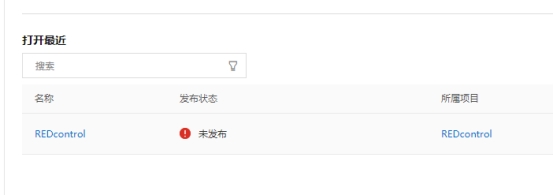
? 图4.2.5.11 移动应用历史
点击右上角的预览,进入测试界面

? 图4.2.5.12 预览测试界面

? 图4.2.5.13 红外发射系统位置图