STM32---串口通信
通过串口通信点亮LED灯
实现通过串口发送’1’ 点亮红灯 ,发送’2’点亮黄灯,发送‘3’点亮所有灯,发送其他数据熄灭所有灯。
串口基本配置
不需要通过中断,所以代码中中断代码注释掉了。
usart.h代码如下:
#ifndef __USART_H
#define __USART_H
#include "stm32f10x.h"

void Usart_Init(void);
void Usart_SendByte(USART_TypeDef* pUSARTx,uint8_t data);

#endif /* USART_H */
usart.c代码如下:
#include "usart.h"
#include "stm32f10x.h"
#include "stdio.h"

//static void Nvic_Init(){
//	NVIC_InitTypeDef NVIC_InitStructure;
//	NVIC_PriorityGroupConfig(NVIC_PriorityGroup_2);
//
//	NVIC_InitStructure.NVIC_IRQChannel=USART1_IRQn;
//	NVIC_InitStructure.NVIC_IRQChannelPreemptionPriority=1;
//	NVIC_InitStructure.NVIC_IRQChannelSubPriority=1;
//	NVIC_InitStructure.NVIC_IRQChannelCmd=ENABLE;
//	NVIC_Init(&NVIC_InitStructure);
//}


void Usart_Init(){
	GPIO_InitTypeDef GPIO_InitStructure;
	USART_InitTypeDef USART_InitStructure;

	//打开IO时钟
	RCC_APB2PeriphClockCmd(RCC_APB2Periph_GPIOA,ENABLE);
	RCC_APB2PeriphClockCmd(RCC_APB2Periph_USART1,ENABLE);

	//发送
	GPIO_InitStructure.GPIO_Pin=GPIO_Pin_9;
	GPIO_InitStructure.GPIO_Mode=GPIO_Mode_AF_PP;
	GPIO_InitStructure.GPIO_Speed=GPIO_Speed_50MHz;
	GPIO_Init(GPIOA,&GPIO_InitStructure);

	//接受
	GPIO_InitStructure.GPIO_Pin=GPIO_Pin_10;
	GPIO_InitStructure.GPIO_Mode=GPIO_Mode_IN_FLOATING;
	GPIO_Init(GPIOA,&GPIO_InitStructure);

	//中断优先级配置
//	Nvic_Init();

	//串口配置
	USART_InitStructure.USART_BaudRate=115200;
	USART_InitStructure.USART_HardwareFlowControl=USART_HardwareFlowControl_None;
	USART_InitStructure.USART_Mode=USART_Mode_Tx|USART_Mode_Rx;
	USART_InitStructure.USART_Parity=USART_Parity_No;
	USART_InitStructure.USART_StopBits=USART_StopBits_1;
	USART_InitStructure.USART_WordLength=USART_WordLength_8b;
	USART_Init(USART1,&USART_InitStructure);

//	USART_ITConfig(USART1,USART_IT_RXNE,ENABLE);

	USART_Cmd(USART1,ENABLE);
}

//发送数据
//void Usart_SendByte(USART_TypeDef* pUSARTx,uint8_t data){
//	USART_SendData(pUSARTx,data);
//	while( USART_GetFlagStatus(pUSARTx,USART_FLAG_TXE) == RESET);
//
//}

//中断服务函数
//void USART1_IRQHandler(){
//	uint8_t text;
//	if(USART_GetITStatus(USART1,USART_IT_RXNE)!=RESET ){
//		text = USART_ReceiveData(USART1);
//
//		USART_SendData(USART1,text);
//	}

//}

//重定义fputc函数
// printf函数重定向
int fputc(int ch, FILE *f)
{
	USART_SendData(USART1,(uint8_t) ch);
	while( USART_GetFlagStatus(USART1,USART_FLAG_TXE) == RESET);
	return (ch);
}
//getchar函数重定向
int fgetc(FILE *f)
{
	while( USART_GetFlagStatus(USART1,USART_FLAG_RXNE) == RESET);
	return (int)USART_ReceiveData(USART1);
}
main函数代码
#include "stm32f10x.h"
#include "led.h"
#include "usart.h"
#include <stdio.h>

int main(void)
{
	uint8_t i;
	Usart_Init();
	LED_Init();
	//Usart_SendByte(USART1,100);
	//USART_SendData(USART1,100);
	printf("程序开始\n");
	while(1){
		i = getchar();
		printf("i = %c\n",i);

		switch(i){
			case '1':
				LED_RED_TOGGLE;
				break;
			case '2':
				LED_YELLOW_TOGGLE;
				break;
			case '3':
				LED_RED_ON;
				LED_YELLOW_ON;
				break;
			default:
				LED_RED_OFF;
				LED_YELLOW_OFF;
				break;
		}
	}
}
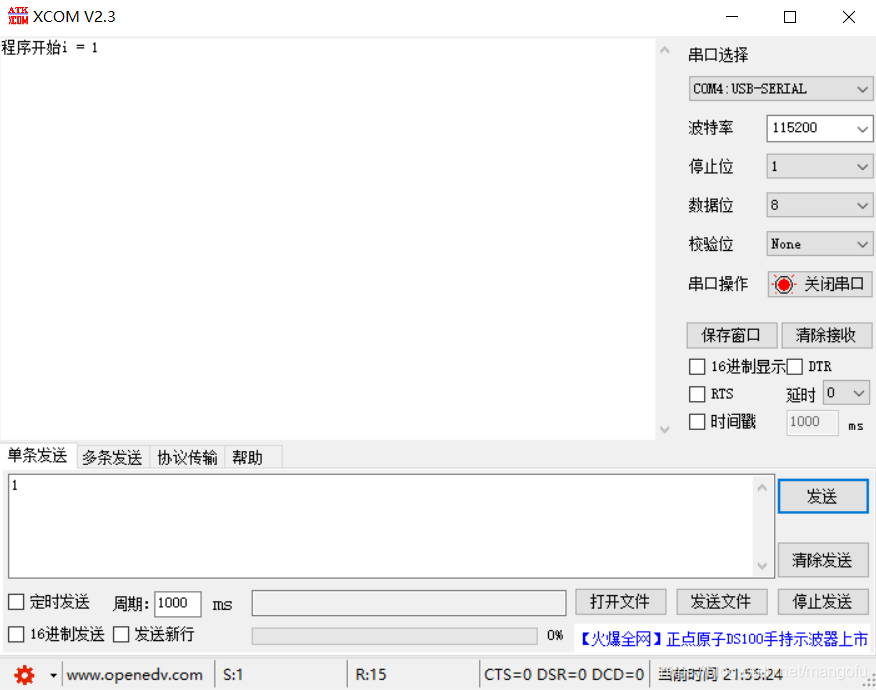
串口调试助手

注意
1.需要勾选Target => Use MicroLIB
2.串口助手若没有勾选16进制 所有发送接受的数据都为字符。