使用CodeLite配合OpenOCD和GDB调试Nuttx(基于STM32)
环境
- Debug tool, OpenOCD V0.11
- JLink V9, Firmware 2021 May 7
- Target board, STM32F103-minimum board
- Host OS, Ubuntu 20 on VMware
依赖
- gdb-multiarch
- CodeLite
过程
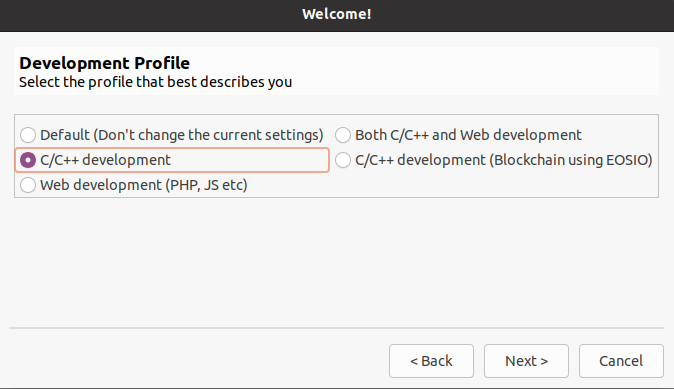
CodeLite工程向导
首次启动会有Setup向导,后面如果想重新打开向导也可以在Help->Run the Setup Wizard中重新运行
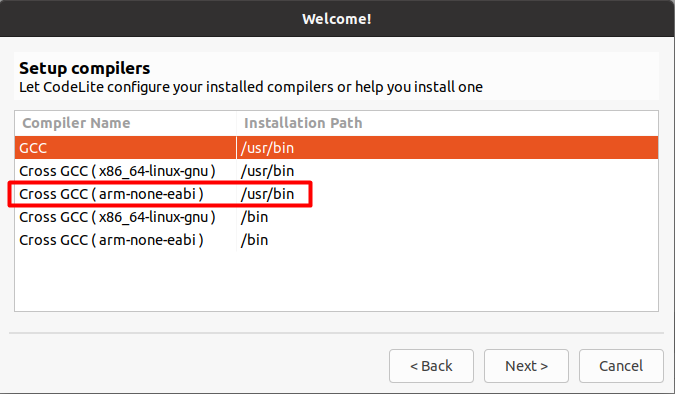
以下是重要过程截图,最重要的是要确认已经安装了arm-none-eabi 交叉编译工具
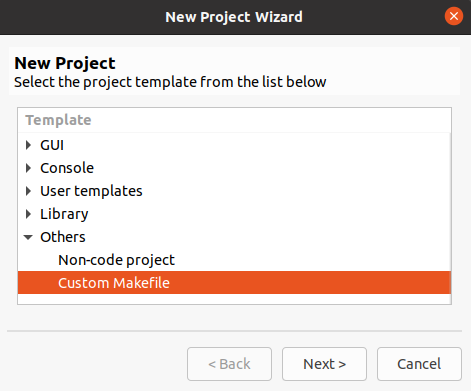
新建工作区和工程
Workspace->New Workspace
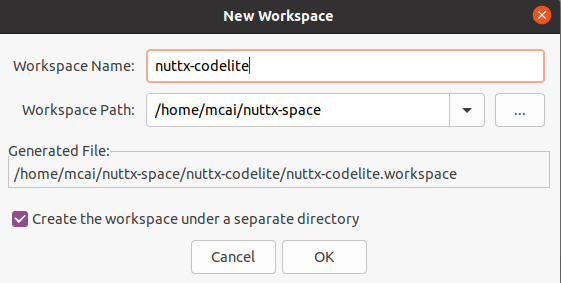
确认后就在nuttx-space下创建了一个名为nuttx-codelite的工作区,在IDE左侧刚生成的nuttx-codelite工作区右键New->New Project

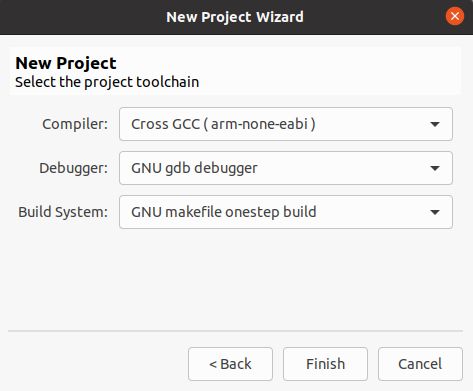
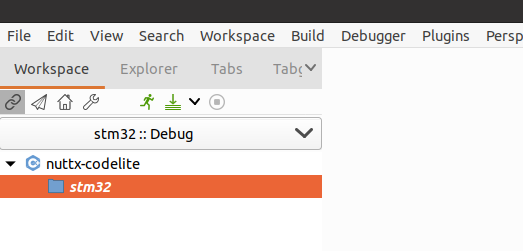
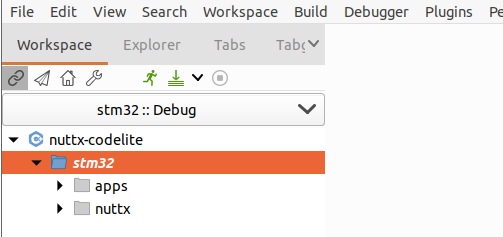
创建完工作区和工程后如下
导入工程文件
在上面stm32工程上右键Import Files From Directory
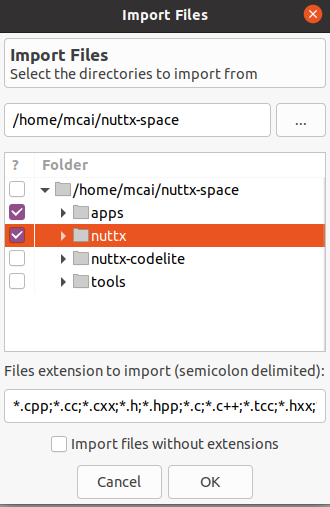
导入ok后如下
编译 -工程设置
在stm32工程右键->Settings,将Working Directory改为nuttx目录,然后Clean改为make distclean(跟实际命令行一致)
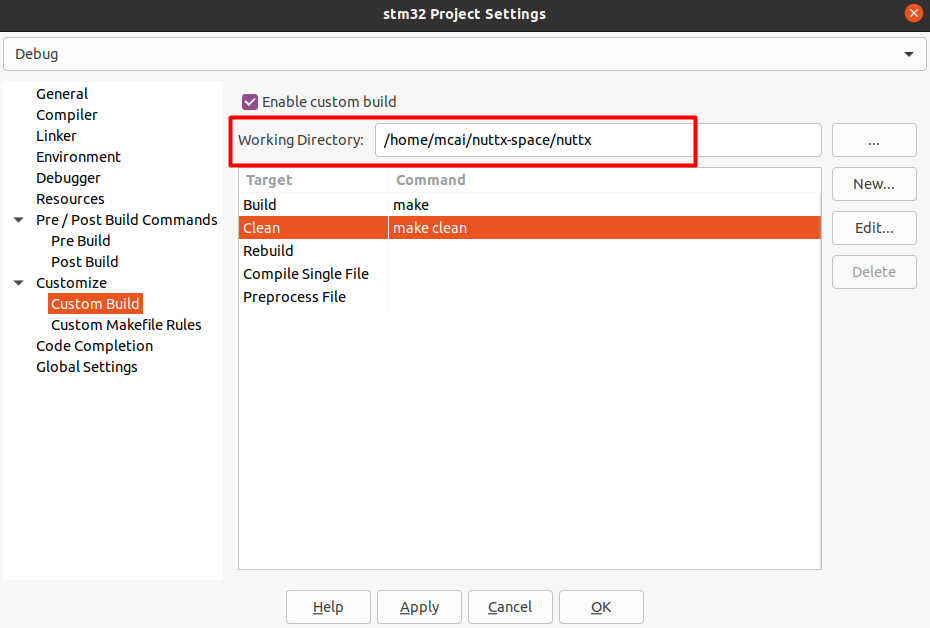
配置完成后应该就可以编译了,工程右键Build(或快捷键F7),如下提示表示编译成功

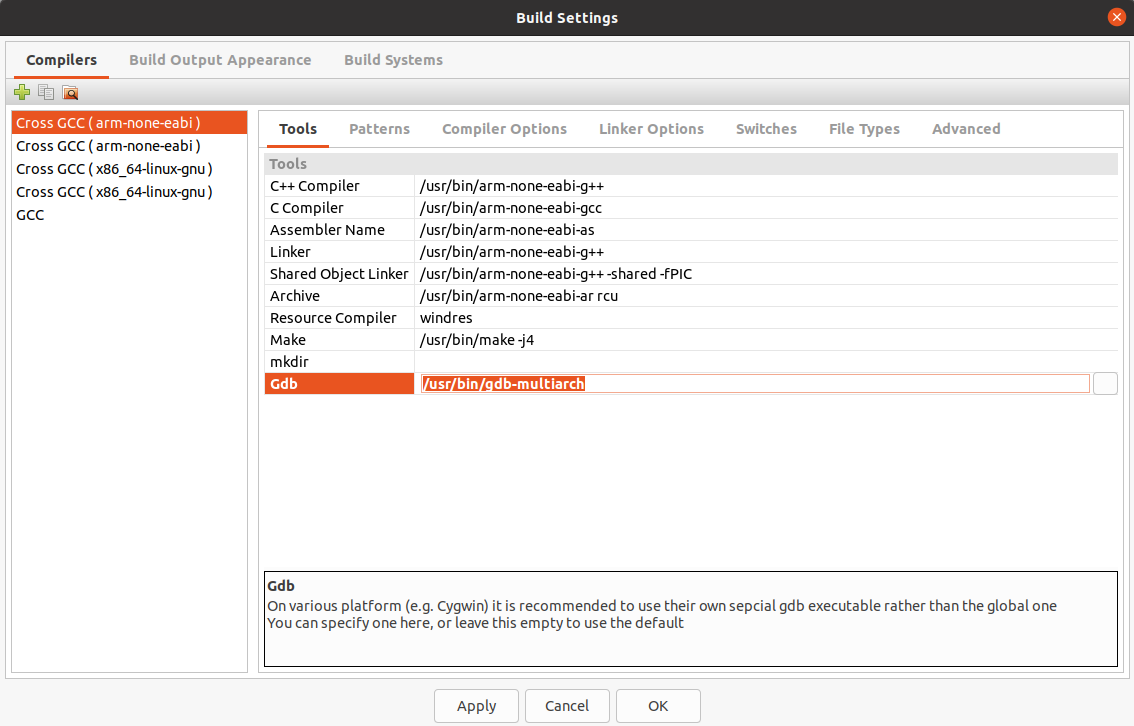
调试 -全局设置
在菜单栏Settings->Build Settings设置如下,设置Gdb位置
调试 -工程设置
设置如下gdb server地址和debug前需要让host执行的命令
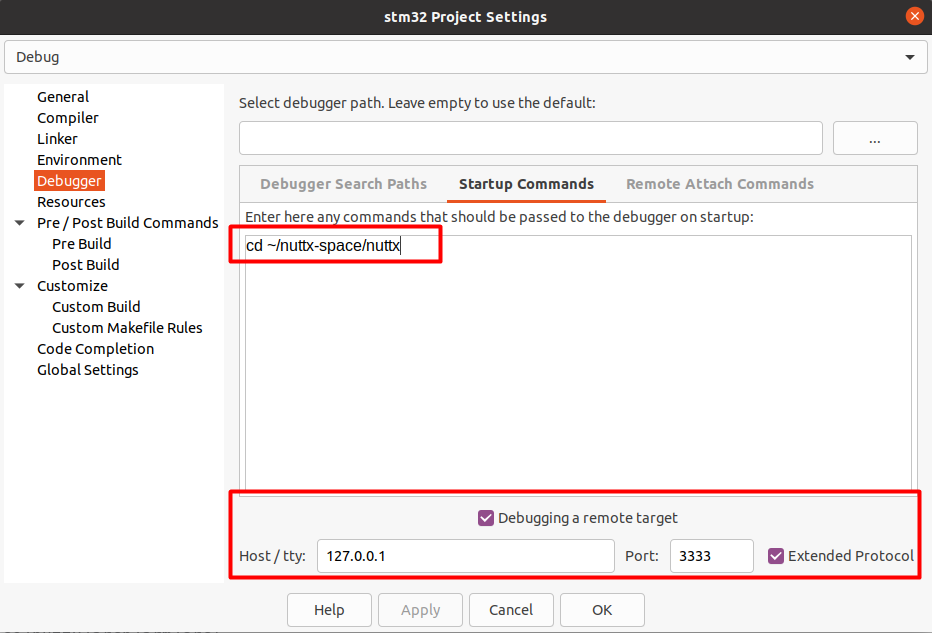
和如下gdb命令,根据实际需要写入,设置断点在nx_start(或者更早的可以设置__start)
mon reset halt
load nuttx
file nuttx
b nx_start

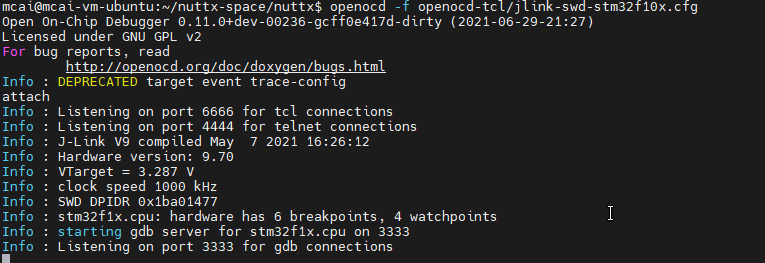
调试 -启动gdb服务
在host终端,执行如下命令,用OpenOCD打开GDB服务
openocd -f openocd-tcl/jlink-swd-stm32f10x.cfg
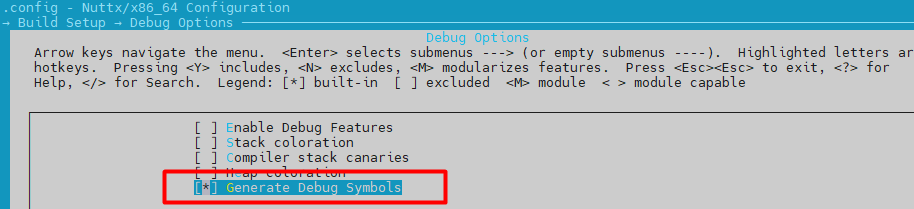
调试 -menuconfig配置
在host终端下,nuttx目录下执行如下,在Build Setup-> Debug Options中勾选Generate Debug Symbols,以便生成符号用于调试
make menuconfig
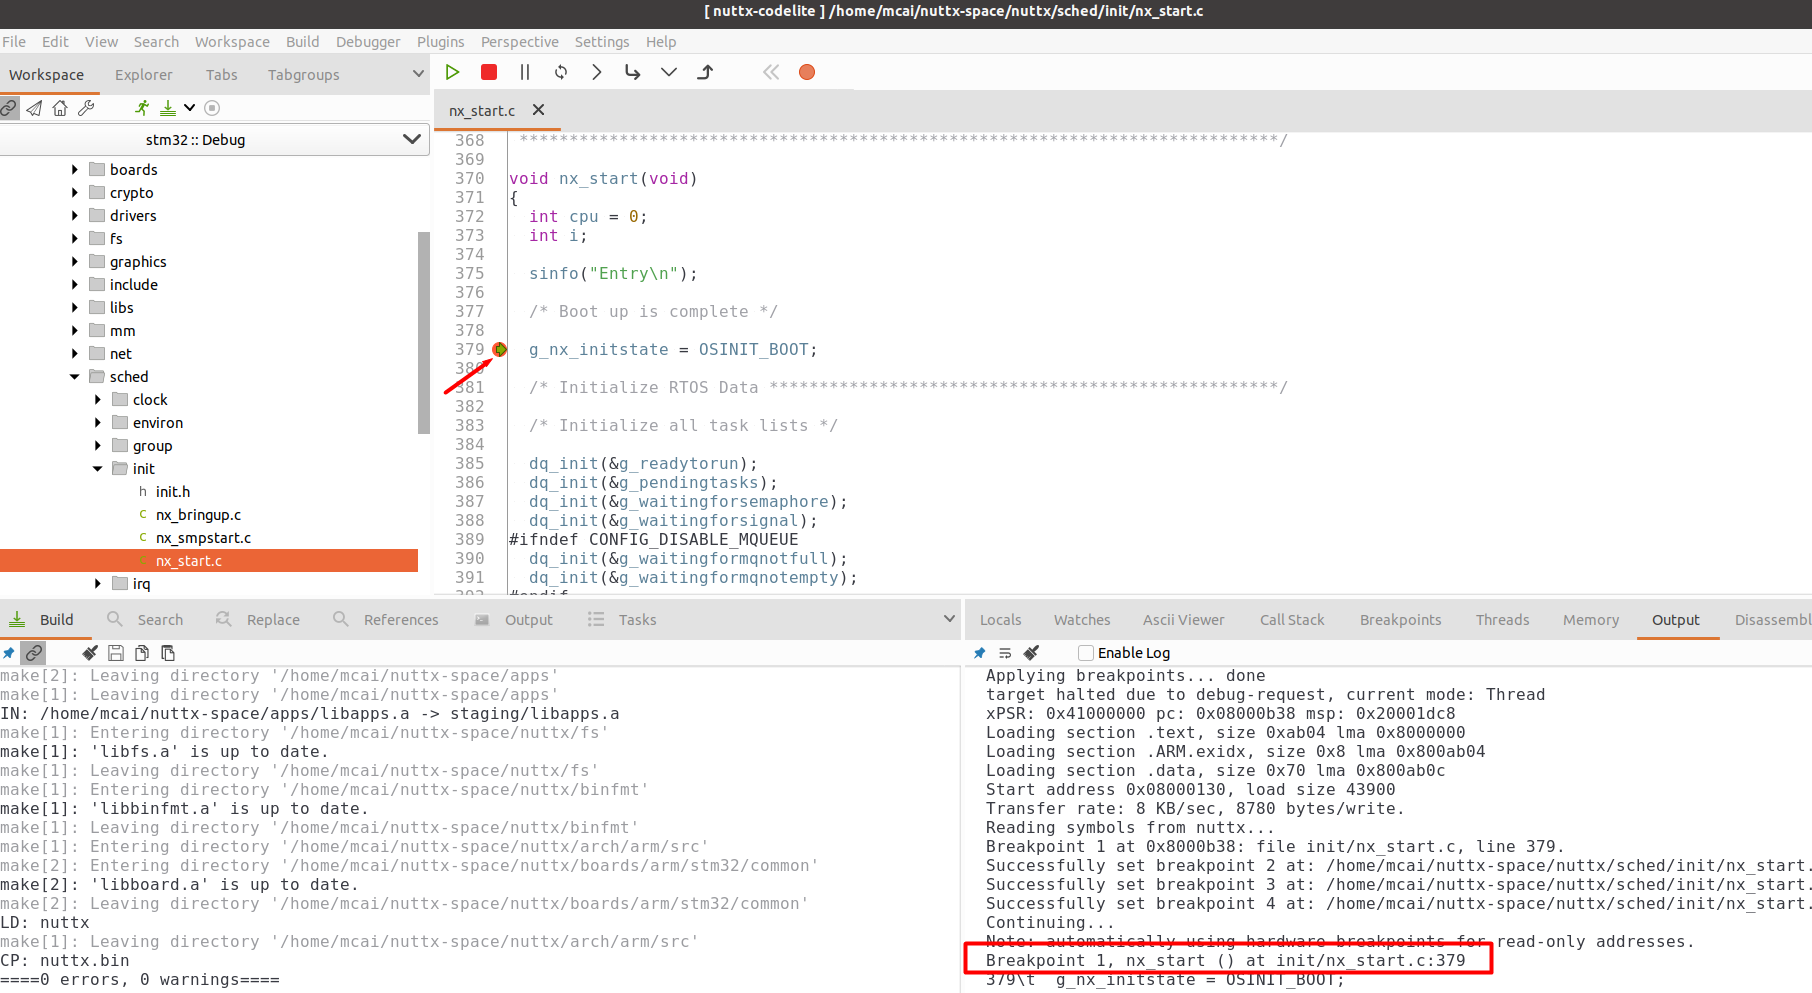
调试 -Codelite Debug
上述配置完成后,可以点击Debugger(或者F5快捷键),等待十多秒(主要耗时在load nuttx上),可以看到程序停在nx_start断点处了
注意,debug时已经把程序下载到stm32 flash中了,也就是load nuttx命令