IAR的基本使用教程
1. IAR颜色字体大小设置
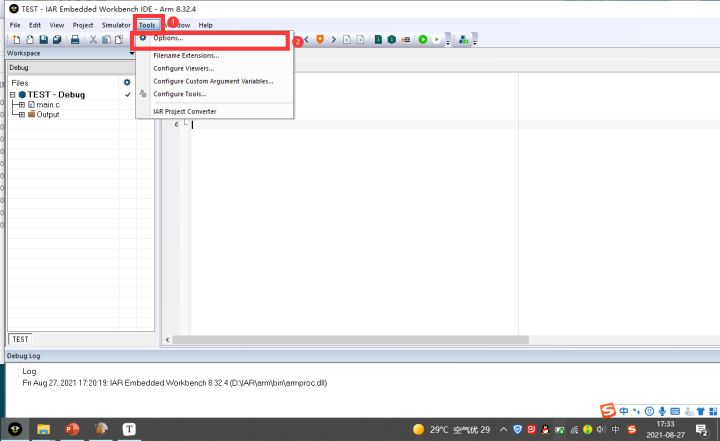
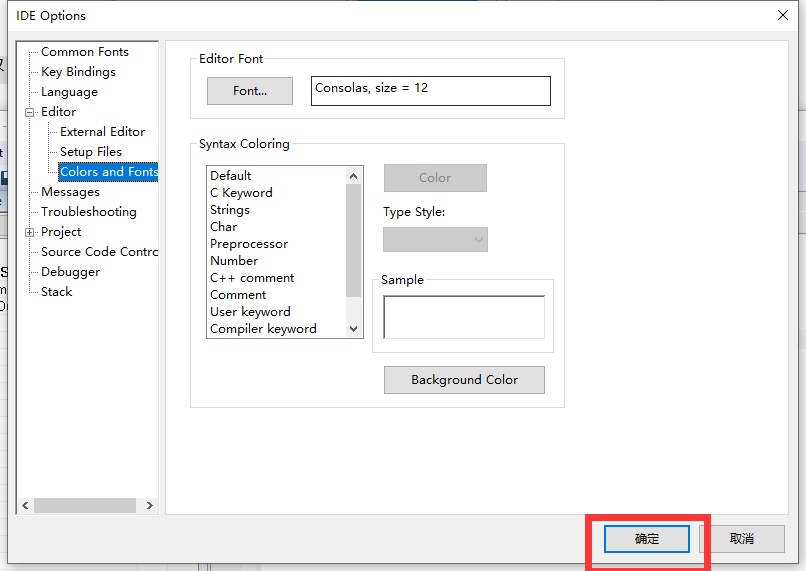
- Tools–>Options
- 双击展开Editor,然后点击"Colors and Fonts"
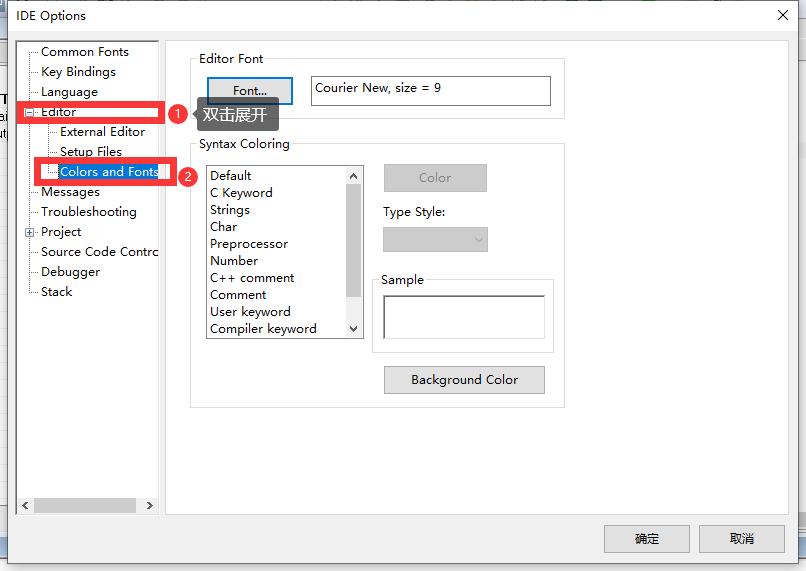
- 下面是我单片机开发用的字体颜色可以参考
- C Keyword (关键字) – blue(蓝色) – Bold(加粗)
- Strings(字符串) --Dark Red(深红)-- Normal(正常字体)
- char(字符) – blue(蓝色) – Normal(正常字体)
- Preprocessor(预处理) – blue(蓝色) – Normal(正常字体)
- Number(数字) – Red(红色) – Normal(正常字体)
- C++ comment/comment(注释) – Green(绿色) – Italic斜体)
- 其他默认
设置好后点击"确定"
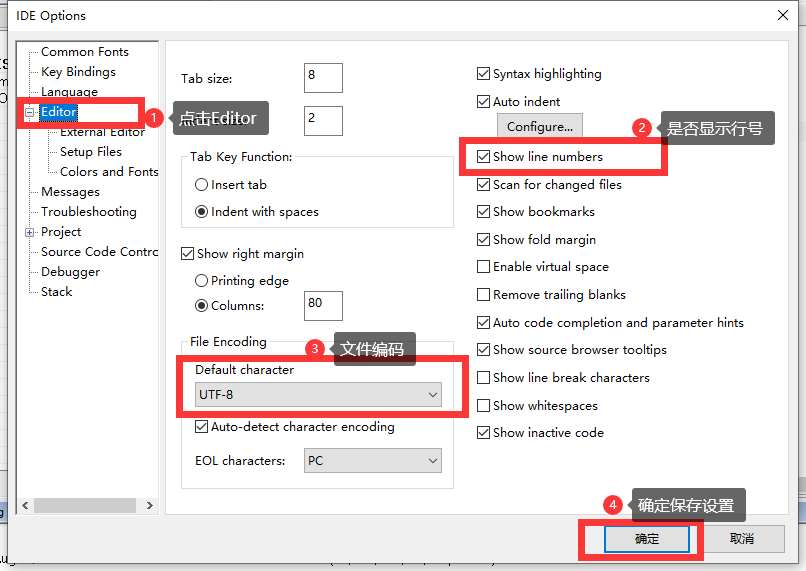
2. 其他设置(行号、文件编码)
- Tools–>Options
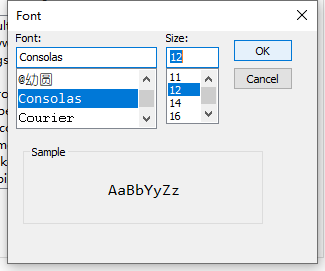
- 点击"Editor",设置如下图
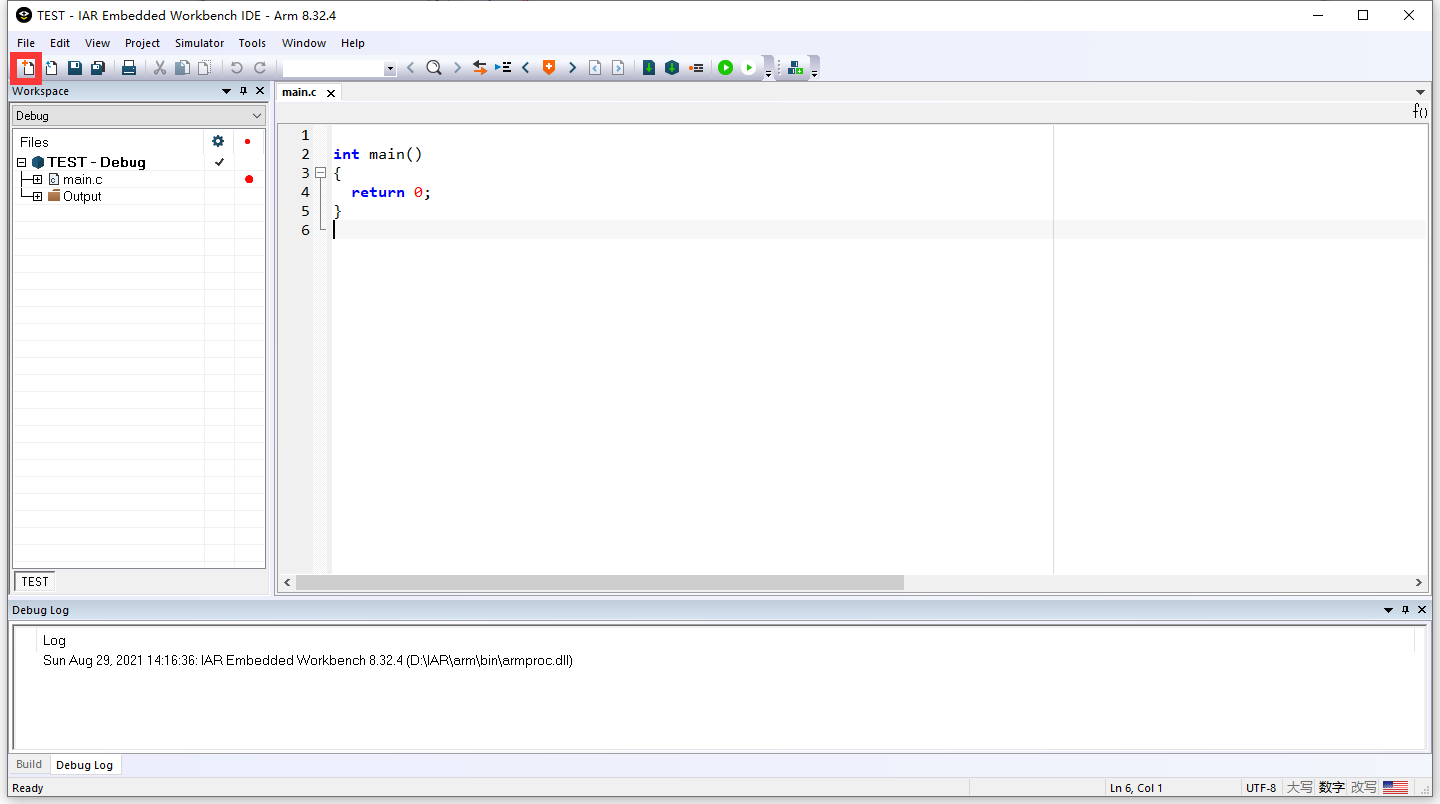
3. 新建用户源文件和头文件模块并添加到工程
- 新建文档(File–>New File)或直接点击"File"下面的小图标

或
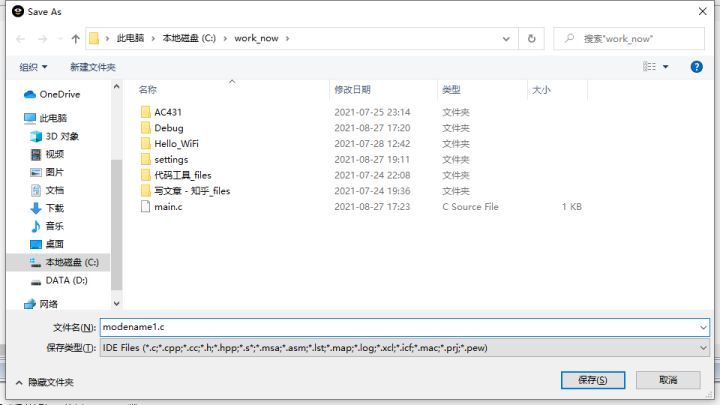
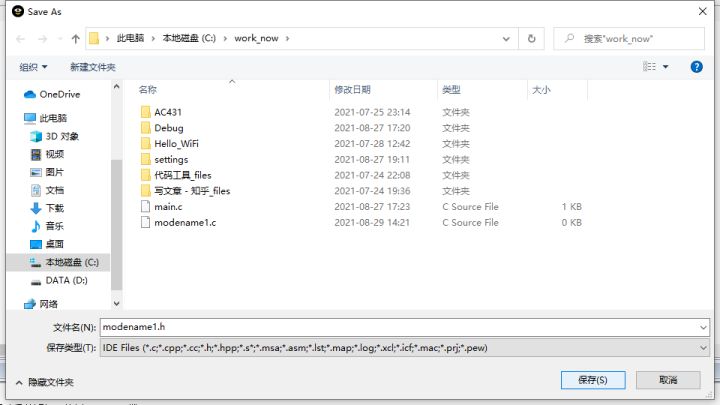
- 新建文档后需要保存(可以直接点击CTRL+ s),可以用模块的名字命名(这里代码举例),按步骤1新建两次文档,这里分别命名为modename1.c,modename1.h
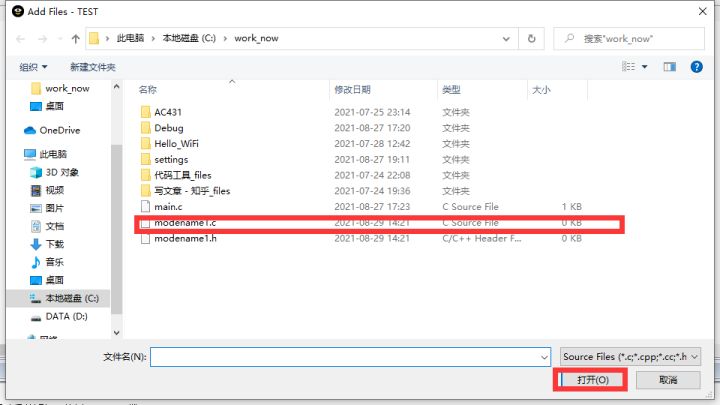
- 将两个文档加入到工程中,只需添加.c文件 ,右击红框内空白处–>Add–>Add Files,选择.c文件打开
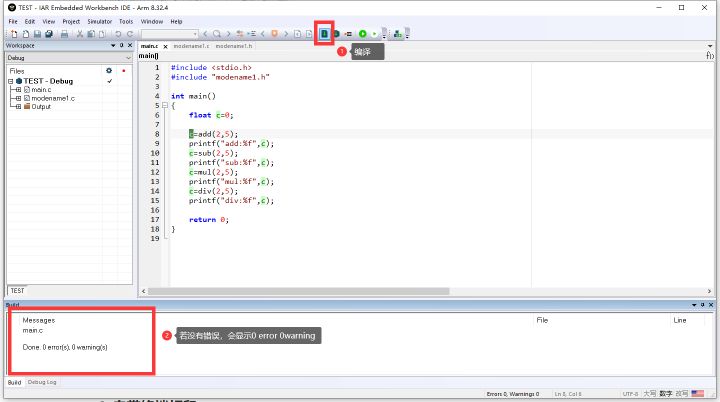
- 分别编写modename1.c,modename1.h,main.c文件,(需要学过c语言)
modename1.c :
#include "modename1.h"

float add(float a,float b)
{
    return (a+b);
}

float sub(float a,float b)
{
    return (a-b);
}

float mul(float a,float b)
{
    return (a*b);
}

float div(float a,float b)
{
    return (a/b);
}
modename1.h :
#ifndef _MODENAME1_H_
#define _MODENAME1_H_

float add(float a,float b); //计算两个数的和
float sub(float a,float b); //计算两个数的差
float mul(float a,float b); //计算两个数的乘积
float div(float a,float b); //计算两个数相除的商

#endif
main.c :
#include <stdio.h>
#include "modename1.h"

int main()
{
    float c=0;

    c=add(2,5);
    printf("add:%f",c);
    c=sub(2,5);
    printf("sub:%f",c);
    c=mul(2,5);
    printf("mul:%f",c);
    c=div(2,5);
    printf("div:%f",c);

    return 0;
}
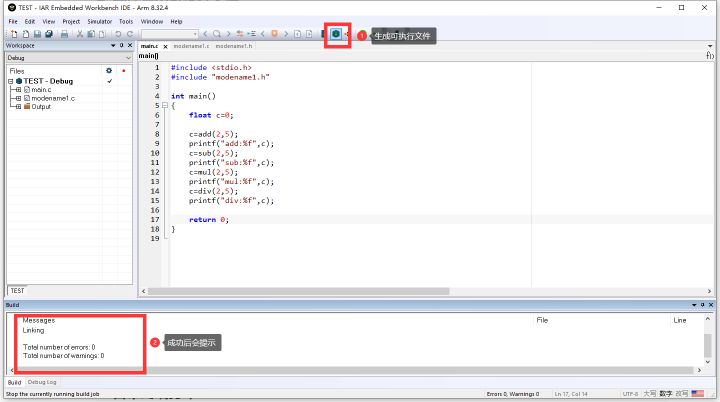
4. 编译输出可执行文件
5. 软件仿真单步调试
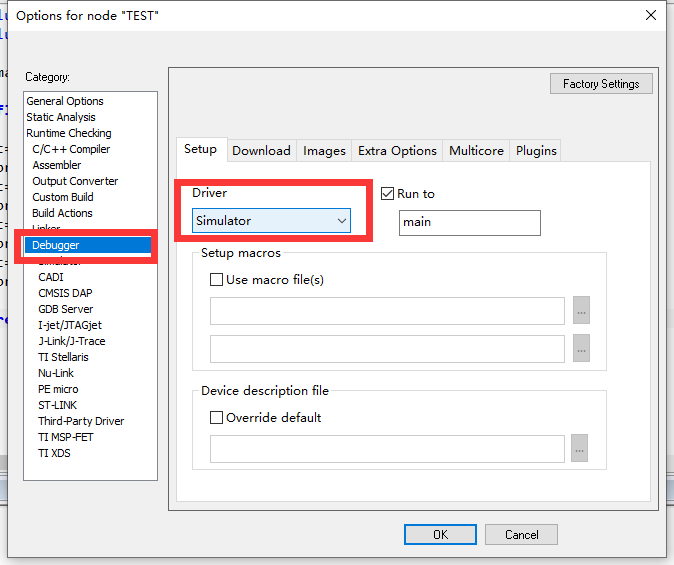
- 选择仿真方式(这里c语言学习,选择Simulator;若用ST-link调试stm32单片机,就可以选择ST-Link)
- 右击红框内空白处–>Options
- 点击"Debugger",Driver选择"Simulator"
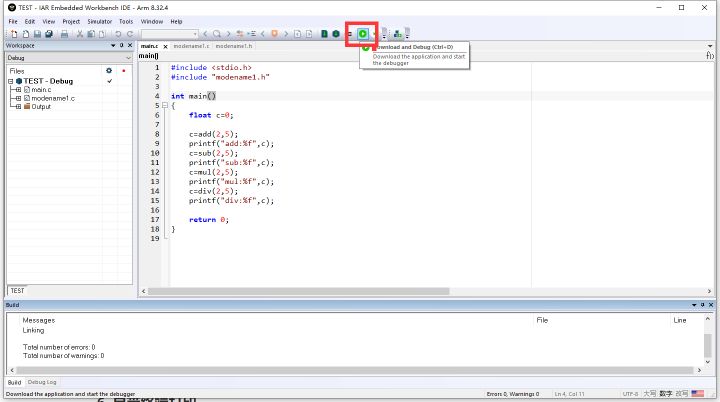
- 点击绿色的类似播放键的小按钮运行程序
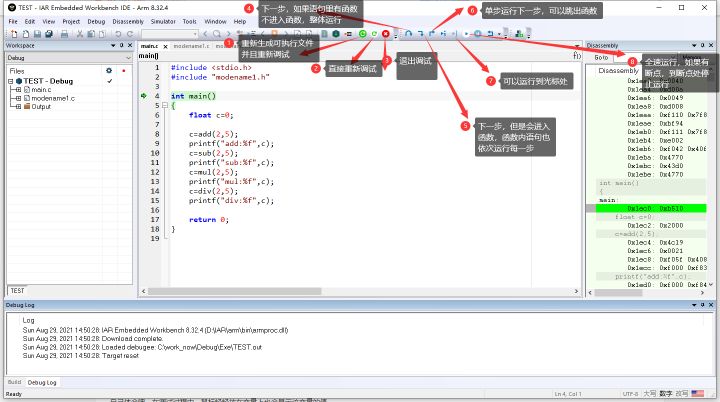
- 下面介绍一下调试图标的作用
6. 自带终端打印
- 点击绿色的类似播放键的小按钮运行程序
- 点击view–>Terminal I/O,调出打印窗口
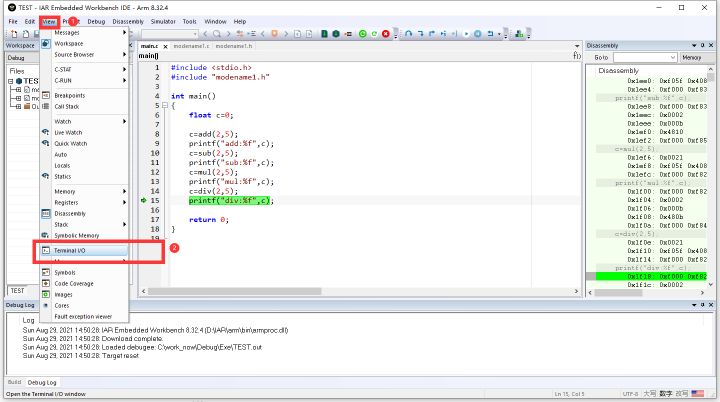
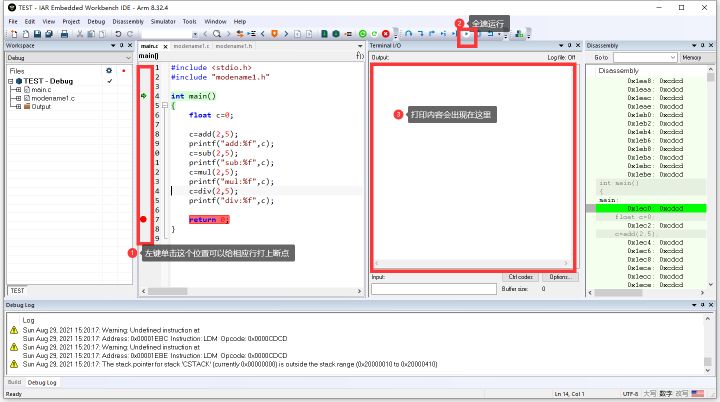
- 本示例可以在17行前打上断点(左键单击数字前的位置就可以打上断点),全速运行,可以看到运行后printf,打印内容出现在打印窗口中
997299)]
6. 自带终端打印
- 点击绿色的类似播放键的小按钮运行程序
- 点击view–>Terminal I/O,调出打印窗口
- 本示例可以在17行前打上断点(左键单击数字前的位置就可以打上断点),全速运行,可以看到运行后printf,打印内容出现在打印窗口中