Getting Start with Autimations
一. 准备
- 下载postman或者使用web端postman
- 通过自己的三星账户创建私人访问令牌
网址:
https://account.smartthings.com/tokens
二. 使用postman向smartthings发送请求,获取自己账户内智能设备的id。
- 在postman中创建一个http request请求,
- 在网址
https://developer-preview.smartthings.com/api/public/#tag/Devices
中获取api网址:
https://api.smartthings.com/v1/devices

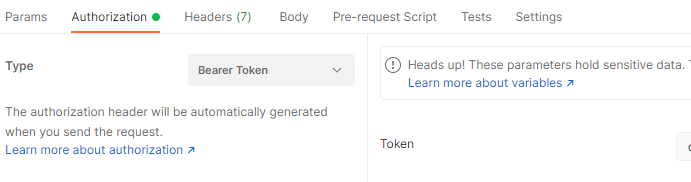
3.在postman的Authorization中选择Bearer Token,将私人访问令牌填入
4.点击send按钮

5.获得json格式的消息,从消息中获取deviceid
三. 创建rule
- 从api网页中获取创建rules的网址
https://api.smartthings.com/rules?locationId=xxxx
- 访问方式改为POST
- 设置Authorization(与二.3相同)
- 在Body中选择raw,添加需要创建的rule

以turn on a switch at sunset为例
{
    "name": "Turn on a switch at sunset",
    "actions": [
        {
            "every": {
                "specific": {
                    "reference": "Sunset",
                    "offset": {
                        "value": {
                            "integer": 0
                        },
                        "unit": "Minute"
                    }
                },
                "actions": [
                    {
                        "command": {
                            "devices": ["your-device-id"],
                            "commands": [ {
                                "component": "main",
                                "capability": "switch",
                                "command": "on"
                            }]
                        }
                    }
                ]
            }
        }
    ]
}
5.点击send
6.得到返回的消息
四.手动触发rule的执行
1.与之前相似的操作
post 网址:https://api.smartthings.com/rules/execute/:ruleId?locationId={your-location-id}
需要设置ruleid:

设置Authorization
2.获得执行结果:
{
    "executionId": "xxx",
    "id": "xxx",
    "behaviorType": "Rule",
    "result": "Success"
}
Final:
虽然显示success,但我的switch并没有打开,但log中能查看到该rule已激活。