esp8266+OLED 2020-08-14
使用arduino框架编写esp8266使用OLED屏幕 IIC U8G2
配置ARDUINO支持ESP8266
-
对arduino编译器设置 文件 -> 首选项 -> 附加开发板管理器网址 填入 http://arduino.esp8266.com/stable/package_esp8266com_index.json
-
添加开发板 工具 -> 开发板 -> 开发板管理器 搜索 esp8266 安装 esp8266 by ESP8266 Community
选择开发板

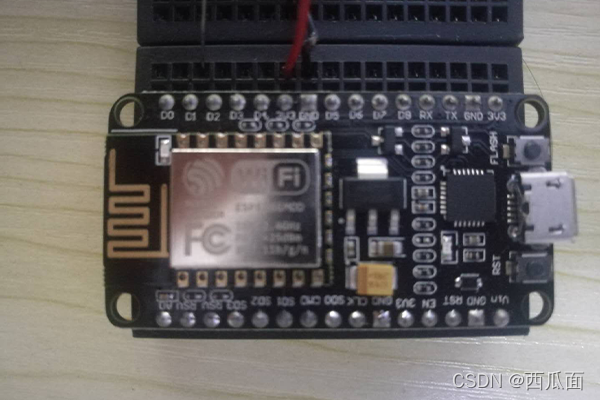
- 我用的是 V3 CP2102 在选择开发板上选择的是 NodeMCU 1.0 (ESP-12E Module) 选普通的ESP8266烧录时会报错
- 设置好单片机的COM口
连接WIFI获取时间
- 使用NTP库来获取时间 项目 -> 添加库 -> 管理库 添加NTP库
- 使用NTP的实例 文件 -> 实例 -> NTPClient -> Basic
#include <NTPClient.h>      //NTP
#include <ESP8266WiFi.h>    //ESP8266
#include <WiFiUdp.h>        //WIFI

const char *ssid     = "<SSID>";        //自己的WIFI的名称
const char *password = "<PASSWORD>";    //自己的WIFI密码

WiFiUDP ntpUDP;
//NTPClient timeClient(ntpUDP);         //这是原本的NTP时间
NTPClient timeClient(ntpUDP, "ntp1.aliyun.com",60*60*8, 30*60*1000);    //这是添加时差后的时间 有8个小时的时间差

void setup(){
  Serial.begin(115200);                 //设置串口比特率115200
  WiFi.begin(ssid, password);           //准备链接WIFI
  while ( WiFi.status() != WL_CONNECTED ) {     //判断是否链接成功 不成功是 6 成功是 WL_CONNECTED 3
    delay ( 500 );                      //等待500毫秒
    Serial.print ( "." );               //在串口打印 .
  }
  timeClient.begin();
}

void loop() {
  timeClient.update();                  //刷新时间
  Serial.println(timeClient.getFormattedTime());    //在串口打印时间
  delay(1000);                          //等待1秒
}
- 设置好WIFI用户名密码改好时间差就可以烧录到ESP8266了
- 打开串口监视器115200 可以看到打印时间
添加OLED屏

- OLED 屏幕需要添加 <ArduinoJson.h> <U8g2lib.h> 这两个库 使用U8G2图形库
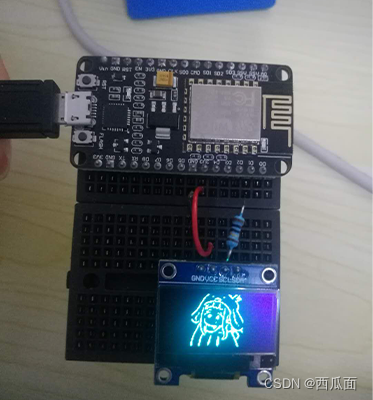
- OLED 通过 I2C 通讯有4个接口 GND (链接板子上的GND) VCC (链接板子上的3.3v) 用来供电
- SCL 时钟链接板子上的D1 SDA 链接板子上的D2
- 这是ESP8266的接口在程序中调用需要写GPIO后面的数字 (比如D5 在程序中要写成 14)
- 声明 U8G2_SSD1306_128X64_NONAME_F_HW_I2C u8g2(U8G2_R0, /* reset=*/ U8X8_PIN_NONE);
- 初始化 U8G2 u8g2.begin(); u8g2.enableUTF8Print();
- 显示 u8g2.setCursor(30, 30); u8g2.print(“hello world”); u8g2.sendBuffer();
- 我们把获取到的时间每隔1秒显示在屏幕上
#include <NTPClient.h>
#include <ESP8266WiFi.h>
#include <WiFiUdp.h>

#include <ESP8266HTTPClient.h>
#include <ArduinoJson.h>
#include <U8g2lib.h>

#ifdef U8X8_HAVE_HW_SPI
#include <SPI.h>
#endif
#ifdef U8X8_HAVE_HW_I2C
#include <Wire.h>
#endif                      //前面这一段是用来判断是 I2C传输还是SPI

U8G2_SSD1306_128X64_NONAME_F_HW_I2C u8g2(U8G2_R0, /* reset=*/ U8X8_PIN_NONE);

const char *ssid     = "YOU WIFI NAME";
const char *password = "YOU PASSWORD";

WiFiUDP ntpUDP;
//NTPClient timeClient(ntpUDP);
NTPClient timeClient(ntpUDP, "ntp1.aliyun.com",60*60*8, 30*60*1000);

void setup(){
  Serial.begin(115200);
  u8g2.begin();
  u8g2.enableUTF8Print();    // enable UTF8 support for the Arduino print() function

  u8g2.setFont(u8g2_font_wqy12_t_gb2312a);  //设置字体这是一个比较小的字体 12px
  u8g2.clear();                             //清屏  清除屏幕和清除显存
  u8g2.setCursor(30, 30);                   //设置显示位置
  u8g2.print("connecting...");              //显示连接中  加载到显存并不是真正的显示
  u8g2.sendBuffer();                        //显示显存中的数据

  WiFi.begin(ssid, password);               //链接WIFI
  while ( WiFi.status() != WL_CONNECTED ) {
    delay ( 500 );
    Serial.print ( "." );
  }
  u8g2.setFont(u8g2_font_fub20_tf);     // 设置字体这是一个比较大的字体 20px 为后面显示时间做准备
  timeClient.begin();                   //开始获取时间

  u8g2.clear();                         //清屏
}

void loop() {
  timeClient.update();              //更新时间
    u8g2.clear();                   //清屏
    u8g2.setCursor(10, 45);         //设置位置
    u8g2.print(timeClient.getFormattedTime());  //显示时间
    u8g2.sendBuffer();              //显示显存中的数据

  Serial.println(timeClient.getFormattedTime()); //串口打印数据
  delay(1000);
}

OLED改进
- 上面那个程序虽然能显示但是可以看到很明显的刷新
- 这就要用到 u8g2.firstPage() u8g2.nextPage() 循环刷新
- 我还想再开机时显示一个头像图片
- 我用的OLED是12864的所以用PS把头像修改为6262的图片
- 通过软件转码可以用 u8g2.drawXBM() 来将图片展示出来
- 最终的代码如下
#include <NTPClient.h>
// change next line to use with another board/shield
#include <ESP8266WiFi.h>
//#include <WiFi.h> // for WiFi shield
//#include <WiFi101.h> // for WiFi 101 shield or MKR1000
#include <WiFiUdp.h>
//
#include <ESP8266HTTPClient.h>
#include <ArduinoJson.h>
#include <U8g2lib.h>

#ifdef U8X8_HAVE_HW_SPI
#include <SPI.h>
#endif
#ifdef U8X8_HAVE_HW_I2C
#include <Wire.h>
#endif

U8G2_SSD1306_128X64_NONAME_F_HW_I2C u8g2(U8G2_R0, /* reset=*/ U8X8_PIN_NONE);

const char *ssid     = "YOU WIFI NAME";
const char *password = "YOU PASSWORD";

const unsigned char col[] U8X8_PROGMEM = {
0x00,0x00,0x0c,0x00,0x00,0x18,0x38,0x01,0x00,0x00,0x06,0x00,0x00,0x70,0x8c,0x01,0x00,0x00,0x01,0x03,0x00,0x60,0xc6,0x00,0x00,0x80,0x00,0x00,0x60,0xc0,0xe1,0x03,0x00,0xc0,0x00,0xe0,0x00,0x80,0xf1,0x06,0x00,0x60,0x00,0xf8,0x03,0x00,0x00,0x07,0x00,0x20,0x00,0x00,0x06,0x00,0xe0,0x01,0x00,0x30,0x00,0x8c,0x03,0x00,0x78,0x00,0x00,0x10,0xe0,0xfb,0x03,0x00,0x10,0x00,0x00,0x08,0x7c,0x00,0x1e,0x00,0x20,0x00,0x00,0x0c,0x07,0x06,0x30,0x00,0x60,0x00,0x00,0x84,0x01,0x06,0xc2,0x00,0x40,0x00,0x00,0xc6,0x08,0x03,0x83,0x01,0xc0,0x00,0x00,0x02,0x07,0x03,0x03,0x03,0xc0,0x00,0x00,0x03,0xe7,0x03,0x03,0x06,0xc0,0x00,0x00,0x01,0x7b,0xbe,0x03,0x0c,0xc0,0x00,0x80,0xa1,0x07,0xe0,0x82,0x08,0xe0,0x00,0xc0,0xa0,0x07,0x00,0x9e,0x18,0x62,0x00,0x40,0x20,0x70,0x00,0x80,0x30,0x62,0x00,0x60,0x30,0x08,0x00,0x80,0x30,0x60,0x00,0x30,0x10,0x06,0x00,0xc0,0x60,0xc2,0x00,0x18,0x10,0x3c,0x00,0xc4,0x60,0x86,0x00,0x0c,0x11,0x06,0x80,0xc9,0x60,0x84,0x01,0x06,0x99,0x01,0x00,0x46,0x20,0x04,0x03,0x83,0x88,0x70,0x00,0x4c,0x28,0x0c,0x02,0x01,0x08,0xf8,0x80,0x59,0x28,0x0c,0x06,0x60,0x08,0x78,0xc0,0x71,0x2c,0x0c,0x0c,0x20,0x08,0x30,0xe0,0x61,0x24,0x08,0x08,0x30,0x08,0x00,0xe0,0x61,0x34,0x08,0x18,0x30,0x8c,0x00,0x80,0x60,0x74,0x18,0x10,0x21,0x8c,0x00,0x00,0x20,0x7e,0x18,0x30,0x23,0x8c,0x00,0x00,0x20,0x4e,0x10,0x20,0x06,0x8d,0x00,0x00,0x20,0x4e,0x30,0x20,0xfc,0x8d,0x01,0x20,0x20,0x7e,0x60,0x00,0x70,0x04,0x03,0x00,0x20,0xd0,0x40,0x00,0x00,0x0e,0x0e,0x00,0x20,0x80,0x00,0x00,0x00,0x0f,0x3c,0x00,0x30,0x8c,0x01,0x01,0x00,0x0d,0xf2,0x3f,0x3e,0x04,0x01,0x00,0x80,0x8d,0x02,0x7f,0x3e,0x06,0x03,0x00,0x80,0x89,0x03,0x3c,0x27,0x86,0x07,0x20,0x80,0x88,0x03,0x9c,0x23,0x06,0x0f,0x30,0xc0,0x98,0x03,0xc8,0x60,0x04,0x3b,0x1c,0x40,0x98,0x03,0x60,0x60,0x8c,0xff,0x1f,0x60,0x90,0x0f,0x30,0x40,0xec,0x37,0x30,0x20,0x30,0xfd,0x0f,0xc0,0xbc,0x6f,0x20,0x30,0x20,0xe3,0x03,0xde,0x0c,0xc7,0x00,0x10,0x60,0x02,0x00,0xc0,0x0c,0x83,0x01,0x18,0xc0,0x00,0x00,0x80,0x0c,0x86,0x01,0x08,0xa0,0x01,0x00,0x80,0x0c,0x06,0x03,0x08,0x30,0x80,0x00,0x80,0x0c,0x0c,0x03,0x0c,0x10,0x80,0x00,0x81,0x04,0x88,0x01,0x04,0x18,0xc0,0x00,0x43,0x06,0x98,0x01,0x04,0x18,0xc0,0x00,0x63,0x03,0xd8,0x00,0x06,0x08,0x40,0x00,0xe3,0x00,0x30,0x00,0x06,0x0c,0x60,0x80,0x03,0x00,0x30,0x00,0x02,0x0c,0x60,0x80,0x03,0x00,0x60,0x00,0x02,0x0c,0x60,0x80,0x03,0x00,0x60,0x00,0x03,0x0c,0x70,0x80,0x03,0x00,0x40,0x00,0x03,0x04,0x30,0x80,0x03,0x00,0xc0,0x00,0x03,0x06,0x30,0x80,0x03,0x00,0xc0,0x00,0x03,0x06,0x10,0x80,0x01,0x00,0x80,0x00,0x03,0x06,0x00,0x00,0x01,0x00,0x80,0x01};
//这个是图片转码后的形式我的OLED屏幕好像大小端和有些不一样可能会错位

WiFiUDP ntpUDP;
NTPClient timeClient(ntpUDP, "ntp1.aliyun.com",60*60*8, 30*60*1000);

void setup(){
  Serial.begin(115200);
  u8g2.begin();
  u8g2.enableUTF8Print();    // enable UTF8 support for the Arduino print() function

  u8g2.setFont(u8g2_font_ncenB14_tr);
  u8g2.drawXBM(32, 0, 62, 62, col);         // u8g2.drawXBM(图片左上角x轴坐标, 图片左上角y轴坐标, 图片长, 图片宽, col);
  u8g2.sendBuffer();
  delay ( 5000 );                   //上面用来显示图片5秒钟

  u8g2.setFont(u8g2_font_wqy12_t_gb2312a); // choose a suitable font  (设置字体)
  u8g2.clear();
  u8g2.setCursor(30, 30);
  u8g2.print("connecting...");
  u8g2.sendBuffer();
  WiFi.begin(ssid, password);

  while ( WiFi.status() != WL_CONNECTED ) {
    delay ( 500 );
    Serial.print ( "." );
  }
  u8g2.setFont(u8g2_font_fub20_tf);
  timeClient.begin();
  u8g2.clear();
}

void loop() {
  timeClient.update();

  u8g2.firstPage();
  do {
    u8g2.setCursor(10, 45);
    u8g2.print(timeClient.getFormattedTime());
    u8g2.sendBuffer();
    } while( u8g2.nextPage() );         //使用 nextPage 就不用清屏操作了变得流畅了

  delay(1000);
}

OLED显示图片错位
- 图片不按正常显示可能是 大小设置的不正确
- 图片超出屏幕
- 和大小端有关比如我这个

- 可以参考 https://www.arduino.cn/thread-89244-1-1.html
- 我最后还是通过大佬的工具来弄好的
- 大佬工具地址 http://tools.clz.me/image-to-bitmap-array
