前言
这篇文章将正式开始带大家学习框架式编程。
一、什么是框架式编程
大多数人都是只在main.c里面编写代码这样会导致代码看起来非常的繁杂,不容易管理。框架式编写代码就是将各种外设写成.c和.h文件这样既方便管理又方便移植。
二、cubeMX配置
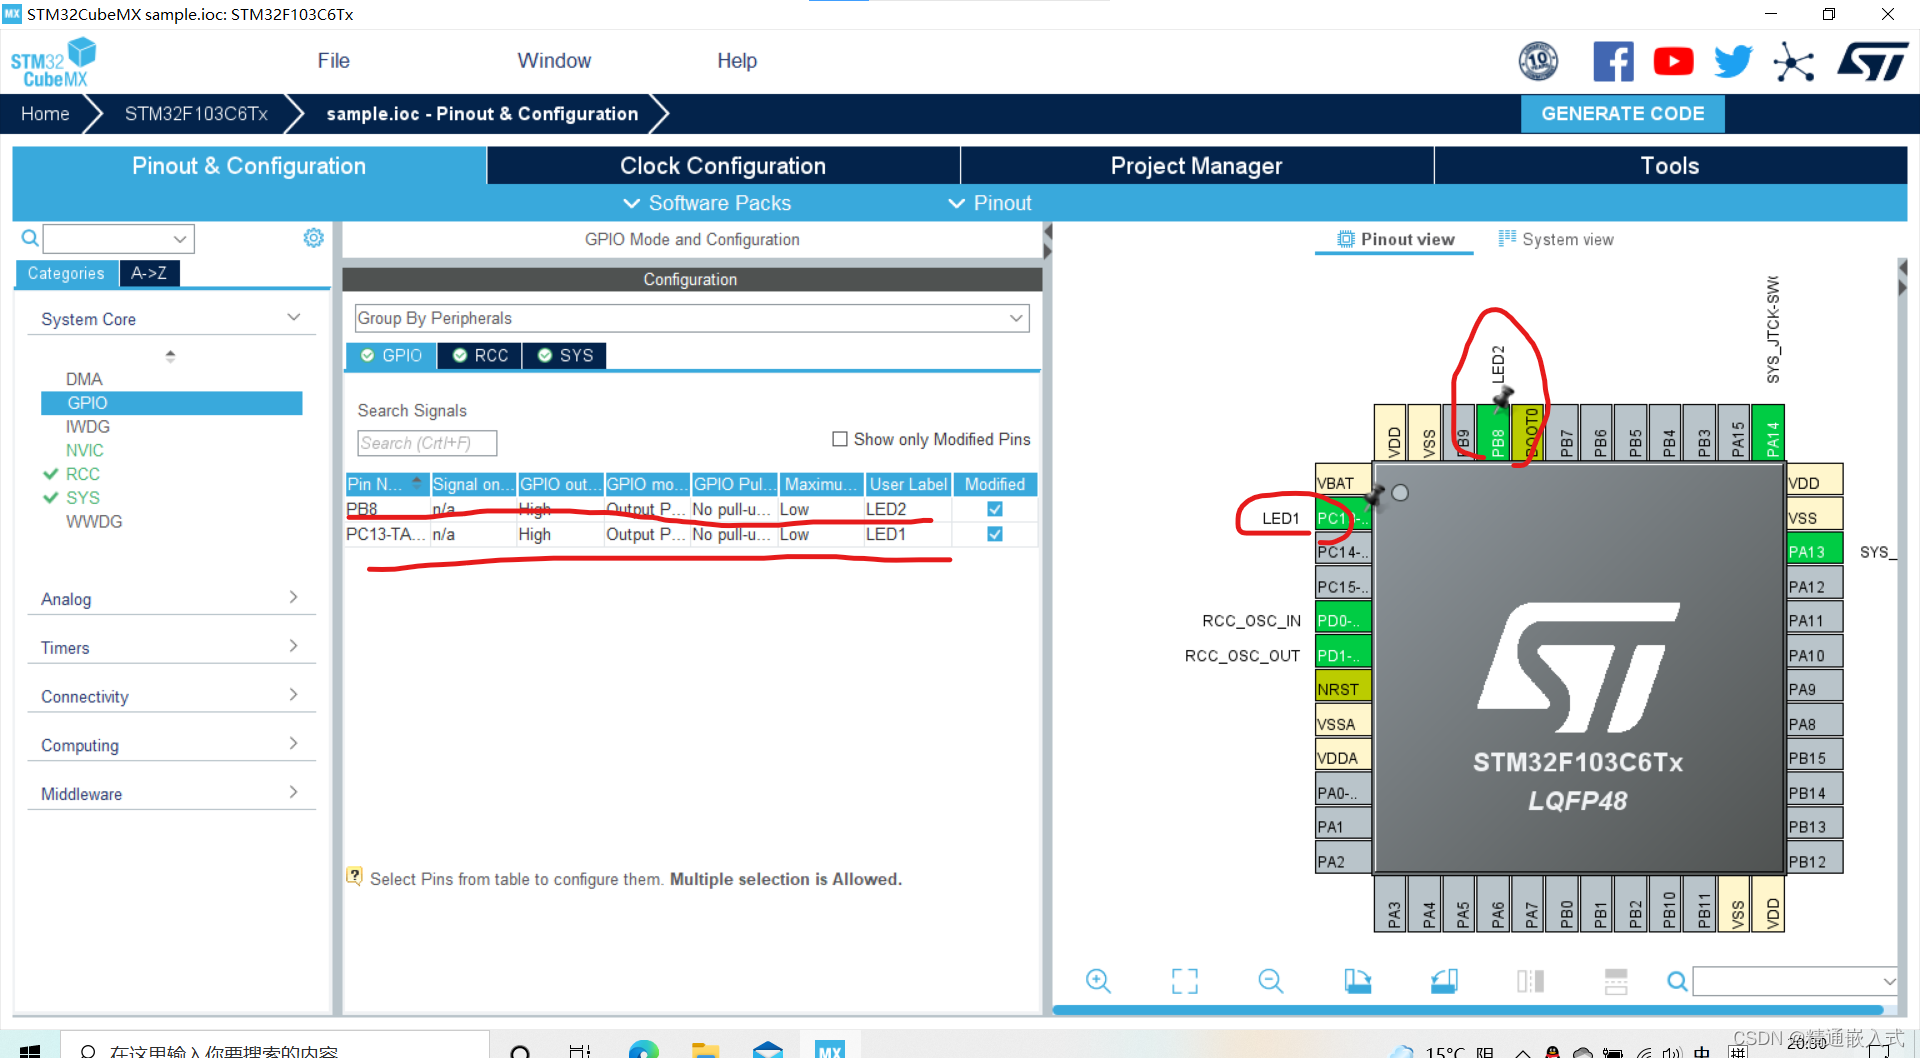
这里我会用到两个LED灯一个作为闪烁灯,一个作为呼吸灯。

不太懂LED怎么配置的同学可以看看我之前的文章:配置LED灯闪烁
三、代码展示
led.c文件
#include "led.h"

LED_DATA ledData;

static void LED_Bre_Ser(void); //启动一个处理bre的服务
static void LED_Blk_Ser(void); //启动一个处理blk的服务

void LED_Bre_Ser(void)
{
    static u16 count=0;
	static u8 step=0;
	static u8 t1=0;
	static u8 t=0;

	if(ledData.bre.sw==0)
	{
	  	count=0;
		t1=0;
		t=0;
		step=0;
        return;
	}

    //模拟产生PWM
    if(t<t1)
    {
        LED2_RESET(); //亮
    }
    else
    {
        LED2_SET(); //灭
    }
    t++;
    t=t%64;

    //渐变占空比
    count++;
    if(count>=(ledData.bre.pre/128*5))
    {
        count=0;
        switch(step)
        {
            case 0:
            {
                t1++;
                if(t1>=64)
                {
                    step=1;
                }
            }
            break;

            case 1:
            {
                t1--;
                if(t1==0)
                {
                    step=0;
                }
            }
            break;
        }
    }
}

void LED_Blk_Ser(void)
{
    static u32 count=0;
	static u8 step=0;

	if(ledData.blk.sw==0)
	{
        step=0;
		count=0;
		return;
	}

	switch(step)
	{
		case 0:
		{
			count++;
			if(count>=(ledData.blk.pre/2*5))
			{
				count=0;
				LED1_SET(); //灭
				step=1;
			}
		}
		break;

		case 1:
		{
			count++;
			if(count>=(ledData.blk.pre/2*5))
			{
				count=0;
				LED1_RESET(); //亮
				step=0;
			}
		}
		break;
	}
}

void LED_Init(void)
{
    LED2_SET(); //LED2灭
	LED1_SET(); //LED1灭

	//设定初始值
	ledData.bre.sw=1;
	ledData.bre.pre=2000; //2000ms
    ledData.blk.sw=1;
	ledData.blk.pre=1000; //1000ms
}

void LED_Task(void)
{

}

void LED_TIM_Handle(void)
{
    LED_Bre_Ser();
    LED_Blk_Ser();
}
led.h文件
#ifndef _LED_H_
#define _LED_H_

#include "main.h"

#define u8 unsigned char
#define u16 unsigned short
#define u32 unsigned int

//灯LED2的IO定义
#define LED2_RESET() HAL_GPIO_WritePin(LED2_GPIO_Port, LED2_Pin, GPIO_PIN_RESET) //设置LED2低电平
#define LED2_SET() HAL_GPIO_WritePin(LED2_GPIO_Port, LED2_Pin, GPIO_PIN_SET) //设置LED2高电平

//灯LED1的IO定义
#define LED1_RESET() HAL_GPIO_WritePin(LED1_GPIO_Port, LED1_Pin, GPIO_PIN_RESET) //设置LED1低电平
#define LED1_SET() HAL_GPIO_WritePin(LED1_GPIO_Port, LED1_Pin, GPIO_PIN_SET) //设置LED1高电平

typedef struct
{
	u8 sw; //开关
	u32 pre; //周期

} BRE_t;

typedef struct
{
	u8 sw; //开关
	u32 pre; //周期

} BLK_t;

typedef struct
{
    BRE_t bre; //呼吸灯
    BLK_t blk; //闪烁灯

} LED_DATA;

extern LED_DATA ledData; //灯属性封装

void LED_Init(void); //初始化调用
void LED_Task(void); //后台轮询调用
void LED_TIM_Handle(void); //定时调用

#endif
总结
本文我们先展示一下代码的具体内容,下篇文章我们接着讲解代码的具体实现原理。整个工程放在代码
供大家下载学习。