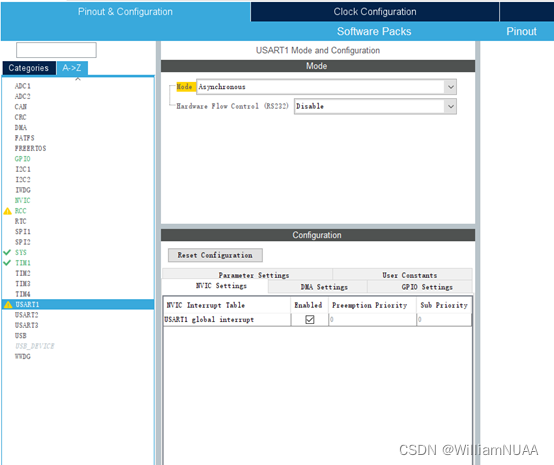
1.ioc文件中选中USART,选择通道,模式选择异步通信。

2.在NVIC Settings中选择Enable进行使能。

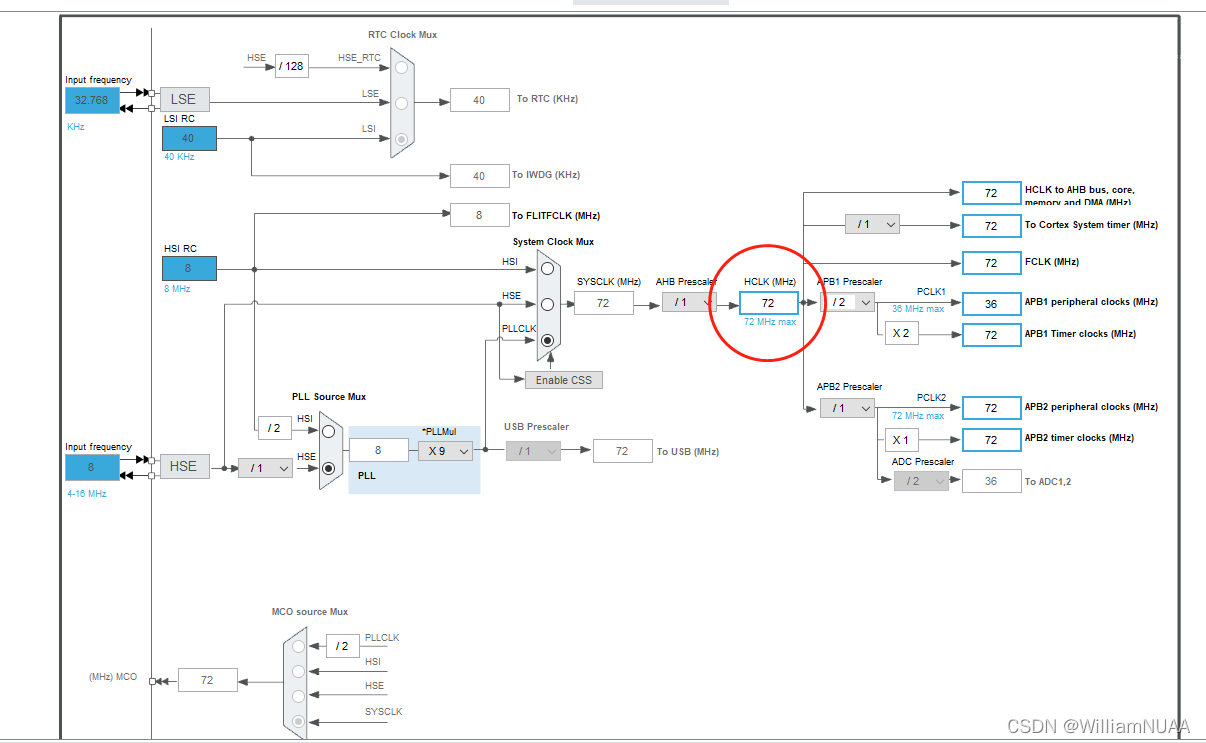
3. 在Clock Configuration中配时钟,在Project Manager 中的Code Generator 中选中如下选项

?
?4.在usart.c 中添加下列代码代码至/* USER CODE BEGIN 0 */和/* USER CODE END 0 */中
#ifdef __GNUC__
/* With GCC/RAISONANCE, small printf (option LD Linker->Libraries->Small printf
set to 'Yes') calls __io_putchar() */
#define PUTCHAR_PROTOTYPE int __io_putchar(int ch)
#else
#define PUTCHAR_PROTOTYPE int fputc(int ch, FILE *f)
#endif /* __GNUC__ */
5.在?
PUTCHAR_PROTOTYPE
{
/* Place your implementation of fputc here */
/* e.g. write a character to the EVAL_COM1 and Loop until the end of transmission */
HAL_UART_Transmit(&huart1, (uint8_t *)&ch, 1, 0xFFFF);
return ch;
}
6.在main.c 中添加输出代码至 ??/* USER CODE BEGIN 2 */和? /* USER CODE END 2 */中。
例如输出PWM,读取TIM1的PWM在寄存器的值,进行输出。
printf("PWM输出为:%d",(&htim1)->Instance->CCR1);