openmv和STM32串口通信识别条形码、二维码
前言
因为自己的毕设用到了条形码识别,所以在这里写一篇关于使用openmv识别条形码和二维码并且与STM32实现串口通讯,希望能帮到以后用到这一模块的同学,STM32方面我使用的是STM32F103RCT6,并且使用HAL进行编写代码。
硬件连接
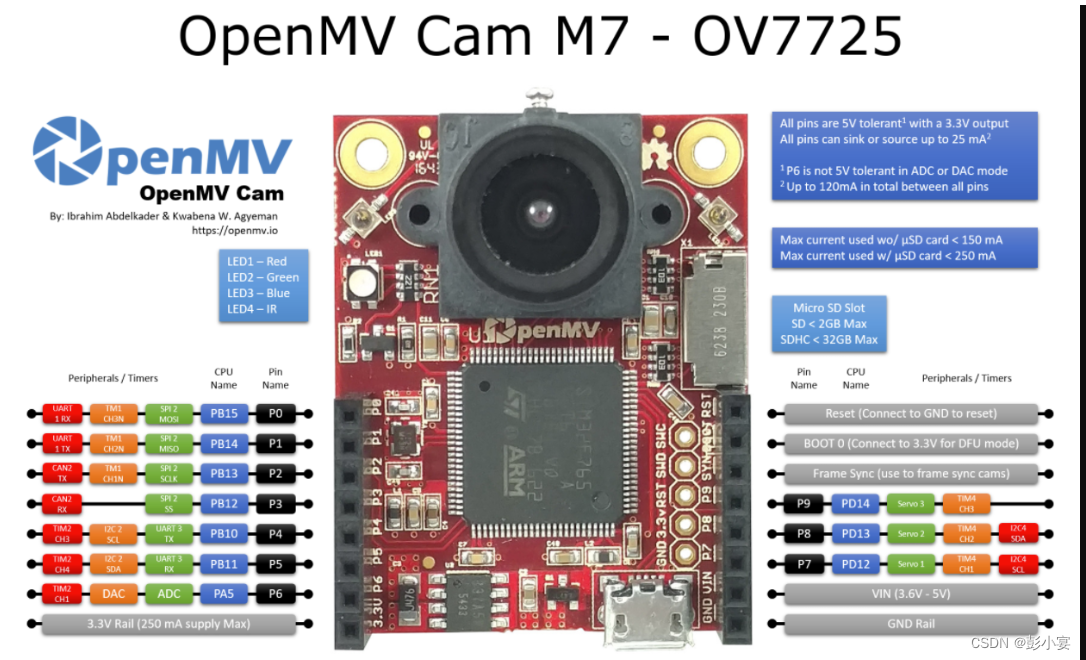
- OpenMV端:由图知UART_RX—P5 ------ UART_TX—P4

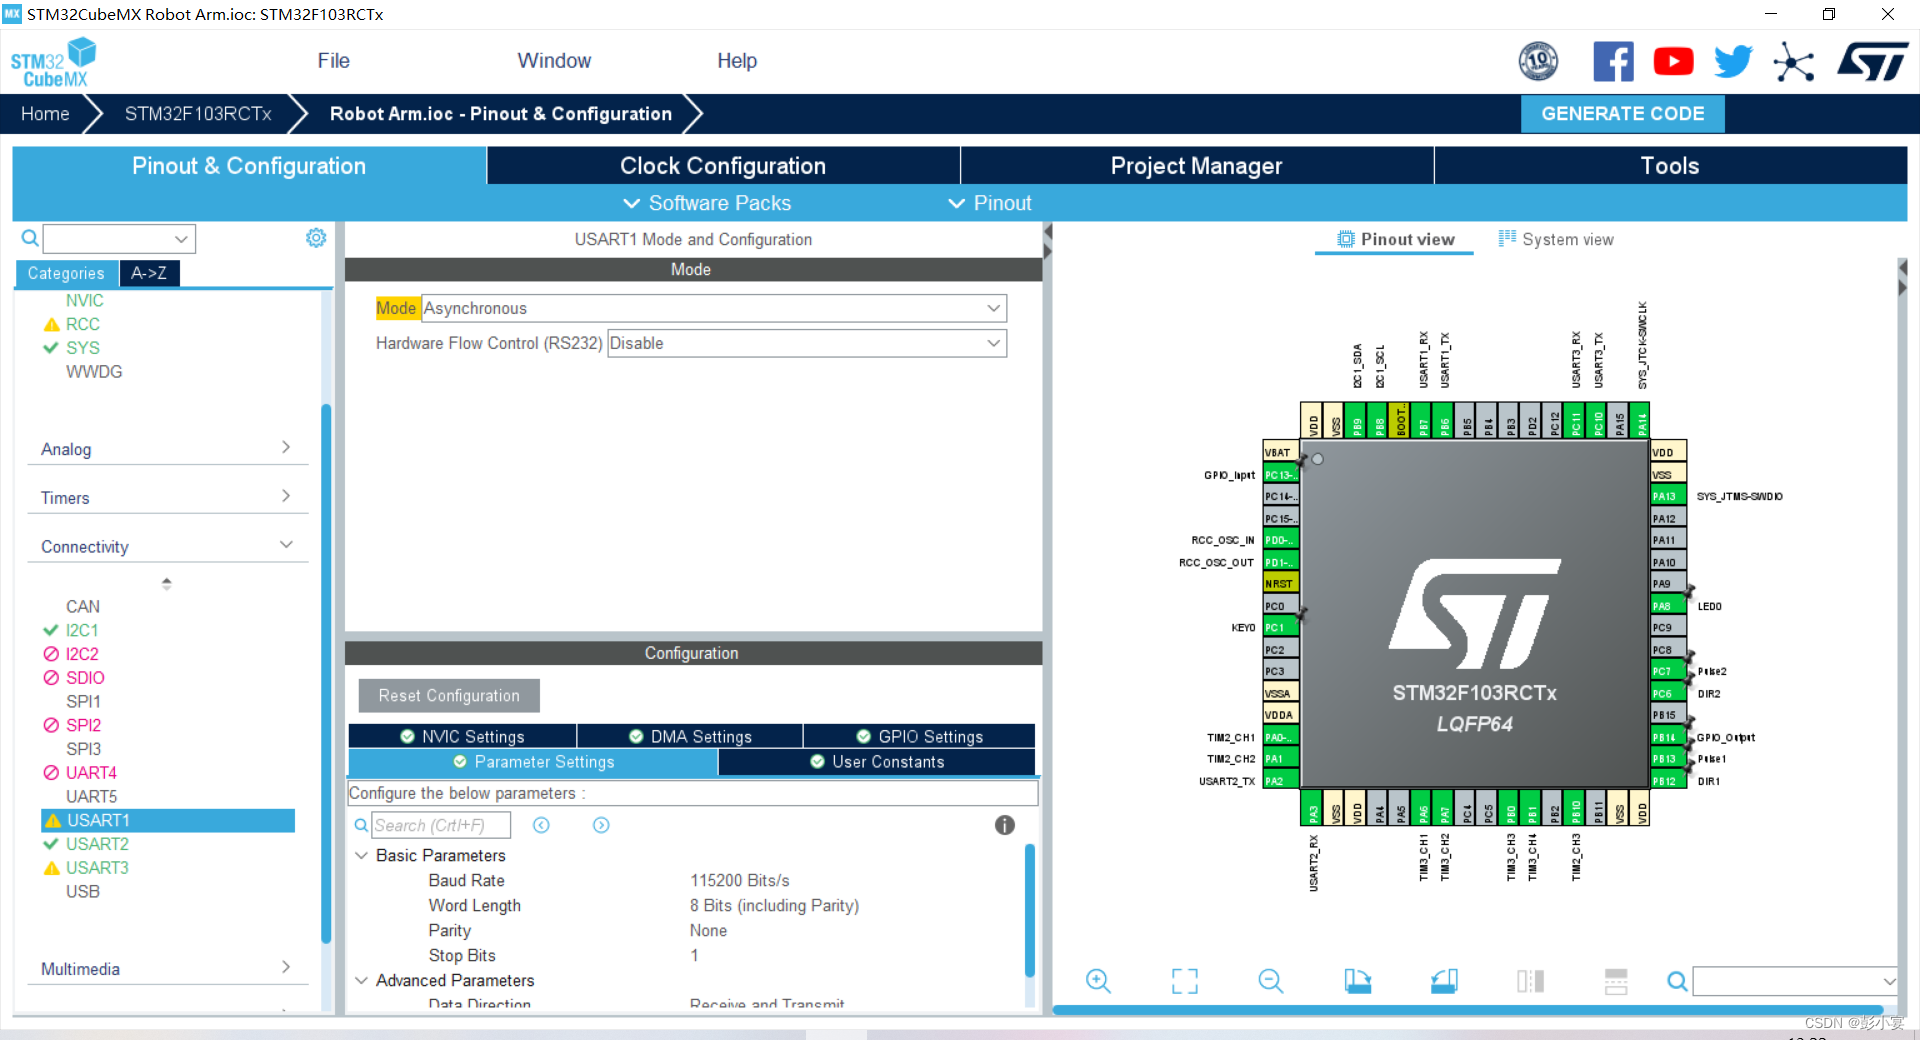
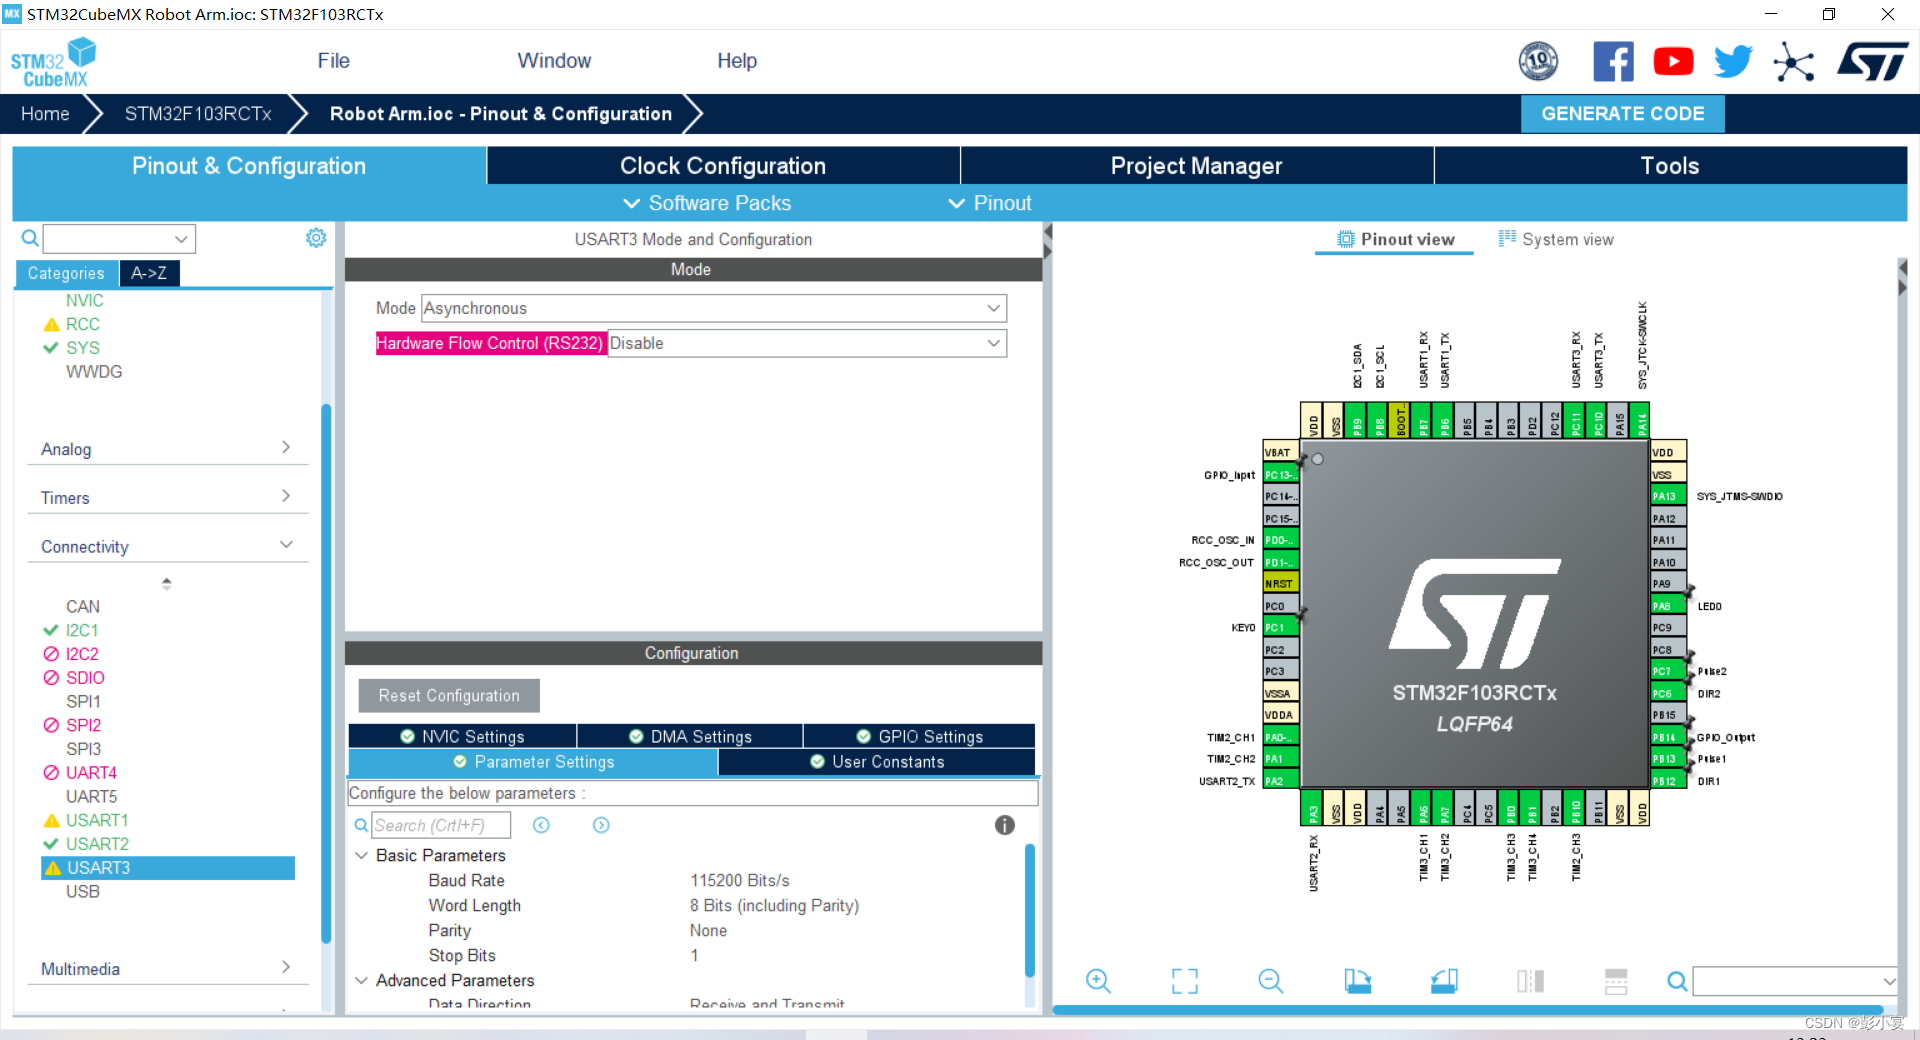
2.STM32端:这里我使用了串口1和串口3,串口一方便看数据和调试,串口三用来接收OpenMV传输的数据。
串口一:
 串口三:
串口三:

软件代码——OpenMV端
条形码识别
import sensor, image, time, math
from pyb import UART, LED
import json
import ustruct

sensor.reset()
sensor.set_pixformat(sensor.GRAYSCALE)
sensor.set_framesize(sensor.VGA) # High Res!
sensor.set_windowing((640, 200)) # V Res of 80 == less work (40 for 2X the speed).
sensor.skip_frames(time = 2000)
sensor.set_auto_gain(False)  # 必须关闭此功能,以防止图像冲洗…
sensor.set_auto_whitebal(False)  # 必须关闭此功能,以防止图像冲洗…
clock = time.clock()


uart = UART(3, 115200)
uart.init(115200, bits=8, parity=None, stop=1)  #8位数据位,无校验位,1位停止位


# 条形码检测可以在OpenMV Cam的OV7725相机模块的640x480分辨率下运行。
# 条码检测也将在RGB565模式下工作,但分辨率较低。 也就是说,
# 条形码检测需要更高的分辨率才能正常工作,因此应始终以640x480的灰度运行。

def barcode_name(code):
    if(code.type() == image.EAN2):
        return "EAN2"
    if(code.type() == image.EAN5):
        return "EAN5"
    if(code.type() == image.EAN8):
        return "EAN8"
    if(code.type() == image.UPCE):
        return "UPCE"
    if(code.type() == image.ISBN10):
        return "ISBN10"
    if(code.type() == image.UPCA):
        return "UPCA"
    if(code.type() == image.EAN13):
        return "EAN13"
    if(code.type() == image.ISBN13):
        return "ISBN13"
    if(code.type() == image.I25):
        return "I25"
    if(code.type() == image.DATABAR):
        return "DATABAR"
    if(code.type() == image.DATABAR_EXP):
        return "DATABAR_EXP"
    if(code.type() == image.CODABAR):
        return "CODABAR"
    if(code.type() == image.CODE39):
        return "CODE39"
    if(code.type() == image.PDF417):
        return "PDF417"
    if(code.type() == image.CODE93):
        return "CODE93"
    if(code.type() == image.CODE128):
        return "CODE128"

while(True):
    clock.tick()
    img = sensor.snapshot()
    codes = img.find_barcodes()
    for code in codes:
        img.draw_rectangle(code.rect())
        print_args = (barcode_name(code), code.payload(), (180 * code.rotation()) / math.pi, code.quality(), clock.fps())
        print("Barcode %s, Payload \"%s\", rotation %f (degrees), quality %d, FPS %f" % print_args)
        FH = bytearray([0xb3,0xb3])
        uart.write(FH)
        uart.write(code.payload())
        FH = bytearray([0x0d,0x0a])
        uart.write(FH)
        time.sleep_ms(100)
    if not codes:
        print("FPS %f" % clock.fps())
二维码识别
二维码识别部分,可以参考这篇文章
openmv和stm32串口通信完成二维码识别
软件代码——STM32端
STM32CobeMX配置
其他配置我这里就没有展示了,只展示串口一和串口三的配置


串口配置好后,要想使用printf打印,别忘了串口重定向
int fputc(int ch, FILE *f){
HAL_UART_Transmit (&huart1,(uint8_t *)&ch,1,0xffff);
	return ch;
}
串口接收数据
/* USER CODE BEGIN 1 */
	void HAL_UART_RxCpltCallback(UART_HandleTypeDef *huart)
{
    uint16_t tempt;/*定义临时变量存放接受的数据*/
    if(huart->Instance==USART3)
    {
        tempt=USART3_RXbuff;

        openmv_receive_data(tempt);
    }
	HAL_UART_Receive_IT(&huart3,(void *)&USART3_RXbuff,1);/*再次开启接收中断*/
}
/* USER CODE END 1 */
#include "openmv.h"
#include "stdio.h"
#include "usart.h"
#include "main.h"
/*四个变量用于存放目标物体的色彩种类以及中心坐标*/

unsigned int  center_x = 0, center_y = 0;
unsigned int color_type = 0;
double  center_x_cm = 0, center_y_cm = 0;
/*数据接收函数*/
uint8_t Uart3_RxFlag = 0;
uint8_t UsartDisPlay[200];
uint8_t Uart3_Rx_Cnt = 0;     //接收缓冲计数
void openmv_receive_data(uint8_t com_data)
{
    /*循环体变量*/
    uint8_t i;
    /*计数变量*/
		 static uint8_t rx_state = 0;
   			if(rx_state==0&&com_data==0xB3)
			{
				rx_state = 1;
			}
			else if(rx_state==1&&com_data==0xB3)
			{
				rx_state=2;
			}
			else if(rx_state==2)
			{
				UsartDisPlay[Uart3_Rx_Cnt++] = com_data;   //接收数据转存
				if((UsartDisPlay[Uart3_Rx_Cnt-1] == 0x0A)&&(UsartDisPlay[Uart3_Rx_Cnt-2] == 0x0D)) //判断结束位
				{
				rx_state = 0;
				printf("recive buff is %s\r\n",UsartDisPlay);
        Uart3_Rx_Cnt = 0;
        memset(UsartDisPlay,0x00,256);
				}
			}
    else   //接收异常
    {
        rx_state = 0;
        Uart3_Rx_Cnt = 0;
        for (i = 0; i < 30; i++)
        {
						UsartDisPlay[i] = 0x00;
        }
    }
}