sudo dpkg -i code_1.32.3-1552606978_amd64.deb
安装完成以后搜索“Visual Studio Code”就可以找到,如图所示

每次打开 VSCode 都要搜索,太麻烦了,我们可以将图标添加到 Ubuntu 桌面上,安装的所
有软件图标都在目录/usr/share/applications 中,如图所示:

找到 Visual Studio Code 的图标,然后点击鼠标右键,选择复制到->桌面,如图所示:

将VSCode图标复制到桌面后我们就可以直接双击图标打开VSCode,Ubuntu下的 VSCode 打开以后如图所示:

可以看出 Linux 下的 VSCode 和 Windows 下的基本是一样的,所以使用方法也是一样的
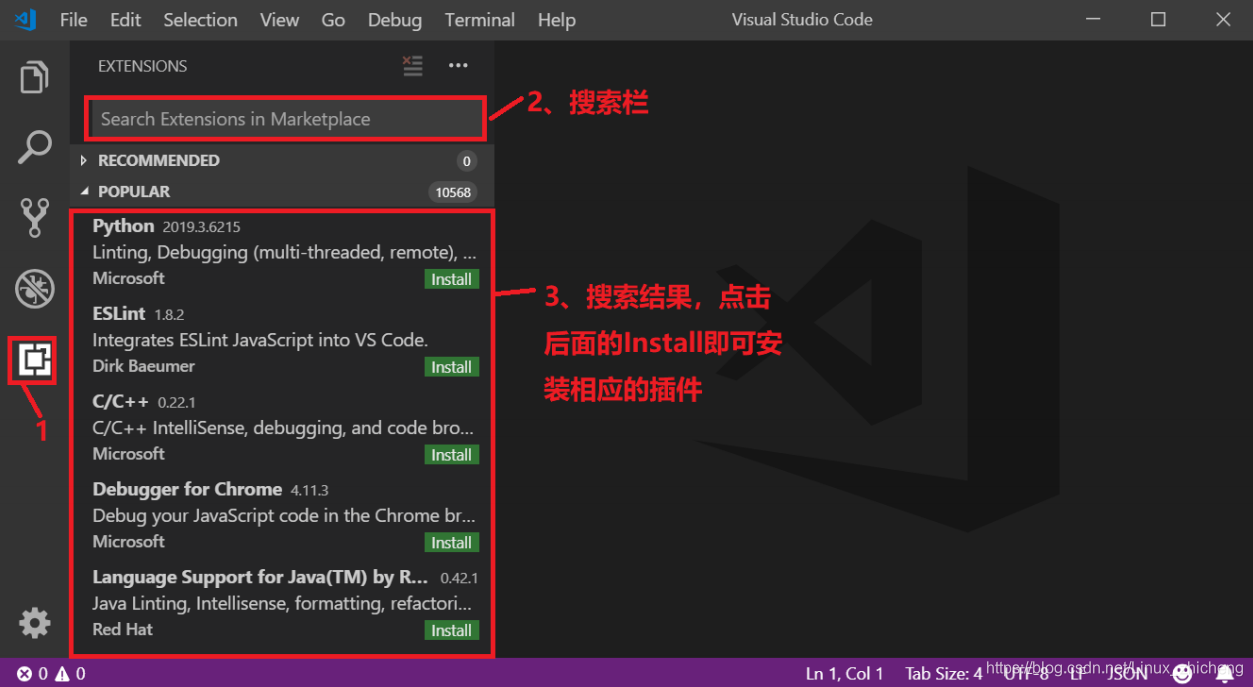
Visual Studio Code 插件的安装
VSCode 支持多种语言,比如 C/C++、Python、C#等等,本教程我们主要用来编写 C/C++程序的,所以需要安装 C/C++的扩展包,扩展包安装很简单,如图所示:
我们需要按照的插件有下面几个:
1)、C/C++,这个肯定是必须的。
2)、C/C++ Snippets,即 C/C++重用代码块。
3)、C/C++ Advanced Lint,即 C/C++静态检测 。 4)、Code Runner,即代码运行。
5)、Include AutoComplete,即自动头文件包含。
6)、Rainbow Brackets,彩虹花括号,有助于阅读代码。
7)、One Dark Pro,VSCode 的主题。
8)、GBKtoUTF8,将 GBK 转换为 UTF8。 9)、ARM,即支持 ARM 汇编语法高亮显示。
10)、Chinese(Simplified),即中文环境。
11)、vscode-icons,VSCode 图标插件,主要是资源管理器下各个文件夹的图标。
12)、compareit,比较插件,可以用于比较两个文件的差异。
13)、DeviceTree,设备树语法插件。
14)、TabNine,一款 AI 自动补全插件,强烈推荐,谁用谁知道!
如果要查看已经安装好的插件,可以按照所示方法查看:

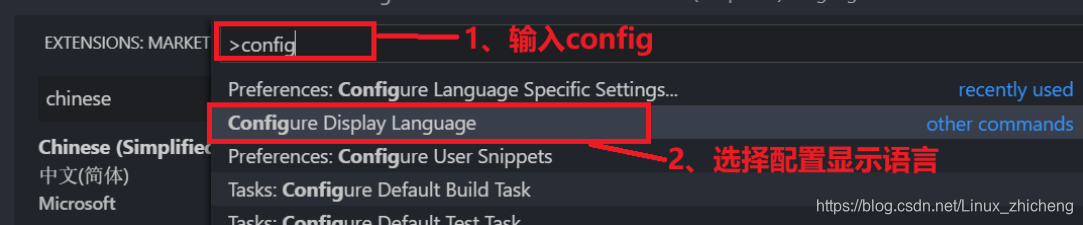
安装好插件以后就可以进行代码编辑了,截至目前,VSCode 界面都是英文环境,我们已经安装了中文插件了,最后将 VSCode 改为中文环境,使用方法如图所示:
按下“Ctrl+Shift+P”打开搜索框,在搜索框里面输入“config”,然后选择“Configure Display Language”,如图所示:
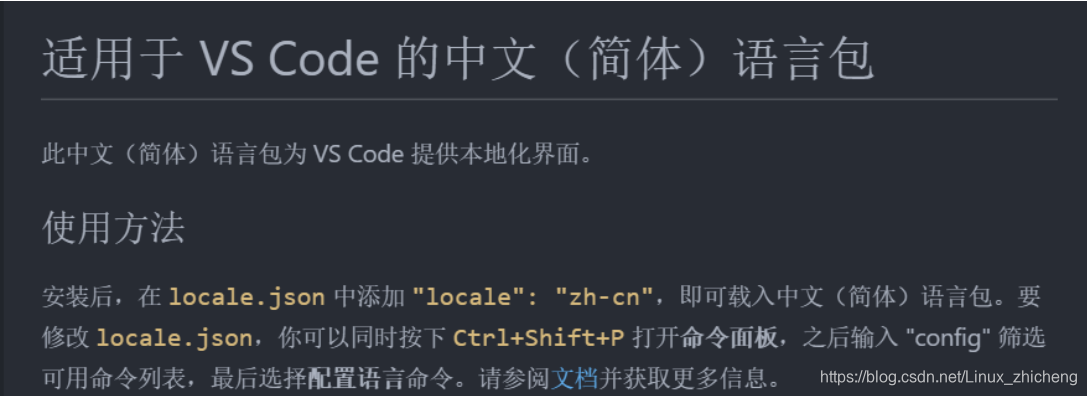
在打开的 local.json 文件中将 locale 修改为 zh-cn,如图所示:

修改完成以后保存 local.json,然后重新打开 VSCode,测试 VSCode 就变成了中文的了,如图所示:
Visual Studio Code 新建工程
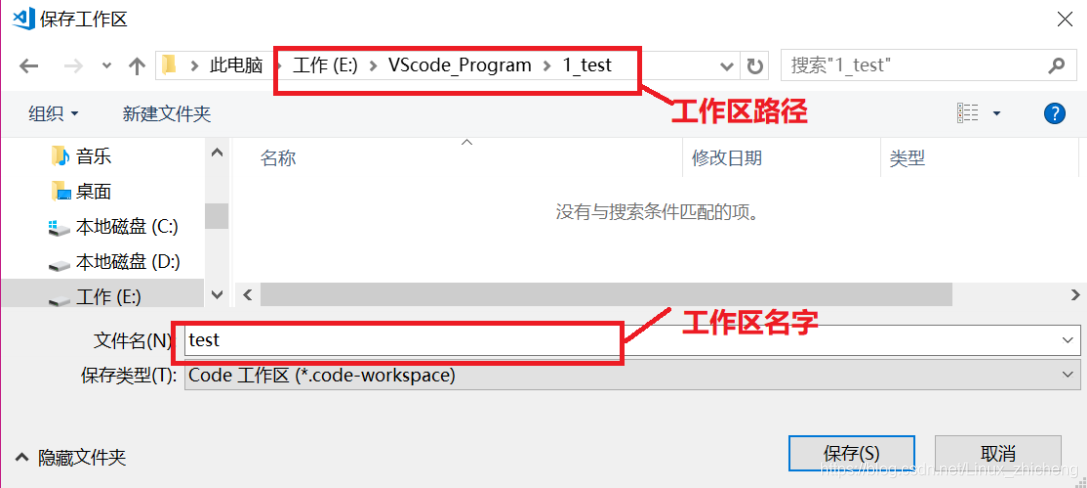
新建一个文件夹用于存放工程,比如我新建的文件夹目录为 E:\VScode_Program\1_test,路径尽量不要有中文和空格。打开 VSCode,然后在 VSCode 上点击文件->打开文件夹…,选刚刚创建的“1_test”文件夹,打开以后如图所示:

可以看出此时的文件夹“1_TEST”是空的,点击文件->将工作区另存为…,打开工作区命名对话框,输入要保存的工作区路径和工作区名字,如图所示:
工作区保存成功以后,点击图中的“新建文件”按钮创建 main.c 和 main.h 这两个文件,创建成功以后 VSCode 如图所示:
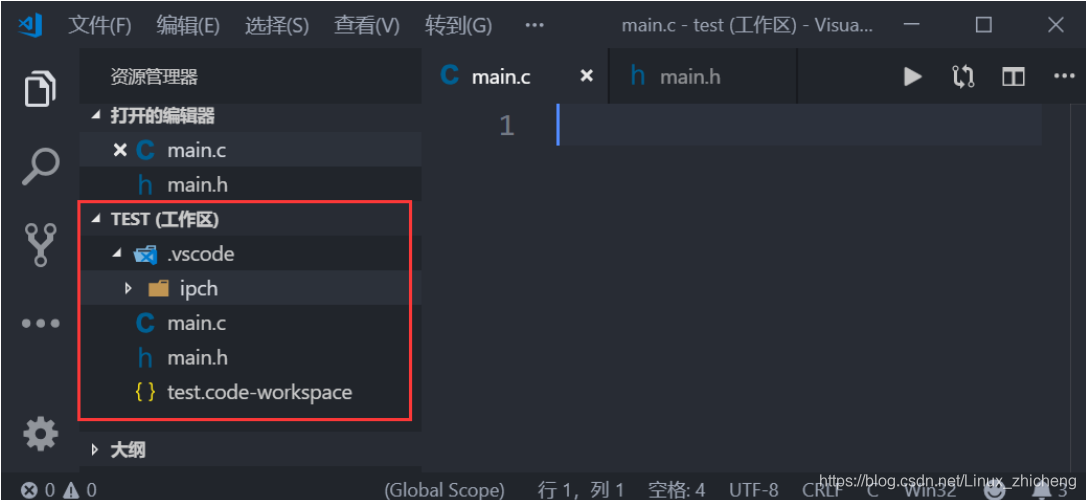
可以看出,此时“实验 1 TEST”中有.vscode 文件夹、main.c 和 main.h,这三个文件和文件夹同样会出现在“实验 1 test”文件夹中,如图所示:

在 main.h 中输入如下所示内容:
#include <stdio.h>
int add(int a, int b);
在 main.c 中输入如下所示内容:
#include <main.h>
int add(int a, int b)
{
return (a + b);

}


 int main(void)
{

 int value = 0;
value = add(5, 6);

 printf("5 + 6 = %d", value);

return 0;

}
代码编辑完成以后 VSCode 界面如图所示:

可以看出,VSCode 的编辑的代码高亮很漂亮,阅读起来很舒服。但是此时提示找不到“stdio.h”这个头文件,如图所示错误提示:
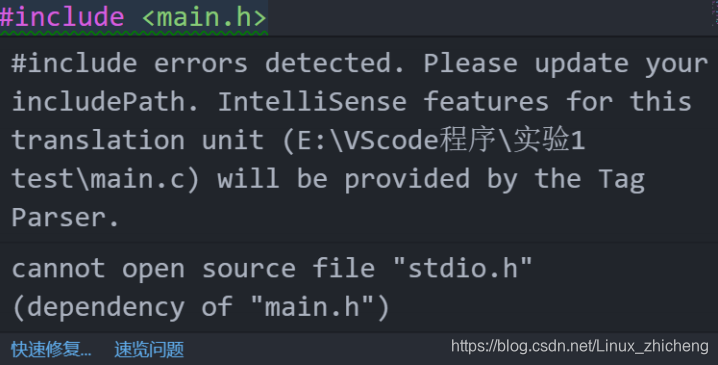
图中提示找不到“main.h”,同样的在 main.h 文件中会提示找不到“stdio.h”。这是因为我们没有添加头文件路径。按下“Ctrl+Shift+P”打开搜索框,然后输入“Edit configurations”,选择“C/C++:Editconfigurations…”,如图所示:

C/C++的配置文件是个 json 文件,名为:c_cpp_properties.json,此文件默认内容如图所示:
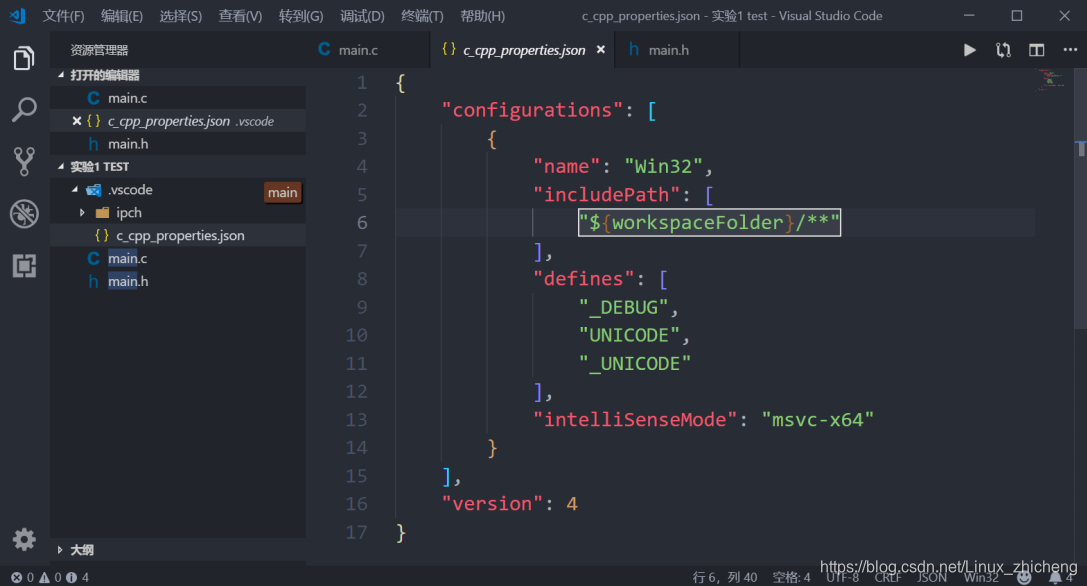
c_cpp_properties.json 中的变量“includePath”用于指定工程中的头文件路径,但是“stdio.h” 是 C 语言库文件,而 VSCode 只是个编辑器,没有编译器,所以肯定是没有 stdio.h 的,除非自行安装一个编译器,比如 CygWin,然后在 includePath 中添加编译器的头文件。这里就不添加了,因为我们不会使用 VSCode来编译程序,这里主要知道如何指定头文件路径就可以了,
我们在 VScode 上打开一个新文件的话会覆盖掉以前的文件,这是因为 VSCode 默认开启了预览模式,预览模式下单击左侧的文件就会覆盖掉当前的打开的文件。如果不想覆盖的话采用双击打开即可,或者设置 VSCode 关闭预览模式,设置如图所示:

我们在编写代码的时候有时候会在右下角有如图所示的警告提示:

这是因为插件 C/C++ Lint 打开了几个功能,我们将其关闭就可以了,顺便也可以学习一下VSCode 插件配置方法,如图所示:
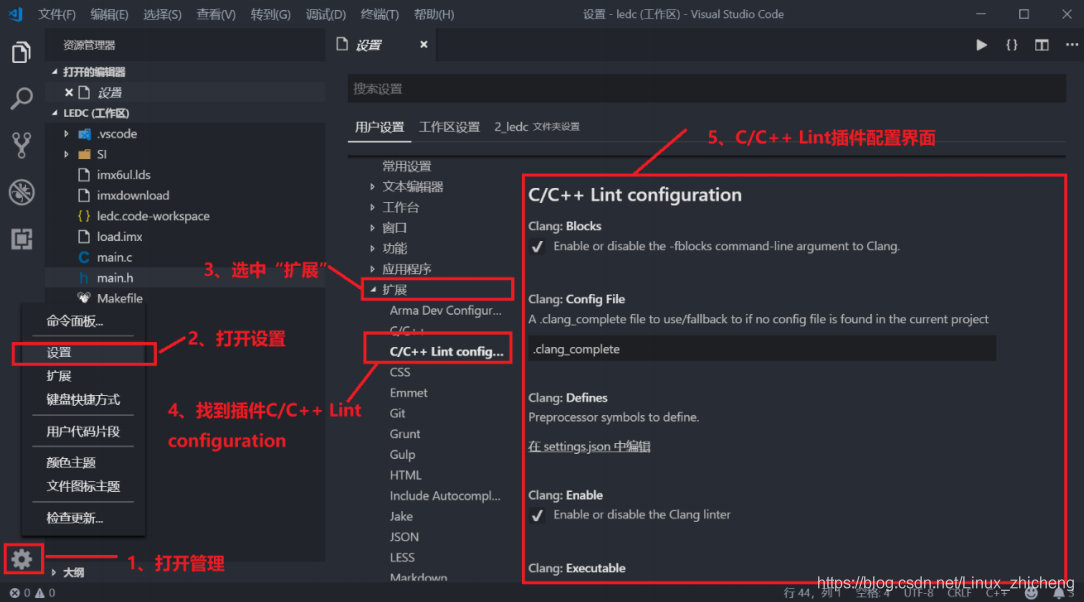
在 C/C++ Lint 配置界面上找到 CLang:Enable、Cppcheck:Enable、Flexlint:Enable 这个三个,然后取消掉勾选即可,如图所示:


取消这三个有关 C/C++ Lint 的配置以后就不会有那个错误提示了。但是关闭 Cppcheck:Enable 以后 VSCode 就不能实时检查错误了,根据实际情况选择即可。
|