下载vscode
点击vscode下载网址
vscode下载网址
进入界面后直接下载安装包

安装vscode
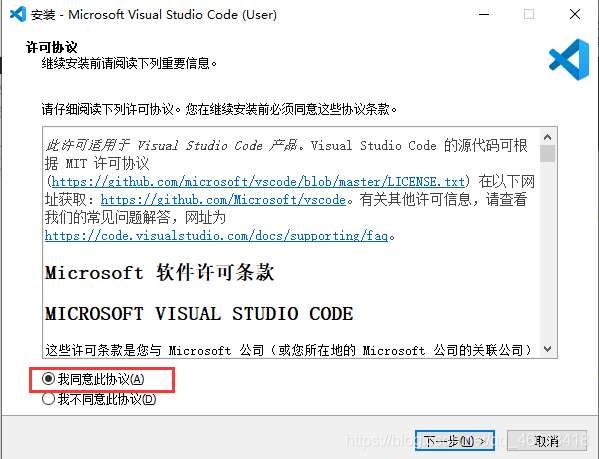
同意协议
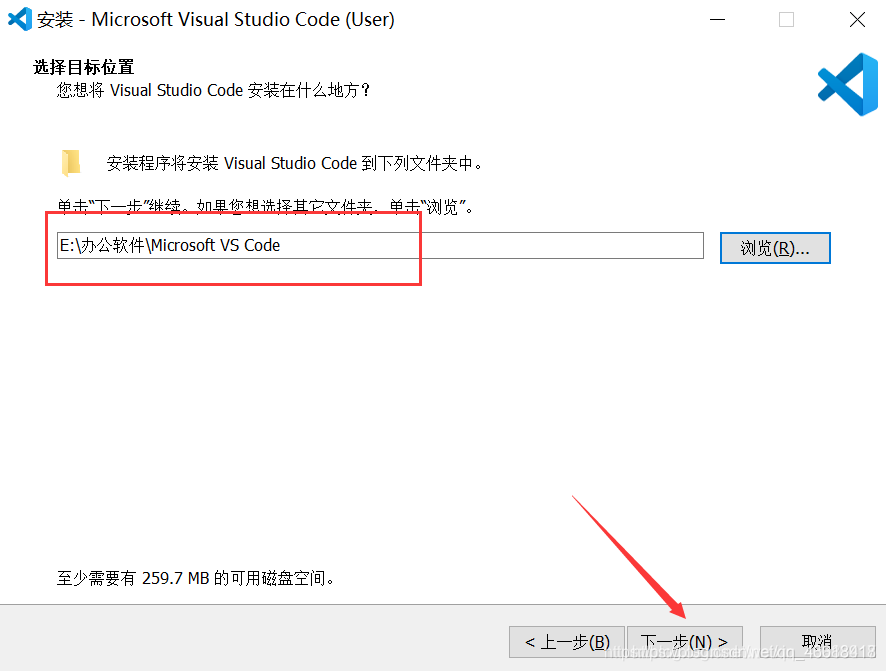
自定义安装目录,不建议安装在C盘

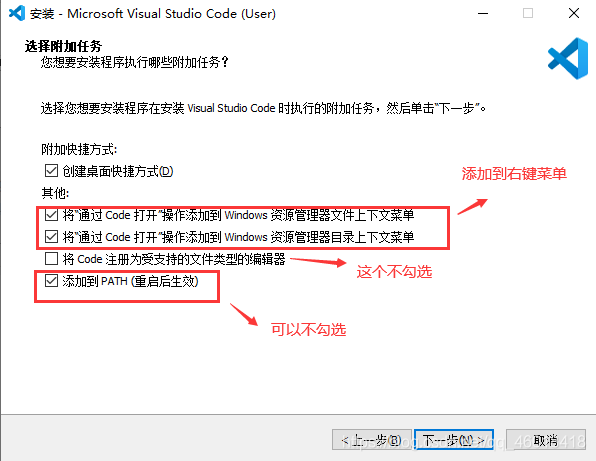
注:1、通过code 打开“操作添加到windows资源管理器文件上下文菜单 :把这个两个勾选上,可以对文件使用鼠标右键,选择VSCode 打开。
注:2、将code注册为受支持的文件类型的编辑器:不建议勾选,这样会默认使用VSCode打开支持的相关文件,文件图标也会改变。
注:3、添加到PATH(重启后生效):建议勾选,这样可以使用控制台打开VSCode 了。

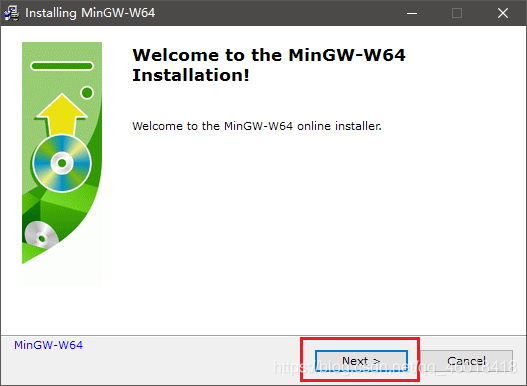
下载Mingw
进入网址
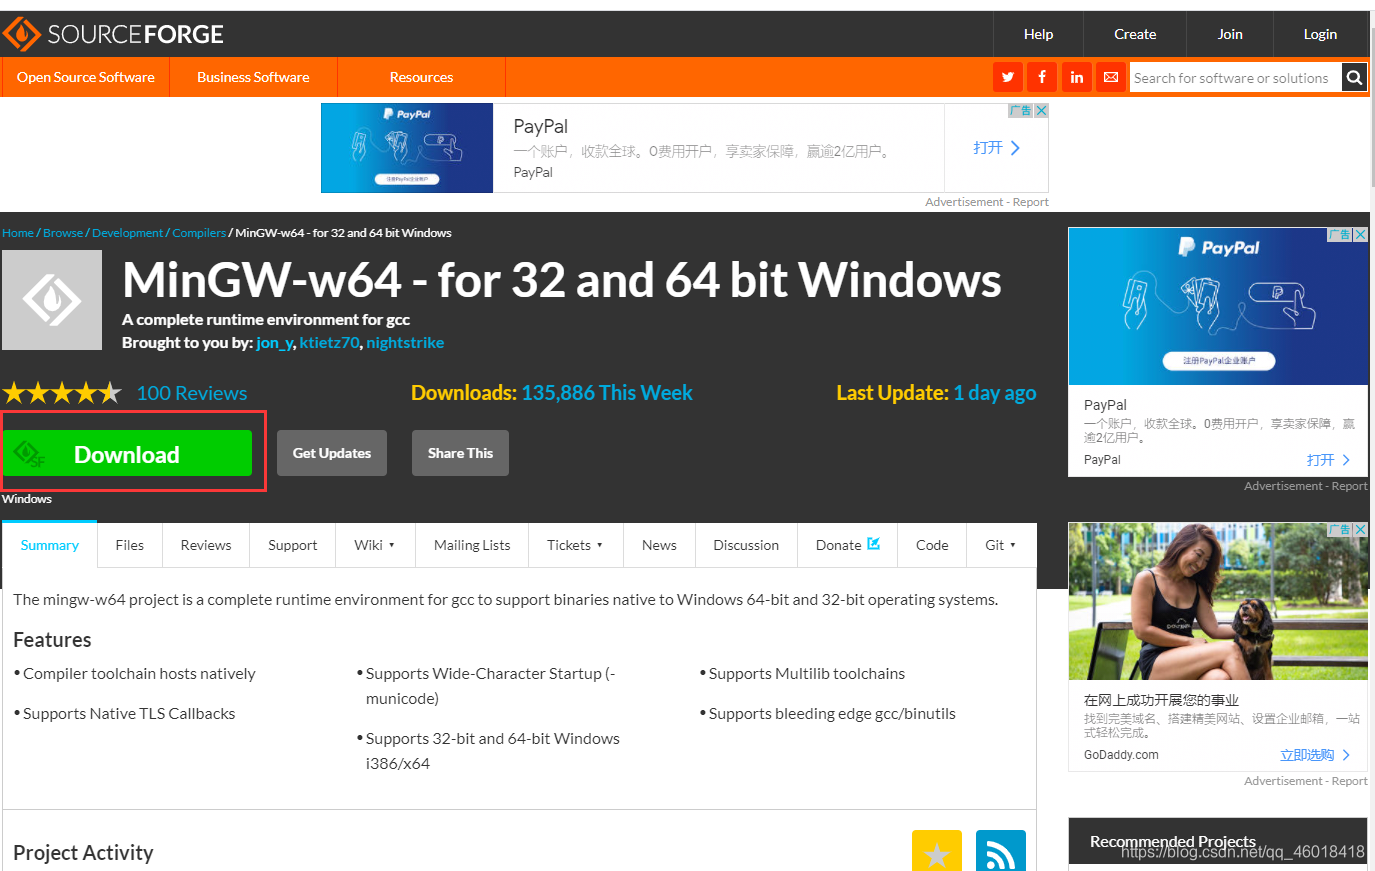
点击Sourceforge

点击Download
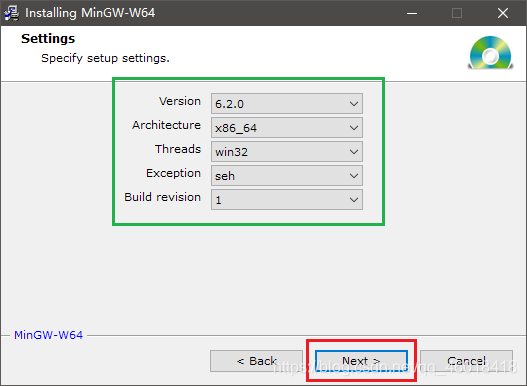
安装Mingw
注:Architecture :是指电脑系统是 32位 还是 64位,根据你的电脑系统做出对应选择。操作:我的电脑系统是 64位 的,所以我选择了 x86_64,如果你是 32位 系统,则选择 i686 即可。
Threads::如果你想要开发 Windows 程序,需要选择 win32 ,而开发 Linux、Unix、Mac OS 等其他操作系统下的程序,则需要选择 posix 。・
Exception:异常处理在开发中非常重要,你在开发的过程中,大部分的时间会耗在处理各种异常情况上。如果你之前选择了 64位,则这里有两个异常处理模型供你选择,seh 是新发明的,而 sjlj 则是古老的。seh 性能比较好,但不支持 32位。 sjlj 稳定性好,支持 32位。 操作:我这里选择了 seh 。
Build revision:5、暂时没弄明白是做什么的。


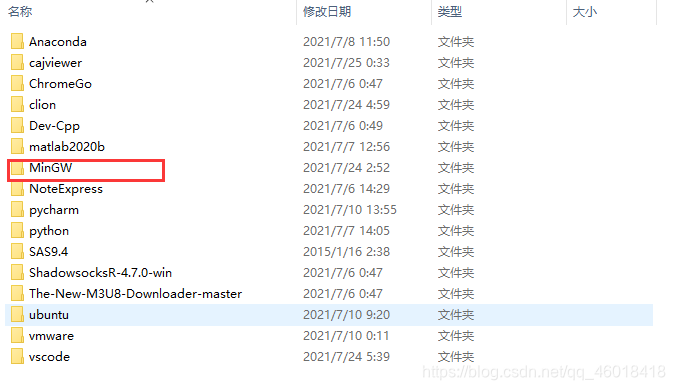
配置Mingw环境变量
找到Mingw的安装目录
进入bin目录

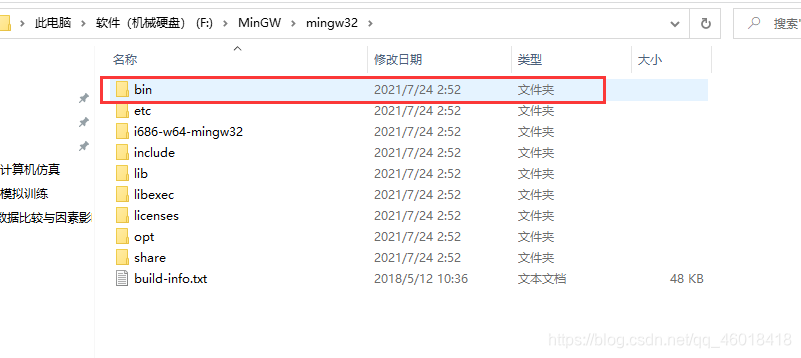
复制路径

右击此电脑->属性->右上方高级系统设置

点击环境变量

找到path,点编辑

将刚刚复制的路径添加进去,点击确定

安装vscode插件
打开vscode,点击扩展

安装以下插件
1、中文简体插件,可以使餐单栏为中文

2、运行C/C++

3、C++代码提示
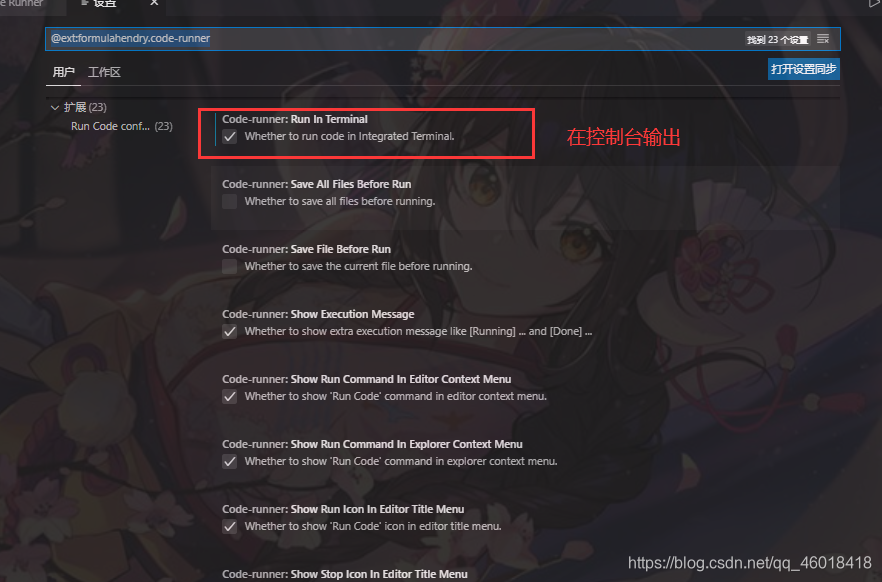
配置控制台输出
点击小齿轮

点击扩展设置

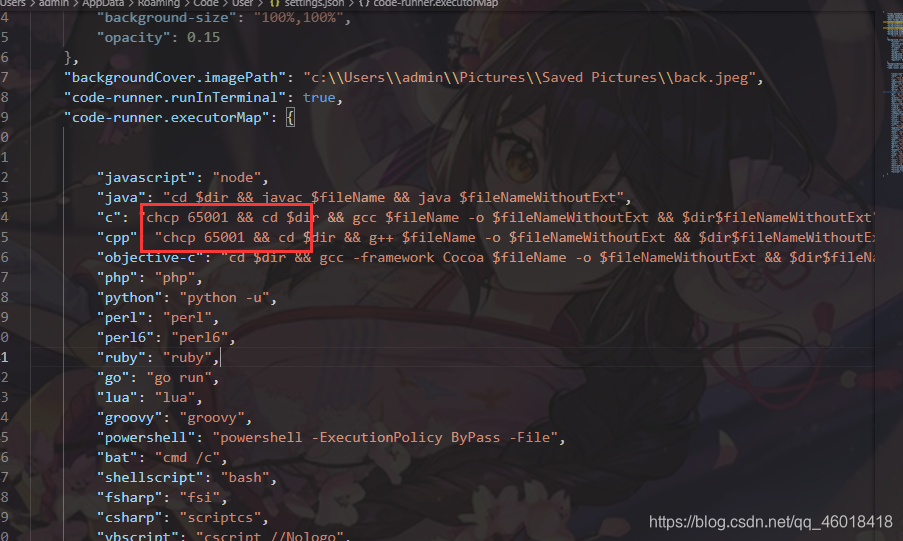
解决控制台输出乱码
勾选完Run in termial后,还是在这个界面找到setting.json并打开
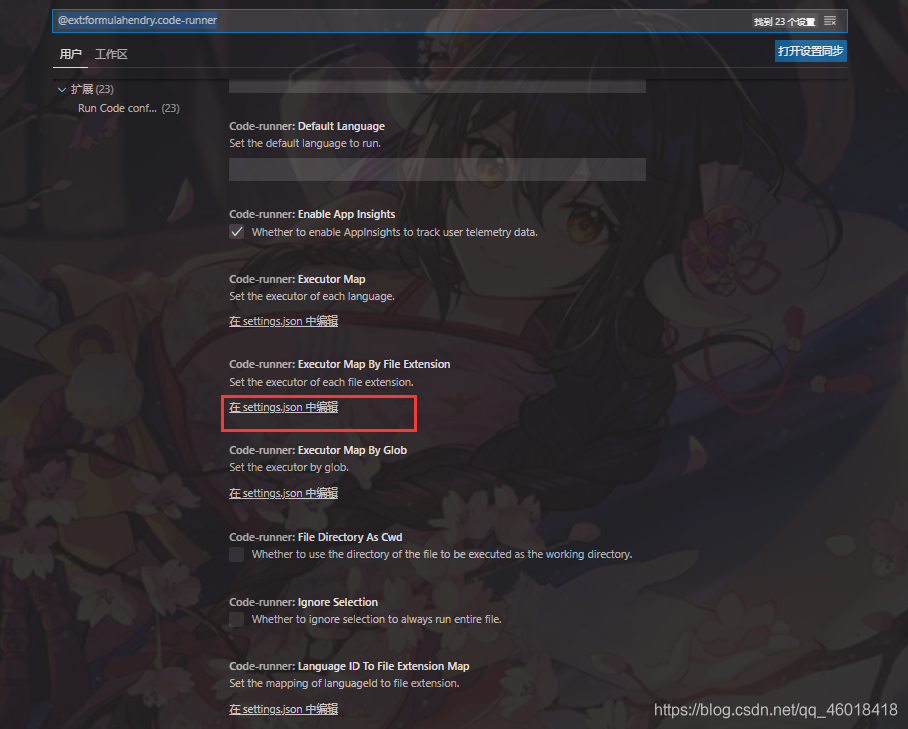
在setting.json中找到c和cpp开头的这两行(其他不用管,我多装了几个插件,所以呈现的内容比你们的多)
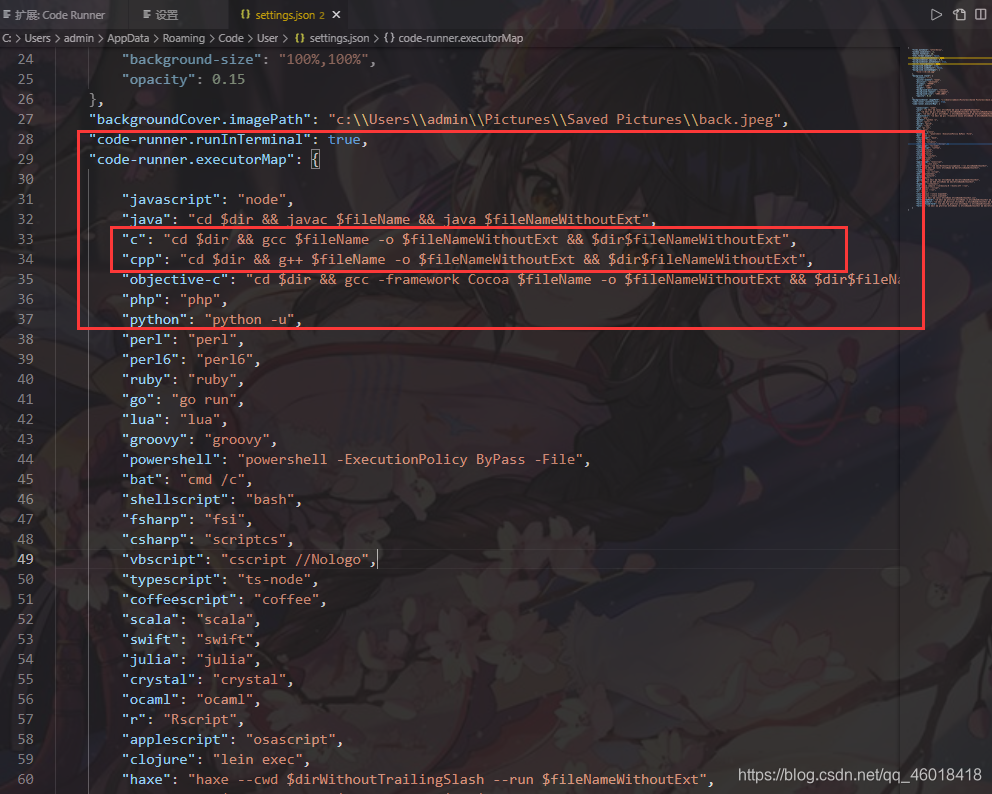
在这两行加上 chcp 65001 &&,然后保存
Debug功能配置
点击昆虫调试

编辑 launch.json 配置文件,“externalConsole”: true,
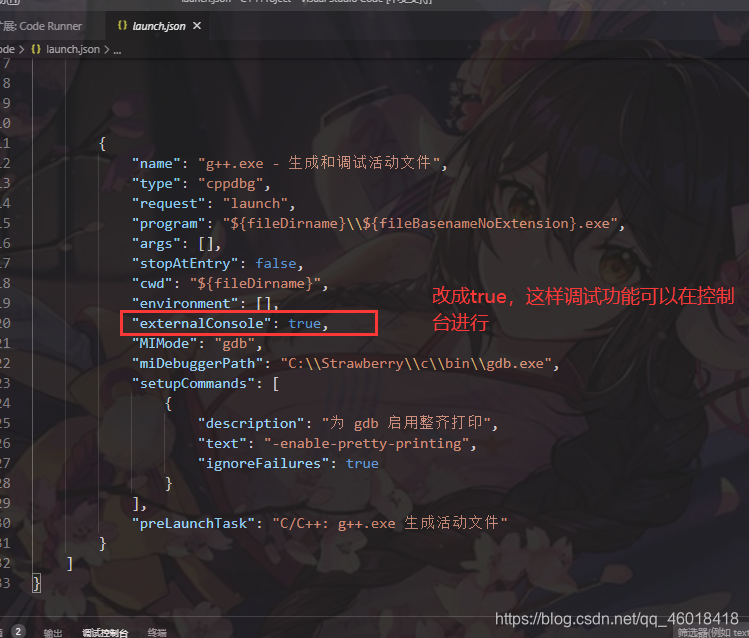
返回到.cpp或者.c文件,按F5或者Fn+F5进行调试,会弹出找不到任务"task g++",选择 “配置任务”,会自动生成 tasks.json 文件。
注:launch.json 文件中 "preLaunchTask" 的值 必须与 tasks.json 文件中 "label"的值一致。

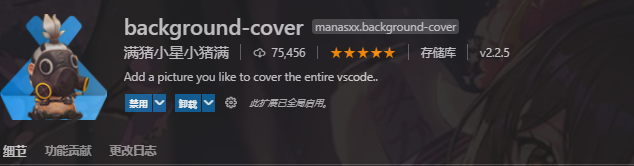
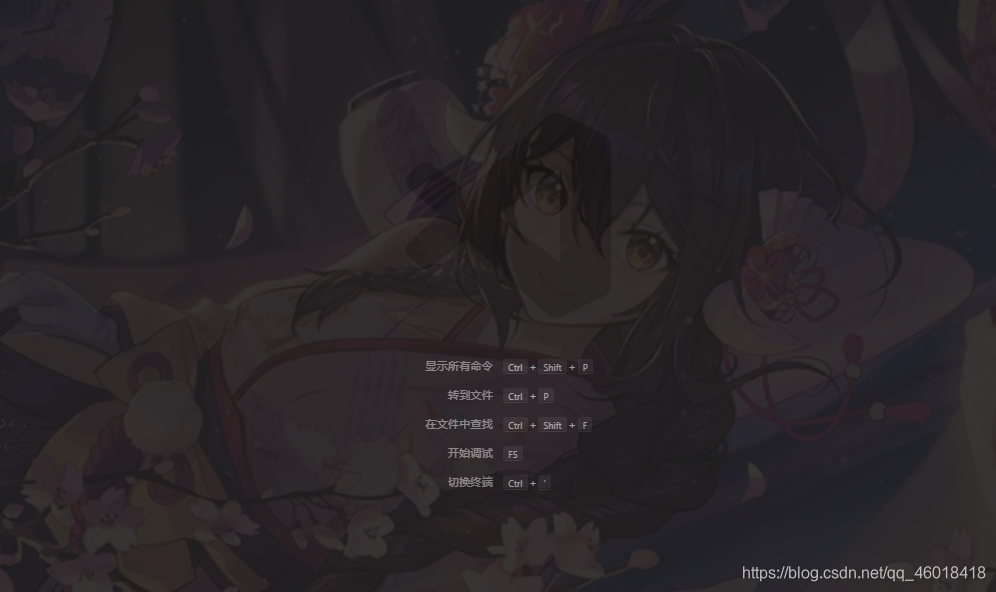
二次元背景图片设置
安装这个插件
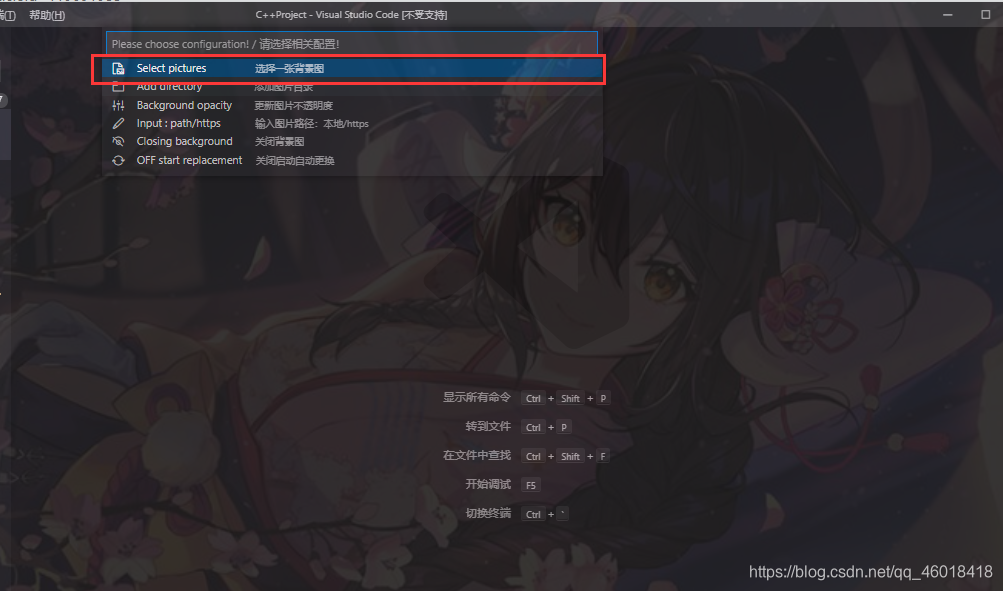
点击右下角的小图标切换背景图

效果展示
有问题可以私聊我哦~