SpringBoot项目远程Debug
1.在远程服务器上使用java -jar启动jar包时,加上参数-Xdebug -Xrunjdwp:transport=dt_socket,server=y,suspend=n,address=5005
如:
java -jar -Xdebug -Xrunjdwp:transport=dt_socket,server=y,suspend=n,address=5005 startDemo-1.0-SNAPSHOT.jar
留意一下这里的address=5005,其他的参数可以忽略.

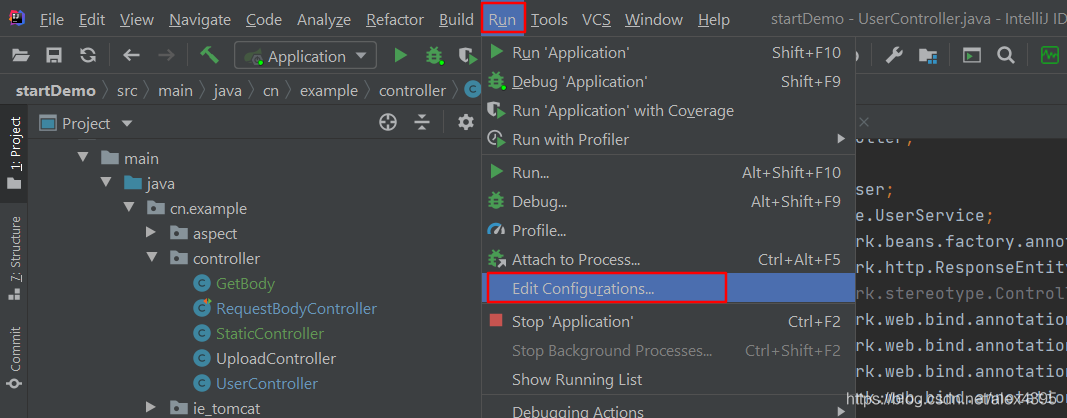
启动成功后,在Idea中打开对应的源码,然后配置一个Remote,具体步骤如下:


填写参数, 其他参数都使用默认值, 只需要填写Host为远程服务器的地址,而这里的Port就是jar包启动时的参数address = 5005;

点击Apply , OK .
然后在源码处打上断点, 点击臭虫标记, 下方的Console显示Connected to the target VM,address…说明连接远程服务器成功.

使用PostMan对远程服务器发起请求:

发现本地的Idea成功进入到了Debug状态,大功告成,开始愉快地抓臭虫吧!

简单总结:
开启debug分为两方面:
- 服务端开启debug模式,指定开放的端口
- 本地使用idea的Remote模式连接服务端,将本地代码与服务端对应起来.