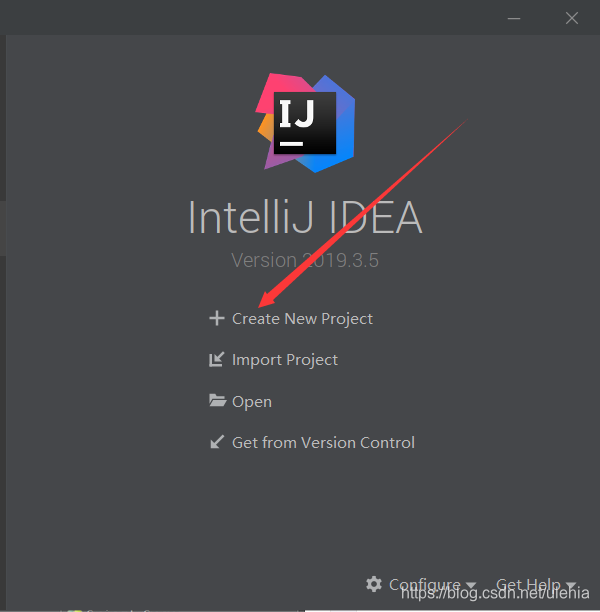
1:我们要先准备好需要的工具
我这里用的是idea2019的版本,tomcat9.0.46的版本,1.8djdk以及mysql5.5以及sqlyog9.0
的版本,还有各种jar包,以及jquery所需要的js文件。(网上均有资源下载,如果实在找不到的可私信我)
2:新建一个javaee项目


 3:进行数据库的连接


4: 在项目中导入jar包

 ?
?
 ?
?
 ?
?
 ?
?
 ?
?
 5:配置文件的编写
?db.properties
jdbc.driver=com.mysql.jdbc.Driver
jdbc.url=jdbc:mysql://localhost:3306/mybatis
jdbc.username=root
jdbc.password=root
jdbc.maxTotal=30
jdbc.maxIdle=10
jdbc.initialSize=5
?applicationContext.xml
<?xml version="1.0" encoding="UTF-8"?>
<beans xmlns="http://www.springframework.org/schema/beans"
       xmlns:xsi="http://www.w3.org/2001/XMLSchema-instance"
       xmlns:aop="http://www.springframework.org/schema/aop"
       xmlns:tx="http://www.springframework.org/schema/tx"
       xmlns:context="http://www.springframework.org/schema/context"
       xsi:schemaLocation="http://www.springframework.org/schema/beans
    http://www.springframework.org/schema/beans/spring-beans-4.3.xsd
    http://www.springframework.org/schema/tx
    http://www.springframework.org/schema/tx/spring-tx-4.3.xsd
    http://www.springframework.org/schema/context
    http://www.springframework.org/schema/context/spring-context-4.3.xsd
    http://www.springframework.org/schema/aop
    http://www.springframework.org/schema/aop/spring-aop-4.3.xsd">
    <!-- 读取db.properties -->
    <context:property-placeholder location="classpath:db.properties"/>
    <!-- 配置数据源 -->
    <bean id="dataSource"
          class="org.apache.commons.dbcp2.BasicDataSource">
        <!--数据库驱动 -->
        <property name="driverClassName" value="${jdbc.driver}" />
        <!--连接数据库的url -->
        <property name="url" value="${jdbc.url}" />
        <!--连接数据库的用户名 -->
        <property name="username" value="${jdbc.username}" />
        <!--连接数据库的密码 -->
        <property name="password" value="${jdbc.password}" />
        <!--最大连接数 -->
        <property name="maxTotal" value="${jdbc.maxTotal}" />
        <!--最大空闲连接  -->
        <property name="maxIdle" value="${jdbc.maxIdle}" />
        <!--初始化连接数  -->
        <property name="initialSize" value="${jdbc.initialSize}" />
    </bean>
    <!-- 事务管理器,依赖于数据源 -->
    <bean id="transactionManager" class=
            "org.springframework.jdbc.datasource.DataSourceTransactionManager">
        <property name="dataSource" ref="dataSource" />
    </bean>
    <!-- 开启事务注解 -->
    <tx:annotation-driven/>
    <!-- 配置MyBatis工厂SqlSessionFactory -->
    <bean id="sqlSessionFactory"
          class="org.mybatis.spring.SqlSessionFactoryBean">
        <!--注入数据源 -->
        <property name="dataSource" ref="dataSource" />
        <!--指定核MyBatis心配置文件位置 -->
        <property name="configLocation" value="classpath:mybatis-config.xml" />
    </bean>
    <!-- 配置mapper扫描器 -->
    <bean class="org.mybatis.spring.mapper.MapperScannerConfigurer">
        <property name="basePackage" value="dao层的位置"/>
    </bean>
    <!-- 扫描Service -->
    <context:component-scan base-package="service层的位置" />
</beans>
?log4j.properties
# Global logging configuration
log4j.rootLogger=ERROR, stdout
# MyBatis logging configuration...
log4j.logger.SRC目录下的路径=DEBUG
# Console output...
log4j.appender.stdout=org.apache.log4j.ConsoleAppender
log4j.appender.stdout.layout=org.apache.log4j.PatternLayout
log4j.appender.stdout.layout.ConversionPattern=%5p [%t] - %m%n
?mybatis-config.xml
<?xml version="1.0" encoding="UTF-8" ?>
<!DOCTYPE configuration PUBLIC "-//mybatis.org//DTD Config 3.0//EN"
        "http://mybatis.org/dtd/mybatis-3-config.dtd">
<configuration>
    <!-- 别名定义 -->
    <typeAliases>
        <package name="po层的位置" />
    </typeAliases>
</configuration>
?springmvc-config.xml
<beans xmlns="http://www.springframework.org/schema/beans"
       xmlns:xsi="http://www.w3.org/2001/XMLSchema-instance"
       xmlns:mvc="http://www.springframework.org/schema/mvc"
       xmlns:context="http://www.springframework.org/schema/context"
       xmlns:tx="http://www.springframework.org/schema/tx"
       xsi:schemaLocation="http://www.springframework.org/schema/beans
  http://www.springframework.org/schema/beans/spring-beans-4.3.xsd
  http://www.springframework.org/schema/mvc
  http://www.springframework.org/schema/mvc/spring-mvc-4.3.xsd
  http://www.springframework.org/schema/context
  http://www.springframework.org/schema/context/spring-context-4.3.xsd">
    <!-- 配置包扫描器,扫描@Controller注解的类 -->
    <context:component-scan base-package="控制层的位置" />
    <!-- 加载注解驱动 -->
    <mvc:annotation-driven />
    <!-- 配置视图解析器 -->
    <bean class=
                  "org.springframework.web.servlet.view.InternalResourceViewResolver">
        <property name="prefix" value="/WEB-INF/jsp/" />
        <property name="suffix" value=".jsp" />
    </bean>
</beans>
web.xml
<?xml version="1.0" encoding="UTF-8"?>
<web-app xmlns:xsi="http://www.w3.org/2001/XMLSchema-instance"
         xmlns="http://xmlns.jcp.org/xml/ns/javaee"
         xsi:schemaLocation="http://xmlns.jcp.org/xml/ns/javaee
  	http://xmlns.jcp.org/xml/ns/javaee/web-app_3_1.xsd"
         id="WebApp_ID" version="3.1">
    <!-- 配置加载Spring文件的监听器-->
    <context-param>
        <param-name>contextConfigLocation</param-name>
        <param-value>classpath:applicationContext.xml</param-value>
    </context-param>
    <listener>
        <listener-class>
            org.springframework.web.context.ContextLoaderListener
        </listener-class>
    </listener>
    <!-- 编码过滤器 -->
    <filter>
        <filter-name>encoding</filter-name>
        <filter-class>
            org.springframework.web.filter.CharacterEncodingFilter
        </filter-class>
        <init-param>
            <param-name>encoding</param-name>
            <param-value>UTF-8</param-value>
        </init-param>
    </filter>
    <filter-mapping>
        <filter-name>encoding</filter-name>
        <url-pattern>*.action</url-pattern>
    </filter-mapping>
    <!-- 配置Spring MVC前端核心控制器 -->
    <servlet>
        <servlet-name>springmvc</servlet-name>
        <servlet-class>
            org.springframework.web.servlet.DispatcherServlet
        </servlet-class>
        <init-param>
            <param-name>contextConfigLocation</param-name>
            <param-value>classpath:springmvc-config.xml</param-value>
        </init-param>
        <!-- 配置服务器启动后立即加载Spring MVC配置文件 -->
        <load-on-startup>1</load-on-startup>
    </servlet>
    <servlet-mapping>
        <servlet-name>springmvc</servlet-name>
        <!--/:拦截所有请求(除了jsp)-->
        <url-pattern>/</url-pattern>
    </servlet-mapping>
</web-app>
6:到此就可以开始编写你的ssm项目了
在编写的过程中,如果发现有错误,可以使用alt + enter 快捷键来快速解决问题,而且idea还有很多的快捷键,等着我们去学习!!
ps1:(这是我第一次写这样的文章,写的不好,还望理解,如果有什么别的问题,可以在下方评论)
ps2:(有困难就上csdn,这个平台可以说是解决了我的大部分问题,感觉也不能总是白嫖,所有才怀着难以表达的心情写下来这篇文章)