一:安装VSCode IDE ,并且安装Remote-ssh 插件
? ? ? ? 参考Remote-ssh插件安装及使用
二:增加launch.json
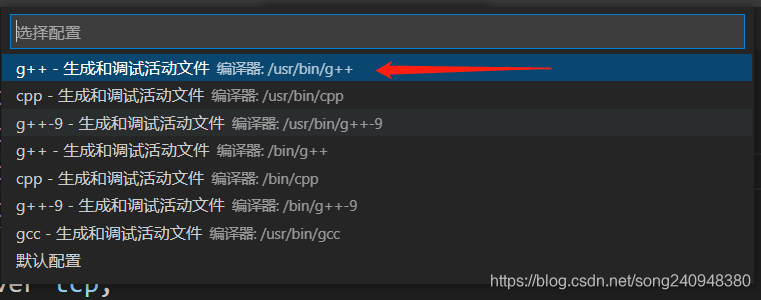
????????一般情况下默认是?No configurations, 此时按下?F5,会提示你配置文件?launch.json?不存在,点击?Open launch.json,然后开始下一步的?launch.json?配置。


{
    // 使用 IntelliSense 了解相关属性。
    // 悬停以查看现有属性的描述。
    // 欲了解更多信息,请访问: https://go.microsoft.com/fwlink/?linkid=830387
    "version": "0.2.0",
    "configurations": [
        {
            "name": "(gdb) 启动",
            "type": "cppdbg",
            "request": "launch",
            "program": "/home/sws/git/SimpleNetwork/example-server/server",
            "args": [],
            "stopAtEntry": false,
            "cwd": "${fileDirname}",
            "environment": [],
            "externalConsole": false,
            "MIMode": "gdb",
            "setupCommands": [
                {
                    "description": "为 gdb 启用整齐打印",
                    "text": "-enable-pretty-printing",
                    "ignoreFailures": true
                }
            ],
            "preLaunchTask":"make",
            "miDebuggerPath":"/usr/bin/gdb"
        }
    ]
}
? ? ? ? 其中需要修改的字段为:
? ? 1.program?要调试的程序名(包含路径,最好绝对路径,免得麻烦)
? ? 2.miDebuggerServerAddress?服务器的地址和端口 (本文没用到)
? ? 3.cwd?调试程序的路径
? ? 4.miDebuggerPath?gdb 的路径
? ? ? ? ? ?5.preLaunchTask 配置编译指令,指向task.json
三:增加task.json
{
    "version":"2.0.0",
    "tasks":[
        {
            "label":"make",
            "command":"make",
            "type":"process",
            "args":[],
            "problemMatcher":"$msCompile"
        }
    ]
}
? ? ? ? ?先执行task.json指定信息,进行编译。然后再执行launch.json进行调试。
四:gdb调试快捷键
????????工具栏从左到右依次代表:
????????????????继续 / 暂停?F5
????????????????跳过?F10
????????????????跳入?F11
????????????????跳出?Shift+F11
????????????????重启?Ctrl+Shift+F5
????????????????停止?Shift+F5
五:创建工程目录,编码Makefile文件,编译选项需要添加-g
? ? ? ? Makefile?example 1:
DEBUG=debug.elf
$(DEBUG):$(OBJS)
	g++ -Wall -o server server.cpp -I../src/ ../src/TCPServer.cpp ../src/TCPClient.cpp -std=c++11 -lpthread -g
all:
	g++ -Wall -o server server.cpp -I../src/ ../src/TCPServer.cpp ../src/TCPClient.cpp -std=c++11 -lpthread -g
? ? ? ? Makefile example 2:
TOOL_CHAIN_ROOT_DIR=/home/sws/gitee/lede_17.01/staging_dir
TOOL_CHAIN=${TOOL_CHAIN_ROOT_DIR}/toolchain-arm_cortex-a7+neon-vfpv4_gcc-5.4.0_musl-1.1.16_eabi/bin/
#export STAGING_DIR=${TOOL_CHAIN_ROOT_DIR}/toolchain-arm_cortex-a7+neon-vfpv4_gcc-5.4.0_musl-1.1.16_eabi/bin:$STAGING_DIR

CC=${TOOL_CHAIN}arm-openwrt-linux-muslgnueabi-gcc
CXX=${TOOL_CHAIN}arm-openwrt-linux-muslgnueabi-g++

#获取.cpp文件
SrcFiles=$(wildcard *.cpp)
#使用替换函数获取.o文件
ObjFiles=$(patsubst %.cpp,%.o,$(SrcFiles))
#生成的可执行文件
all:Robot
#目标文件依赖于.o文件
Robot:$(ObjFiles)
    ${CXX} -o $@ $(SrcFiles) -lpthread -std=c++0x -g -Wwrite-strings -I./
#.o文件依赖于.cpp文件,通配使用,一条就够
%.o:%.cpp
    ${CXX} -c $< -lpthread -std=c++0x -g -Wwrite-strings -I./
clean:
    rm -f *.o
    rm -f Robot
? ? ? ? Makefile example 3:
# C compiler options
CXX	= g++
#CFLAGS	= -g -O2
RELEASE	= release.elf
DEBUG	= debug.elf
PWD := $(shell pwd)
LIBS = -std=c++11 -lstdc++ -lnsl -lrt -L. \
		  -I $(PWD)/zookeeper/ \
		  -I $(PWD) \
		  -I $(PWD)/mysql/include/ \
		  -lmysqlclient -lm -lssl -lcrypto -lz -lpthread -lrt -ldl -lhiredis -g -o ClusterManager
INC	= ZookeeperLib.h
LD_LIBRARY_PATH=

# Source files
SRCS = main.cpp \
		redisLib.cpp \
		DataBase.cpp  \
		ZookeeperLib.cpp \
		LinuxPublicLibrary.cpp \
		strnormalize.cpp \
		libzookeeper.a \
		libhashtable.a \
		liblog4cplus.a \
		libssl.a \
		libcrypto.a \
		libmysqlclient.a

# Make everything
all:	$(RELEASE) $(DEBUG)

# Make the application
$(RELEASE): $(OBJS)
	$(CC) -o $(RELEASE) $(SRCS) $(LIBS)

$(DEBUG): $(OBJS)
	$(CC) -o $(DEBUG) $(SRCS) $(LIBS) -ggdb3

#
# Clean all object files...
#
clean:
	$(RM) $(DEBUG) $(RELEASE)