环境 :
- JAVA 1.8??
- IDEA
1.? 安装??
?github 地址? :?https://github.com/zhkl0228/unidbg
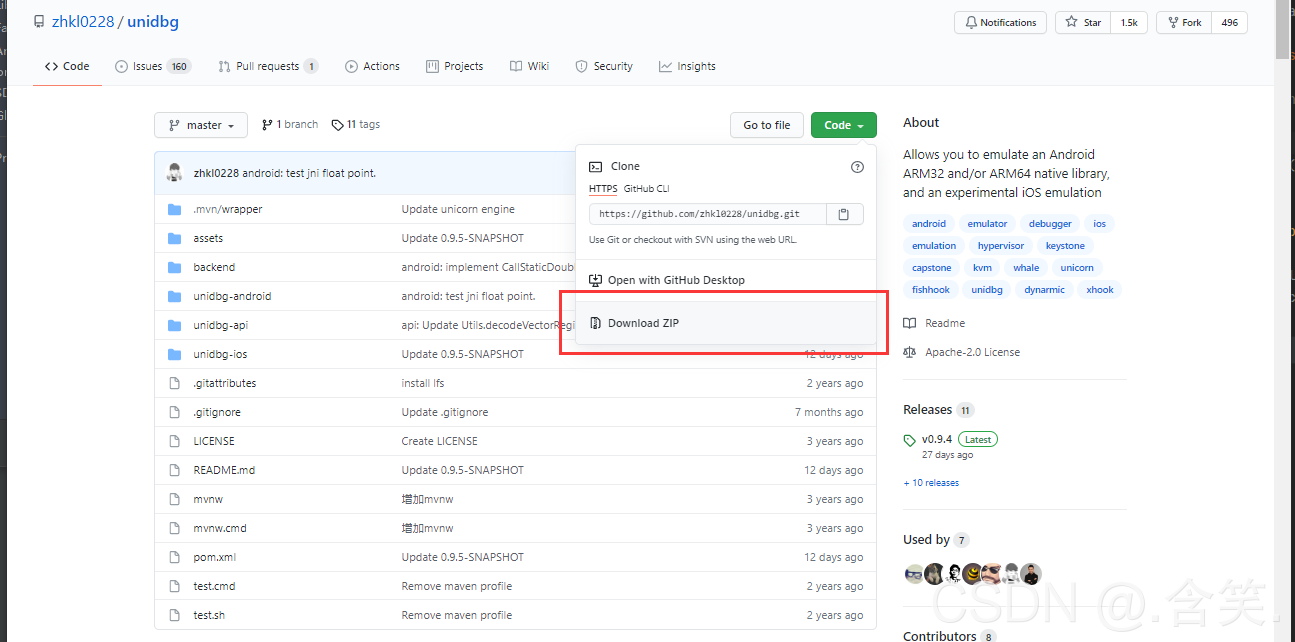
?把项目下载下来,使用 IDEA 打开项目,等待加载完
(注意看看java的版本吧,加载失败可以重新加载试试)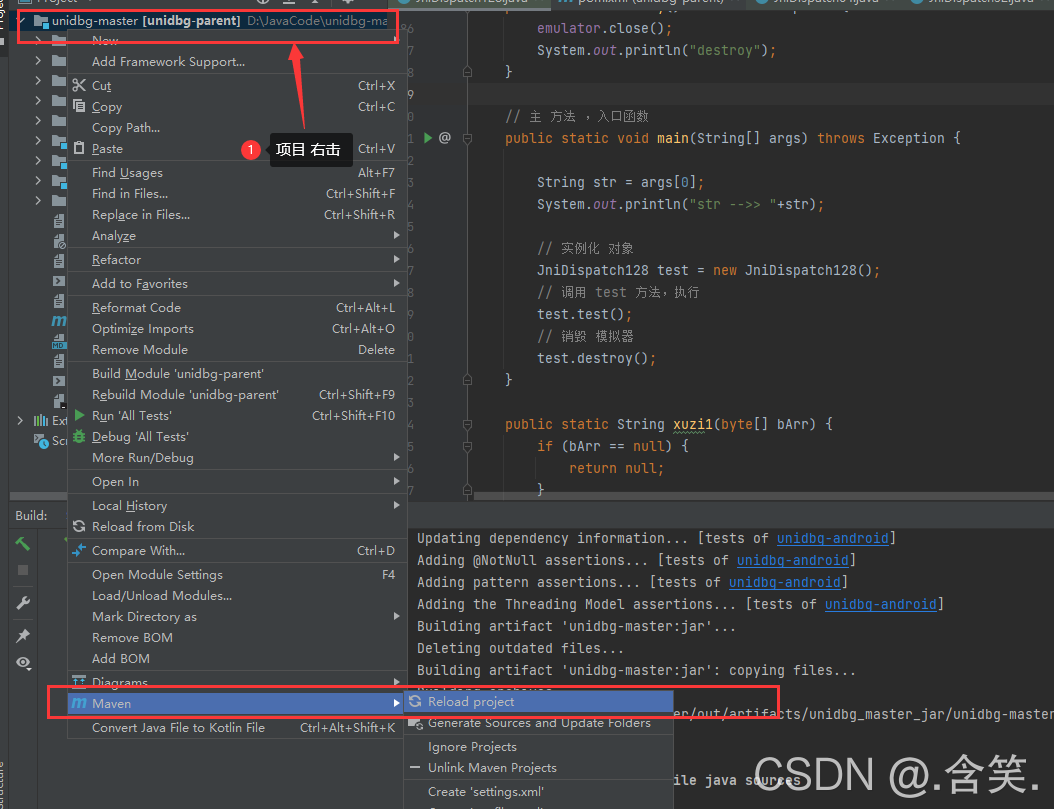
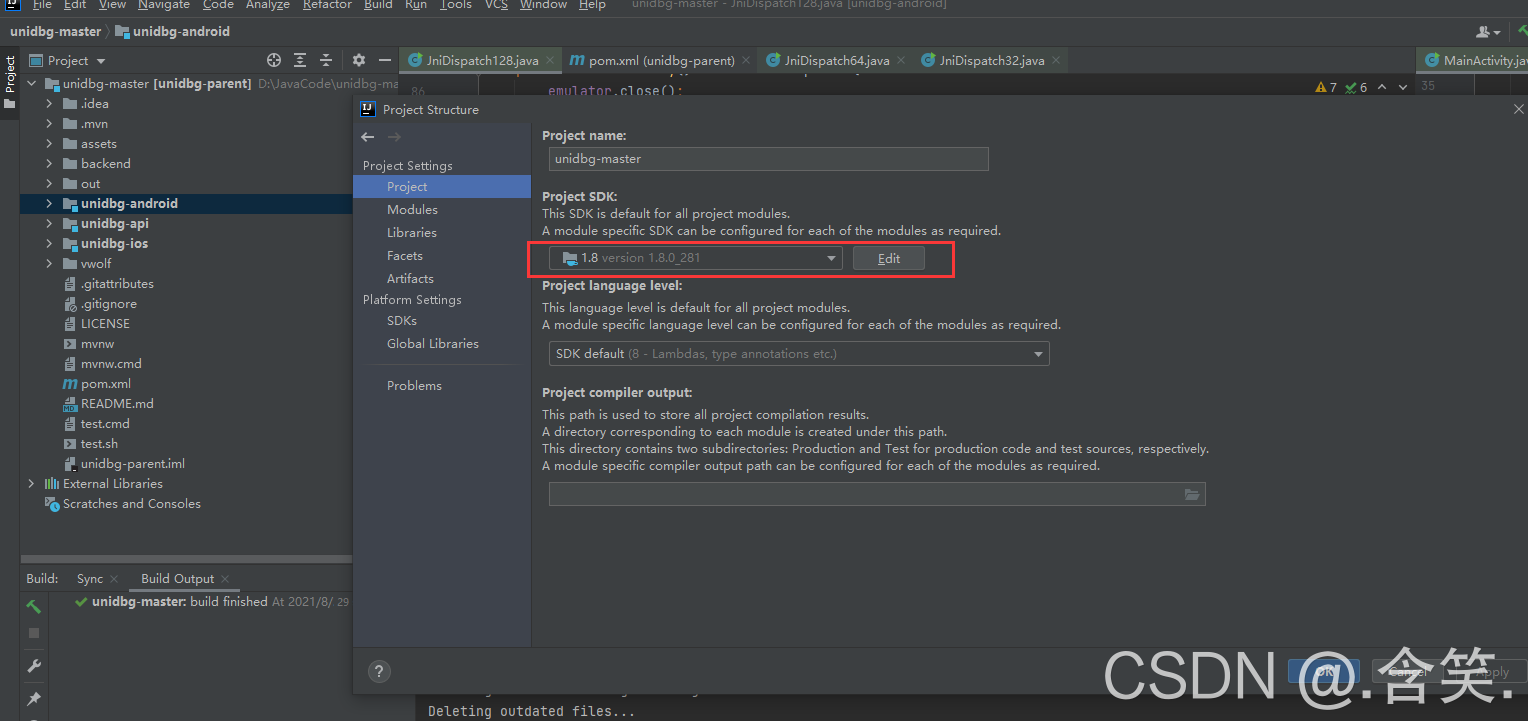
2.? 实践Code
首先 看到?unidbg-android/src/test/java/com/sun.jna 里面的 文件,这里是 32 和 64 的案例
可以模仿这 案例来学习?
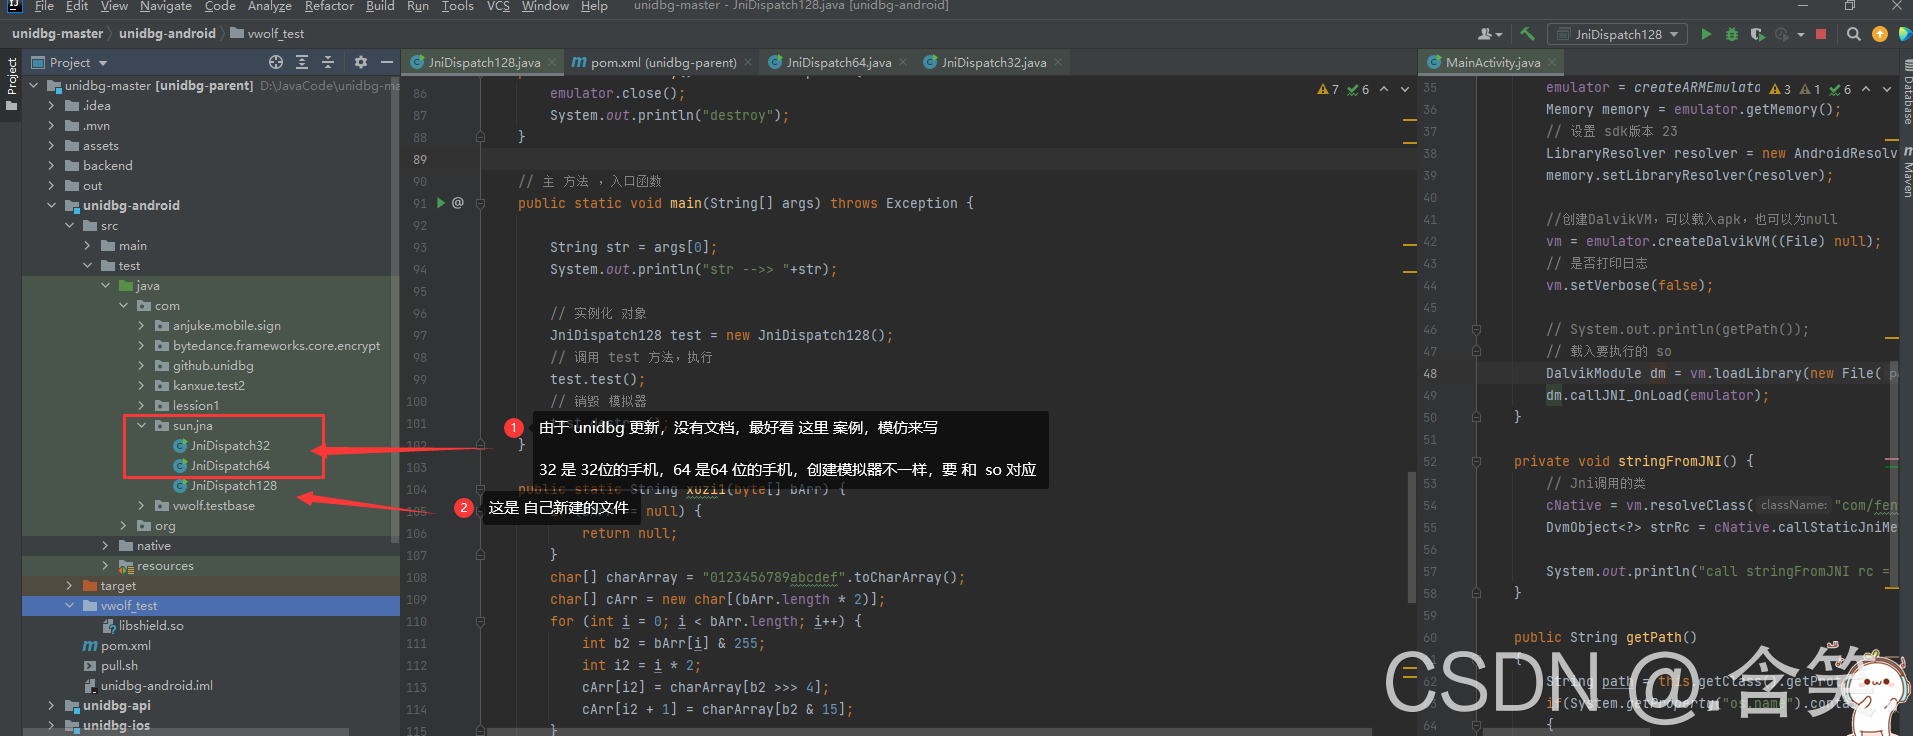
?这里的案例也是网上百度,模仿写的,能运行打包,出结果就可以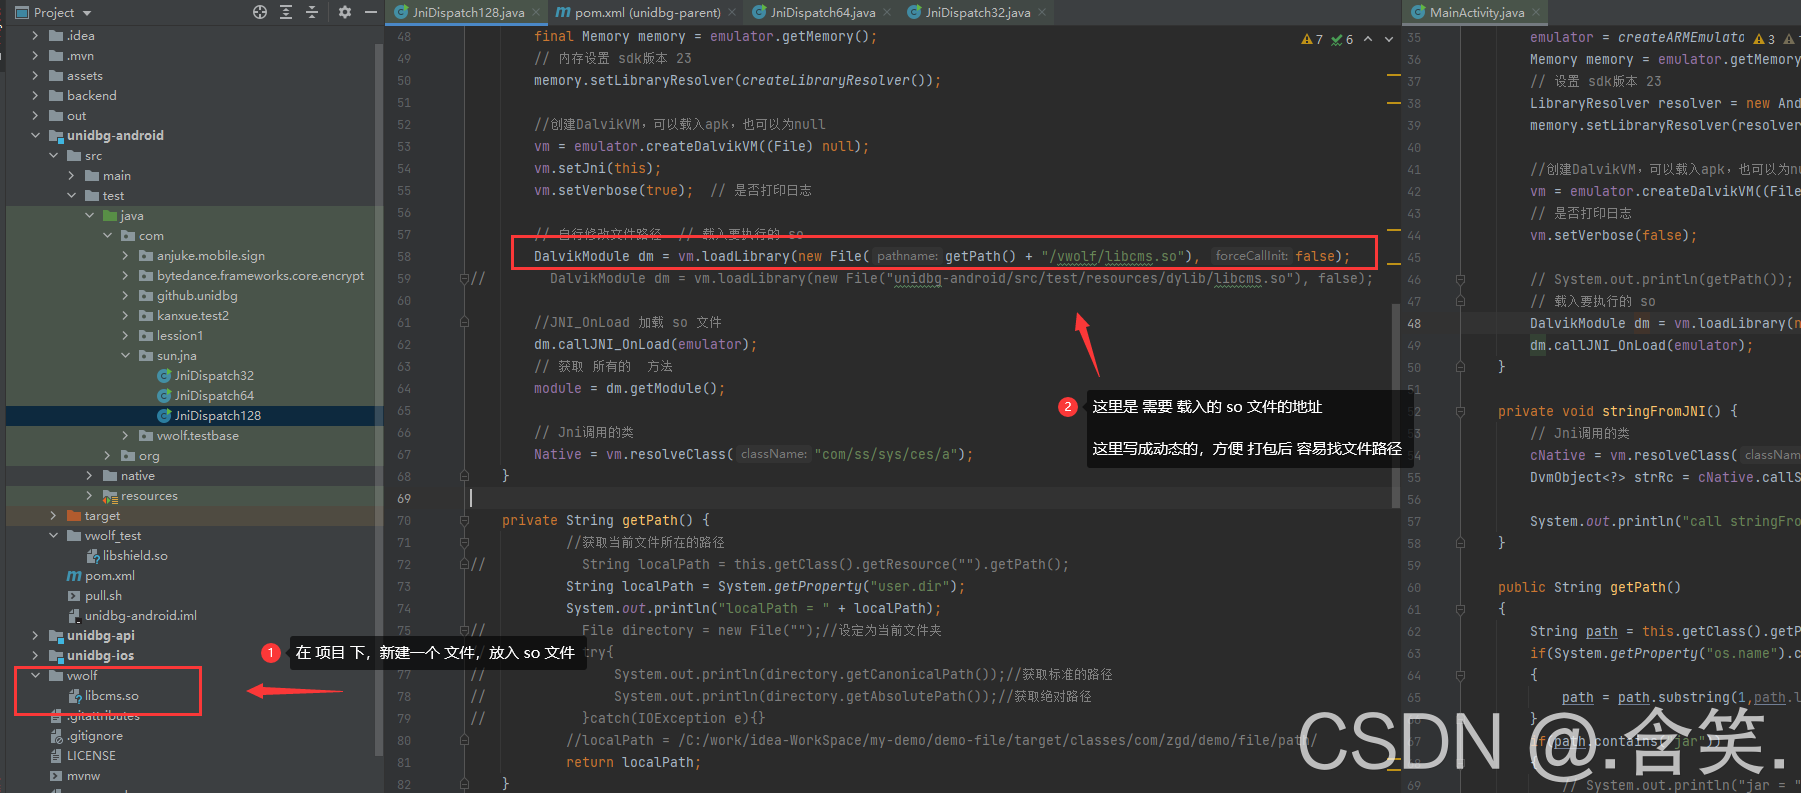
?代码 案例,自己可以换一个 so 文件 测试?
public class JniDispatch128 extends AbstractJni {

    private static LibraryResolver createLibraryResolver() {
        return new AndroidResolver(23);
    }


    // 创建模拟器实例,要模拟32位或者64位,在这里区分  for32Bit
    private static AndroidEmulator createARMEmulator() {
//        return new AndroidARMEmulator("com.sun.jna"); // "com.sun.jna"
        return AndroidEmulatorBuilder.for32Bit()
                .setProcessName("com.sun.jna")
                .addBackendFactory(new HypervisorFactory(true))
                .build();
    }

    private final AndroidEmulator emulator;
    private final Module module;
    private final VM vm;

    private final DvmClass Native;


    private JniDispatch128() throws IOException {


        // 插件模拟器 实例
        emulator = createARMEmulator();
        // 获取模拟器的内存
        final Memory memory = emulator.getMemory();
        // 内存设置 sdk版本 23
        memory.setLibraryResolver(createLibraryResolver());

        //创建DalvikVM,可以载入apk,也可以为null
        vm = emulator.createDalvikVM((File) null);
        vm.setJni(this);
        vm.setVerbose(true);  // 是否打印日志

        // 自行修改文件路径  // 载入要执行的 so
        DalvikModule dm = vm.loadLibrary(new File(getPath() + "/vwolf/libcms.so"), false);
//        DalvikModule dm = vm.loadLibrary(new File("unidbg-android/src/test/resources/dylib/libcms.so"), false);

        //JNI_OnLoad 加载 so 文件
        dm.callJNI_OnLoad(emulator);
        // 获取 所有的  方法
        module = dm.getModule();

        // Jni调用的类
        Native = vm.resolveClass("com/ss/sys/ces/a");
    }

    private String getPath() {
            //获取当前文件所在的路径
//            String localPath = this.getClass().getResource("").getPath();
            String localPath = System.getProperty("user.dir");
            System.out.println("localPath = " + localPath);
//            File directory = new File("");//设定为当前文件夹
//            try{
//                System.out.println(directory.getCanonicalPath());//获取标准的路径
//                System.out.println(directory.getAbsolutePath());//获取绝对路径
//            }catch(IOException e){}
            //localPath = /C:/work/idea-WorkSpace/my-demo/demo-file/target/classes/com/zgd/demo/file/path/
            return localPath;
    }

    // 销毁 模拟器
    private void destroy() throws IOException {
        emulator.close();
        System.out.println("destroy");
    }

    // 主 方法 ,入口函数
    public static void main(String[] args) throws Exception {

        String str = args[0];
        System.out.println("str -->> "+str);

        // 实例化 对象
        JniDispatch128 test = new JniDispatch128();
        // 调用 test 方法,执行
        test.test();
        // 销毁 模拟器
        test.destroy();
    }

    public static String xuzi1(byte[] bArr) {
        if (bArr == null) {
            return null;
        }
        char[] charArray = "0123456789abcdef".toCharArray();
        char[] cArr = new char[(bArr.length * 2)];
        for (int i = 0; i < bArr.length; i++) {
            int b2 = bArr[i] & 255;
            int i2 = i * 2;
            cArr[i2] = charArray[b2 >>> 4];
            cArr[i2 + 1] = charArray[b2 & 15];
        }
        return new String(cArr);
    }


    private void test() {
        String methodSign = "leviathan(II[B)[B";

        byte[] data = "暂时随便写的,这里是url经过处理后的data".getBytes();
        int time = (int) (System.currentTimeMillis() / 1000);

        Native.callStaticJniMethod(emulator, methodSign, -1,time,new ByteArray(vm,data));

        Object ret = Native.callStaticJniMethodObject(emulator, methodSign, -1,time,new ByteArray(vm,data));

        System.out.println("callObject执行结果:"+((DvmObject) ret).getValue());

        byte[] tt = (byte[]) ((DvmObject) ret).getValue();
        System.out.println(new String(tt));
        String s = xuzi1(tt);
        System.out.println(s);
    }
}
能运行就谢天谢地了
?运行后,就是想办法,打包成 jar?
3. 打包 jar?
? ? ?IDEA 找到 File → Project Structure …? 然后选择 Artifacts, 点加号 Add?

?注意 俩个勾选的地方? include tests 和 include in project build 编译?
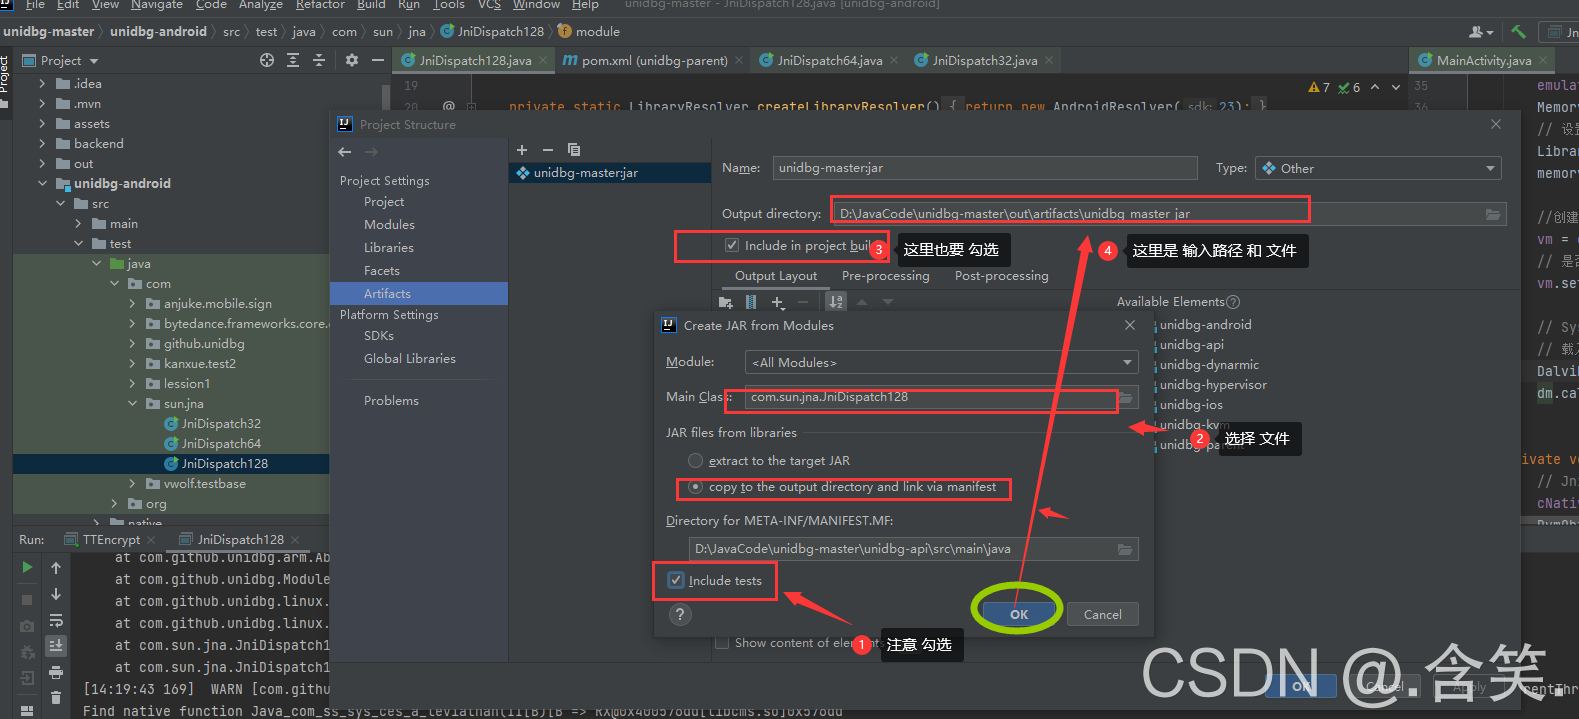
最后 点击运行 或 小绿锤子 ,会在输出文件夹出现很多 jar 文件?

使用 命令运行,完成没毛病

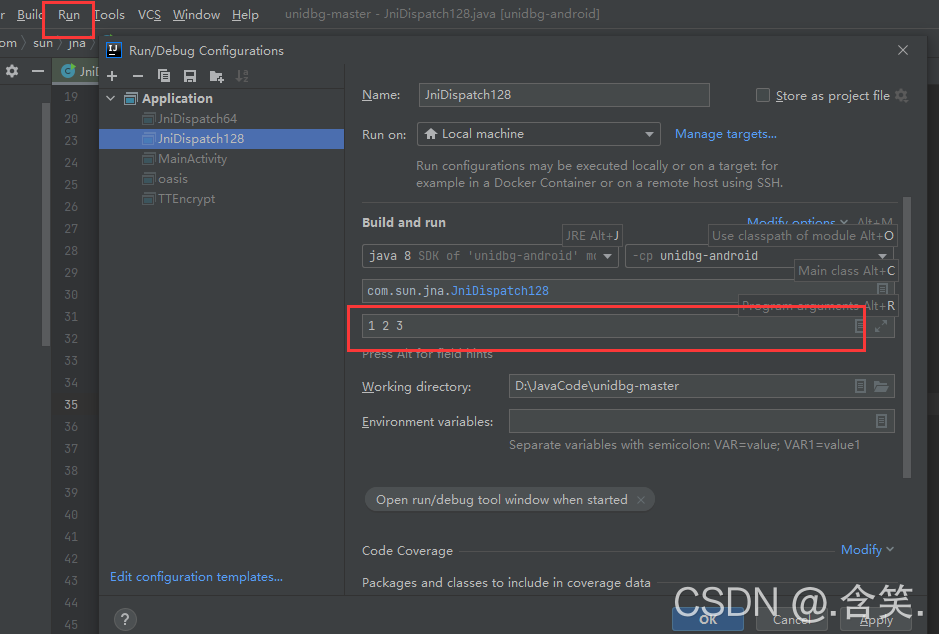
?想给启动程序传入参数,这时在 idea编译设置个参数
?首先 点击菜单 Run->Edit Configurations?
然后 在主类的Configuration -> Program arguments中输入你的参数,多个参数以空格分隔
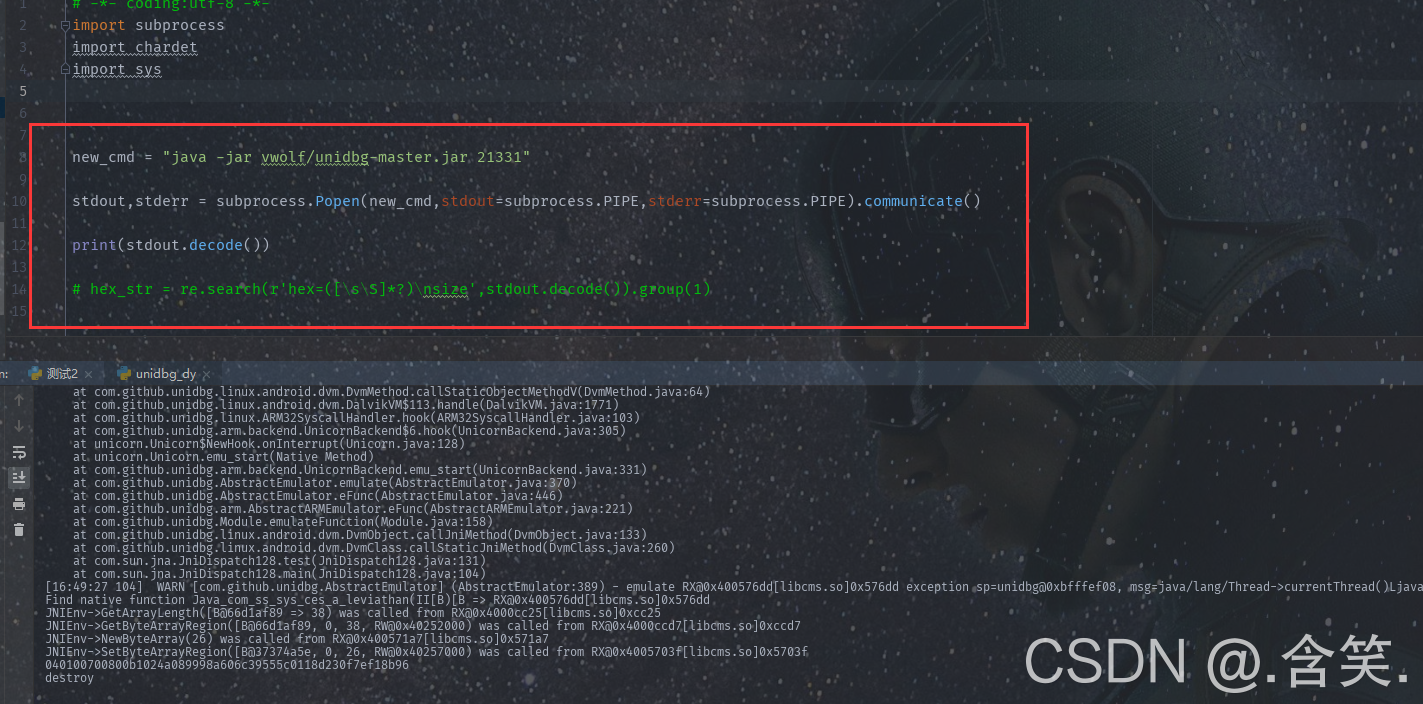
什么都配置好了,用Py执行jar获取返回值,运行完成,OK?
后面在想怎么部署到服务器吧,可以参考下面的文章
参考 :
- Unidbg使用?:https://code.newban.cn/151.html
- Unidbg使用?:https://www.jianshu.com/p/59e08e48ac20
- unidbg服务 :?https://github.com/cxapython/unidbg-server