����дĿ¼����
Git
Git���
**Git**����Linus Torvalds����,Linus������Linux����ϵͳ�����俪Դ,��������BitKeeper������ά��Linux�Ŀ�Դ���롣��2005��,BitKeeper����ҵ��˾��ֹ�˺�Linux�ں˿�Դ�����ĺ���������,Linus������Git���Թ���ά�����롣
Git ��Svn�Ա�
Svn
**Svn**�Ǽ���ʽ�汾��������,,ͨ�����÷�֧����ϵͳ�ĸ�Ч����,�����֮�������ڶ���˹�ͬ����ͬһ����Ŀ,ʵ�ֹ�����Դ,ʵ�����ռ���ʽ�Ĺ�����
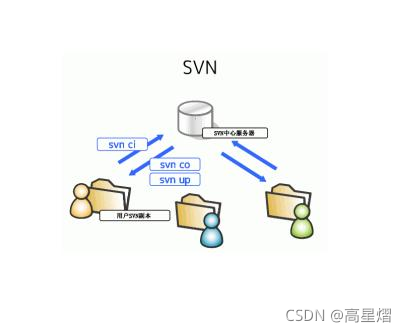
���й�����ʽ��һ���̶��Ͽ��Կ���������Ա�ڸ�ʲô,������Աҳ������������ÿ���˵Ŀ���Ȩ�ޡ�
����ͬʱ��ȱ��Ҳ��ʮ������:
- �������������
- �ݴ��Բ�
Git
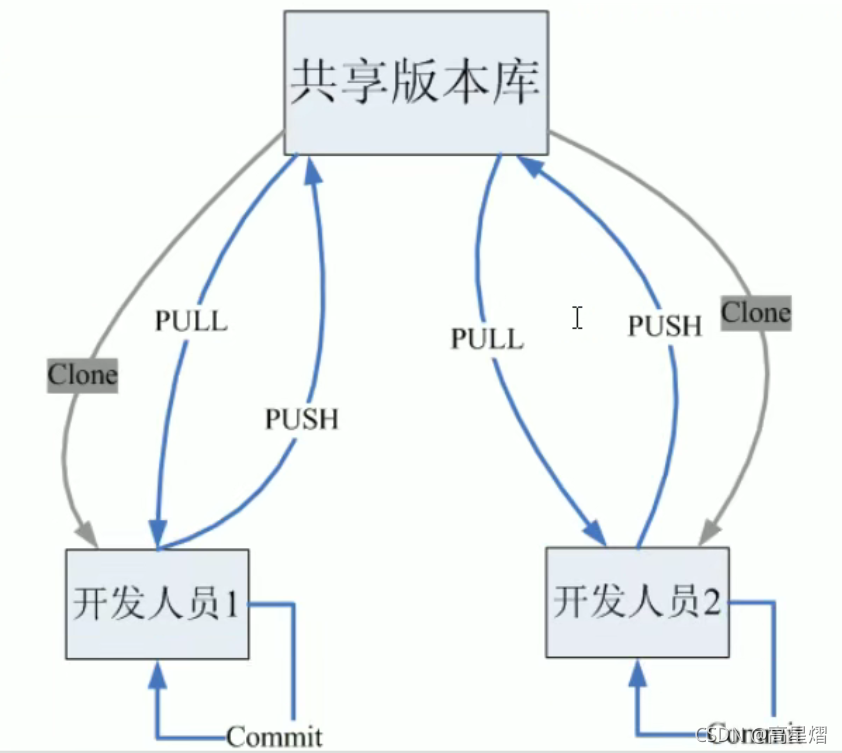
Git�Ƿֲ�ʽ�İ汾����ϵͳ,û�����������,ÿ���˵ĵ����϶���һ�������İ汾��(���زֿ�),����������ʱ��Ͳ���Ҫ�������ڶ���Э������,ÿ����ֻ�轫���Ե��Ĵ��ݴ����Է�,�Ϳ��Կ����Է������ˡ�
Git��������
һ�㹤����������:
- ��Զ�ֿ̲��п�¡Git��Դ��Ϊ���زֿ�
- �ӱ��زֿ���checkout����Ȼ���ֽ��д�����
- ���ύǰ�Ƚ������ύ���ݴ���
- �ύ�ġ��ύ�����زֿ⡣���زԿ��б����ĵĸ�����ʷ�汾
- ������ɺ�,��Ҫ���Ŷӳ�Ա��������ʱ,���Խ�����push��Զ�ֿ̲⡣

Git�İ�װ
Git��ʹ�÷���
�������زֿ�
�ڰ�װ��Git��,������Ҫ�ȴ������زֿ�(repository),��������Ҫ�����е��ļ����õ������½�������汾������,����Git������
�������زֿ�:mkdir �ֿ�����
������C���д���һ����Ϊ:firstProject�IJֿ�
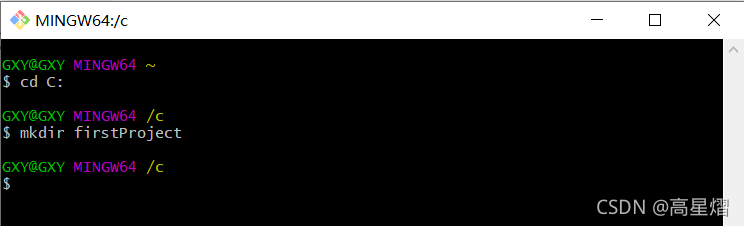
Ȼ�����ǾͿ�����C���п�������һ���յ��ļ���

Ȼ�����Ǿ�Ҫ������ļ���,���ó�Git���Թ����IJֿ⡣
������Ҫ��ʾ��ǰĿ¼
��ʾ��ǰĿ¼����:pwd
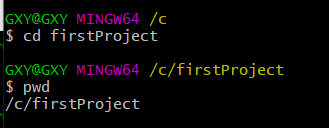
Ȼ��,����Ŀ¼����ΪGit�ɹ����ֿ�
����ǰĿ¼����ΪGit�ɹ����ֿ�:git init
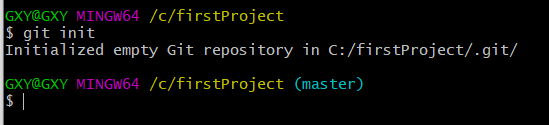
���������óɹ���,����ͼ,������ʹ��git init �����,�ڵ�ǰĿ¼�µõ���һ����ʼ�����һ����Ϊ��.git���IJֿ⡣
�����ļ���Git�ֿ�
Ҫ�����ļ�����Git�ֿ�
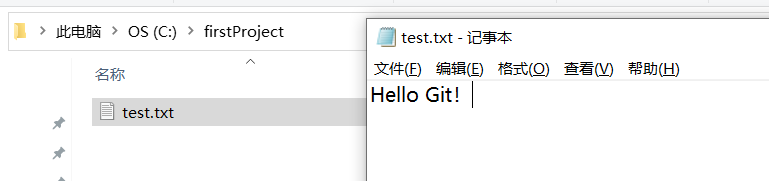
1. �ڲֿ�Ŀ¼���½��������ļ�
�ҵ����زֿ�,���������Ӵ�������ļ�
2. ���ļ��������ݴ���
���ļ������ݴ������� git add �ļ�

3. ���ļ��ύ���ֿ�
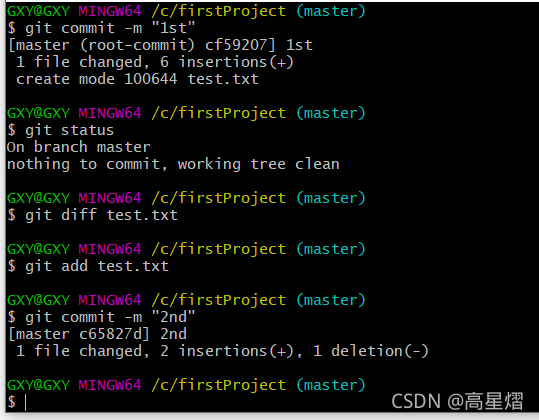
�ύ����:git commit
git commit -m ��XXX�� ���С�XXX�������ǶԱ����ύ��˵��,�����պ�����Լ��������Ķ�ʹ��
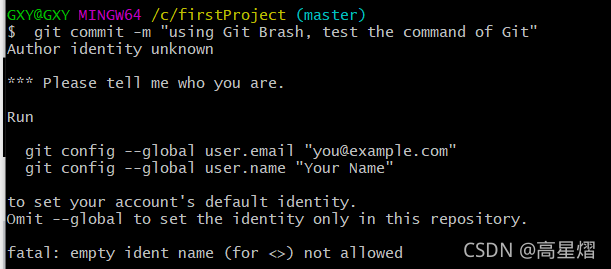
���������ڵݽ��ļ�ǰ����Ҫ����������������
��������
git config --global user.email ��XXX��
git config --global user.name"XXX"
������ɺ��ٵݽ��ļ�

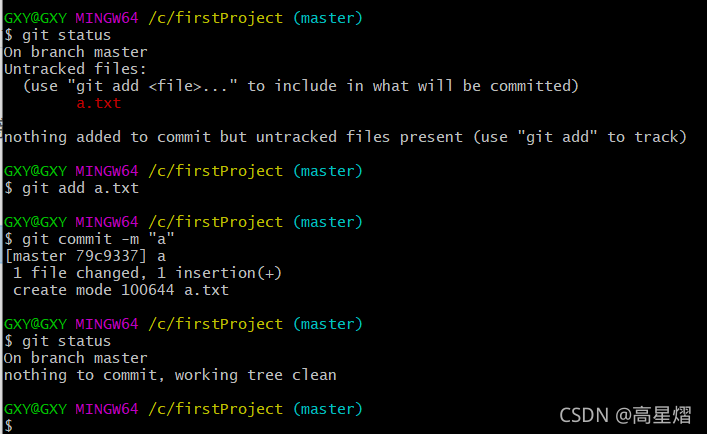
�ݽ��ɹ���,���ǿ���ͨ���鿴�ļ����ύ״��,������Ƿ����ļ�û���ύ
�鿴�ļ��ύ״��: git status

˵��û���ļ���Ҫ�ύ�ˡ�
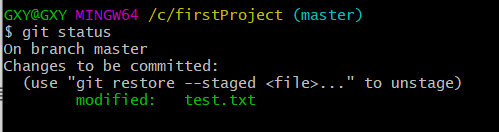
�������Ĺ��Ѿ��ϴ��ļ���,�ڲ鿴Git�ύ�ļ���״̬
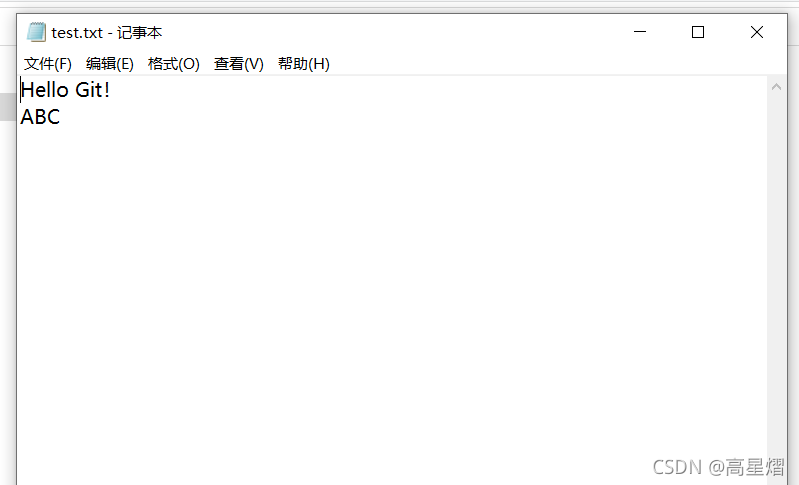
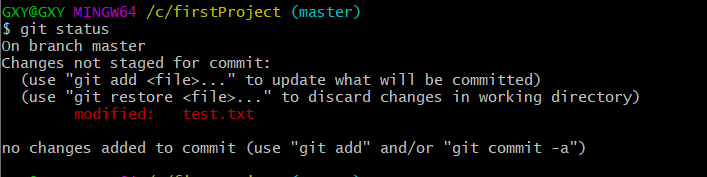
��������ļ�����,���IJ��ֻ����ݴ���δ���ύ��
�鿴�ļ�����(�ļ����IJ���): git diff �ļ�
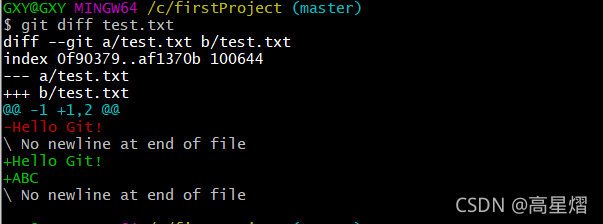
����Ϳ��Գ��ֳ������ĵIJ���,Ȼ��֪���IJ��ֺ�,�Ϳ��Խ����ٴ��ύ�ֿ��ˡ�
�汾����
Ԥ�ȶ�test.txt�ļ����м�����,ż�����������ͼ�ı���:

���index.lock�ļ�,���ڽ���ijЩ�ȽϷ�ʱ��git����ʱ�Զ�����,�����������Զ�ɾ��,�൱��һ�������ļ�,Ŀ�����ڷ�ֹ��һ��Ŀ¼ͬʱ���ж����������ʱ��ǿ�ƹرս����е�git������,����ļ�û�б��Զ�ɾ��,֮�������������git����,�����ֶ�ɾ����
�ֶ�ɾ��index.lock�ļ�:git clean -f .git/index.lock
�����ȶԸð汾���м�����
��һ�ι��̵�����������Ҫ��εķ�����һ���ļ�,���Կ��Զ汾����л�����ʮ����Ҫ�IJ���
���汾���˵���һ���汾: git reset --hard HEAD^
���汾���˵�����һ���汾: git reset --hard HEAD^^
����һ������

�鿴�汾����ʷ��¼��Ϣ: git log
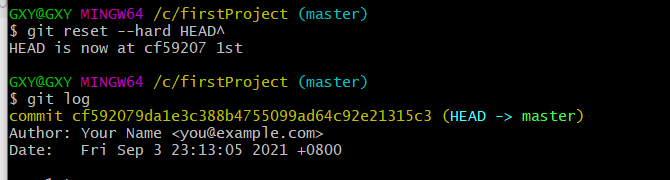
��ͼ��,���л��˲��������Ժ�,HEAD is now at cf59207 1st,���cf5927���ǰ汾��
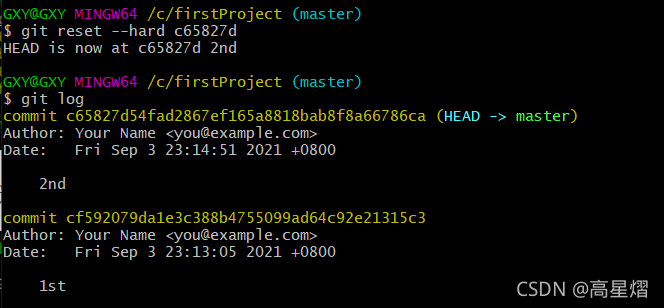
�鿴�汾��:git reflog

���ݰ汾��,���ǿ��������л��汾
�л�����Ӧ�汾�Ű汾:git reset --hard �汾��
Git�ij�ɾ�ļ�����
�����������Ҫ�汾�ļ�����ʱ,���ǿ��Բ�ȡ���ַ���:
- ֱ�Ӹ����ļ����ύ
- �汾����
- ʹ��Git������ļ�������
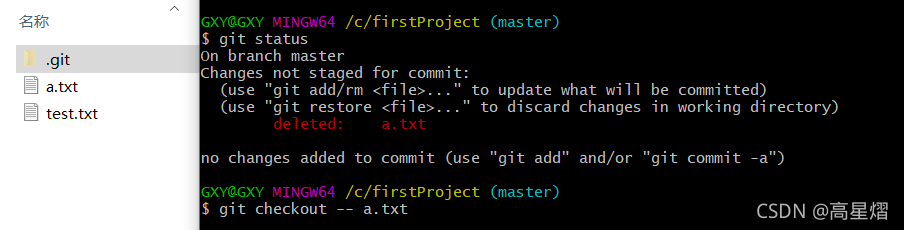
�����������ļ�
���Ƕ��ļ�����һЩ��
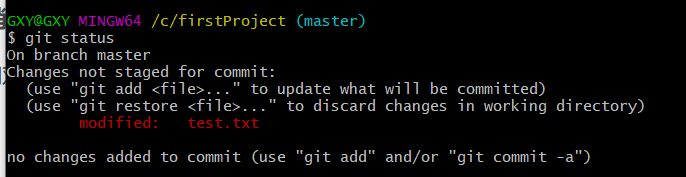
������˵��,�ļ��ѱ��ĵ�ʱ��δ���ύ���ݴ���,���ǿ��Զ�����г���������
�����������е��ļ���:git checkout �C �ļ�
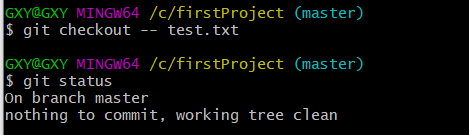
����������ɹ��ˡ�
�ļ�ɾ��
���ڲֿ����½�һ���µ��ļ�

Ȼ���ϴ�������
�Ƴ��汾�����ļ�:git rm �ļ�
��Ҫ����ɾ��,��Ҫ�Ƴ�����Ҫ�ٴ�commit�仯
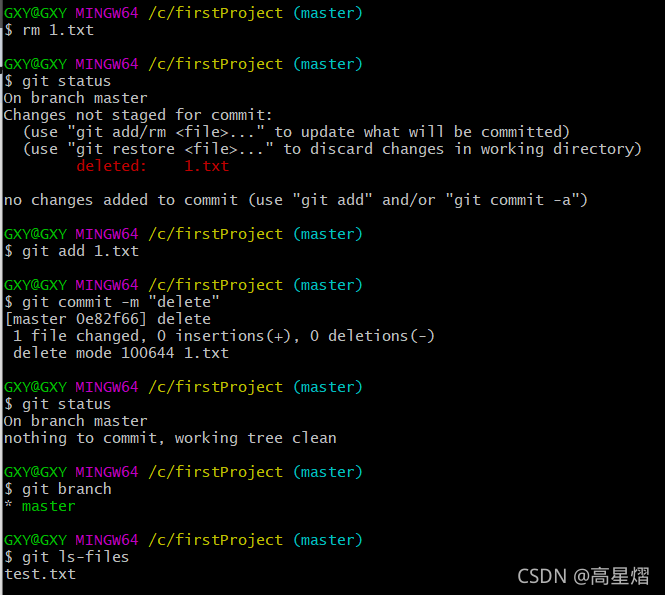
rm�Ƴ���git rm �Ƴ�������
������Ҫע�����:
���ʹ�� git rm �ļ� ��ʽɾ���ļ�,ɾ���������Ѿ������ݴ�����;���ʹ��rm �ļ� ����ɾ���Ļ�,�ò���������Git���ݴ���,��Ҫ�ύ�仯,Ҫ�Ƚ����ļ������ݴ�����
rm�Ƴ�
git rm �Ƴ�
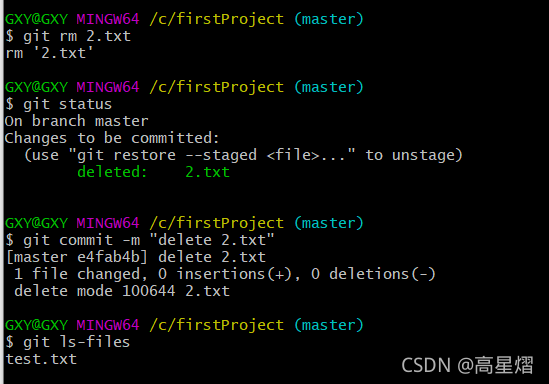
Ȼ��ͱ��Ƴ����ˡ�
���û�а��Ƴ��仯�ύ���ǿ��Իظ��ļ���ɾ��
�ָ�ɾ���ļ�(δ�ύ):git checkout �C �ļ�
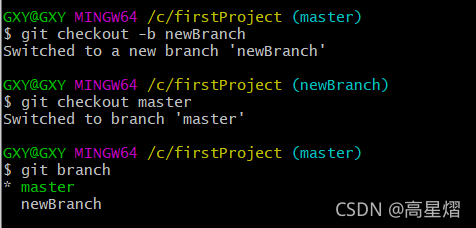
��֧
Git�ֿ��и��ַ�֧���ļ�����,���Լ���̶������ļ����������
������֧:git checkout -b �½���֧��
�л���֧:git checkout ��֧��
�鿴��֧:git branch
�鿴���з�֧: git branch -a
���·�֧���벢�ύ:
git add *
git commit -m ��init newBranch��
git push origin newBranch
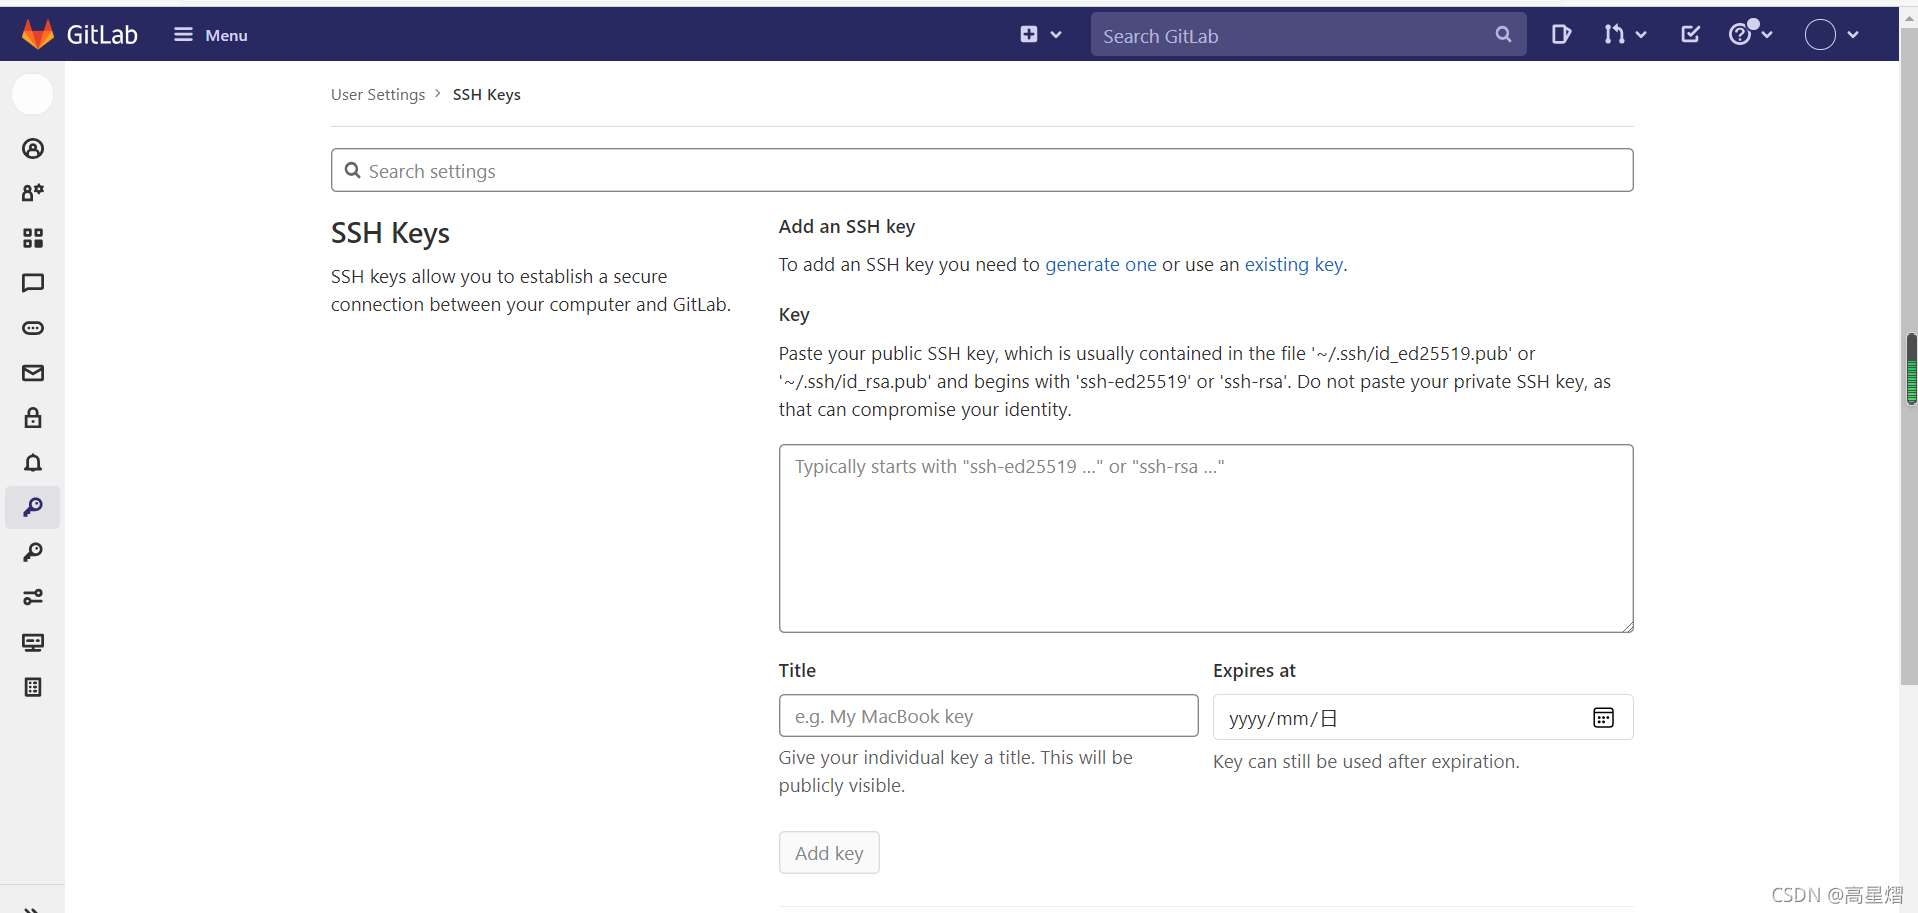
����Զ�̿�
ʹ��Git��������Github��GitLab������һЩԶ�ֿ̲�,���ڱ��زֿ��Զ�ֿ̲�֮������ݴ�������SSH����,������ʹ��ǰӦ������Զ�ֿ̲������ӱ���Git��SSH��Կ
�鿴SSH��Կ:ssh-keygen -t rsa -C ��youemail@example.com��
�õ���Կ��,�ٰ�SSH��Կճ����Զ�ֿ̲�
Ȼ��Ϳ����������¡��ı��ذ汾���ˡ�
