gitlab
GitLab
最初,该产品名为GitLab,是完全免费的开源软件,按照MIT许可证分发。
2013年7月,产品被拆分为:GitLabCE(社区版)和GitLabEE(企业版),当时,GitLabCE和GitLabEE的许可仍然是根据MIT许可分发的免费和开源软件。
GitLab原理:
GitLab是一个用于仓库管理系统的开源项目,使用Git作为代码管理工具,并在此基础上建立的web服务.
其实说直白点,他就是个git服务器,和github差不多,只不过,这个gitlab可以下载到本地进行搭建,代码存在本地服务器上,而不是远端的github上。

| 对比 | GitLab | GitHub |
|---|---|---|
| 安全性 | 代码存在本地,自行管控 | 代码存在远端,厂商管控 |
| 私密性 | 代码能见度自行设定 | 免费的代码开放,付费的代码隐藏 |
| 成本 | 运维成本 | 代码隐藏 |
综上所述
 要是企业中有服务器,建议搭建gitlab,毕竟代码放到自己这里安心些.
 当然要是公司写的代码不重要的话,可以放到免费版的github上
Git,GitLab,GitHub,Gittee到底是什么?
 git 是一种版本控制系统,是一个命令,是一种工具
 github 是一个基于git实现在线代码托管的仓库,向互联网开放,企业版要收钱
 gitee 类似github,一般在企业内搭建git私服,要自己搭建环境
 git-ce 是社区版,gitlab-ee是企业版,要收费.
GitHub、GitLab 不同点:
GitHub如果使用私有仓库,是需要付费的,GitLab可以在上面搭建私人的免费仓库。
GitLab让开发团队对他们的代码仓库拥有更多的控制,相对于GitHub,它有不少的特色:
- 1 允许免费设置仓库权限
- 2 允许用户选择分享一个project的部分代码
- 3 允许用户设置project的获取权限,进一步提升安全性
- 4 可以设置获取到团队整体的改进进度
- 5 通过innersourcing让不在权限范围内的人访问不到该资源
GitLab部署
环境说明
| 主机名 | ip | 系统 |
|---|---|---|
| server | 192.168.58.110 | Contos7 |
关闭防火墙
[root@server~ ]# systemctl disable --now firewalld
[root@server ~]# setenforce 0

安装git
[root@server~ ]# yum -y install epel-release git

安装依赖包
[root@server~ ]# yum -y install curl openssh-server openssh-clients postfix cronie policycoreutils-python

启动postfix
[root@server~ ]# systemctl enable --now postfix
Created symlink /etc/systemd/system/multi-user.target.wants/postfix.service → /usr/lib/systemd/system/postfix.service.

下载gitlab的rpm包
wget https://mirrors.tuna.tsinghua.edu.cn/gitlab-ce/yum/el7/gitlab-ce-14.3.2-ce.0.el7.x86_64.rpm

安装
[root@server~ ]# rpm -ivh gitlab-ce-14.3.2-ce.0.el8.x86_64.rpm

警告:gitlab-ce-14.3.2-ce.0.el8.x86_64.rpm: 头V4 RSA/SHA256 Signature, 密钥 ID f27eab47: NOKEY
Verifying...                          ################################# [100%]
准备中...                          ################################# [100%]
正在升级/安装...
   1:gitlab-ce-14.3.2-ce.0.el8        ################################# [100%]
It looks like GitLab has not been configured yet; skipping the upgrade script.

       *.                  *.
      ***                 ***
     *****               *****
    .******             *******
    ********            ********
   ,,,,,,,,,***********,,,,,,,,,
  ,,,,,,,,,,,*********,,,,,,,,,,,
  .,,,,,,,,,,,*******,,,,,,,,,,,,
      ,,,,,,,,,*****,,,,,,,,,.
         ,,,,,,,****,,,,,,
            .,,,***,,,,
                ,*,.


     _______ __  __          __
    / ____(_) /_/ /   ____ _/ /_
   / / __/ / __/ /   / __ `/ __ \
  / /_/ / / /_/ /___/ /_/ / /_/ /
  \____/_/\__/_____/\__,_/_.___/


Thank you for installing GitLab!
GitLab was unable to detect a valid hostname for your instance.
Please configure a URL for your GitLab instance by setting `external_url`
configuration in /etc/gitlab/gitlab.rb file.
Then, you can start your GitLab instance by running the following command:
  sudo gitlab-ctl reconfigure

For a comprehensive list of configuration options please see the Omnibus GitLab readme
https://gitlab.com/gitlab-org/omnibus-gitlab/blob/master/README.md

修改配置文件
[root@server~ ]# vim /etc/gitlab/gitlab.rb
external_url 'http://192.168.58.10'   /将此处设为gitlab的服务器ip地址亦或域名

重载配置文件并重启gitlab
[root@server~ ]# gitlab-ctl reconfigure
[root@server~ ]# gitlab-ctl restart

#查看当前gitlab版本
[root@server~ ]# head -1 /opt/gitlab/version-manifest.txt
gitlab-ce 14.3.2

#gilab密码存放位置
[root@server~ # vim /etc/gitlab/initial_root_password

# WARNING: This value is valid only in the following conditions
#          1. If provided manually (either via `GITLAB_ROOT_PASSWORD` environment variable or via `gitlab_rails['initial_root_password']` setting in `gitlab.rb`, it was provided before database was seeded for the first time (usually, the first reconfigure run).
#          2. Password hasn't been changed manually, either via UI or via command line.
#
#          If the password shown here doesn't work, you must reset the admin password following https://docs.gitlab.com/ee/security/reset_user_password.html#reset-your-root-password.

Password: ySZB0NeTyAbfZUNfy0mcdYnYuTzvtiZjIRckDGl/6tc=    //将此密码设置为你自己想设置的密码
gitlab管理
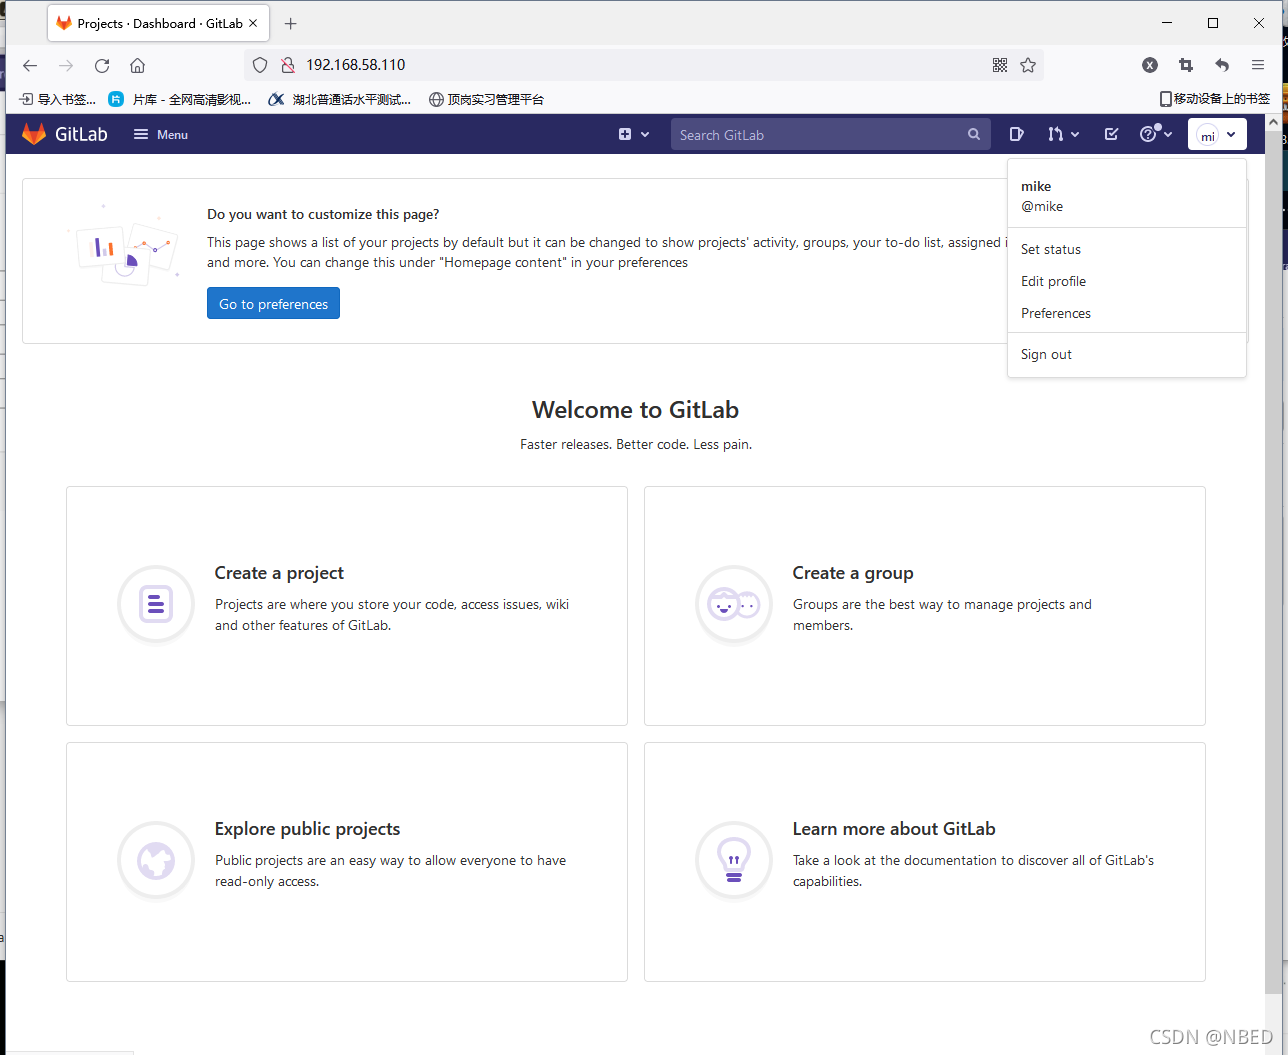
在浏览器中使用gitlab服务器的ip访问

主页

GitLab页面操作
web主页

Menu菜单选项主要是方便与多个页面的切换

User 用户
创建用户

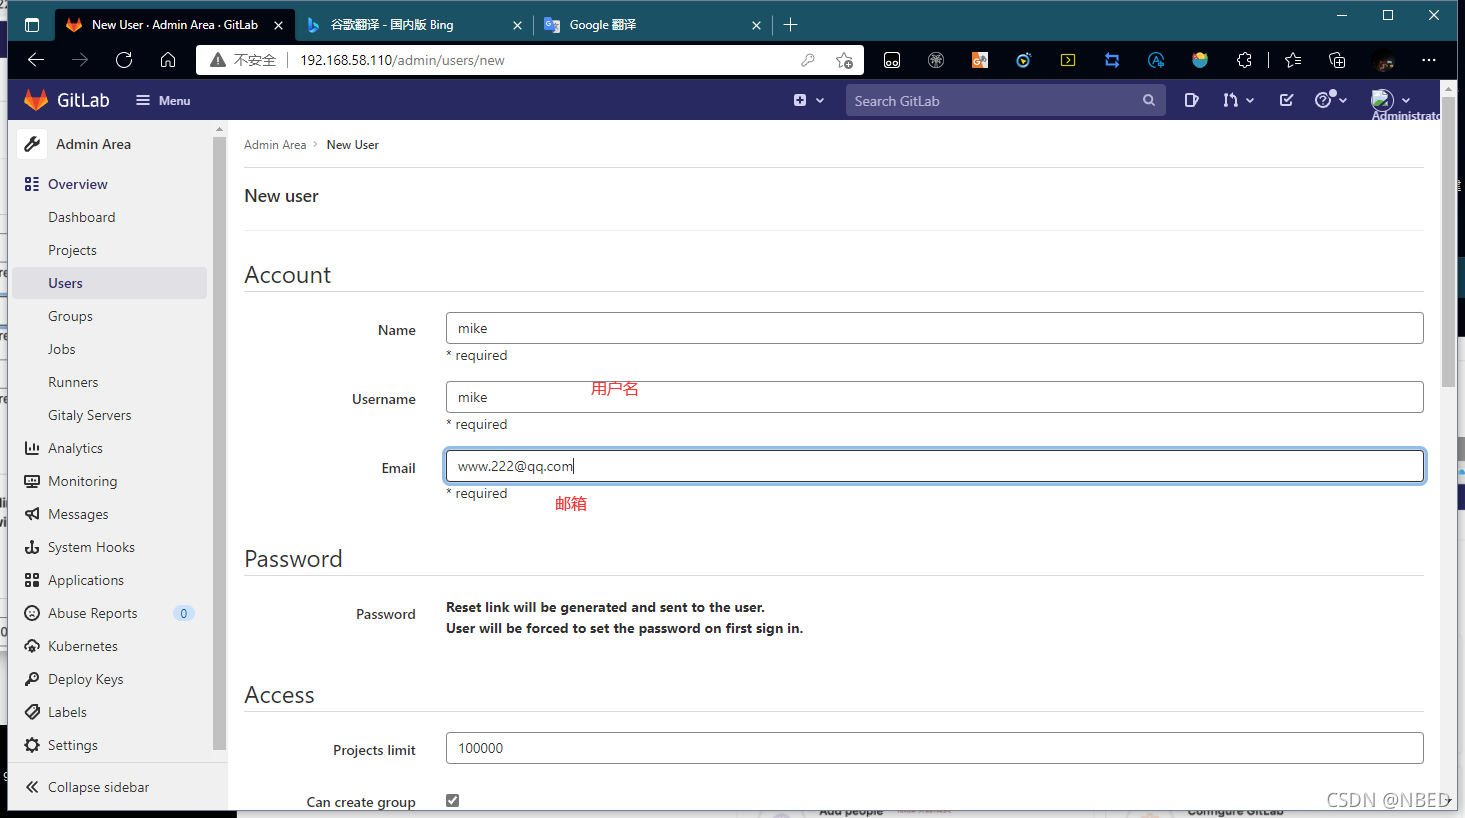


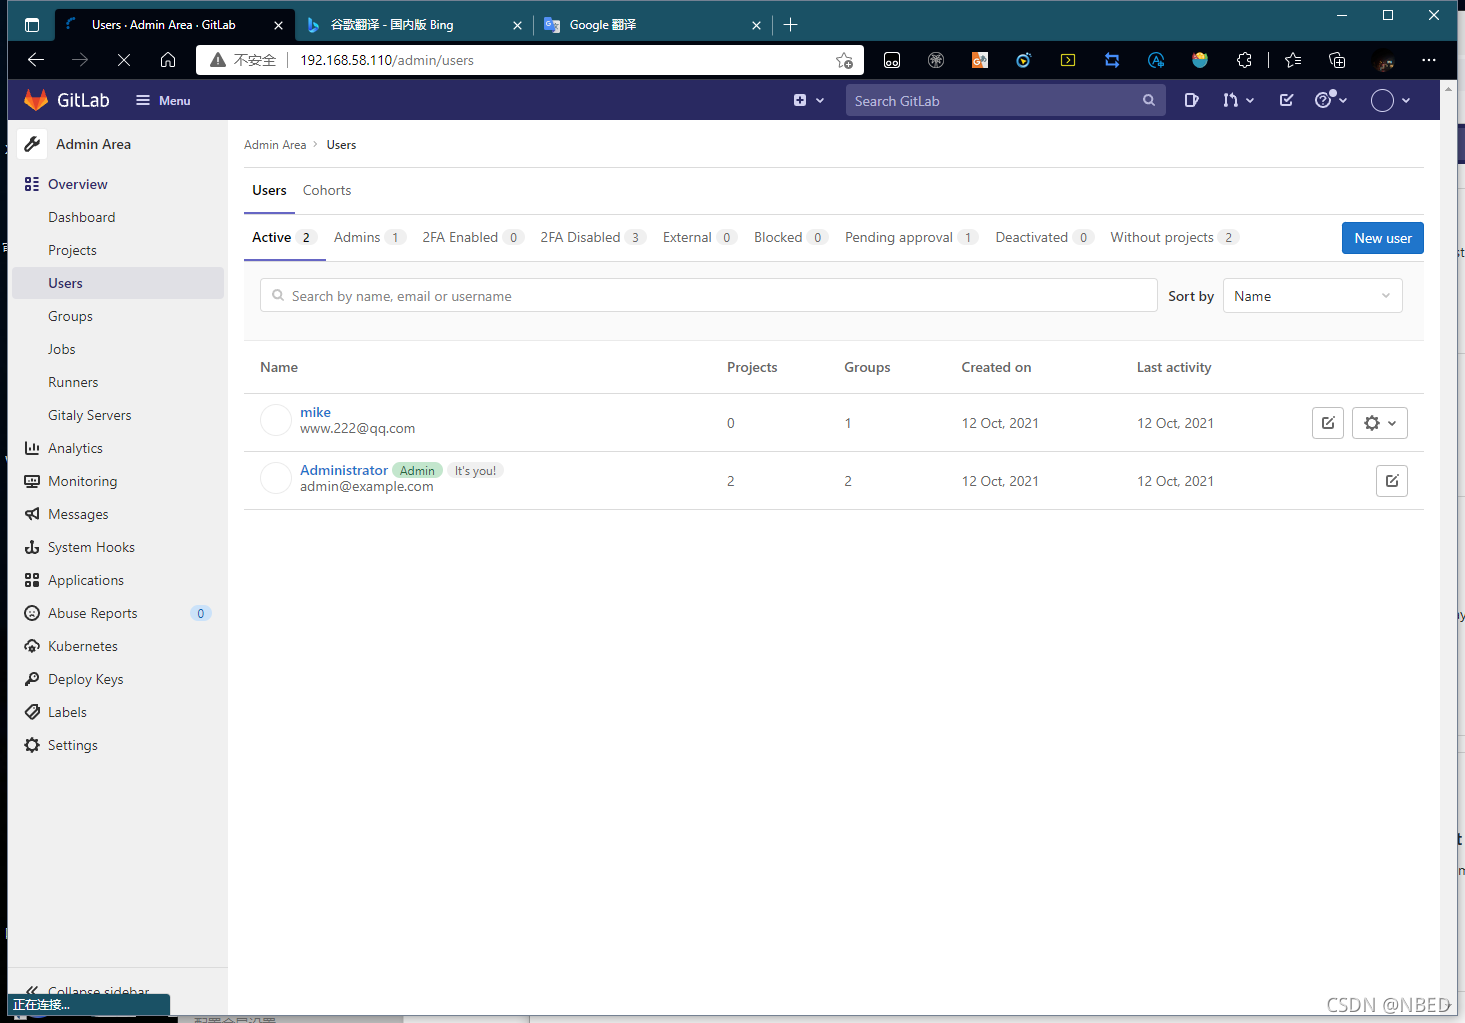
在创建mike用户过程中无法设置密码需要创建完成后,在User设置中单独设置


设置密码后再创建一个组
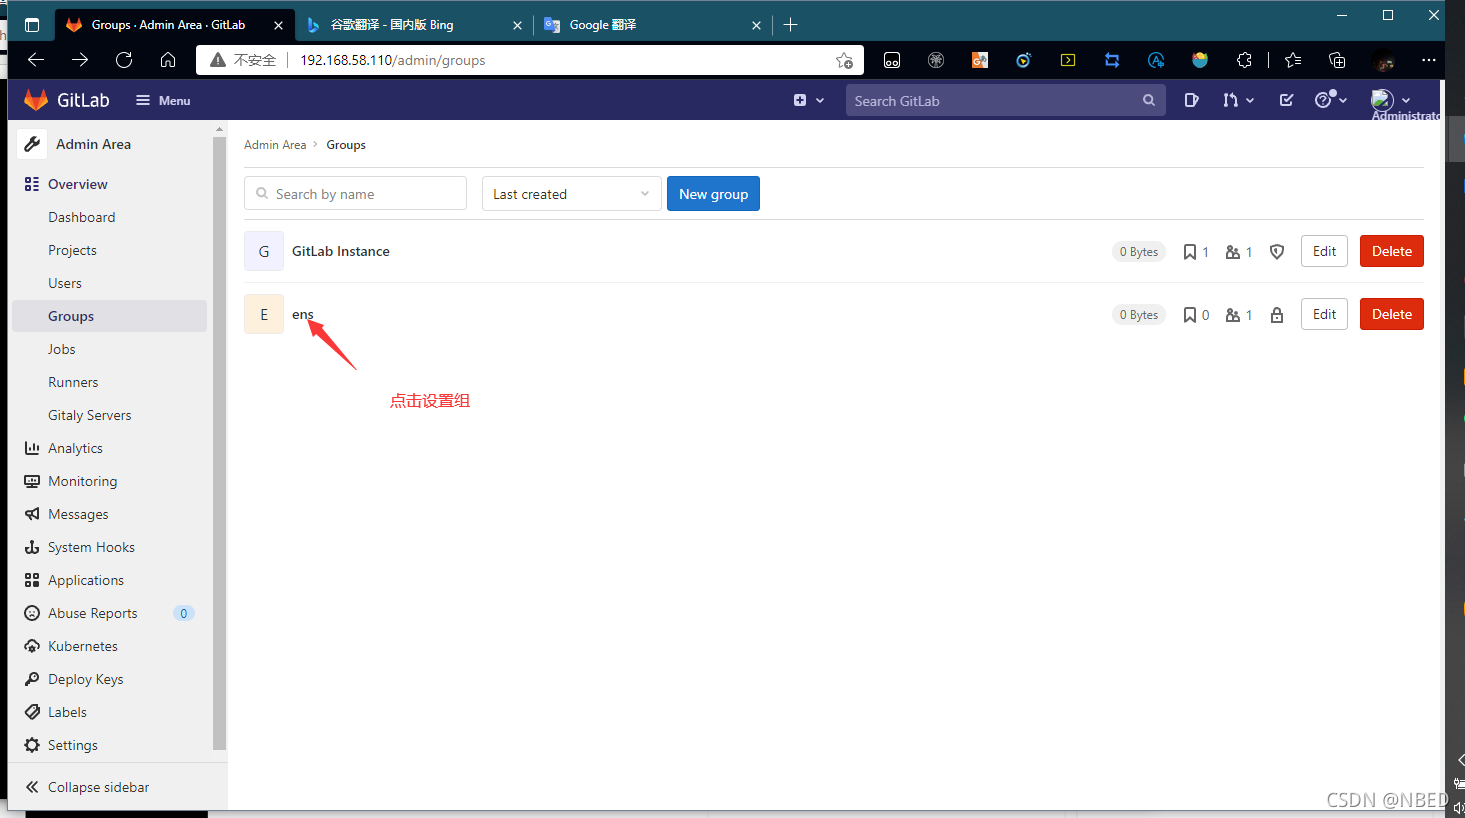
Groups 组


创建ens组完成后再将mike用户添加至ens组中


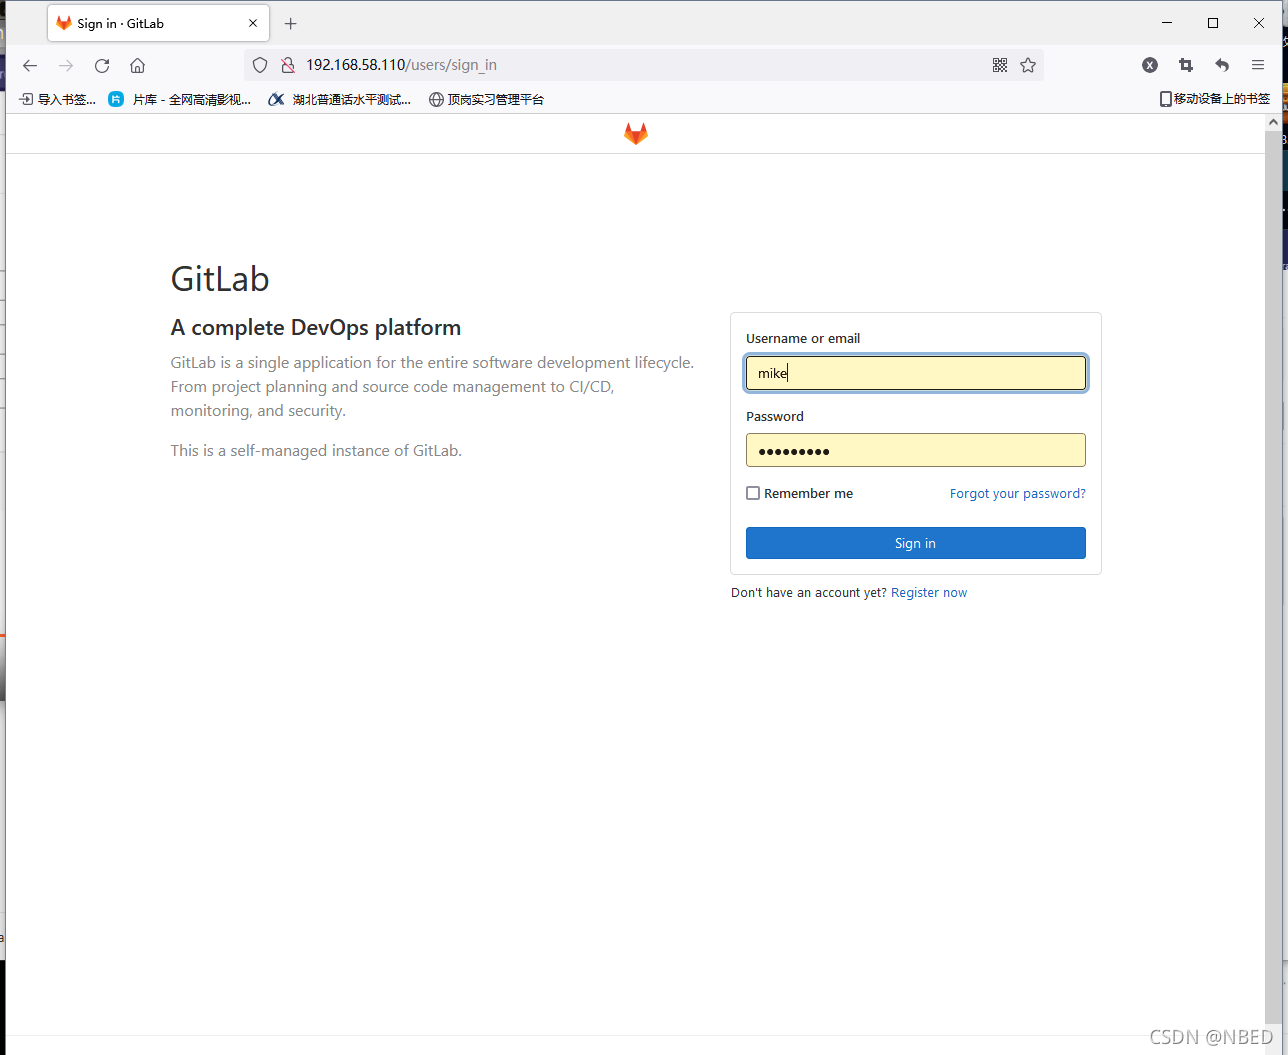
当mike在ens组中后便可以通过mike用户来登录GitLab web界面


修改密码后再进行登录
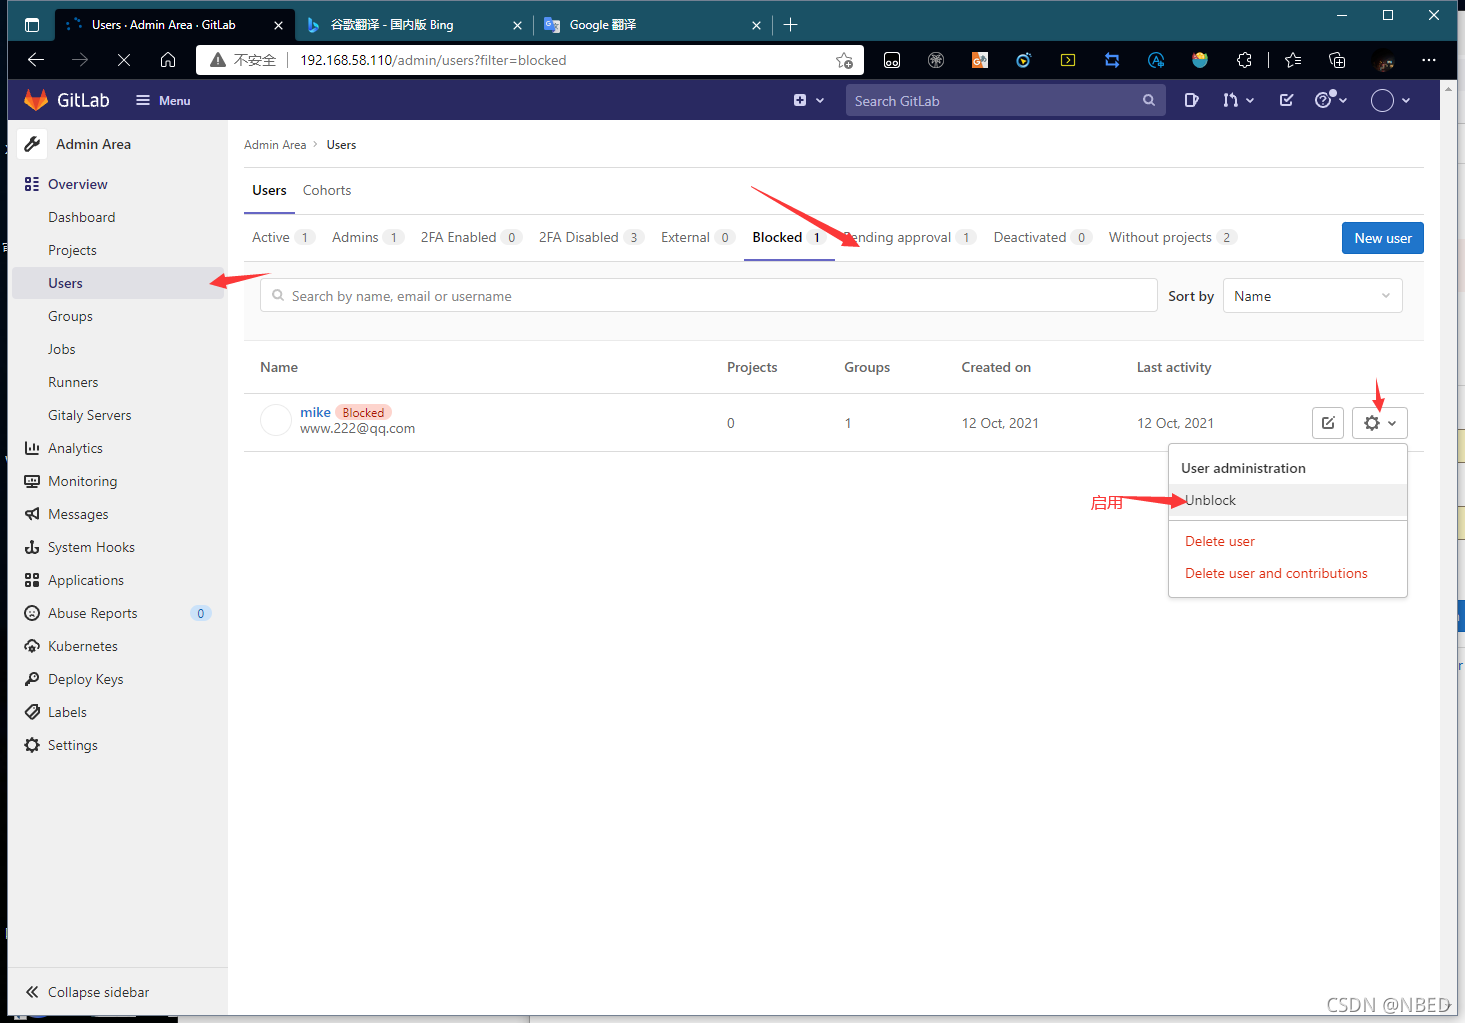
禁用用户


再启用

项目管理


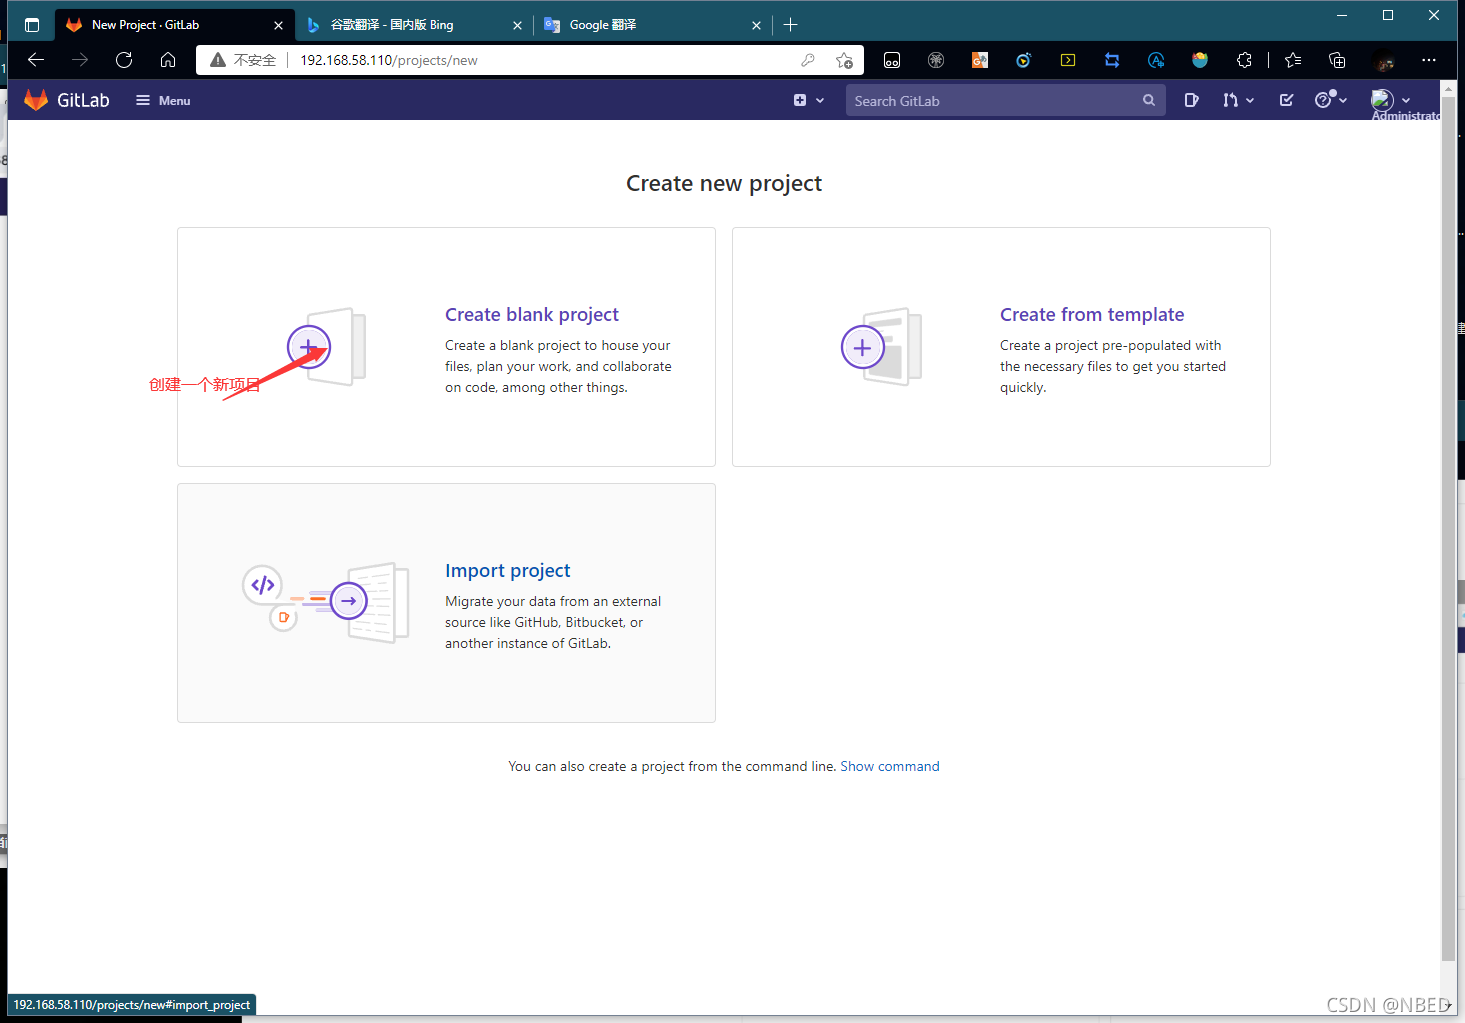
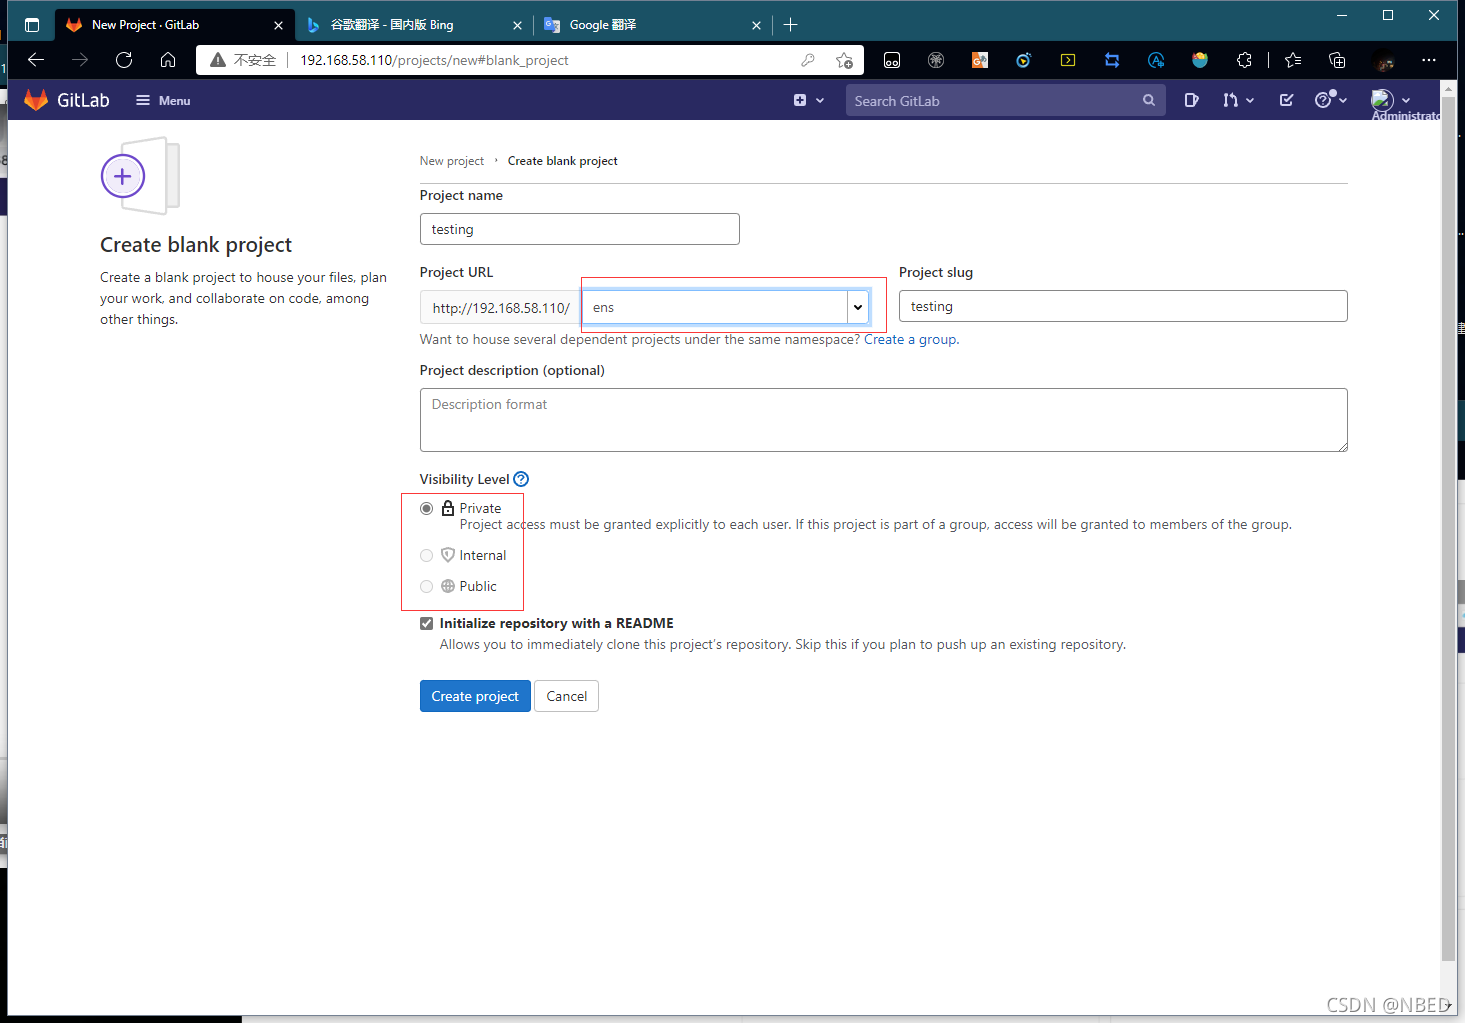
使用root用户和普通用户创建的项目的对比
使用root创建时可以设置项目的类型;可以设置为 私密、内部、公开三种

使用普通用户mike创建项目则不能选择
我们使用root用户来创建项目来实现项目的上传

将项目链接复制到目标主机上来克隆项目

拉取项目
[root@localhost ~]# git clone http://192.168.58.110/root/testing.git
正克隆到 'testing'...
warning: 您似乎克隆了一个空版本库。
[root@localhost ~]# cd testing/
[root@localhost testing]# ls -a
.  ..  .git

配置全局设置
[root@localhost ~]# git config --global user.name "Administrator"
[root@localhost ~]# git config --global user.email "admin@example.com"

创建一个新的存储库
[root@localhost ~]# cd testing/
[root@localhost testing]# ls
[root@localhost testing]# git switch -c main
切换到一个新分支 'main'
[root@localhost testing]# touch README.md
[root@localhost testing]# ls
README.md

//提交
root@localhost testing]# git commit -m "add README"
[main(根提交) 78a3a16] add README
 Committer: root <root@localhost.localdomain>
您的姓名和邮件地址基于登录名和主机名进行了自动设置。请检查它们正确
与否。您可以对其进行设置以免再出现本提示信息。运行如下命令在编辑器
中编辑您的配置文件:

    git config --global --edit

设置完毕后,您可以用下面的命令来修正本次提交所使用的用户身份:

    git commit --amend --reset-author

 1 file changed, 0 insertions(+), 0 deletions(-)
 create mode 100644 README.md

//上传项目
[root@localhost testing]# git push -u origin main
Username for 'http://192.168.58.110': root
Password for 'http://root@192.168.58.110':
枚举对象: 3, 完成.
对象计数中: 100% (3/3), 完成.
写入对象中: 100% (3/3), 215 字节 | 215.00 KiB/s, 完成.
总共 3(差异 0),复用 0(差异 0),包复用 0
To http://192.168.58.110/root/testing.git
 * [new branch]      main -> main
分支 'main' 设置为跟踪来自 'origin' 的远程分支 'main'。
当通过目标主机上传后,刷新页面发现项目中已经有了新的项目

但如何将mike 用户也能加入到项目当中来呢?
我们通过以下操作能够实现:
1.进入项目选项卡,找到testing项目,点击设置

2.进入到项目设置页面,从左边的 设置菜单中找到,项目信息选项,点击它时会弹出三个选项,选择最底下“成员”的选项

进入到成员选项时,便将mike用户添加至项目中如下图:

添加成功

使用mike用户再另一个浏览器(推荐:火狐)中进行登录验证

我们添加成员的同时也可以移除成员使其不能访问项目如下图:


