git 学习笔记
Git简介
背景
在1991年,Linus创建了开源的Linux后,世界各地的志愿者们将源代码通过diff的方式发送给Linus,然后由Linus本人进行合并。
到了2002年,Linux系统发展十余年,代码已经十分庞大,很难进行手工管理,Linus选择了一个商业版本控制系统BitKeeper,然而由于Linux社区有一些人试图破解BitKeeper的协议,被BitMover公司发现,于是收回了Linux社区的免费使用权。
Linus本人花了两周时间用C写了一个分布式控制系统Git,到了2008年,Github上线。
集中式与分布式
集中式即代码版本库是存放于中央服务器的,分布式则是每个人电脑里都有完整的版本控制系统。
集中式的有CVS和SVN,分布式代表即是Git
Git基础
安装后的配置
安装很容易,安装后需要配置config参数(由于Git是分布式版本控制系统,因此必须自报家门)
$ git config --global user.name "Your Name"
$ git config --global user.email "email@example.com"
查看配置的信息
- 当前用户配置

- 当前仓库配置信息

创建仓库
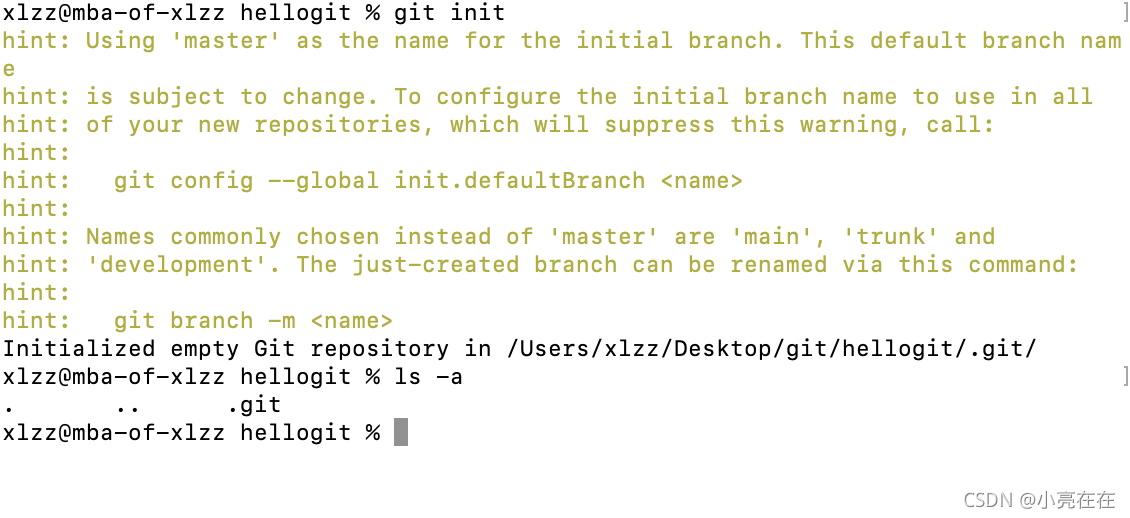
git init,此时会创建一个.git文件夹

提交文件
在当前版本库中创建了一个readme.txt文件,利用git status查看状态

利用git add添加文件

利用git commit提交文件

利用git log可以查看提交信息

修改readme.txt,使用git status显示已被修改但是changes没有被提交

利用git diff命令查看具体修改了什么内容

知道对readme.txt修改后,需要重新利用git add和git commit提交(提交修改和新文件没有区别),也可以直接使用git commit -a一步到位

此时再利用git status可以看到没有要提交的修改且仓库是干净的

打上标签
单纯的commit id难以记忆,常常打上标签

对于之前的commit也可以打上标签

利用git tag可以查看所有标签,利用git show 可以查看标签对应的commit信息

一般来说,git tag -a 标签名 -m 说明文字 commit-id## 回退版本
-
命令git push origin 可以推送一个本地标签;
-
命令git push origin --tags可以推送全部未推送过的本地标签;
-
命令git tag -d 可以删除一个本地标签;
-
命令git push origin :refs/tags/可以删除一个远程标签。
对readme.txt再次进行了修改并提交

至此,通过git log可以查看到至今的三次commit经历

使用git log --pretty=oneline,可以美化输出

git的commit id是用sha1算出来的一个非常庞大的数字(由于是分布式,因此使用1、2、3、4此类简单数字作为版本Id,肯定很容易冲突)
在git中HEAD指向的就是当前版本,HEAD^ 即上一个版本,HEAD^^就是上上个版本,HEAD~100就是往前推100个版本

此时查看readme.txt,的确进行了回退

利用git log输出发现the second modification不见了

使用get reset --hard + 之前版本Sh1数字的前几位又可以回退到之前的版本

git 版本回退十分快,因为只是改变HEAD指针的指向
可以通过git reflog查看每次head修改命令

.gitignore
使某些文件不必出现在git status中的untracked files…中,这些文件一般包括:
- os自动生成的文件
- 编译中间文件
- 敏感信息配置文件
# Windows:
Thumbs.db
ehthumbs.db
Desktop.ini

# Python:
*.py[cod]
*.so
*.egg
*.egg-info
dist
build

# My configurations:
db.ini
deploy_key_rsa

配置别名
git config --global alias.lg “log --color --graph --pretty=format:’%Cred%h%Creset -%C(yellow)%d%Creset %s %Cgreen(%cr) %C(bold blue)<%an>%Creset’ --abbrev-commit”

当前仓库的配置文件

当前用户的配置文件在~./gitconfig

Git内部原理
工作区
电脑里能够看到的目录

暂存区
在每个项目中都有个.git隐藏目录,这个不是工作区,而是git的版本库。版本库中最重要的是:
- 被称为stage(或者index)的暂存区
- 分支,git默认创建的第一个分支是master

从上图可以看出,git add就是把文件从工作区添加到暂存区,git commit就是把文件从暂存区添加到当前分支,举例如下所示


修改
对于所有的版本控制系统,其只能追踪文本文件的改动,获得每次文本的改动,而对于二进制文件,无法获得直观的信息。
相对于版本控制系统,git管理的是修改,而不是文件。只有每次改动被推送到暂存区或者分支内部。
- 利用git checkout – file 可以回退工作区文件的修改,将其回滚到最近一次git commit或者git add时的状态

- 利用git reset HEAD file 可以撤销掉暂存区的修改
- 删除文件
创建一个test.txt文件并添加到分支中,此时删除掉test.txt

git status查看输出信息,可以看到git记录了删除的文件

-
此时利用git rm删掉,并且git commit,这时候版本库就没有此文件了

-
利用git checkout – test.txt,实现一键还原

远程仓库
github
Github提供Git仓库托管服务,本地仓库和远程Github仓库是通过SSH协议加密的。
在本地用户目录中有.ssh目录,里面有id_rsa和id_rsa.pub两个文件,把pub后缀的公钥添加到github上,这样github就能识别出本地用户的推送。
在Git创建好一个仓库后,根据网站的提示,可以把本地的仓库推送上去,在本地使用如下命令即可:
$ git remote add origin git@github.com:michaelliao/learngit.git

git push -u origin master
Git远程仓库默认的名字是origin。
Github现在通过Personal access tokens来进行访问验证,在初次push时会出现要输入账号和密码的情况,密码即是在github登录后setting界面上生成的tokens。
利用git remote -v可以查看远程库

也可以使用git remote rm origin来解除本地与远程的绑定关系
利用git clone + 仓库路径可以从远程克隆仓库到本地,git支持多种协议,默认的git://使用ssh,也可以使用https,但后者较慢
Github的一些常用术语如下:

Watch:观察。
如果watch了一个项目,之后这个项目有更新,你会在第一时间收到该项目更新通知。
Star:点赞。
点过赞的项目会保存在个人中心的“stars”中,之后可以查看。
Fork:开分支。
	如果对一个项目感兴趣,并且想在此基础开发新的功能,就可以fork这个项目。它会复制一个完全相同的项目到你自己的github账号中,你可以自行修改项目内容而不会影响原始的库,也可以将自己的修改通过合并请求(a pull request)的方式请求原始库的开发者更新你的修改。

Issues:问题。
如果你看了某个项目,发现它有什么bug或者不足,就可以在这里提出来。
Pull requests:代码合并请求。
此功能是建立在Fork之上的,如果你Fork了一个项目,对其进行了修改,觉得改的还不错就可以对原项目的拥有者提出一个Pull请求,如果请求通过,就可以把你修改过的内容合并到原项目中了。
Repository :简称“Repo”,仓库,库。
库是GitHub的最基本元素,可想象成本地的项目文件夹;一个库包含所有的项目文件(包括帮助文档),并保存每个文件的修改历史;库可以有多个合作开发者,也可以作为公共库或私有库的形式开发;
Branch:分支。
分支是一个库的并行版本,包含在库内,允许独立的开发而不影响现有主分支(primary or master)的运行;当在分支的修改需要发布时,就可以将分支合并(merge)至主分支(master branch),这样利于多人的分布式开发;
Clone :克隆。
克隆是将GitHub上的库文件整个复制到本地主机上,可以实现离线修改,等上线后再同步至Github上的库即可;
Commit :提交信息。
或者称为修改信息,是个人提交的对文件的修改记录;
Push :推送。
表示将本地的修改内容推送至线上的库,这样其它的开发者就可以通过GitHub网站访问到你的修改内容了;
Remote :远端版本。
即类似于GitHub.com的非本地主机的项目版本,可以连接至本地克隆的版本以实现内容同步;
User:用户。
指个人注册的GitHub账户,每个用户都可以拥有多个公共库或私有库,也可被邀请加入organizations或称为collaborates;
Organizations:组织。
即多个开发者组成的团体,可包含众多的库和开发团队;
Collaborator :合作开发者。
被库的所有者邀请共同开发某一项目,拥有对库的读写权限;
Contributor:贡献者 。
对项目有所贡献(如提交代码,修复bug等)的开发者,但不具备合作开发者的访问权限;
推送分支
利用git push origin 分支名

拉取分支
git clone+ url

默认情况下只能拉取main分支,通过 git checkout -b dev origin/dev来创建远程分支到本地

在团队合作中,如果出现多人同时推送,很可能会出现冲突:

因此必须先和远方同步,再进行推送,直接使用git pull会出错

必须先指定本地dev分支与远程origin/dev分支的链接

进行pull

之后再进行push

分支管理
概述
分支管理是团队代码编写的大杀器,通过分叉和合并,实现不同功能的并行开发。
团队合作的分支一般如下所示:

- master(main)分支是十分稳定的,一般只用来发布新版本
- dev分支是不稳定的,每个团队成员都在dev分支基础上引出自己分支,然后往dev分支上合并
与其他版本控制系统相比,git的分支是与众不同的,其创建、切换和删除都很快完成,一般1秒内即可。
创建和合并分支
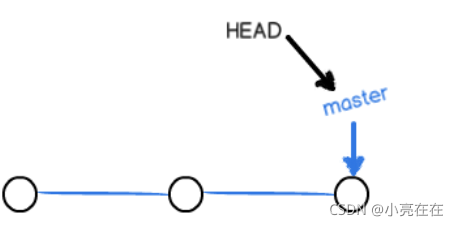
Git把每次提交都串成一条时间线,这条时间线就是一个分支。截至到现在,只有一条分支,即master分支,HEAD指向的是当前分支。

创建一个新的分支dev,只是增加了一个指针

git checkout -b dev相当于git branch dev git checkout dev

利用git branch即可列出所有分支,当前分支前面会标一个*号

在新的分支上创建并提交一个对readme.txt的修改
切回到main分支

利用git merge dev进行合并

Fast-forward是“快进模式”,合并后即可删除dev分支
git branch -d branchname

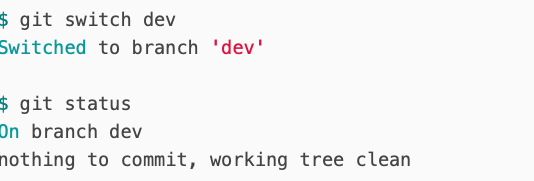
最新版本的git 提供了git switch命令来切换分支
git switch -c dev
git switch master
解决冲突
通过新建分支合并然后制造冲突
git switch -c feature1

vim readme.txt
# 修改最后一行为Creating a new branch is quick AND simple.

git add readme.txt
git commit -m "AND simple"
通过 git switch main可以查看到git的自动提示(采用的他人截图,master应为main)

接着在main分支继续修改readme.txt文件,在两个分支都提交后,此时

git merge feature1果然出现了冲突

git status此时也可以看到冲突的文件

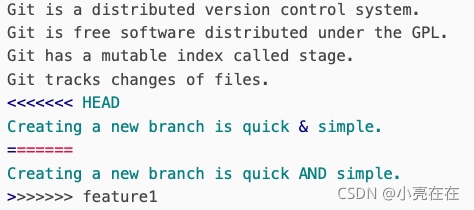
此时查看readme.txt文件内容,会发现其变成了如下:

人工修改文件后,在add和commit,此时

通过git log --graph也可以查看图形化的commit历史

合并策略
合并时如果前一分支直接在当前分支前一个commit身为,极有可能采用 Fast forward模式(此时只是会丢掉分支信息)。
禁用Fast forward后,会在merge时生成一个新的commit。如下在新建一个dev分支后,利用- - no-ff 就可以实现禁用Fast forward。

即如下所示情况

Bug分支
如果接到临时要求修复Bug的通知,利用git stash可以处理好这种突发情况。
在dev分支上,利用git status查看基本情况:

利用git stash 保存当前工作现场

假设bug在main分支,创建临时分支修复后合并


至此main分支上的bug修复完毕,后面恢复dev现场

利用git stash list可以查看存储的现场
利用git stash apply恢复现场,git stash drop删除存储的现场,或者利用git stash pop一步到位
由于dev是早期从main分支引出来的,因此dev也存在类似的bug,只需要利用git cherry-pick 提交对于id号即可复制提交所做修改。

如果要丢弃一个没有被合并的分支,使用git branch -D 分支名
rebase
通过git log查看历史,可以看到交错的直线,利用rebase可以将提交历史变成一条干净的直线

之后继续对hello.py进行两次修改,此时:

此处应用rebase没有明显变化,但实际上rebase有着使log历史更加平整的效果。

git 高级知识
子模块
子模块允许将一个git仓库作为另一个git仓库的子目录
git submodule add https://github.com/chaconinc/DbConnector
之后会在项目生成新的.gitmodules文件
[submodule “DbConnector”]
path = DbConnector
url = https://github.com/chaconinc/DbConnector
在克隆含有子项目的模块时,默认会包含该子模块目录,但是其中还没有任何文件,此时必须运行git submodule init和git submodule update来进行更新
如果使用–recuisive参数则会循环克隆项目
一般将子模块存储在third-party文件夹下,此时
git submodule add url third-party/xxx