这里写自定义目录标题
系统:win10+X64
1. 安装软件VSCode
2.安装Microsoft C ++(MSVC)编译器工具集
如果已安装最新版本的Visual Studio,从Windows“开始”菜单中打开Visual Studio Installer,安装C ++工作负载。如果已经安装该负载项,忽略。
3. 系统配置
1)启动VS Code
在user目录,新建一个项目文件夹“projects”;
cd命令进入项目文件夹,建立“helloword”文件夹;
在Windows的“开始”菜单中输入“Developer”,弹出“Developer PowerShell for VS2022",右键单击以管理员身份打开。

在打开的命令提示符,进入”helloword“目录,并输入命令”code .",打开PowerShell窗。

2) 写C++实例文件
#include <iostream>
#include <vector>
#include <string>
using namespace std;
int main()
{
    vector<string> msg {"Hello", "C++", "World", "from", "VS Code!"};
    for (const string& word : msg)
    {
        cout << word << " ";
    }
    cout << endl;
}
4)配置Intellisense文件
快捷组合键Ctrl + Shift + P打开命令面板,输入C/C++,并点击编辑配置(UI):

此时,在项目根目录的“.vscode"中,自动生成一个文件”c_cpp_properties.json“。
{
    "configurations": [
        {
            "name": "Win32",
            "includePath": [
                "${workspaceFolder}/**"
            ],
            "defines": [
                "_DEBUG",
                "UNICODE",
                "_UNICODE"
            ],
            "windowsSdkVersion": "10.0.20348.0",
            "compilerPath": "C:\\Program Files\\Microsoft Visual Studio\\2022\\Community\\VC\\Tools\\MSVC\\14.30.30705\\bin\\Hostx64\\x64\\cl.exe",
            "cStandard": "c17",
            "cppStandard": "c++17",
            "intelliSenseMode": "windows-msvc-x64"
        }
    ],
    "version": 4
}
5)创建编译任务文件
激活cpp源文件,快捷组合键Ctrl + Shift + P打开命令面板,输入tasks,并点击默认配置任务:

在弹出的界面,点击编译器 c/c++:cl.exe,此时在项目根目录的“.vscode"中,自动生成一个文件“tasks.json”
{
	"version": "2.0.0",
	"tasks": [
		{
			"type": "cppbuild",
			"label": "C/C++: cl.exe 生成活动文件",
			"command": "cl.exe",
			"args": [
				"/Zi",
				"/EHsc",
				"/nologo",
				"/Fe:",
				"${fileDirname}\\${fileBasenameNoExtension}.exe",
				"${file}"
			],
			"options": {
				"cwd": "${fileDirname}"
			},
			"problemMatcher": [
				"$msCompile"
			],
			"group": {
				"kind": "build",
				"isDefault": true
			},
			"detail": "编译器: cl.exe"
		}
	]
}
上述程序中,其他保留默认状态。
激活tasks.json文件,组合快捷键ctrl+shift+B,即可生成exe文件。
6)创建调试配置文件
激活cpp 源文件,点击“run”菜单,点击“Add Configure”,

选择 C / C++Windows(Launch)

此时在项目根目录的“.vscode"中,自动生成一个文件“launch.json”
{
    // Use IntelliSense to learn about possible attributes.
    // Hover to view descriptions of existing attributes.
    // For more information, visit: https://go.microsoft.com/fwlink/?linkid=830387
    "version": "0.2.0",
    "configurations": [

        {
            "name": "cl.exe - 生成和调试活动文件",
            "type": "cppvsdbg",
            "request": "launch",
            "program": "${fileDirname}\\${fileBasenameNoExtension}.exe",
            "args": [],
            "stopAtEntry": true,
            "cwd": "${fileDirname}",
            "environment": [],
            "console": "externalTerminal",
            "preLaunchTask": "C/C++: cl.exe 生成活动文件"
        }
    ]
}
上述程序中,stopAtEntry字段修改为true,保证调试开始时,指针停留在主程序的入口处,其他保留默认状态。
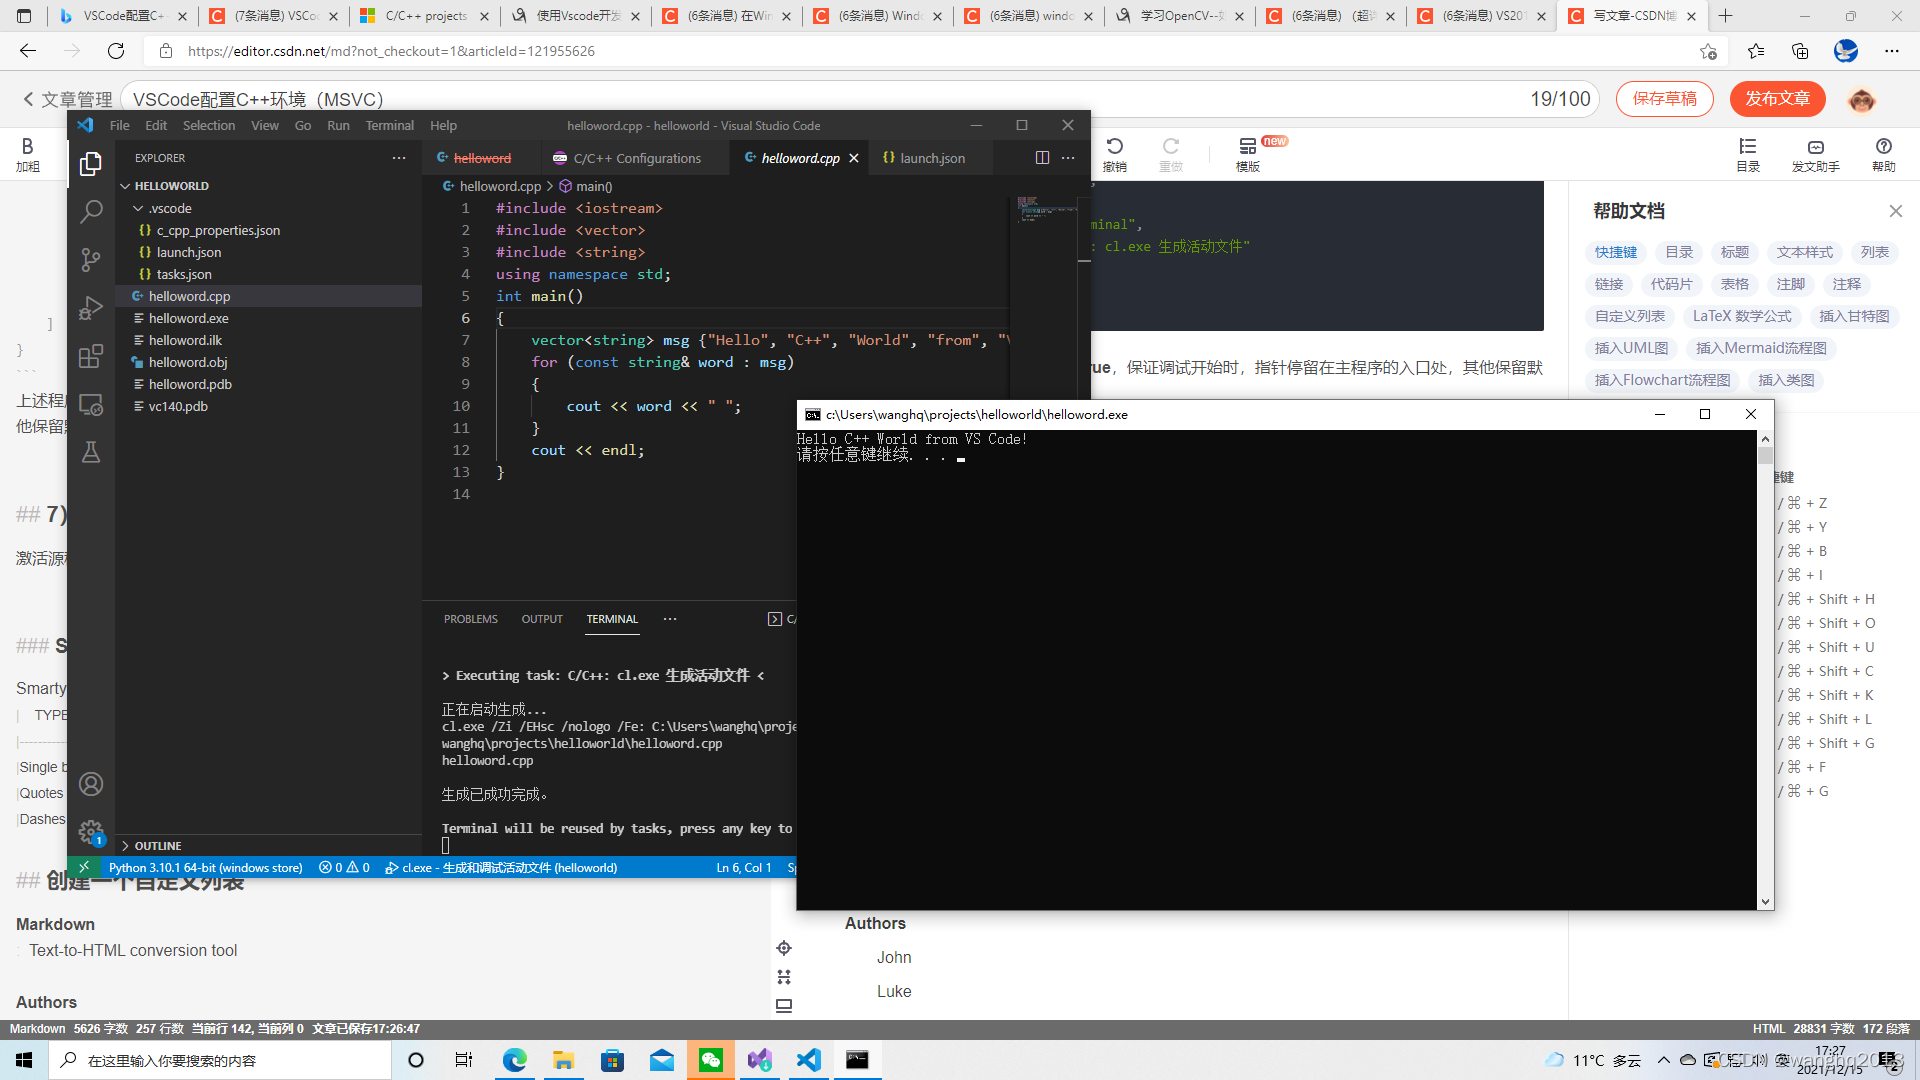
7)调试源程序
激活源程序,点击”F5“功能键,

项目测试结束。
总结:
VSCode的麻烦之处在于以后写别的c++文件也需要这样做一遍,官方推荐的做法是每次写都把这次配置的.vscode文件夹复制到项目文件夹中去。另外,调试源文件时,如果修改了代码,需要激活tasks.json用组合键ctrl+shift+B重新生成 exe文件。
