目录
?每天起床第一句,先给自己打个气

?概念
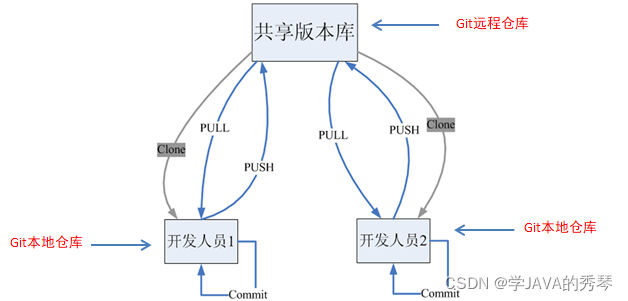
?????????Git是分布式版本控制系统(Distributed Version Control System,简称 DVCS) ,分为两种类型的仓库
- 本地仓库:是在开发人员自己电脑上的Git仓库
- 远程仓库:是在远程服务器上的Git仓库
基本操作
- Clone:克隆,就是将远程仓库复制到本地
- Push:推送,就是将本地仓库代码上传到远程仓库
- Pull:拉取,就是将远程仓库代码下载到本地仓库
Git工作流程
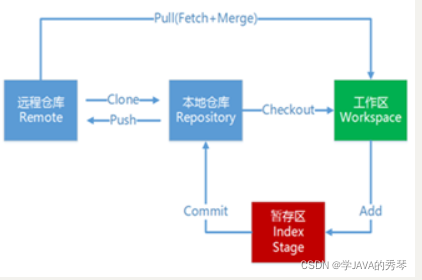
工作流程如下
1.从远程仓库中克隆代码到本地仓库
2.从本地仓库中checkout代码然后进行代码修改
3.在提交前先将代码提交到暂存区
4.提交到本地仓库。本地仓库中保存修改的各个历史版本
5.修改完成后,需要和团队成员共享代码时,将代码push到远程仓库
GIT的使用步骤
Git下载与安装
下载地址: Git - Downloads
Git代码托管服务
????????前面我们已经知道了Git中存在两种类型的仓库,即本地仓库和远程仓库。那么我们如何搭建Git远程仓库呢?我们可以借助互联网上提供的一些代码托管服务来实现,其中比较常用的有GitHub、码云、GitLab等。
? ? ? ? e码云(地址: Gitee - 基于 Git 的代码托管和研发协作平台 )是国内的一个代码托管平台,由于服务器在国内,所以相比于GitHub,码云速度会更快
在码云注册账号
要想使用码云的相关服务,需要注册账号(地址: 注册 - Gitee.com )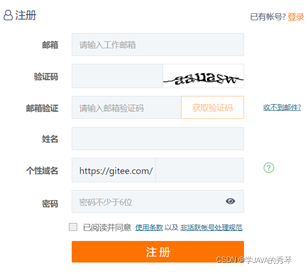
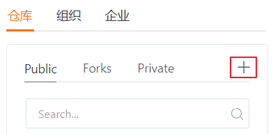
登录成功后就可以创建Git远程仓库
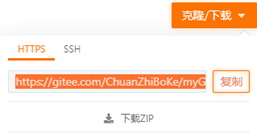
?????????每个Git远程仓库都会对应一个网络地址,可以点击克隆/下载按钮弹出窗口并点击复制按钮获得这个网络地址
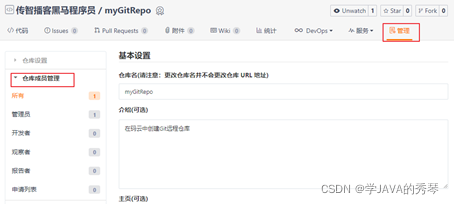
邀请其他用户成为仓库成员
????????前面已经在码云上创建了自己的远程仓库,目前仓库成员只有自己一个人(身份为管理员)。在企业实际开发中,一个项目往往是由多个人共同开发完成的,为了使多个参与者都有权限操作远程仓库,就需要邀请其他项目参与者成为当前仓库的成员。
在IDEA中使用Git
在IDEA中配置Git
????????安装好IntelliJ IDEA后,如果Git安装在默认路径下,那么idea会自动找到git的位置,如果更改了Git的安装位置则需要手动配置下Git的路径。
选择File→Settings打开设置窗口,找到Version Control下的git选项:
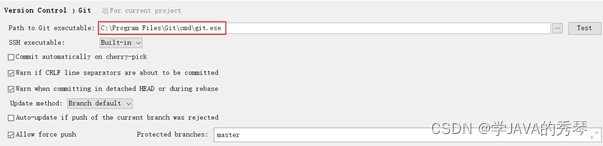
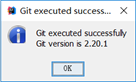
选择git的安装目录后可以点击“Test”按钮测试是否正确配置
在IDEA中使用Git
在IDEA中创建工程并将工程添加至Git
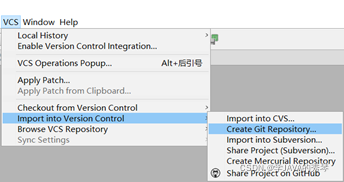
? 将项目添加至Git管理后,可以从IDEA的工具栏上看到Git操作的按钮
将文件添加到暂存区
提交文件

将代码推送到远程仓库

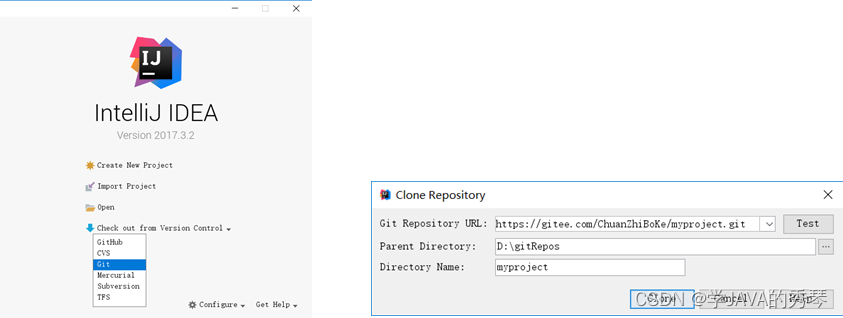
从远程仓库克隆工程到本地
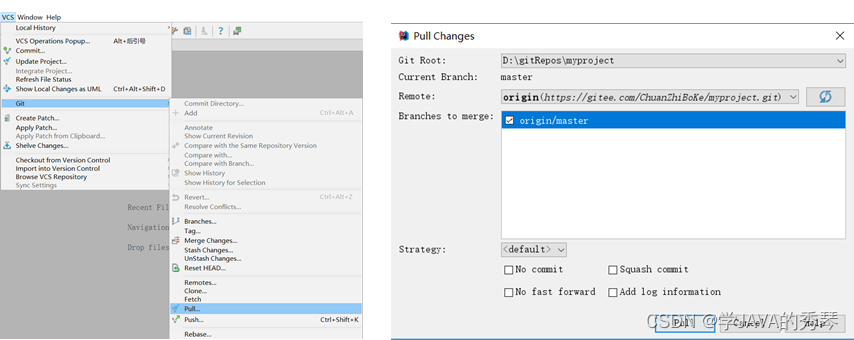
从远程拉取代码
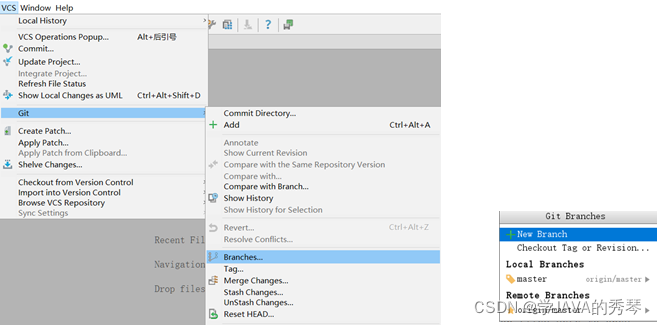
创建分支
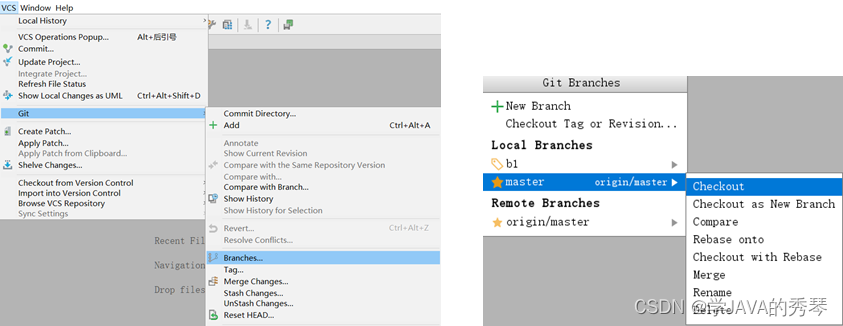
切换分支
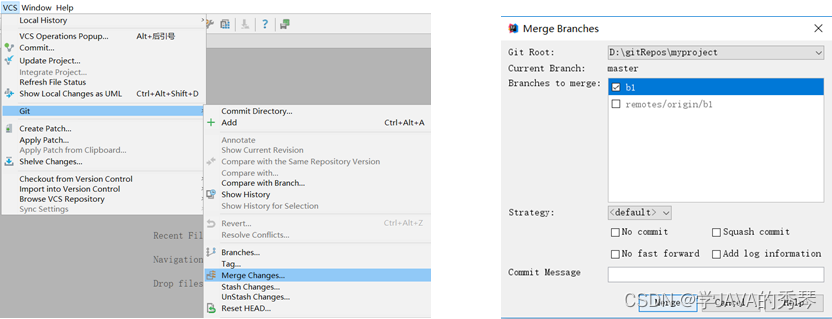
分支合并
?