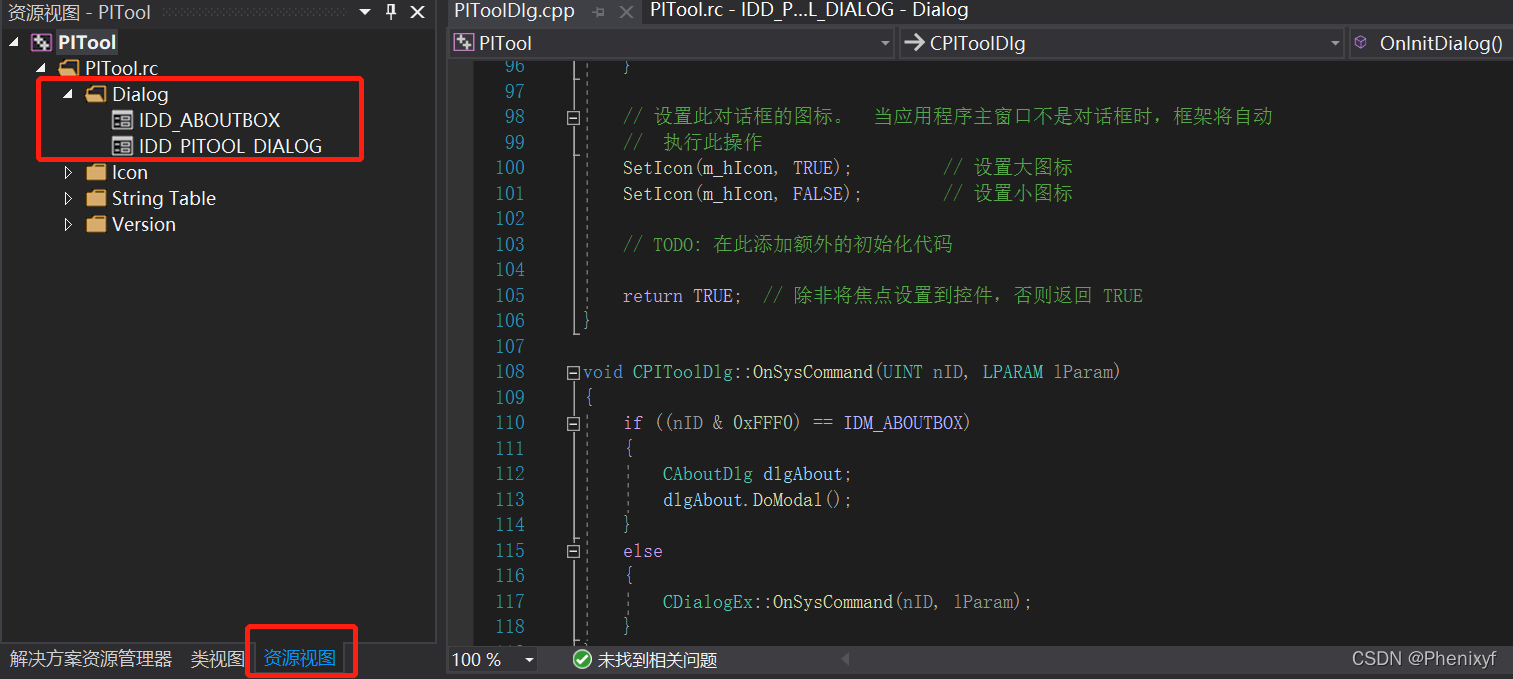
1. 新建一个基于 dialog 的空 MFC 工程

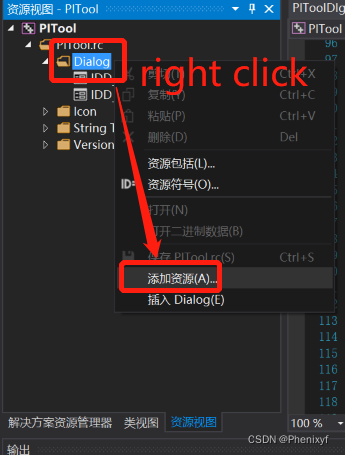
2. 添加两个新的对话框作为子对话框


 ?
?
接下来两步,每个子对话框都要操作:
2.1 设置各子对话框属性为 "child, none"

2.2 给各对话框生成对应的对话框类:


3. 在父对话框的头文件中 include 两个子对话框类的头文件并添加两个子对话框的成员变量


4. 在父对话框中添加 Tab 控件并添加此 Tab 控件成员变量


5. 在父对话框 initial 函数中添加如下代码?

    CRect tabRect;   // 标签控件客户区的位置和大小

	m_tab_mainDlg_ct.InsertItem(0, _T("Tab Dialog1"));			// 插入第一个标签“Tab Dialog1”
	m_tab_mainDlg_ct.InsertItem(1, _T("Tab Dialog2"));			// 插入第二个标签“Tab Dialog2”

	m_tabDlg1.Create(IDD_DIALOG_TABDLG1, &m_tab_mainDlg_ct);    // 创建第一个标签页
	m_tabDlg2.Create(IDD_DIALOG_TABDLG2, &m_tab_mainDlg_ct);	// 创建第二个标签页

	m_tab_mainDlg_ct.GetClientRect(&tabRect);    // 获取标签控件客户区Rect
	// 调整tabRect,使其覆盖范围适合放置标签页
	tabRect.left += 1;
	tabRect.right -= 1;
	tabRect.top += 25;
	tabRect.bottom -= 1;
	// 根据调整好的tabRect放置m_jzmDlg子对话框,并设置为显示
	m_tabDlg1.SetWindowPos(NULL, tabRect.left, tabRect.top, tabRect.Width(), tabRect.Height(), SWP_SHOWWINDOW);
	// 根据调整好的tabRect放置m_androidDlg子对话框,并设置为隐藏
	m_tabDlg2.SetWindowPos(NULL, tabRect.left, tabRect.top, tabRect.Width(), tabRect.Height(), SWP_HIDEWINDOW);
6. 给 Tab 控件添加 TCN_SELCHANGE 通知消息及编写其处理函数?
?

?TCN_SELCHANGE 消息处理函数中添加代码如下:
	CRect tabRect;    // 标签控件客户区的Rect

	// 获取标签控件客户区Rect,并对其调整,以适合放置标签页
	m_tab_mainDlg_ct.GetClientRect(&tabRect);
	tabRect.left += 1;
	tabRect.right -= 1;
	tabRect.top += 25;
	tabRect.bottom -= 1;

	switch (m_tab_mainDlg_ct.GetCurSel())
	{
		// 如果标签控件当前选择标签为“Tab Dialog1”,则显示m_tabDlg1对话框,隐藏m_tabDlg2对话框
	case 0:
		m_tabDlg1.SetWindowPos(NULL, tabRect.left, tabRect.top, tabRect.Width(), tabRect.Height(), SWP_SHOWWINDOW);
		m_tabDlg2.SetWindowPos(NULL, tabRect.left, tabRect.top, tabRect.Width(), tabRect.Height(), SWP_HIDEWINDOW);
		break;
		// 如果标签控件当前选择标签为“Tab Dialog2”,则显示m_tabDlg2对话框,隐藏m_tabDlg1对话框
	case 1:
		m_tabDlg1.SetWindowPos(NULL, tabRect.left, tabRect.top, tabRect.Width(), tabRect.Height(), SWP_HIDEWINDOW);
		m_tabDlg2.SetWindowPos(NULL, tabRect.left, tabRect.top, tabRect.Width(), tabRect.Height(), SWP_SHOWWINDOW);
		break;
	default:
		break;
	}