准备工具
Typora :MarkDown 编辑器
PicGo:图床管理工具(mac中还有ipic,可以直接用ipic,不用准备图床)
Github:全球最大的代码仓库托管平台,缺陷每个仓库1G容量;
下载Typora和Picgo
Typora官网暂时无法访问(https://typora.io/)
提供了下载地址和下载包, 需要哪个版本自己取(版本有可能不是最新)
下载地址:
Typora官网中文地址:https://typoraio.cn/
gitee中也可以下载:https://gitee.com/typora-mirror/Typora-Mirror/releases
下载包:
https://wwe.lanzouw.com/b01v3tijc
密码:gd4p
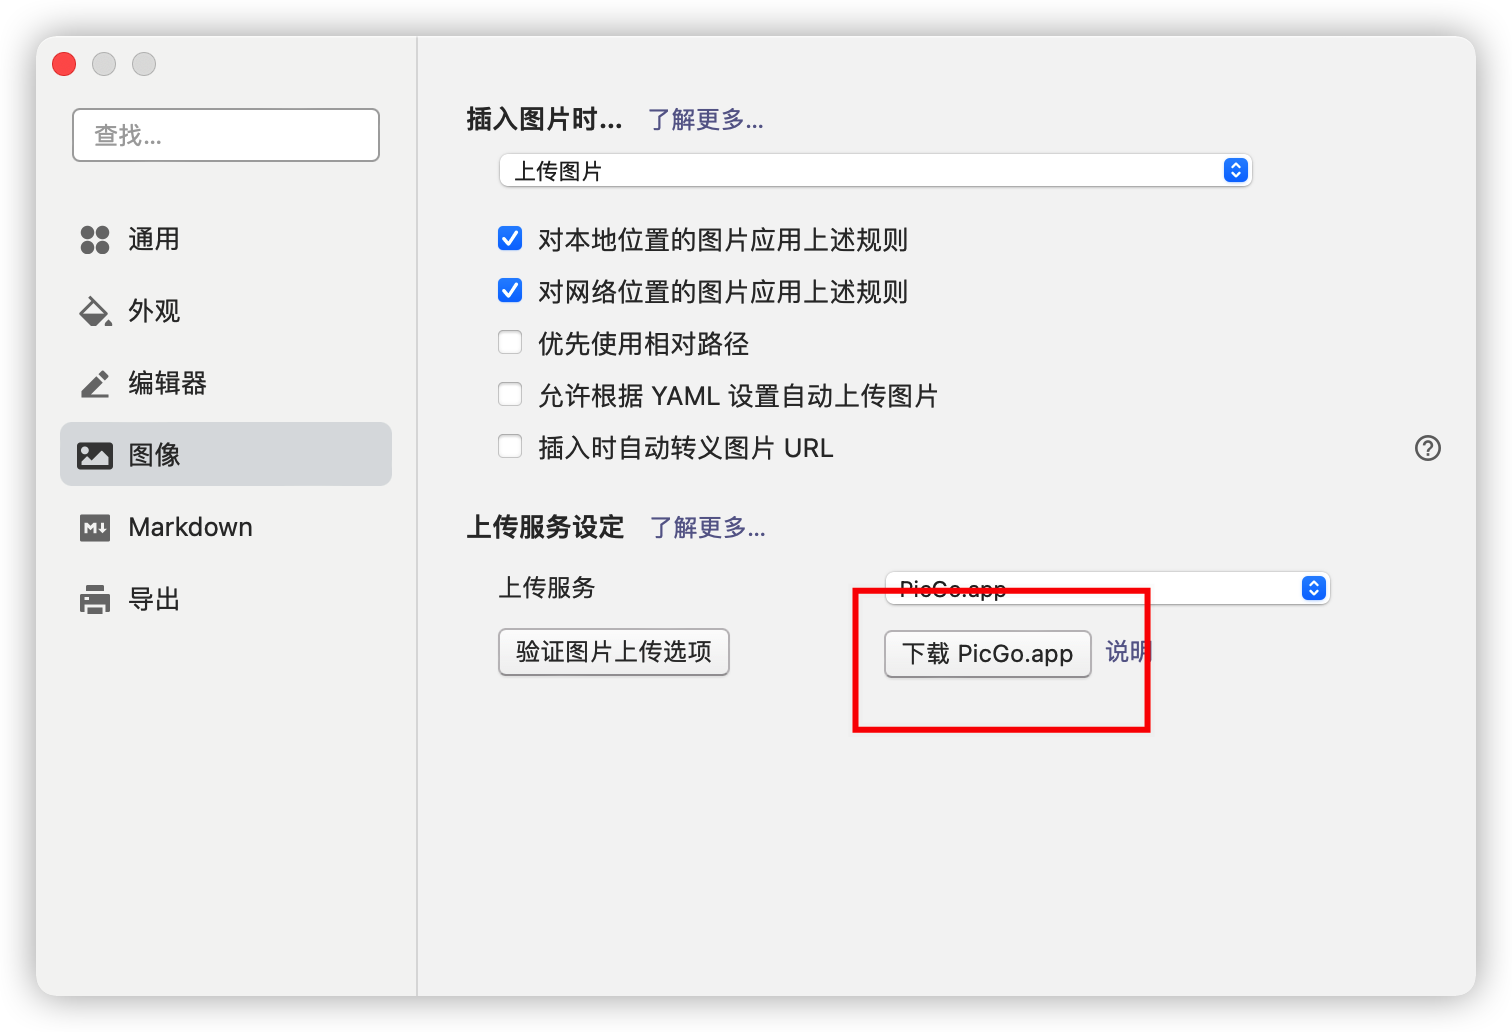
想看Typora的图床文档操作步骤可以看这个:
https://support.typoraio.cn/Upload-Image/#ipic-macos-freemium
Picgo可以按照这个地址下载, 也可以在Typora软件中点击下载跳转下载:
https://molunerfinn.com/PicGo/
GitHub准备图床仓库
-
新建仓库
GitHub地址:https://github.com/
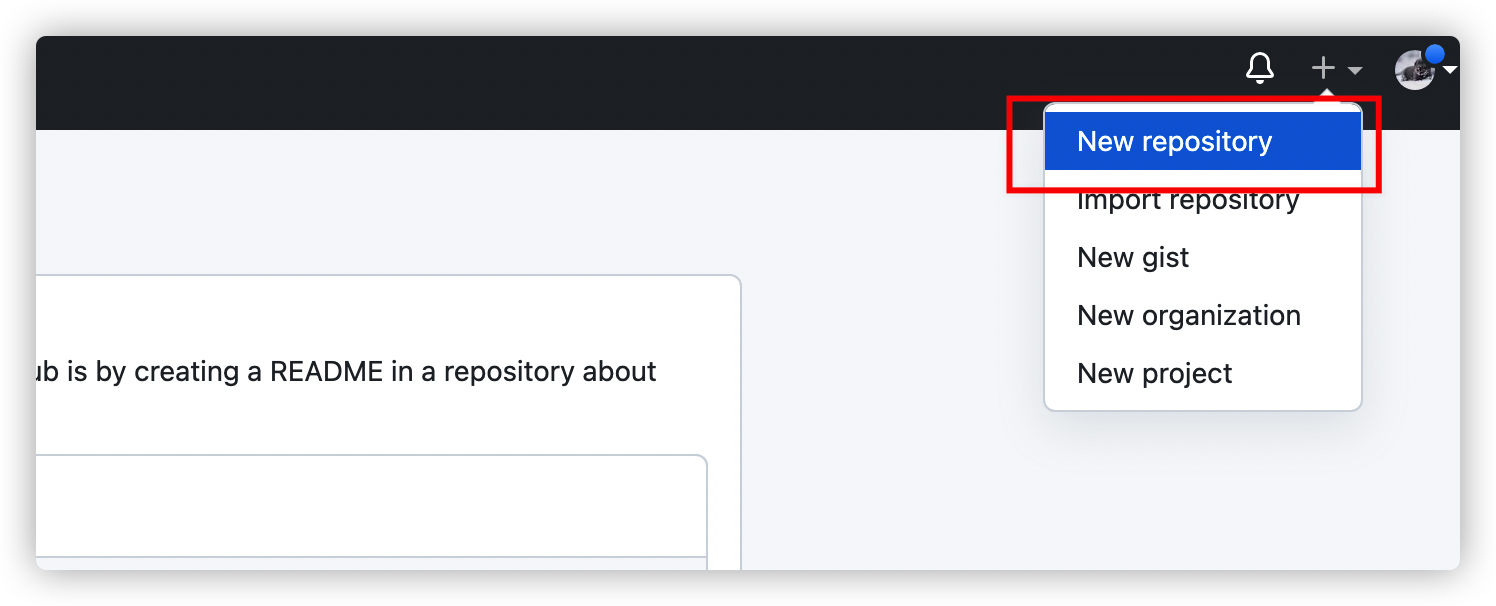
进入GitHub自行注册登录, 然后点击右上角的“+”,在点击“New repository”
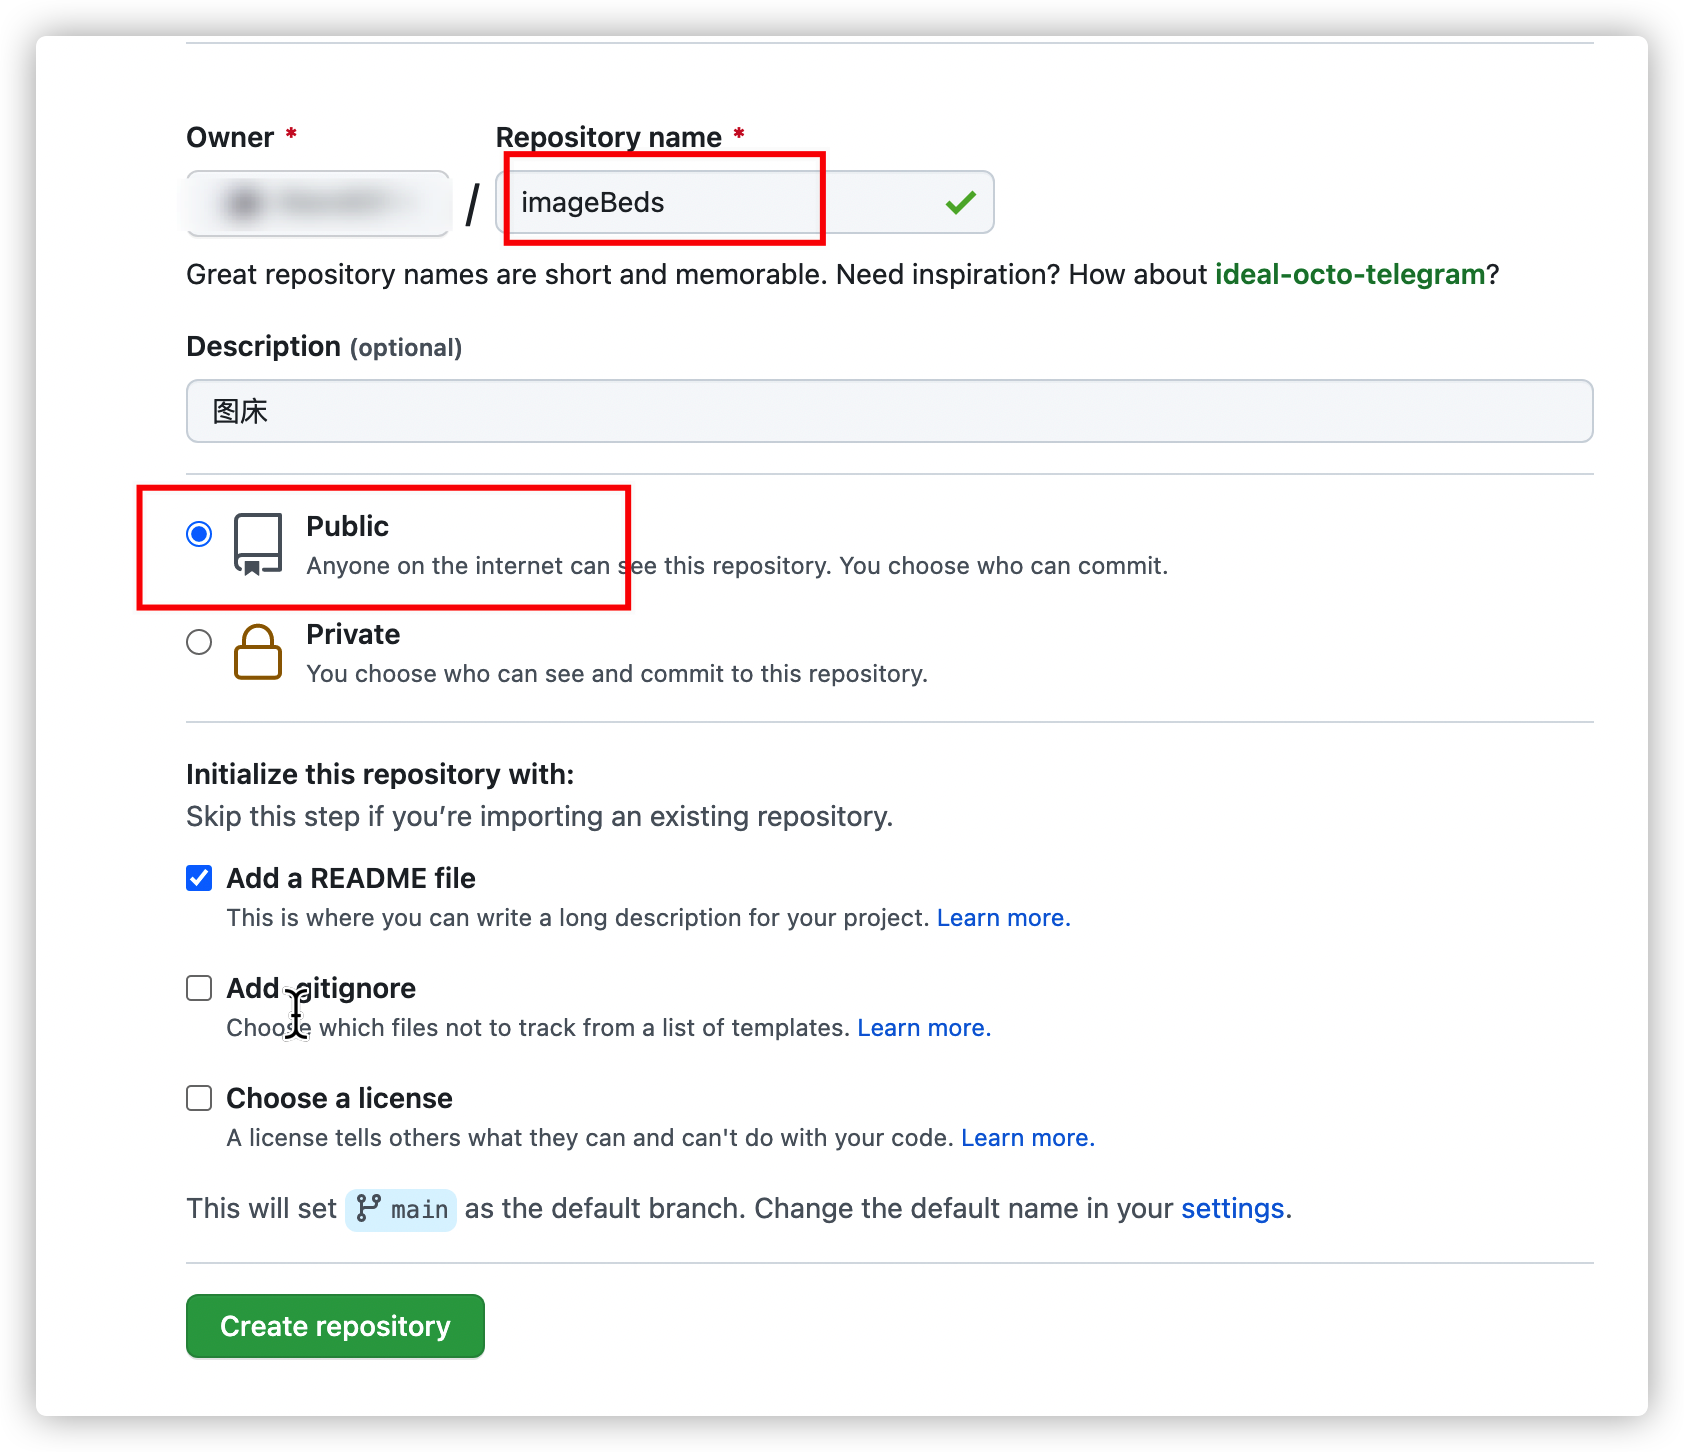
自定义一个仓库名称,吧仓库设置为“public”切记吧仓库设置成“public”,不然在Typora中不显示图片不显示图片的解决办法
-
生成私人令牌
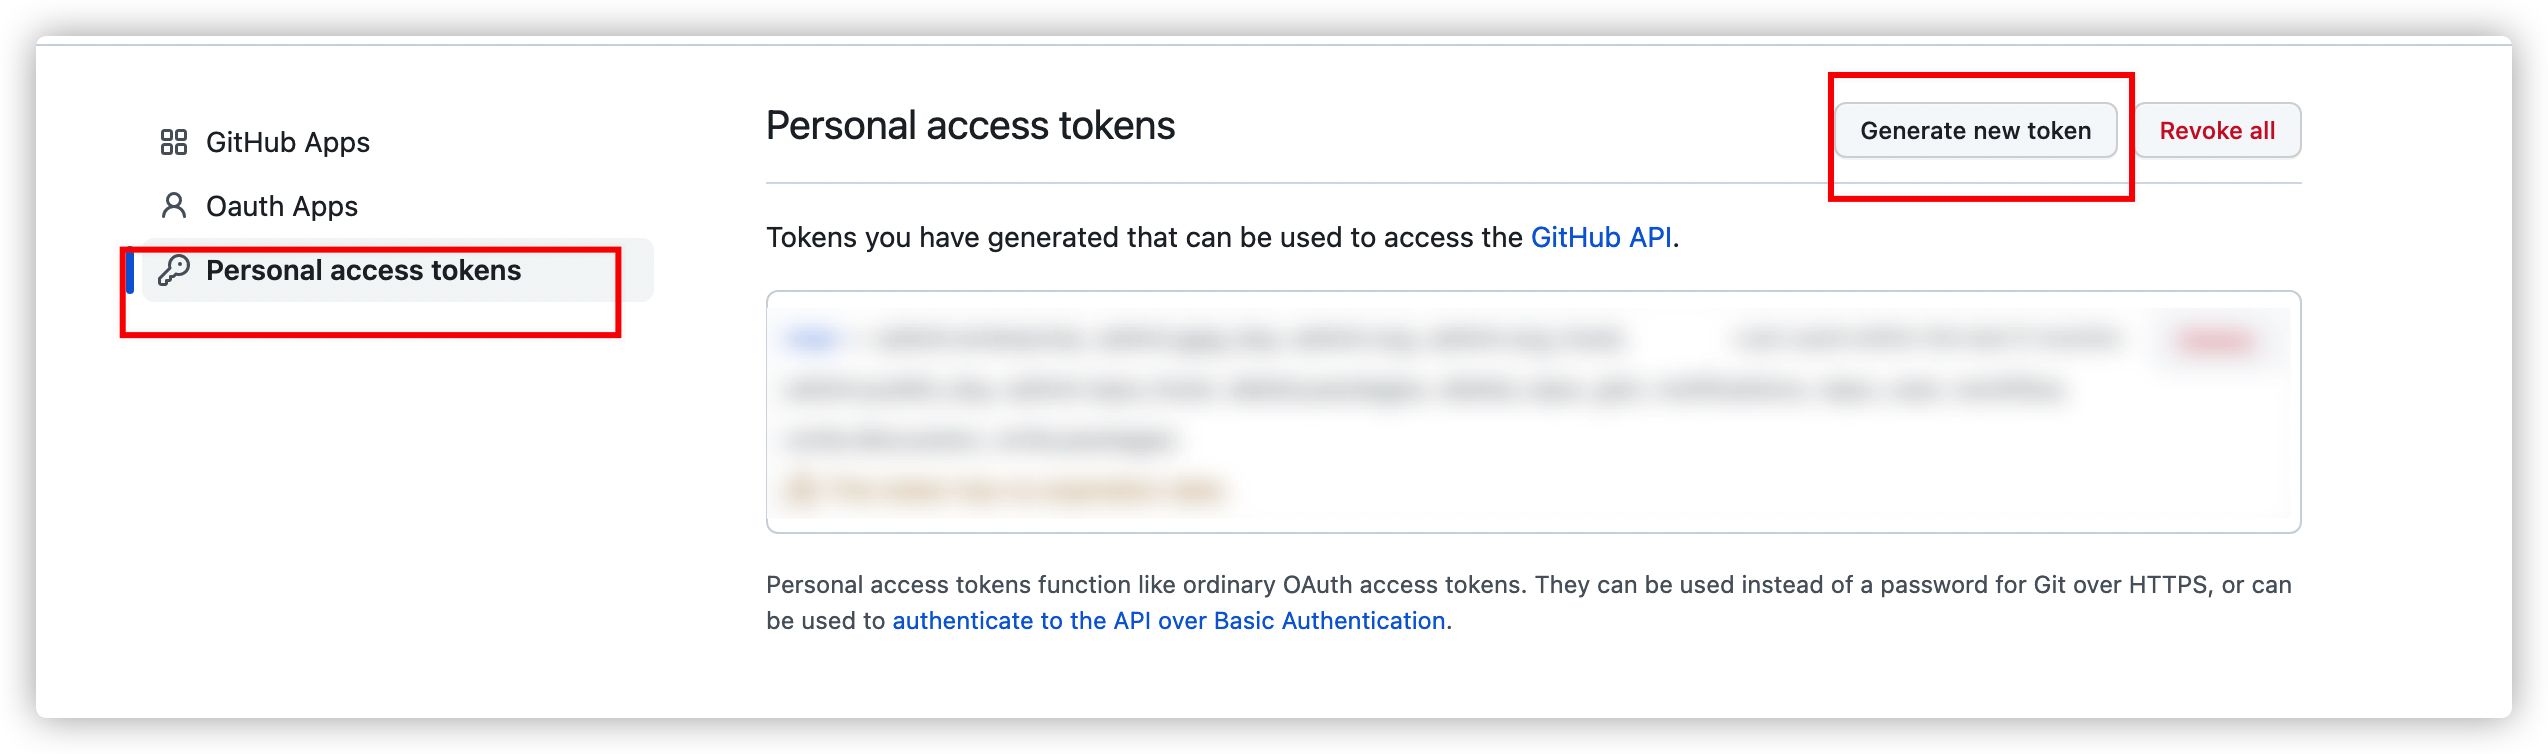
右上角点击“用户头像”,
“Settings”
--> “Developer settings”
-->  Personal access tokens(个人访问令牌)
-->  Generate new token(生成新令牌)
这里选择repo(这个代表你对仓库的操作权限)和user(自己用户的一些信息), 其他的建议不要选择
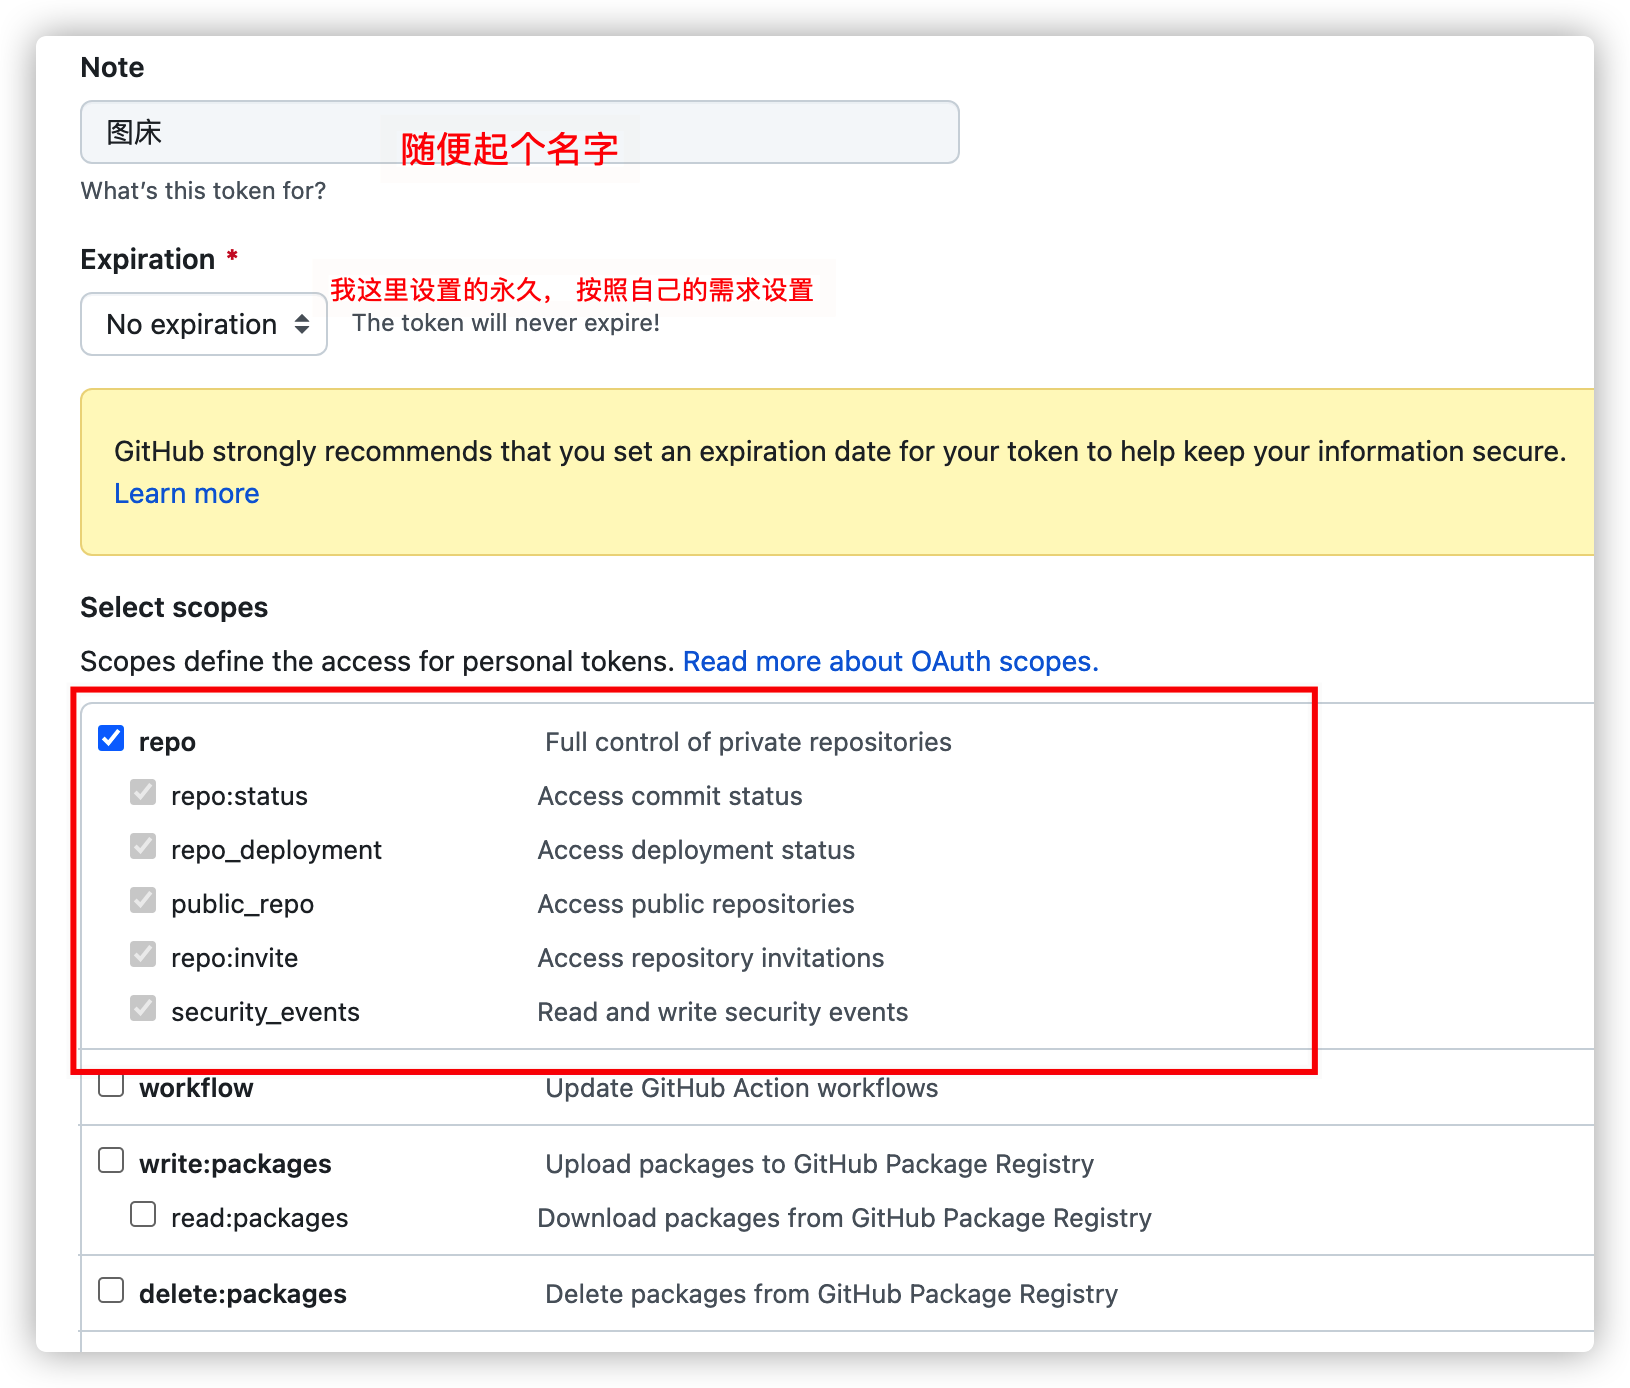

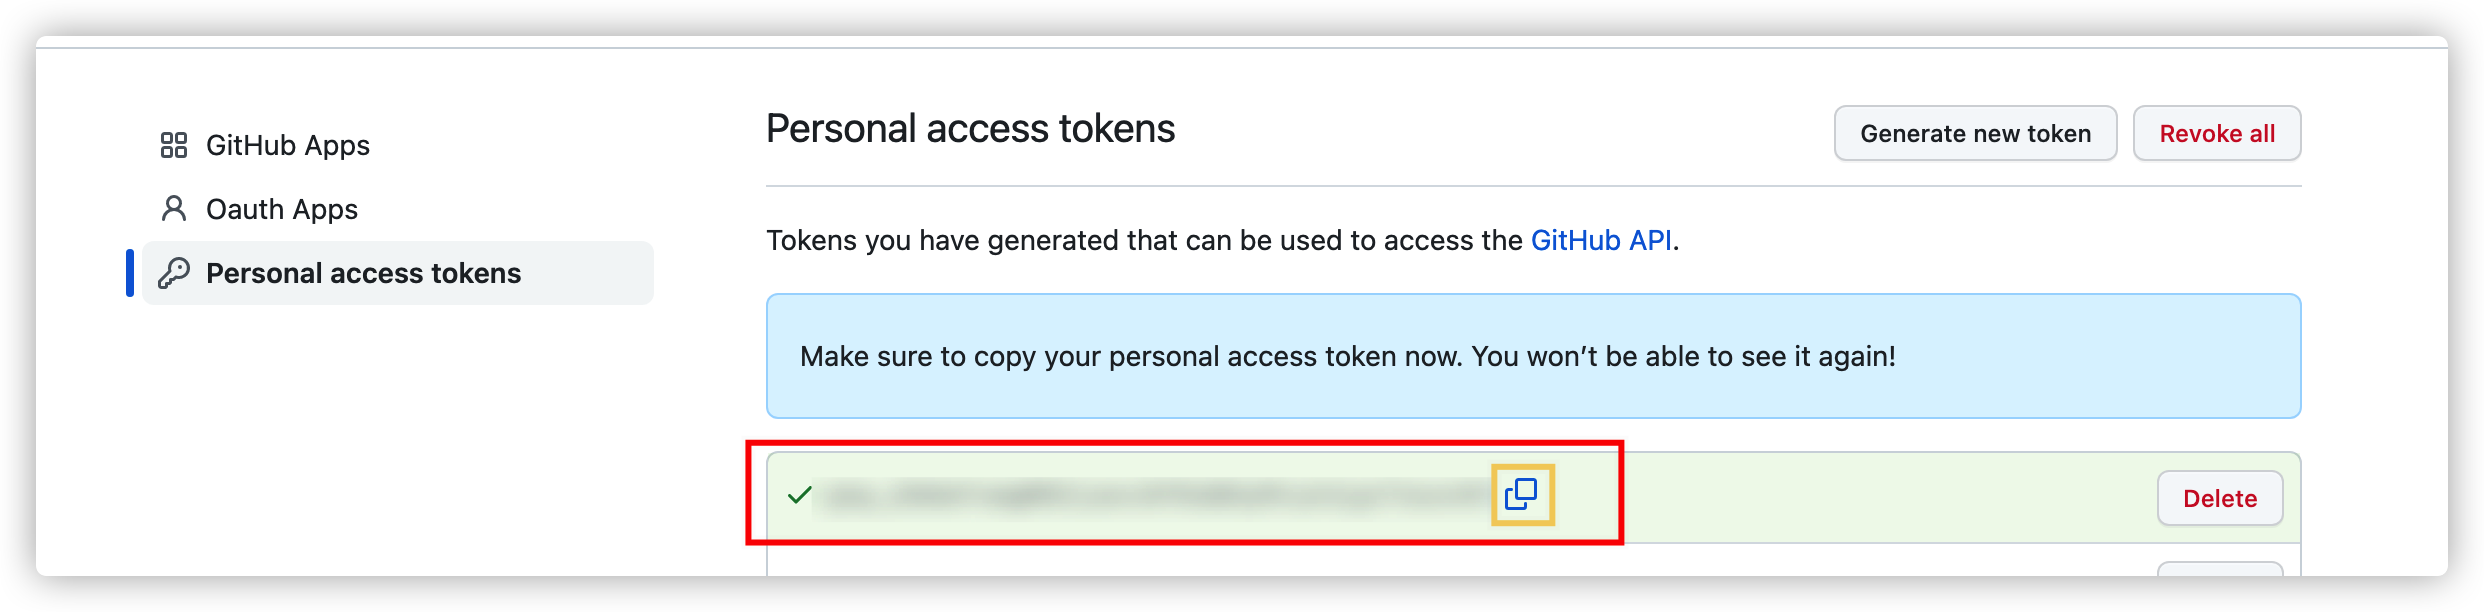
点击Generate token生成令牌
复制这个令牌,别丢失, 如果没有保存的删除重新来一遍
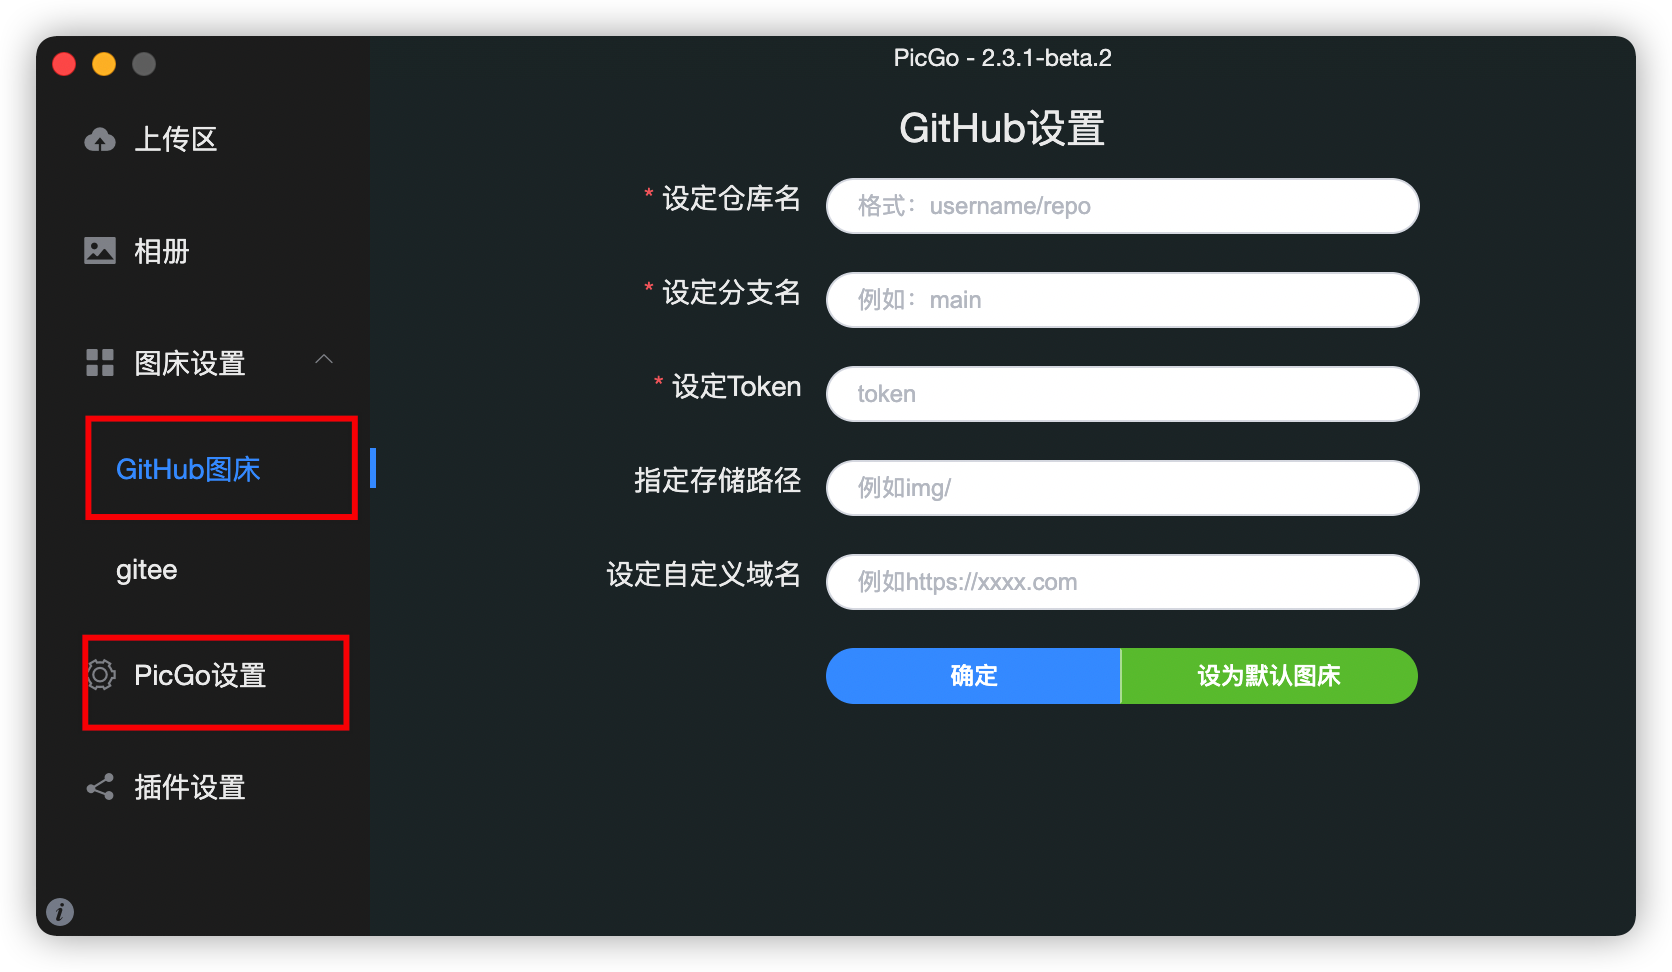
PicGo配置GitHub图床
-
首先找到GitHub, 如果没有需要到插件设置中进行下载
-
如果提示“请安装Node.js并重启PicGo再继续操作”,点击“是”,在弹出的网页下载并安装“Node.js”,如果你有homebrew,直接执行
brew install nodejs即可。重启“PicGo”,再安装”github插件“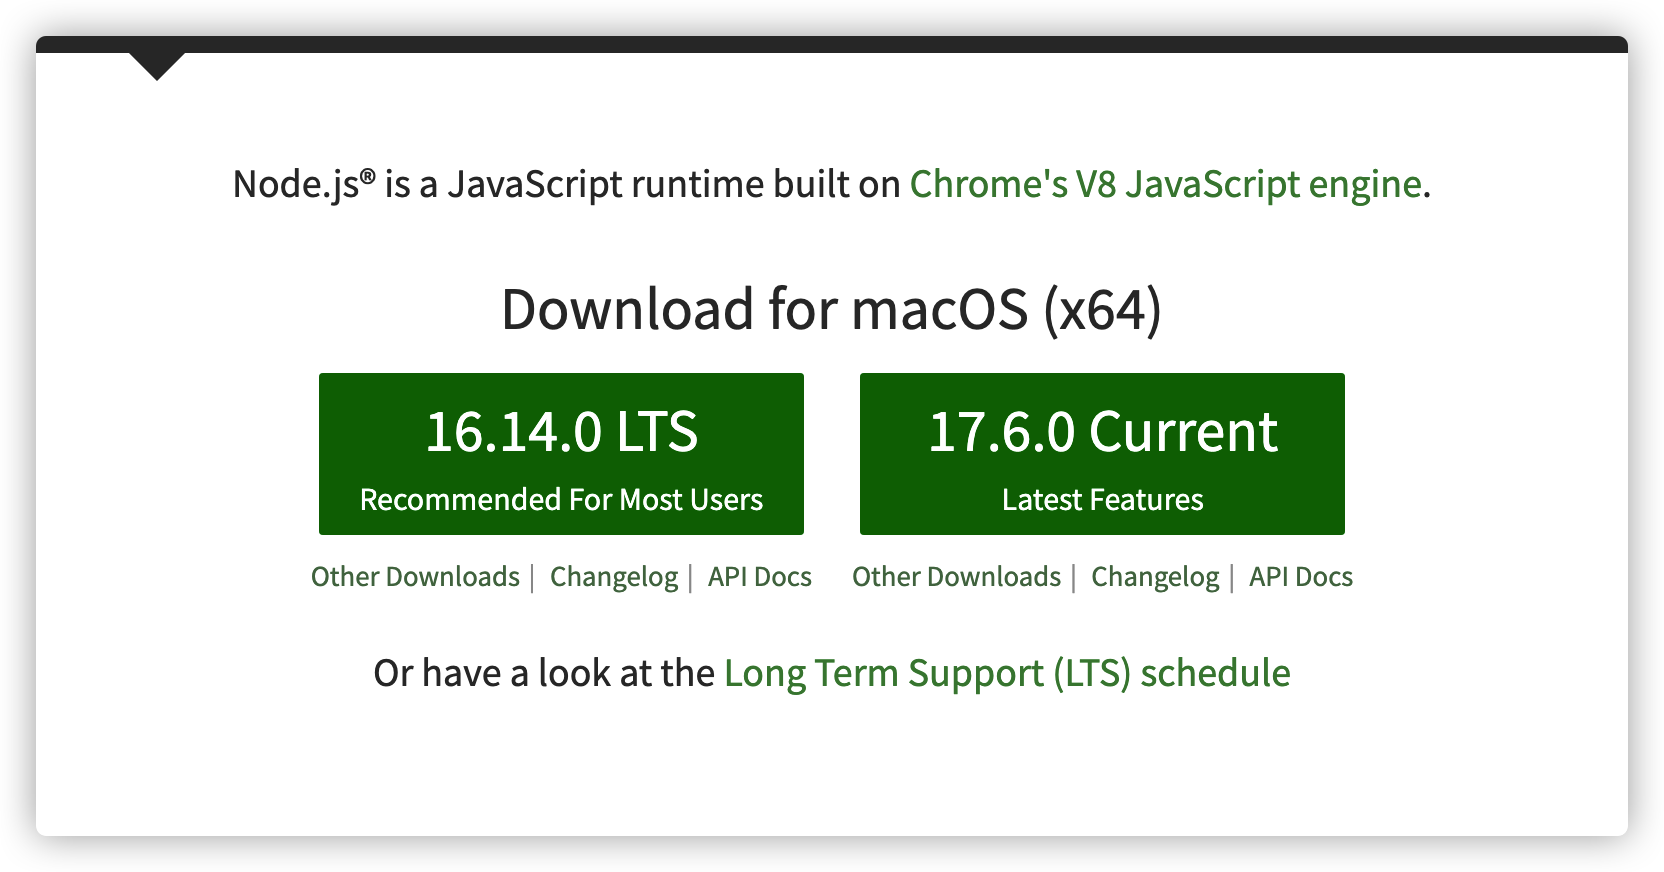
-
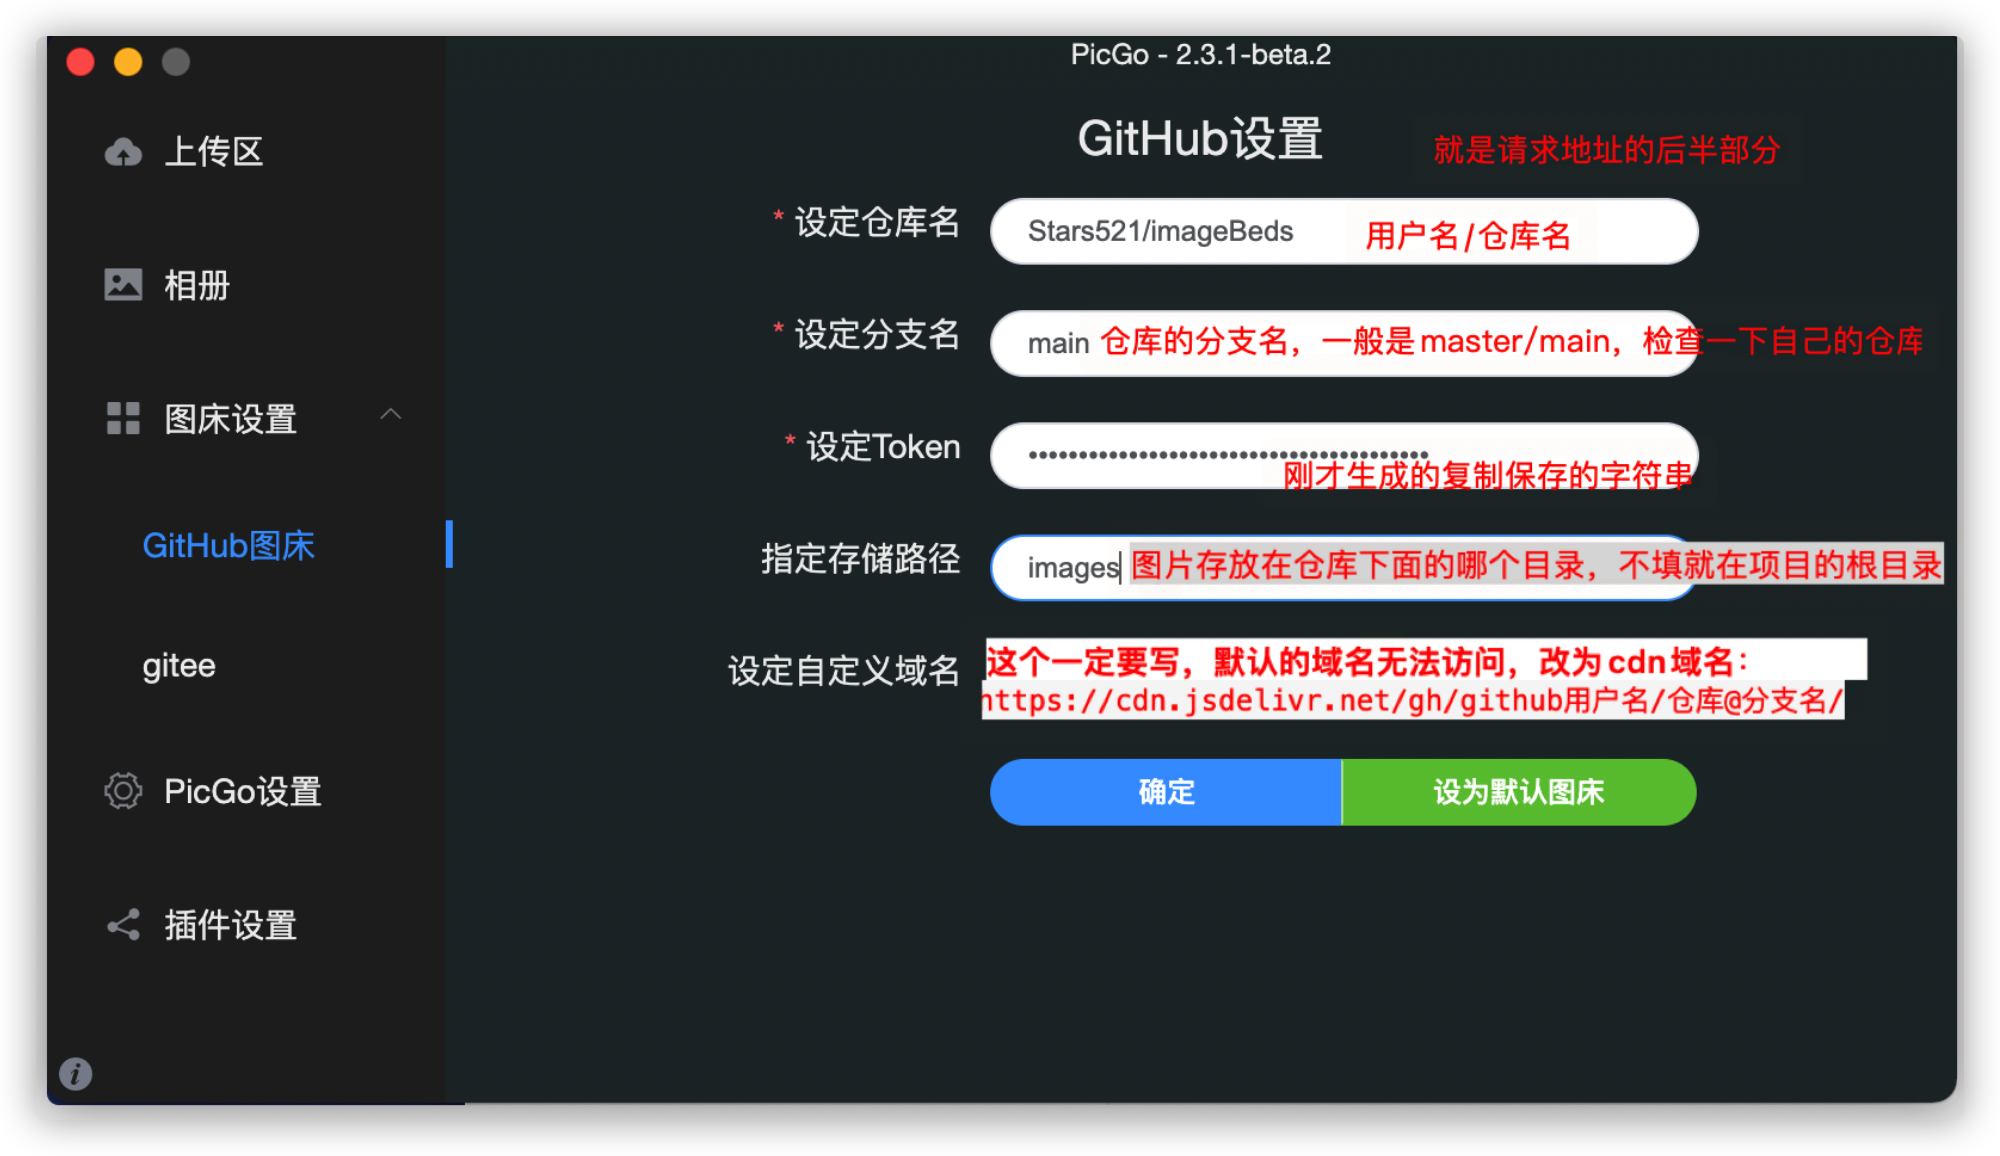
开始配置GitHub
https://cdn.jsdelivr.net/gh/github用户名/仓库@分支名/
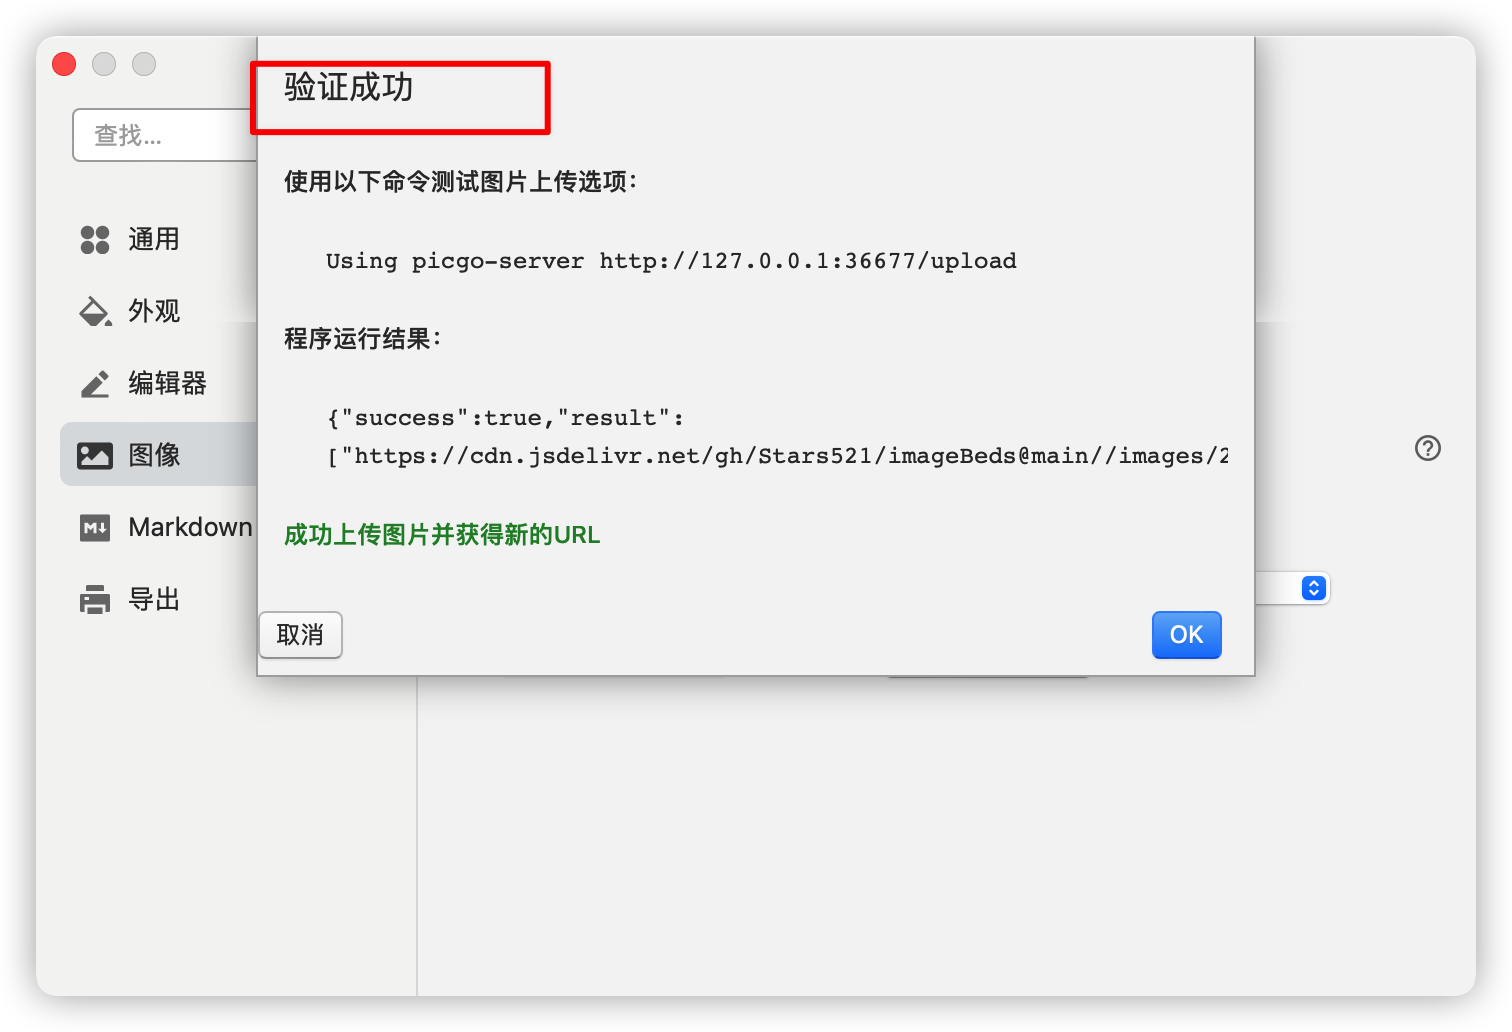
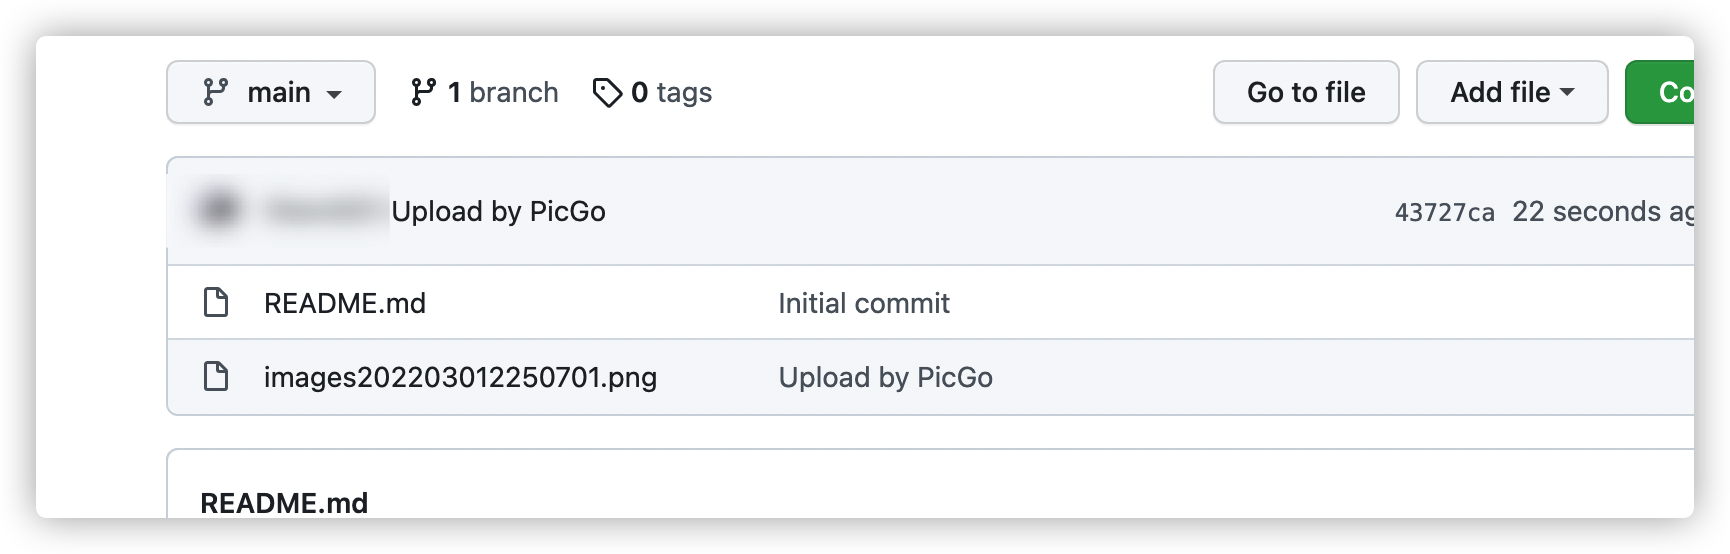
验证是否连接成功并上传
发生的错误
- 图片可以上传成功,但是在Typora中不显示,同时在Pi cGo中图片不显示

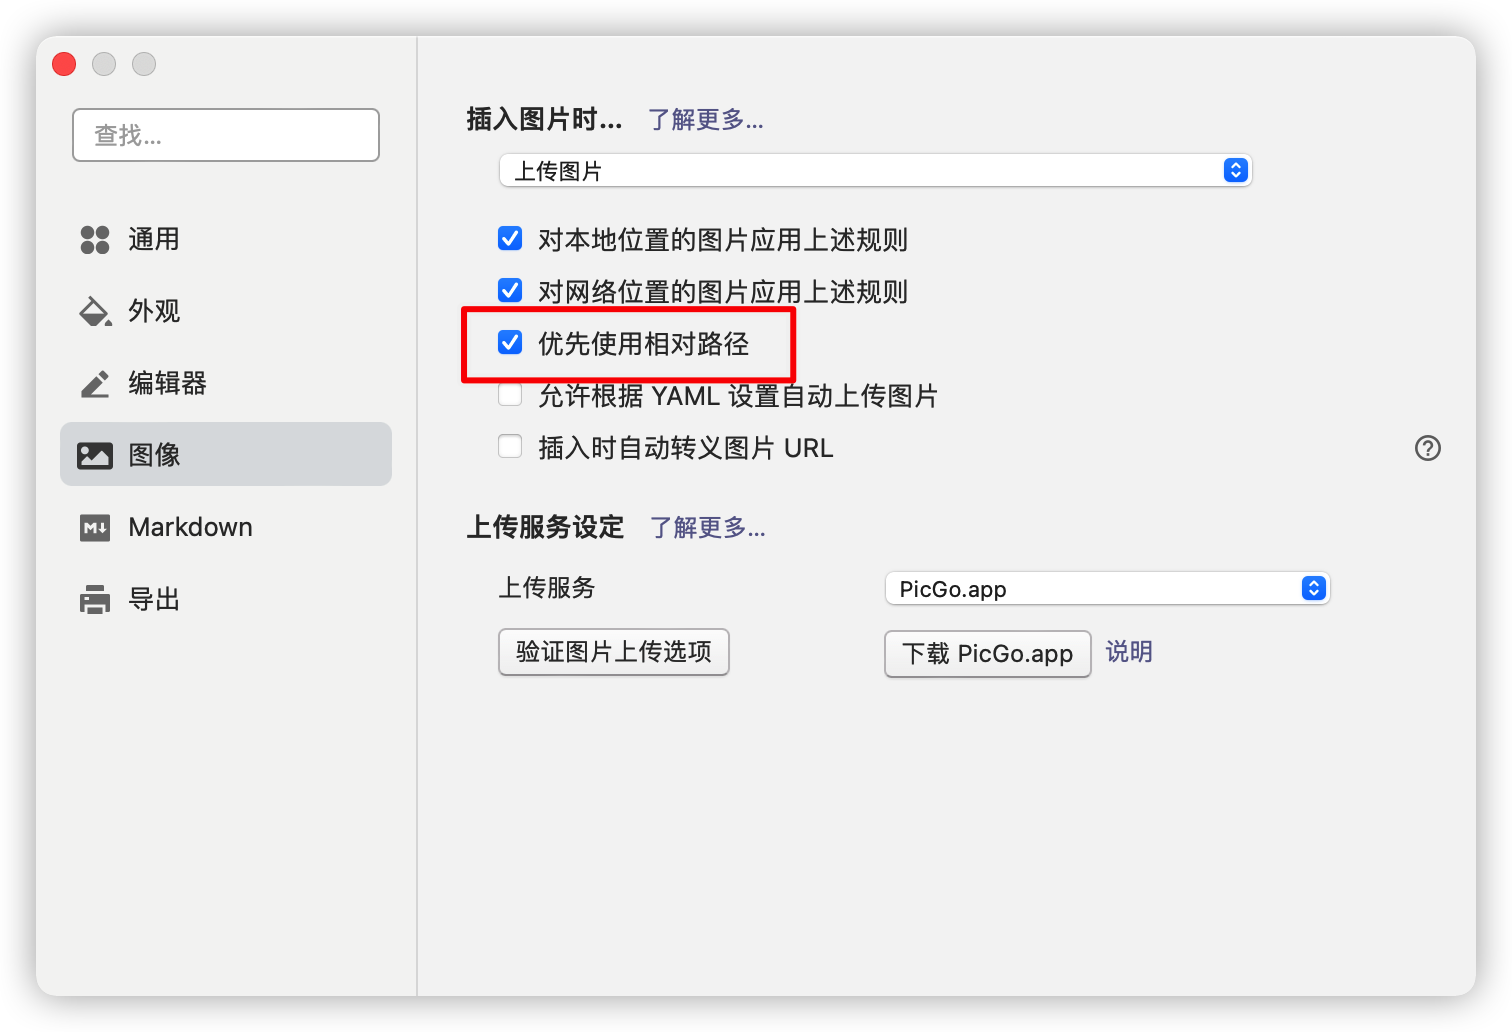
解决办法:1. 检查仓库是否是“public”, 如果不是,设置成“public” 2. 如果是“public”, 那就有可能是图片地址不同, 可以检查一下 不能正常显示的图片: https://cdn.jsdelivr.net/gh/[github账号]/[仓库名]/@main/img/202109301506815.png 可以正常显示的图片 https://cdn.jsdelivr.net/gh/[github账号]/[仓库名]@main/img/202109301521995.png picgo里面图床设置的github图床自定义域名有问题:把那个地方的改了,就正常了 3. 查看 设置是否“优先使用相对路径”
```
2. 上传失败的错误
1. 再次检查你的仓库名是否正确,仓库名不能出现空格!!如果一定要有空格请用 - 来代替
2. 不能上传文件名重复的图片
3. 文件名不要包含奇怪的字符(加号、乘号、百分号等等)