gitlab15批量新增用户
gitlab开放了restApi,只要获取管理员的private_token之后就可以编写shell脚本免登陆通过api操作新增用户。
-
使用管理员账号生成其private_token

网页登陆gitlab账号后,在头像–>settings–>Access tokens 页面(中文版本是 头像–>偏好设置–>个人令牌生成),填写name、失效时间以及使用范围,点击创建personal access token。创建成功后,页面会显示access token。
-
参考gitlab的api新增用户
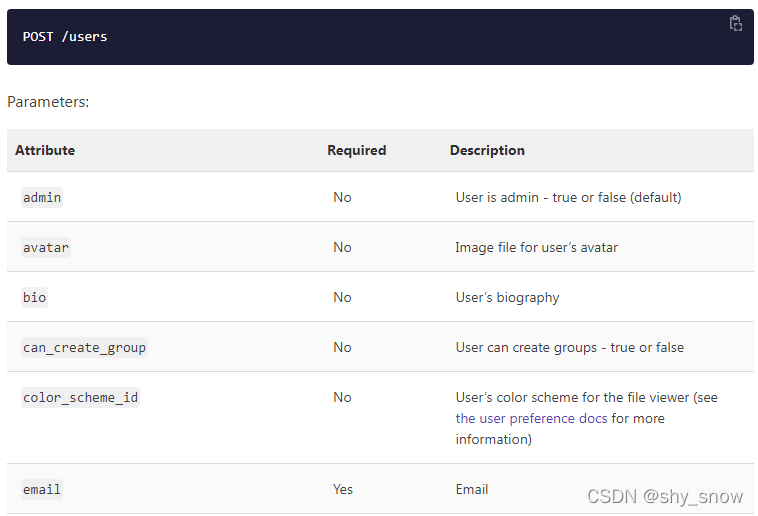
参考gitlab的api https://docs.gitlab.com/ee/api/users.html#User%20creation
直接把用户信息post到 gitlab的web_url下的/users就可以新增用户

#!/bin/bash
private_token=V9khDsdfsdfesfddy
web_url=http://192.168.129.123
#张三  zhangsan@csdn.com
userinfo=userinfo.txt
while read line
do
 name=`echo $line | awk '{print $1}'`
 email=`echo $line | awk '{print $2}'`
 username=`echo $line | awk '{print $2}' | cut -d "@" -f1`
 password=`echo $line | awk '{print $2}'`
#echo "password=$password&email=$email&username=$username&name=$name"
 curl -d "password=$password&email=$email&username=$username&name=$name&skip_confirmation=true&private_token=$private_token" "${web_url}/api/v4/users"
done<$userinfo
注意免邮箱验证要设置下skip_confirmation=true
userinfo.txt
张三 zhangsan@csdn.com
李四 lisi@csdn.com
如要删除测试用户,需要先查询出用户id然后根据id删除。
查询用户id等信息
# username可以改成需要查询的条件
curl "http://192.168.129.123/api/v4/users?username=zhangsan&private_token=zWdfssyCFzdsR2gJdfRx0"

根据id删除用户(谨慎,别删错了)
# DELETE /users/:id 用户id的值到/users?username=zhangsan去查假设是1000
curl -v -X DELETE http://192.168.129.123/api/v4/users/1000?private_token=zWg1yCF2fK2vVR5tJR1e
修改配置文件后执行上面的批量添加脚本就可以了
[1] [https://docs.gitlab.com/ee/api/users.html#User%20creation]