打开cmd 输入 git config -l
可以获取到 配置好的邮箱密码
git config --global user.name "latte"
git config --global user.email "1780834604@qq.com"
git config -l
上述配置提交代码时要使用,会记录在每次提交中
架构
版本库(仓库):工作区中有一个隐藏目录.git:
暂存区:临时区域:工作区进入仓库中的转站
分支:提交文件最终存储,记录文件的诸多版本
选择一个目录,执行命令:
git init
工作区:执行git int 的目录即为工作区,所有文件,首先都要在工作区新建,然后可以存入仓库,进行版本控制

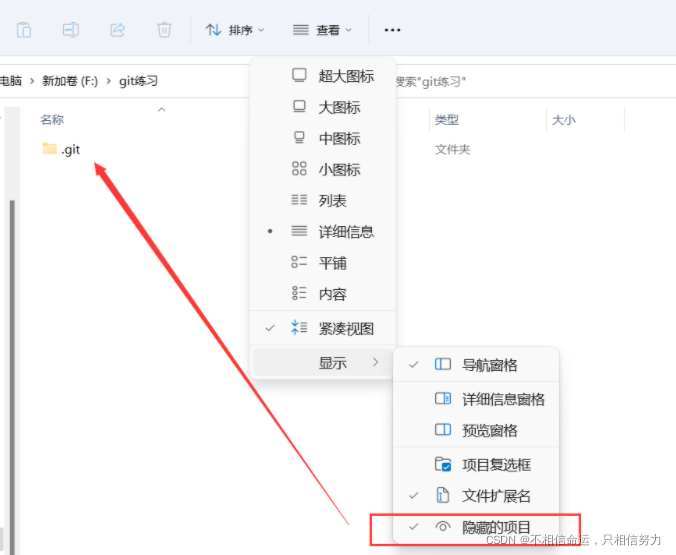
进入文件对应路径,执行 git init ,就创建了一个空白的仓库,到对应路径得文件夹下,勾选查看隐藏项目,就可以看到隐藏目录.git
仓库基本操作
查看仓库状态
git status
``
**暂存文件**

```python
git add .
提交文件
git commit -m "描述信息"
版本比对
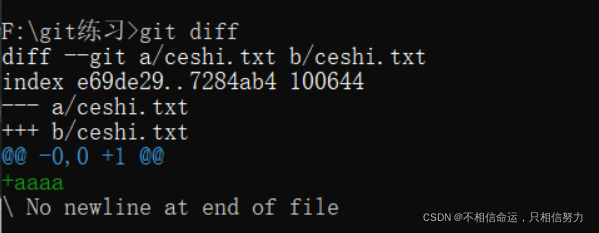
git diff
—表示旧版本的文件
+++表示新版本的文件
 回退
回退
git reset --hard HEAD^ 表示回退到上一个版本
windows操作系统 cmd 中的 “^” 表示换行符,
在Git中,用HEAD表示当前版本,上一个版本就是HEAD^,
上上一个版本就是HEAD^^,当然往上100个版本写100个
^比较容易数不过来,所以写成HEAD~100。
git reset --hard HEAD^100
在gitee 中新建远程仓库
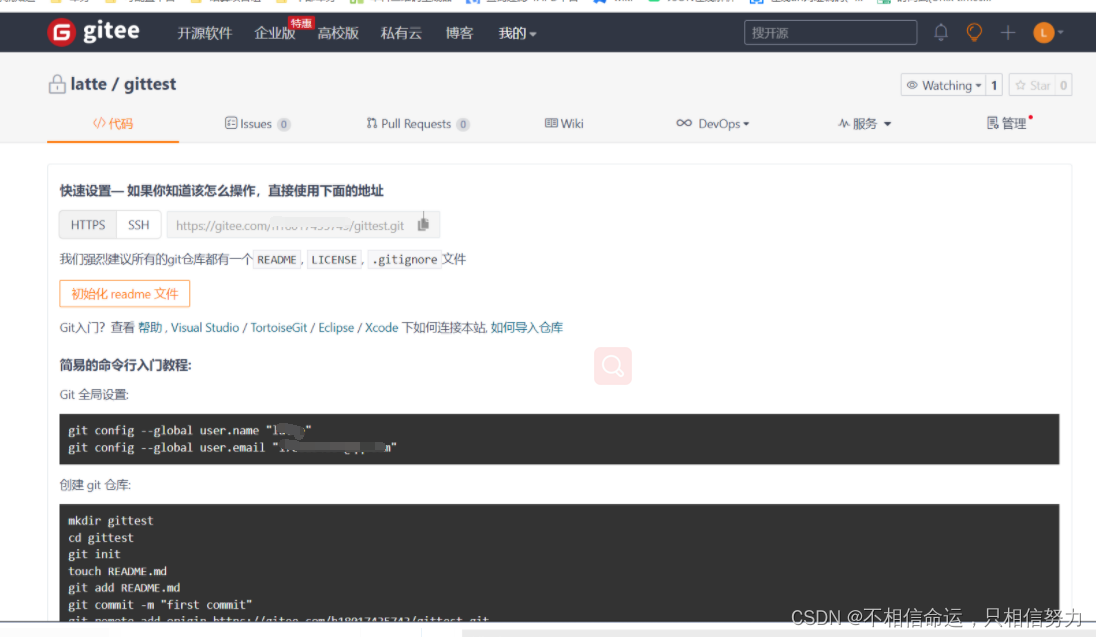
本地关联远程仓库,git remote add origin 后面跟远程仓库地址
git remote add origin https://gitee.com/h18017435743/gittest.git
推送文件到远程仓库
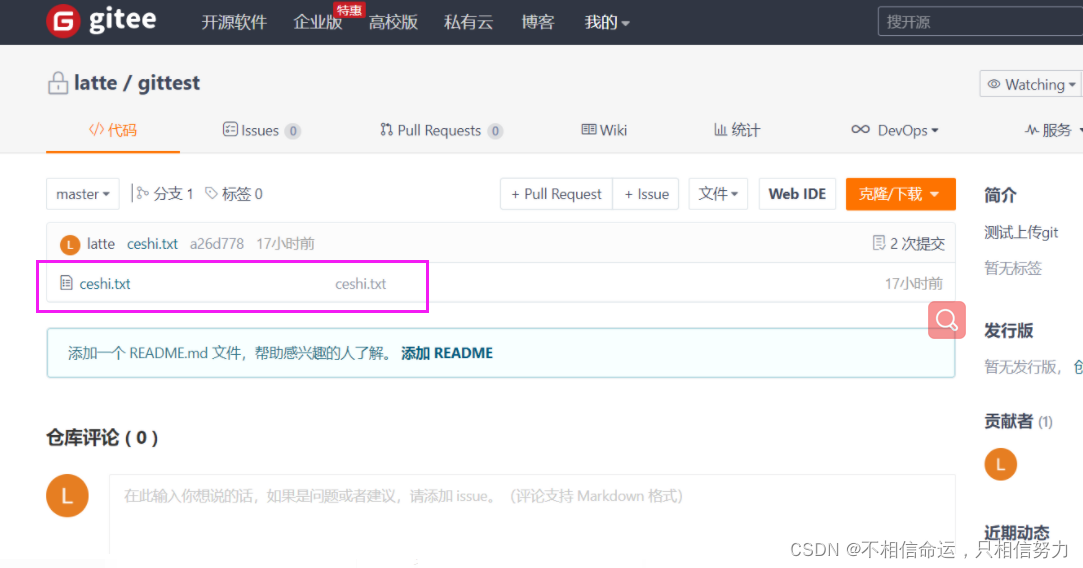
git push origin master

刷新远程仓库,就会发现 文件已推送到远程仓库中
克隆远程仓库
git clone https://gitee.com/h18017435743/gittest.git
代码共享
多人协同开发时,写好代码git push 上传到远程仓库;需要代码 git pull 拉取代码即可
比如开发者甲:push
git pull origin master
分支
分支:每个版本最终存储得位置;每次git commit 形成一个版本,存储在分支得一个提交点击上

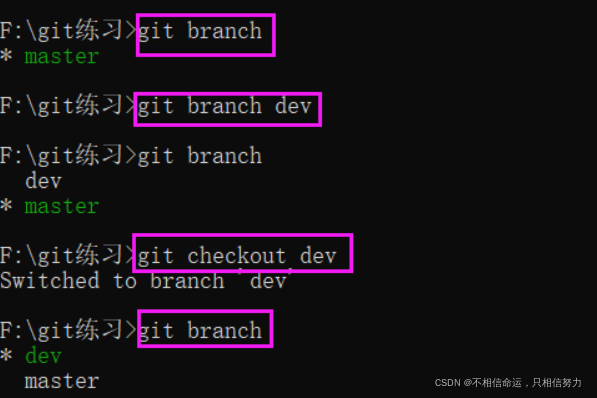
查看分支
git branch
创建分支
git branch dev
切换分支
git checkout dev
多分支走向
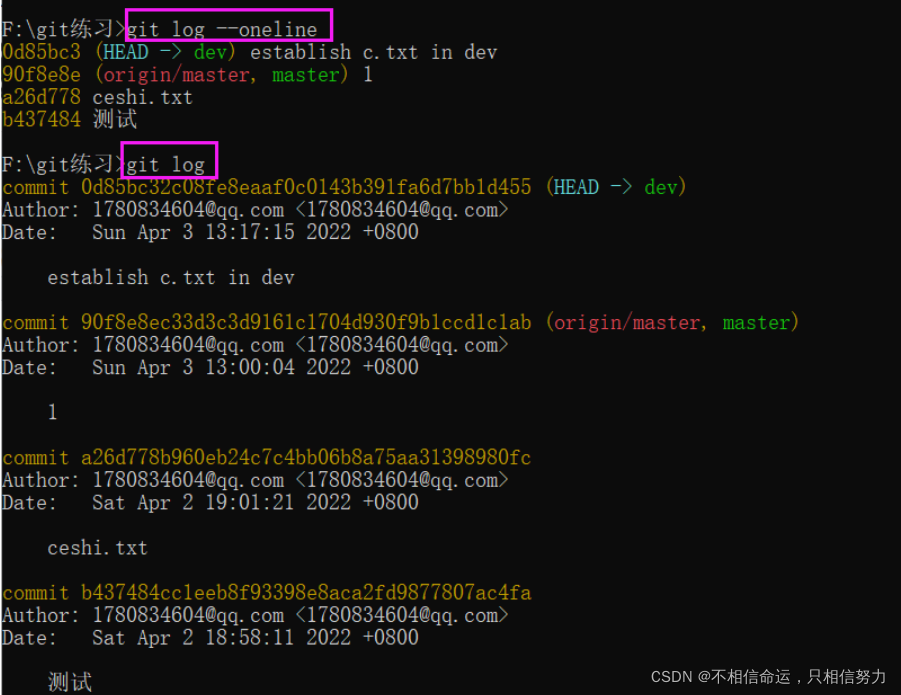
比如在dev 新建代码,进行git add . 和git commit


多分支提交日志
简易日志:git log --oneline
完整日志:git log
分支合并
1.快速合并
如果分支dev当前得修改,是完全基于master的修改而来,那么master
分支合并dev代码,就是指针的移动既可


2.三分合并
在不具备快速合并的条件下,会采用三方合并
git merge dev

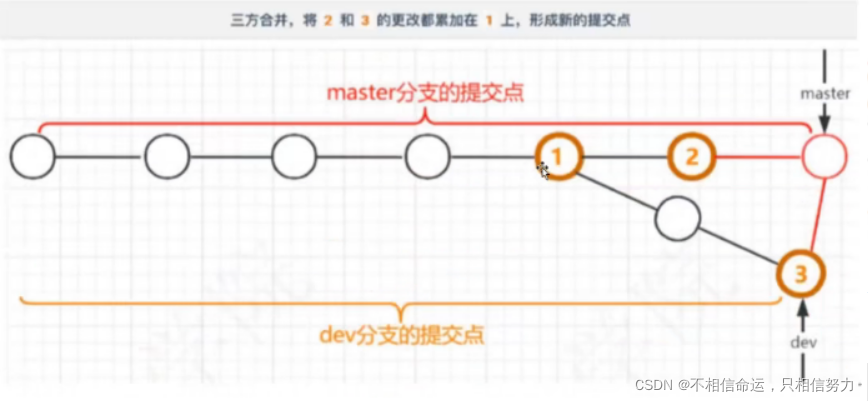
主分支添加分件后,切换到dev 添加文件。进行合并操作

合并冲突
两个分支进行合并,但是它们是对同一个代码的修改则会在合并的时候出现冲突
比如我在master分支修改了

打开冲突文件
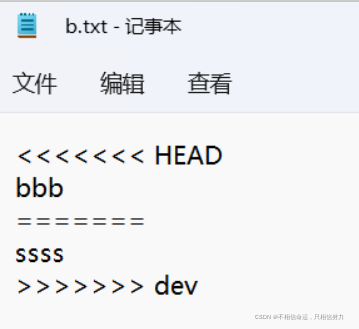
解决冲突:
出现冲突后,需要两个开发人员协商,如何取舍
1.保留一方,删除另一方
2.保留双方的(记得删除<<<<===>>>)