环境配置
1. windows安装cmake
下载地址:https://cmake.org/download/

按照上图中的下载cmake的安装包,安装注意事项如下:
安装路径切记不能包含空格!!!!
安装路径切记不能包含空格!!!!
安装路径切记不能包含空格!!!!
不要安装到“Program Files”这个文件夹,不要问我为什么,因为编译过程中会因为空格导致截断报错!!!!
安装完成后,通过下面命令验证安装成功,如果显示cmake版本信息则安装成功:
d:\> cmake -version
cmake version 3.23.1
CMake suite maintained and supported by Kitware (kitware.com/cmake).
将CMake的bin目录添加到系统环境变量path中。
2. Linaro-Arm-linux编译工具链下载
下载地址:https://releases.linaro.org/components/toolchain/binaries/6.5-2018.12/arm-linux-gnueabihf/

下载完成后,直接解压到本地目录即可。
3.windows下cygwin安装
下载地址:https://cygwin.com/setup-x86_64.exe
安装到本地目录,将cygwin64的bin目录和sbin目录添加到本地目录。
4.opencv源码下载
下载git地址:https://opencv.org/releases/
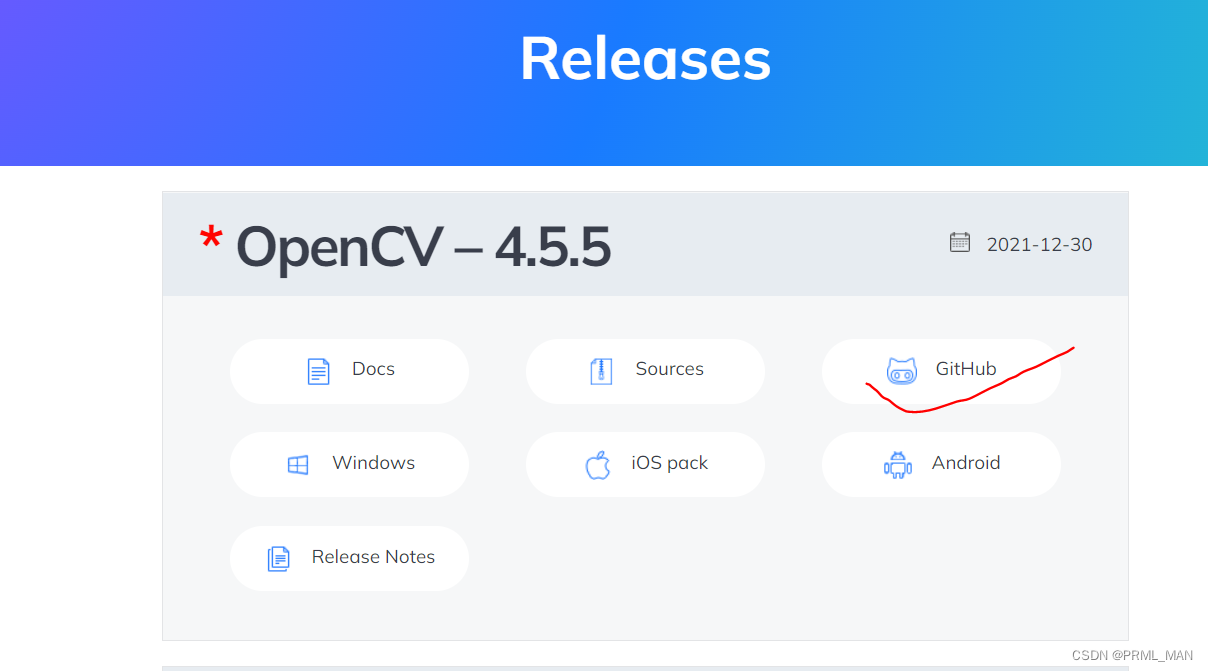
本地用的opencv版本是4.5.4,可根据自己的需要下载指定版本,选择GitHub下载源码,流程见下图。
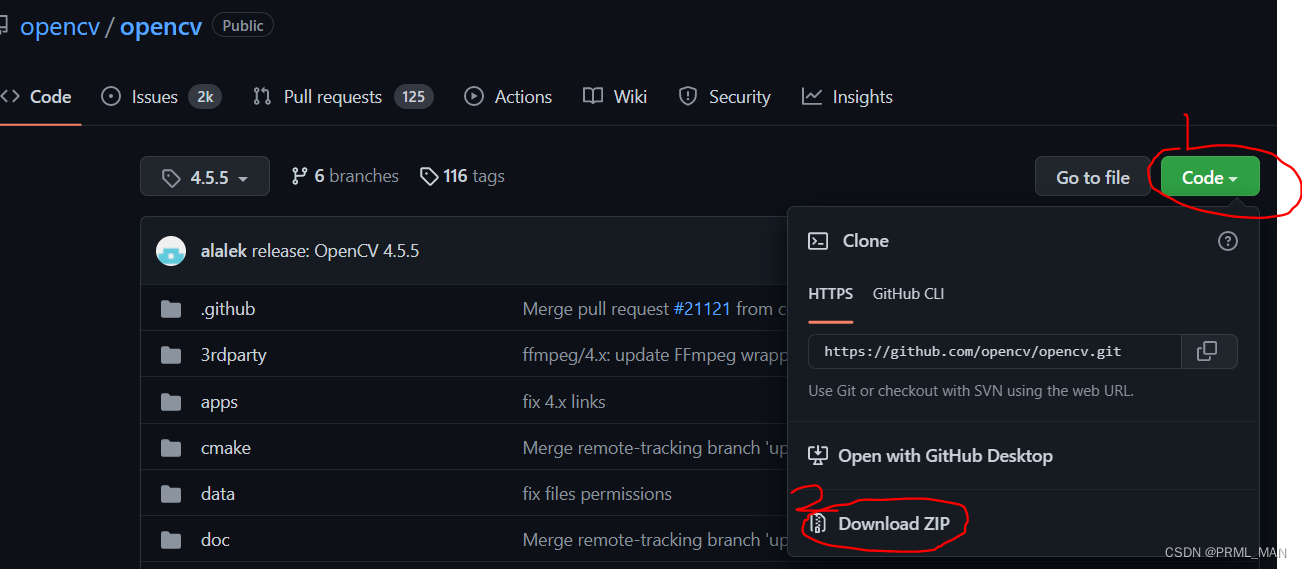
下载后的源码直接解压到本地目录即可。
5.Github下载安装
因为windoes的cmd和powershell通过make来编译opencv时报错,因此最终选择git bash来作为命令执行窗口
下载地址:https://gitforwindows.org/

安装流程可以参考下面的连接:
https://baijiahao.baidu.com/s?id=1670483893309279162&wfr=spider&for=pc
6. make.exe 下载并配置到git中
32位下载地址:http://www.equation.com/ftpdir/make/32/make.exe
64位下载地址:http://www.equation.com/ftpdir/make/64/make.exe
可以根据自己win10系统的位数来选择下载32还是64位。
搜索git-bash.exe所在的目录并打开,如下图
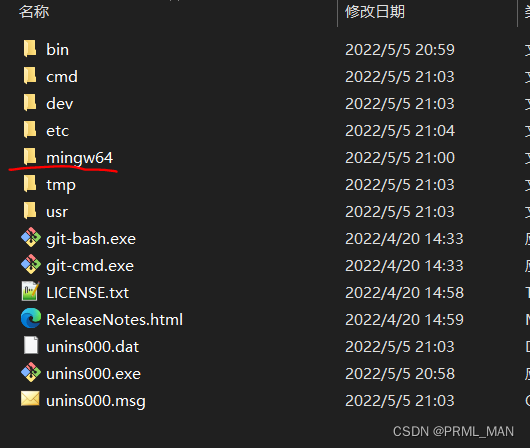
将make.exe拷贝到当前目录下的“/mingw64/bin”文件夹下,此时,git中就可以使用make命令来执行makefile文件了。
通过gitbash来测试make是否正常:
$ make -v
GNU Make 4.2
This program is built by Equation Solution <http://www.Equation.com>.
Copyright (C) 1988-2016 Free Software Foundation, Inc.
License GPLv3+: GNU GPL version 3 or later <http://gnu.org/licenses/gpl.html>
This is free software: you are free to change and redistribute it.
There is NO WARRANTY, to the extent permitted by law.
同时将make.exe 拷贝到cygwin的bin目录下,通过windows的cmd窗口测试测试是否成功:
C:\Users\Administrator>make -v
GNU Make 4.2
This program is built by Equation Solution <http://www.Equation.com>.
Copyright (C) 1988-2016 Free Software Foundation, Inc.
License GPLv3+: GNU GPL version 3 or later <http://gnu.org/licenses/gpl.html>
This is free software: you are free to change and redistribute it.
There is NO WARRANTY, to the extent permitted by law.
开始配置CMake和编译工具链
配置CMake
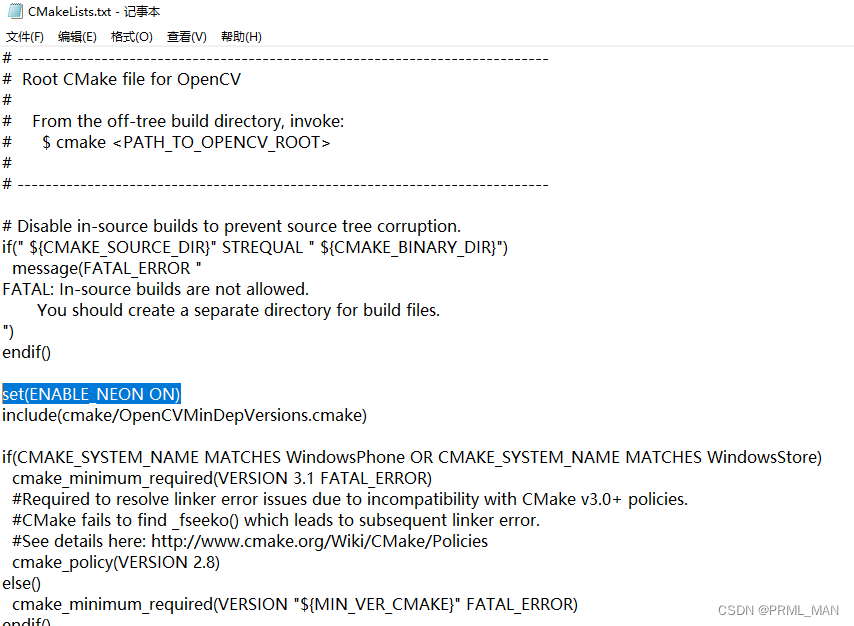
0 非常重要的一步,将在opencv目录下的CMakeList.txt中,添加set(ENABLE_NEON_ON),然后保存关闭
1 打开cmake
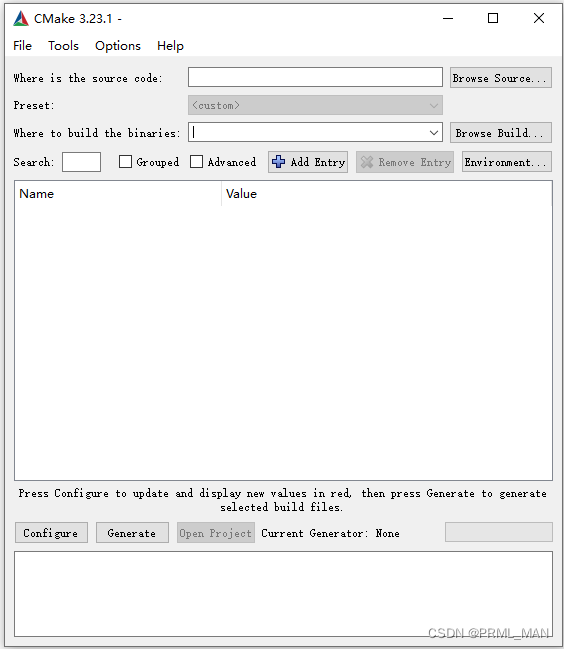
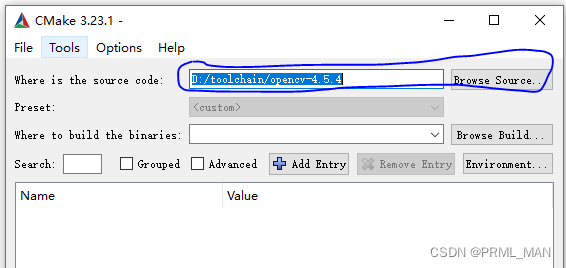
2 选择源码,选择opencv源码解压后的目录
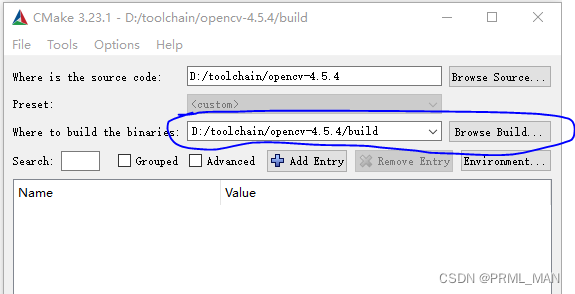
3 选择编译后的目录,一般在opencv目录下创建一个build文件夹用于存放编译的相关文件
4 配置编译工具链
点击左下方的configure按钮,按下图选择
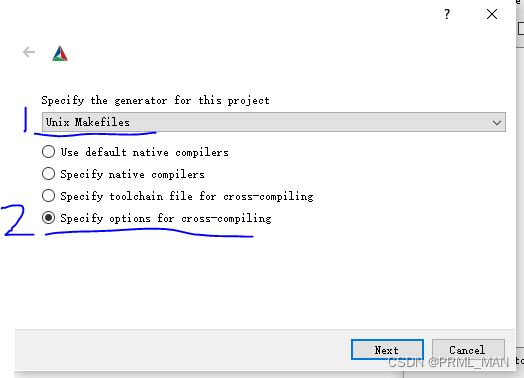
5 填写编译工具链信息
系统名称:Linux
处理器:arm
编译器C: 选择 \gcc-linaro-6.5.0-2018.12-i686-mingw32_arm-linux-gnueabihf\bin\arm-linux-gnueabihf-gcc.exe
编译器C++: 选择 \gcc-linaro-6.5.0-2018.12-i686-mingw32_arm-linux-gnueabihf\bin\arm-linux-gnueabihf-g++.exe
Target Root:选择 \gcc-linaro-6.5.0-2018.12-i686-mingw32_arm-linux-gnueabihf\lib
其他的不需要变
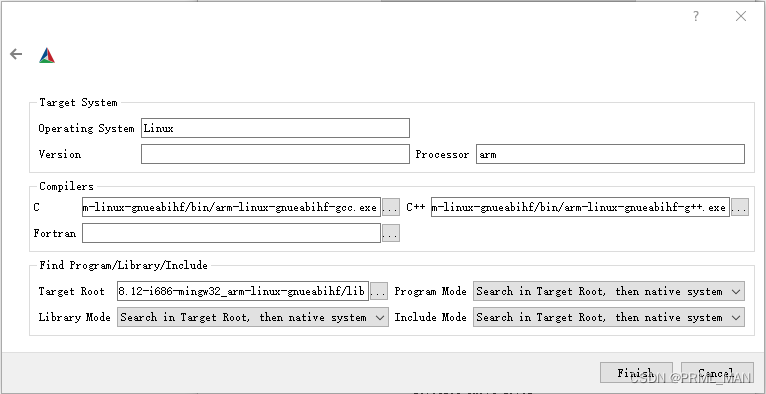
6 点击finish按钮,等待configuration done出现,这说明配置成功
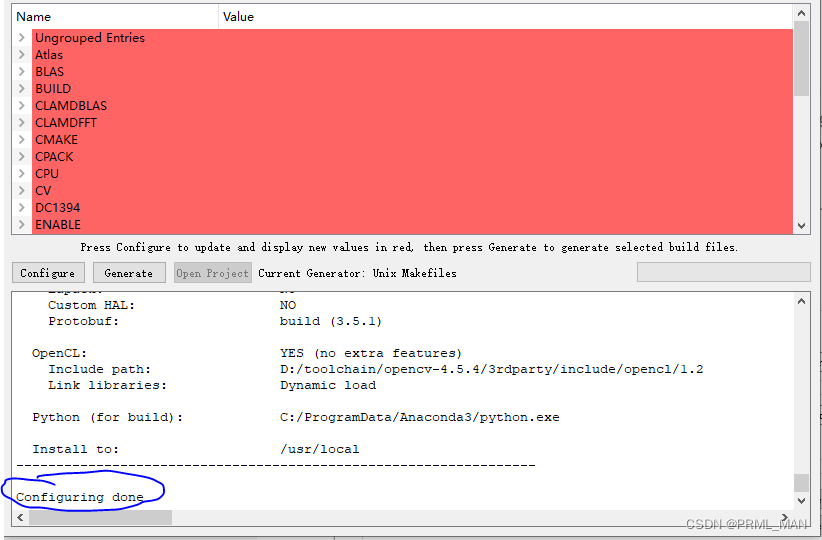
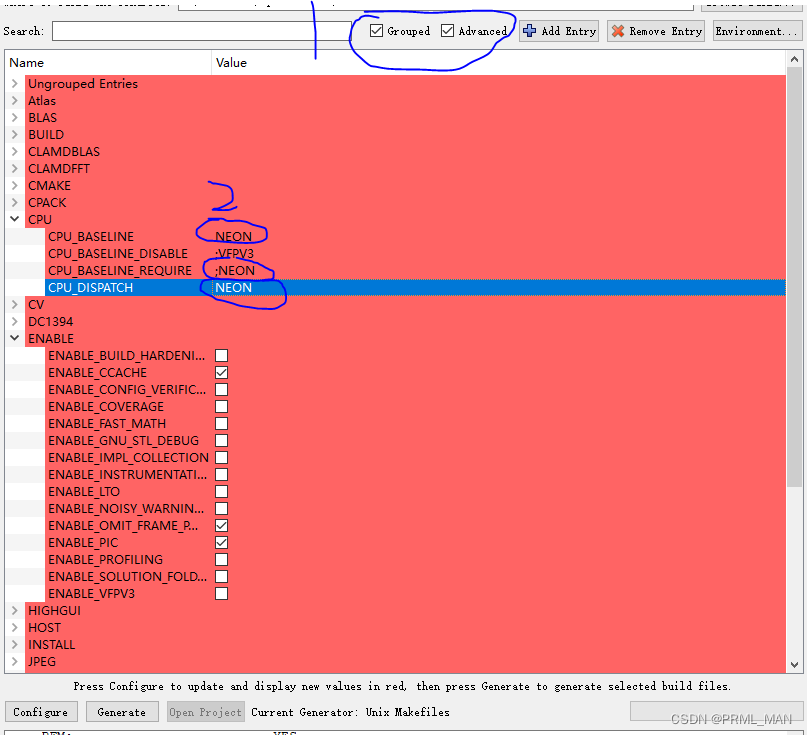
7 配置neon
将cpu配置为NEON
8 点击Generate按键,进行生成makefile
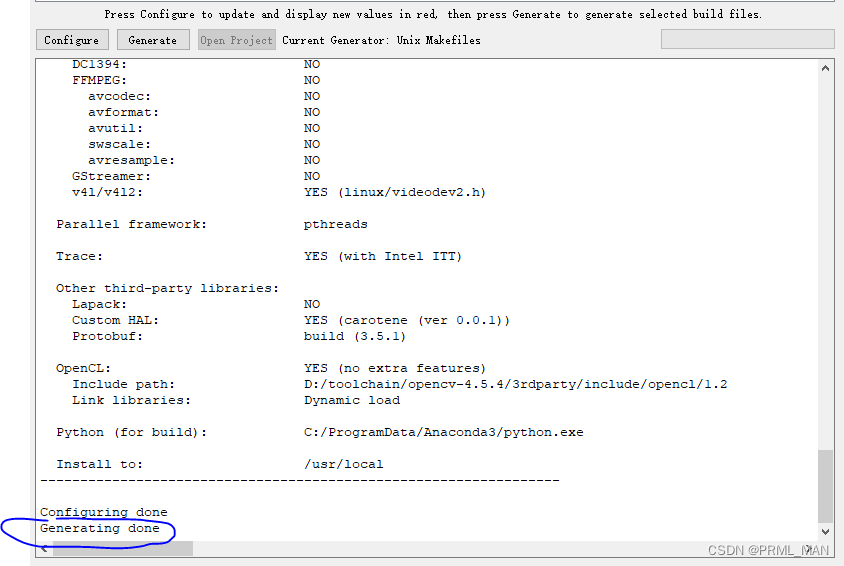
开始编译opencv源码
到opencv build目录下,空白处鼠标右键,选择“git bash here”
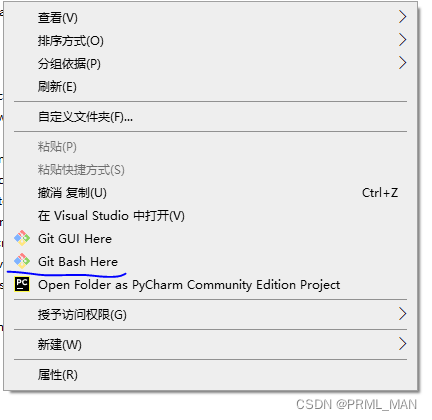
在git命令行下输入:
make -j4
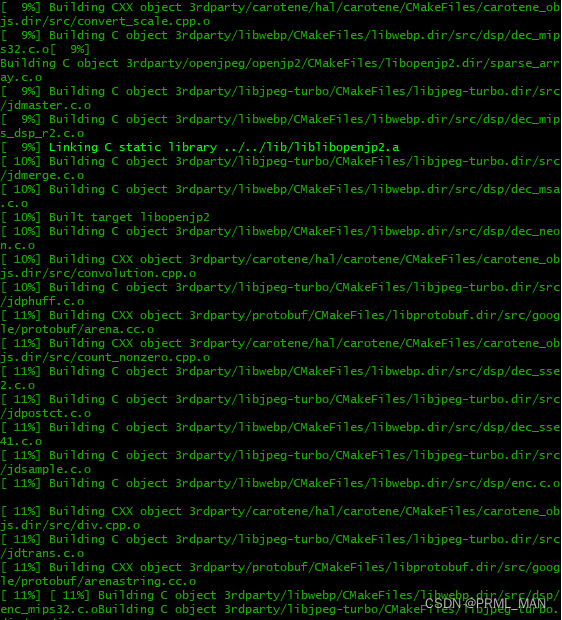
编译完成后,输入下面的命令
make install
目前,开启NEON加速的opencv的源码就可以编译成功了。
