介绍
简介
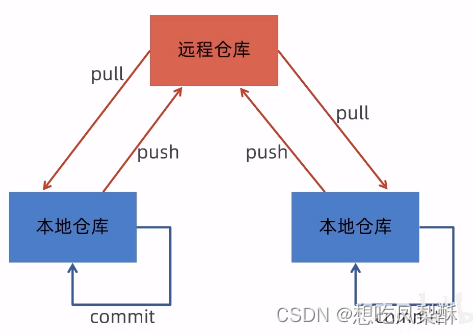
Git是一个分布式版本控制工具,通常用来对软件开发过程中的源代码文件进行管理。通过Git 仓库来存储和管理这些文件,Git仓库分为两种:
- 本地仓库:开发人员自己电脑上的Git 仓库
- 远程仓库:远程服务器上的Git仓库
commit:提交,将本地文件和版本信息保存到本地仓库
push:推送,将本地仓库文件和版本信息上传到远程仓库
pull:拉取,将远程仓库文件和版本信息下载到本地仓库
Git代码托管服务
常用的Git代码托管服务
Git中存在两种类型的仓库,即本地仓库和远程仓库。那么我们如何搭建Git远程仓库呢?
我们可以借助互联网上提供的一些代码托管服务来实现,其中比较常用的有GitHub、码云、GitLab等。
- gitHub (地址: https:l /github.com/ ),是一个面向开源及私有软件项目的托管平台,因为只支持Git作为唯一的版本库格式进行托管,故名gitHub
- 码云(地址: https://gitee.com/ ),是国内的一个代码托管平台,由于服务器在国内,所以相比于GitHub,码云速度会更快
- GitLab(地址: https:/l about.gitlab.com/ ),是一个用于仓库管理系统的开源项虽,使用Git作为代码管理工具,并在此基础上搭建起来的web服务
- BitBucket(地址: https://bitbucket.org/),是一家源代码托管网站,采用Mercurial和Git作为分布式版本控制系统,同时提供商业计划和免费账户
码云托管项目
使用码云的操作流程如下:
- 注册码云账号
- 登录码云
- 创建远程仓闻
- 邀请其他用户成为仓库成员
常用命令
Git全局设置
当安装Git后首先要做的事情是设置用户名称和email地址。这是非常重要的,因为每次Git提交都会使用该用户信息。
在Git命令行中执行下面命令:
- 设置用户信息
git config --global user.name “itcast”
git config --global user.email "hello@itcast.cn” - 查看配置信息
git config --list
注意:上面设置的user.name和user.email并不是我们在注册码云账号时使用的用户名和邮箱,此处可以任意设置。
获取Git仓库
第一种方式:获取Git仓库-在本地初始化Git仓库
执行步骤如下:
- 在任意目录下创建一 个空目录(例如repo1)作为我们的本地Git仓库
- 进入这个目录中,点击右键打开Git bash窗口
- 执行命令** git init **
如果在当前目录中看到.git文件夹(此文件夹为隐藏文件夹)则说明Git仓库创建成功
第二种方式:获取Git仓库-从远程仓库克隆
可以通过Git提供的命令从远程仓库进行克隆,将远程仓库克隆到本地
命令形式: ** git clone【远程Git仓库地址】 **
工作区、暂存区、版本库概念
为了更好的学习Git,我们需要了解Git相关的一些概念,这些概念在后面的学习中会经常提到
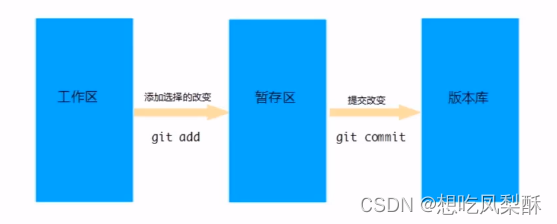
版本库:前面看到的.git隐藏文件夹就是版本库,版本库中存储了很多配置信息、日志信息和文件版本信息等
工作区:包含.git文件夹的目录就是工作区,也称为工作目录,主要用于存放开发的代码
暂存区:.git文件夹中有很多文件,其中有一个index文件就是暂存区,也可以叫做stage。暂存区是一个临时保存修改文件的地方
Git工作区中文件的状态
Git工作区中的文件存在两种状态:
- untracked 未跟踪(未被纳入版本控制)
- tracked 已跟踪(被纳入版本控制)
- Unmodified 未修改状态
- Modifieg 已修改状态
- Staged 已暂存状态
注意:这些文件的状态会随着我们执行Git的命令发生变化
查看状态命令:git status
本地仓库操作
本地仓库常用命令如下:
- git status 查看文件状态
- git add 将文件的修改加入暂存区
- 全部加入:git add *
- 单个加入:git add user.java
- git reset 将暂存区的文件取消暂存或者是切换到指定版本
- 取消暂存:git reset
- 切换到指定版本:git reset --hard
版本号(使用git log 查看版本号)
- git commit 将暂存区的文件修改提交到版本库
- 全部提交:git commit “提交说明”
- 单个提交:git commit “提交说明” user.java
- git log 查看日志(可以查看版本号(对应的commit列))
远程仓库操作
前面执行的命令操作都是针对的本地仓库,本节我们会学习关于远程仓库的一些操作,具体包括:
- git remote 查看远程仓库
- git remote:关联了远程仓库就会显示
origin - git remote -v :关联了远程仓库就会显示
origin+仓库地址
- git remote:关联了远程仓库就会显示
- git remote add 添加远程仓库
- git remote add <仓库别名> <仓库地址> :git remote add origin https://gitee.com/hassd/test.git
- git clone 从远程仓库克隆
- git clone <仓库地址>:git clone https://gitee.com/hassd/test.git
- git pull 从远程仓库拉取
- git pull <仓库别名> <分支名称>:git pull origin master
- 如果报错( fatal: refusing to merge unrelated histories )
就解决此问题可以在git pull命令后加入参数 --allow-unrelated-histories
git pull origin master --allow-unrelated-histories
- git push 推送到远程仓库
- git push <仓库别名> <分支>:git push origin master
分支操作
分支是Git,使用过程中非常重要的概念。使用分支意味着你可以把你的工作从开发主线上分离开来,以免影响开发主线。同一个仓库可以有多个分支,各个分支相互独立,互不干扰。
通过git init命令创建本地仓库时默认会创建一个master分支。
本节我们会学习关于分支的相关命令,具体如下:
- git branch 查看分支
- git branch 列出所有本地分支
- git branch -r 列出所有远程分支
- git branch -a 列出所有本地分支和远程分支
- git branch [分支名] 创建分支
- git checkout [分支名] 切换分支
- git push [仓库别名] [分支名] 推送至远程仓库分支
- git merge [分支名] 合并分支
分支操作都要切换到相对应的分支
修改冲突之后提交到版本库失败加上: git commit “手动处理文件合并问题” user.java -i
标签操作
Git 中的标签,指的是某个分支某个特定时间点的状态。通过标签,可以很方便的切换到标记时的状态。
比较有代表性的是人们会使用这个功能来标记发布结点(v1.0 、v1.2等)。下面是mybatis-plus的标签:
在本节中,我们将学习如下和标签相关的命令:
- git tag 列出已有的标签
- git tag [标签名] 创建标签
- git push [仓库别名] [标签名] 将标签推送至远程仓库
- git checkout -b [新的分支名] [标签名] 检出标签
在IDEA中使用Git
在IDEA中配置Git
在IDEA中使用Git,本质上还是使用的本地安装的Git软件,所以需要在IDEA中配置Git。
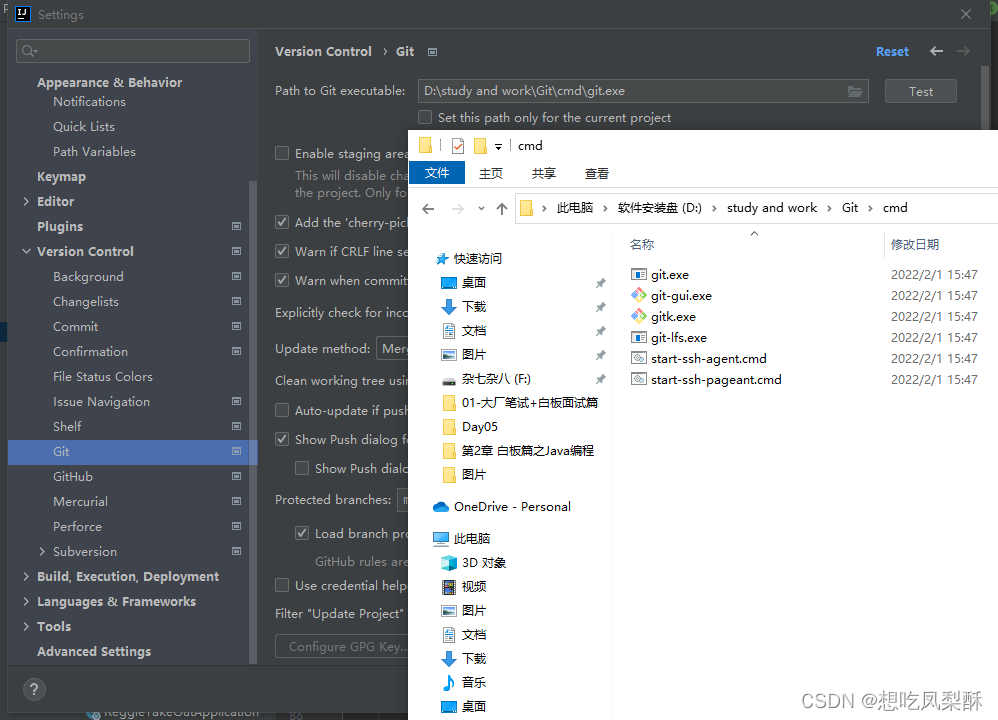
获取Git仓库
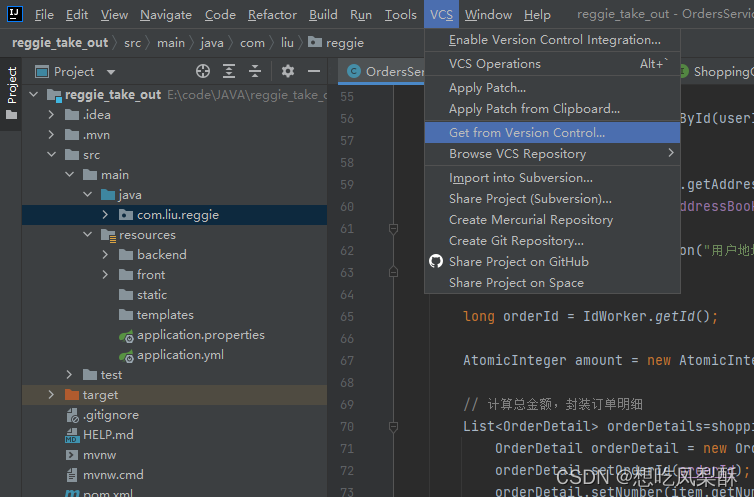
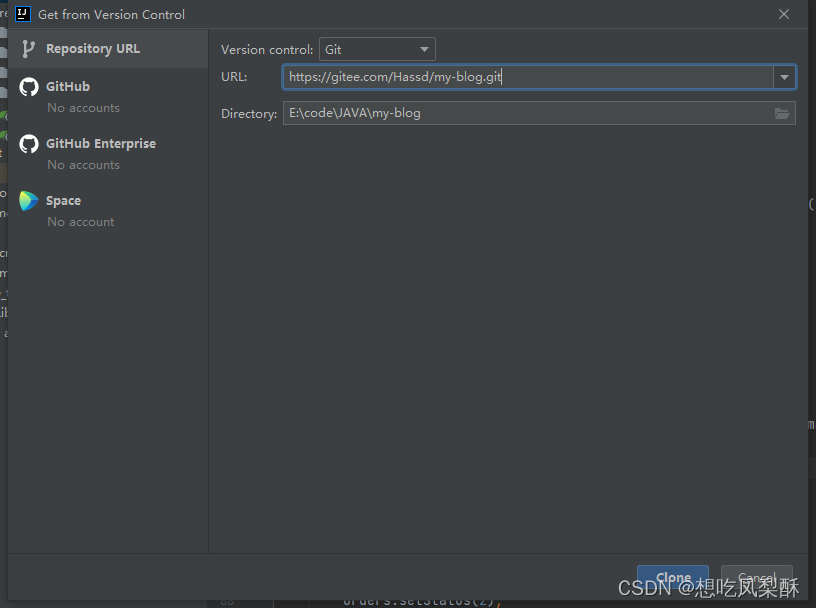
在IDEA中使用Git获取仓库有两种方式:
- 本地初始化仓库
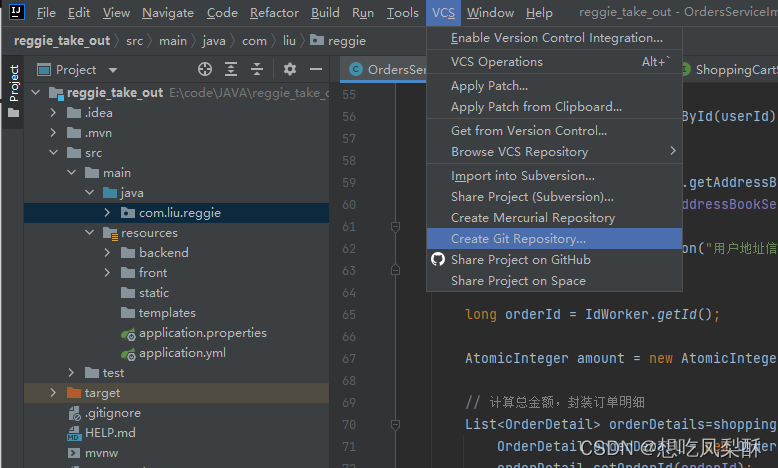
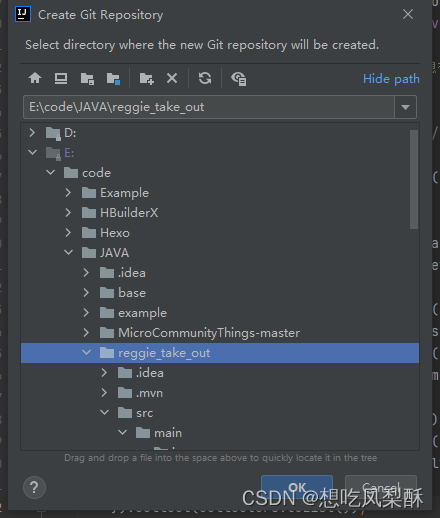
一定要选项目根目录 - 从远程仓库克隆
本地仓库操作
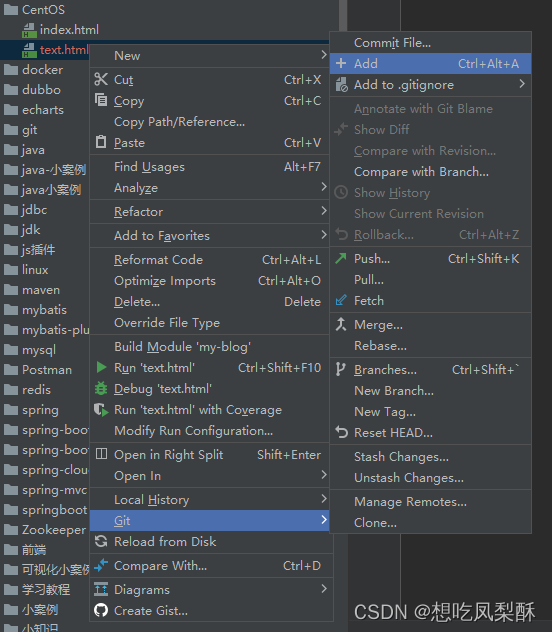
- 将文件加入暂存区
新建就会自动提示
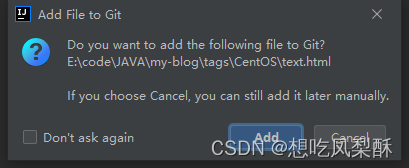
或者自己手动
- 将暂存区的文件提交到版本库
单个文件提交
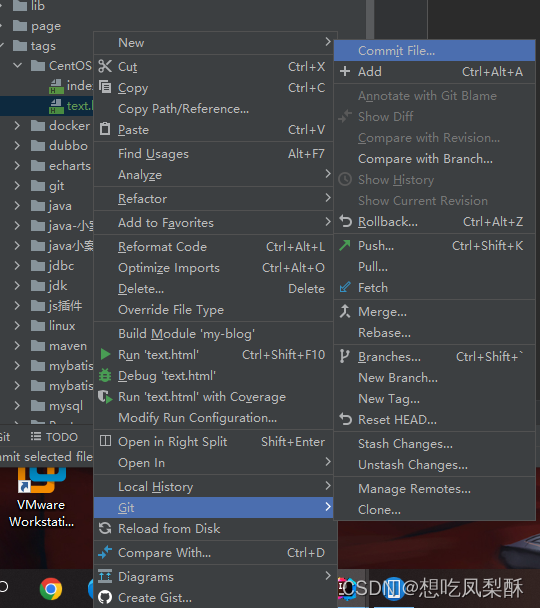
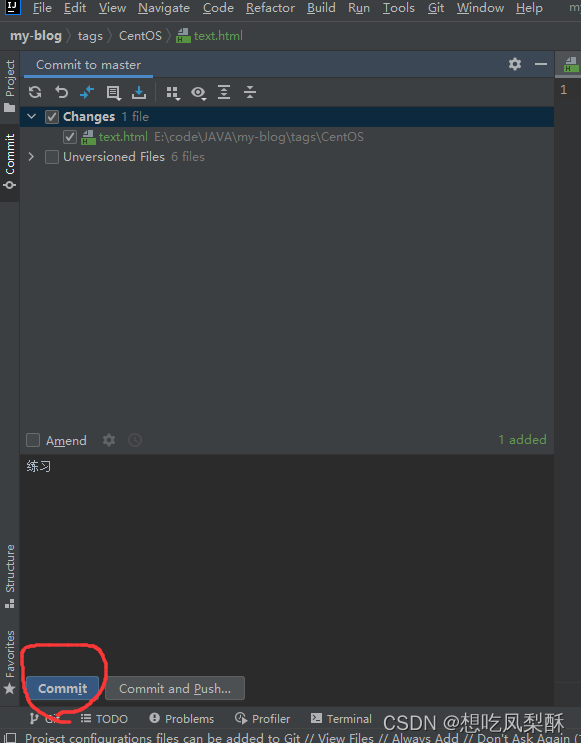
整个目录提交
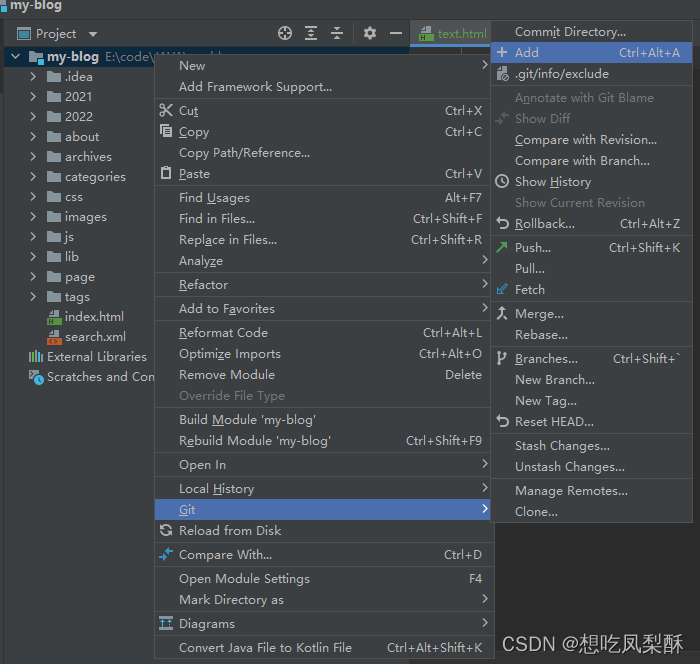
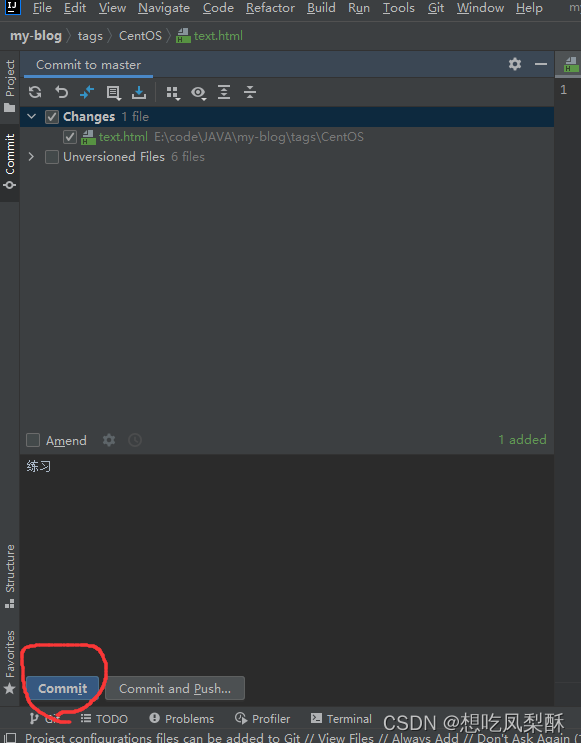
或者直接简单的点击对钩

- 查看日志
选择根目录,点击小时钟就可以看到所有的历史了
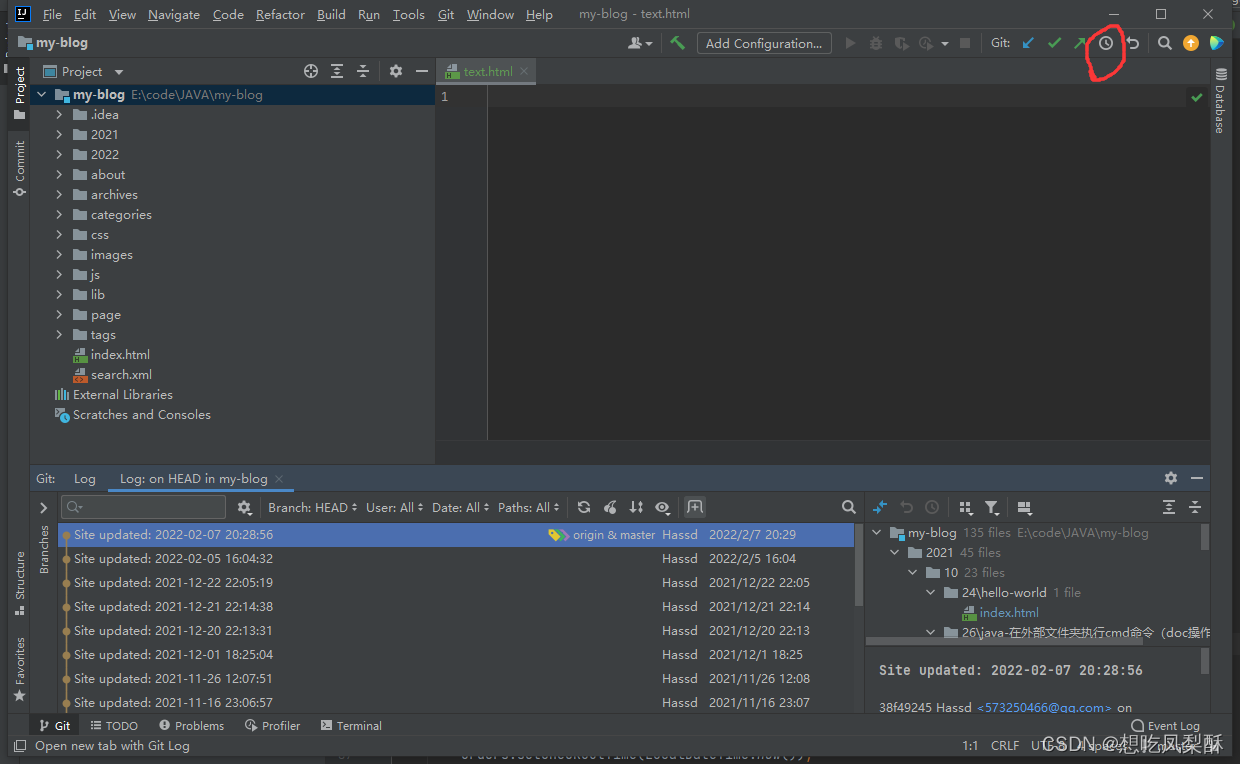
远程仓库操作
- 推送到远程仓库
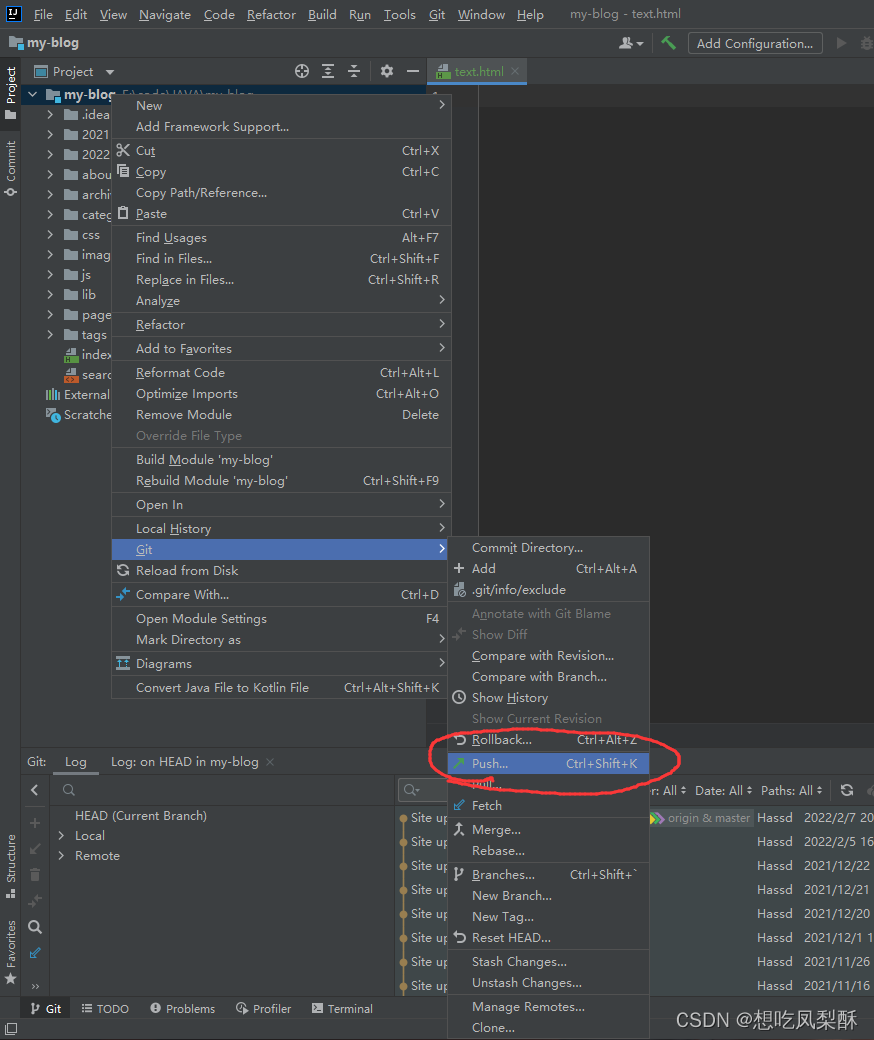
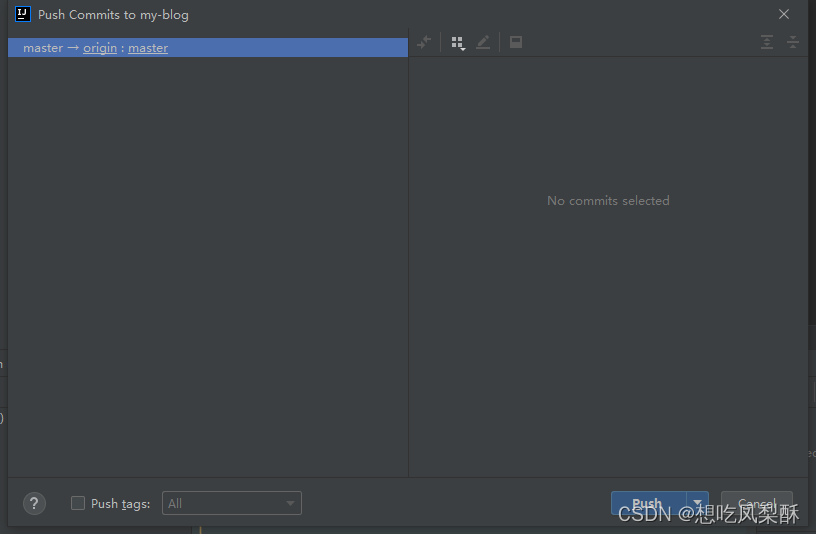
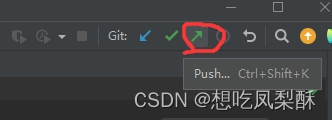
或者直接点击 向右上的箭头
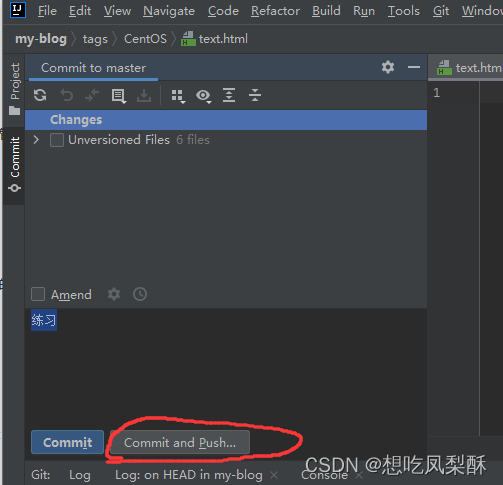
或者提交时推送
- 拉取
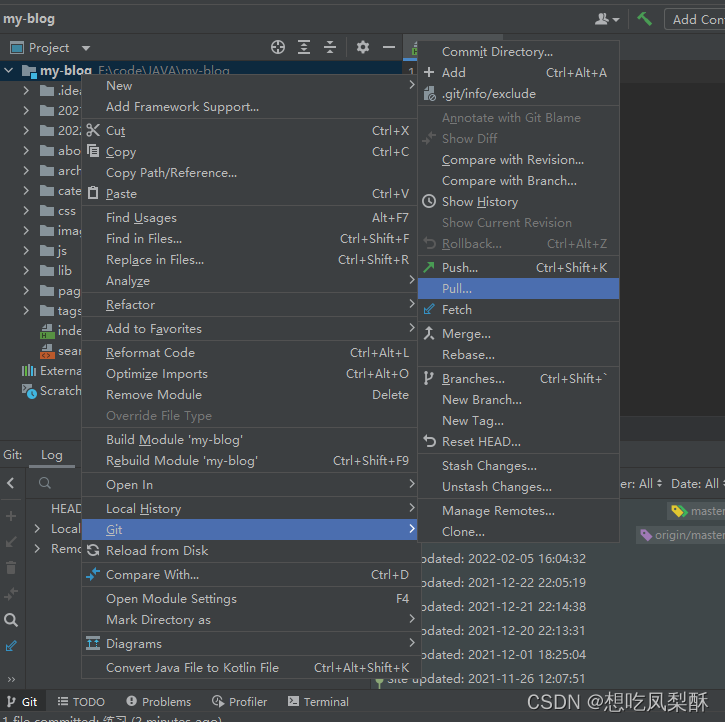

或者点击向左下角的按钮

分支操作
- 查看分支
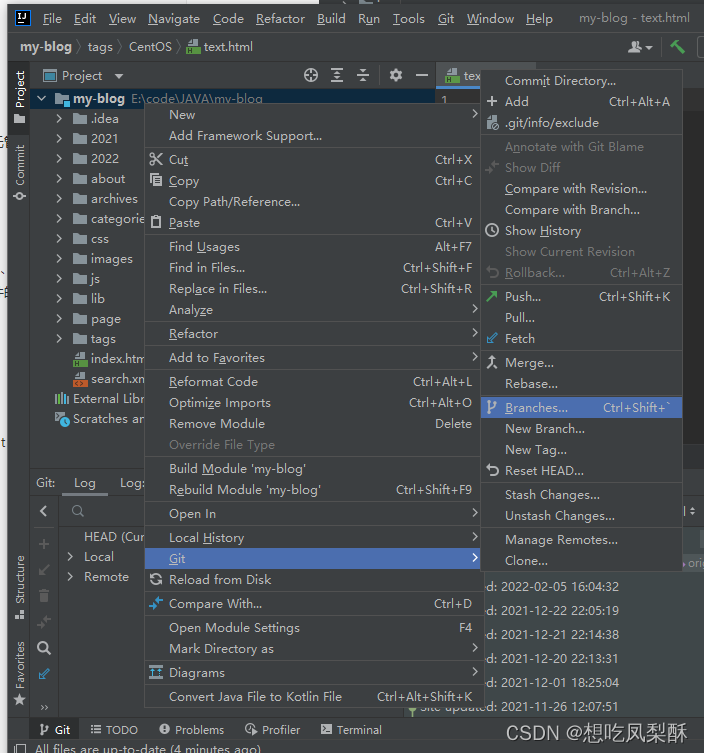
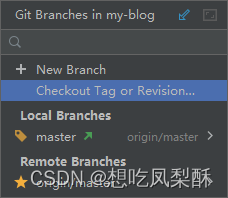
或者直接点击右下角
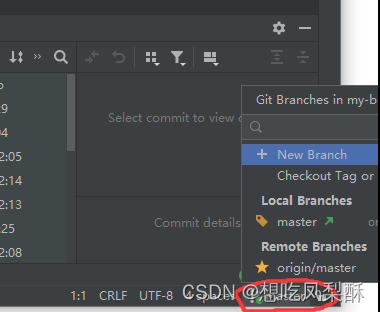
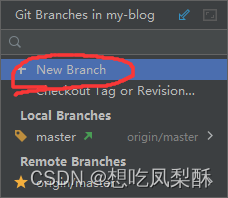
- 创建分支
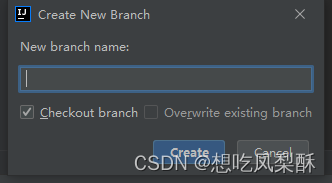
- 切换分支
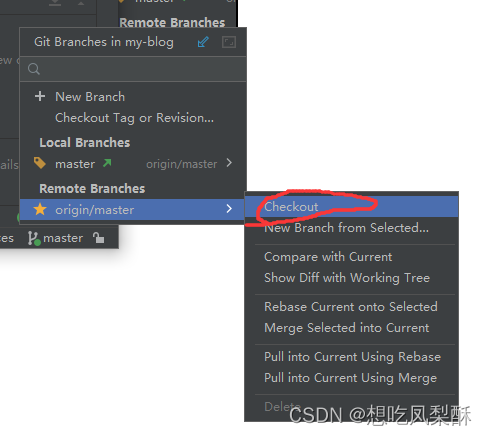
- 推送分支到远程仓库
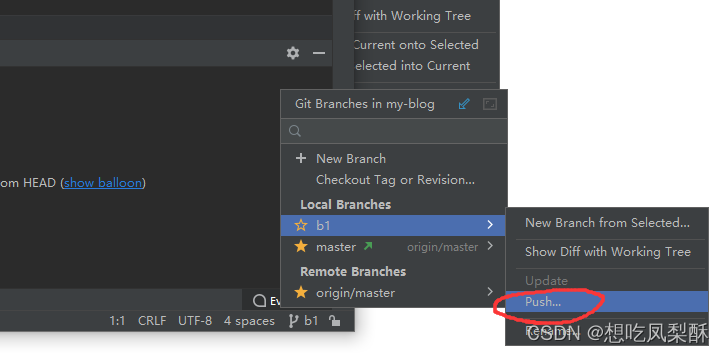
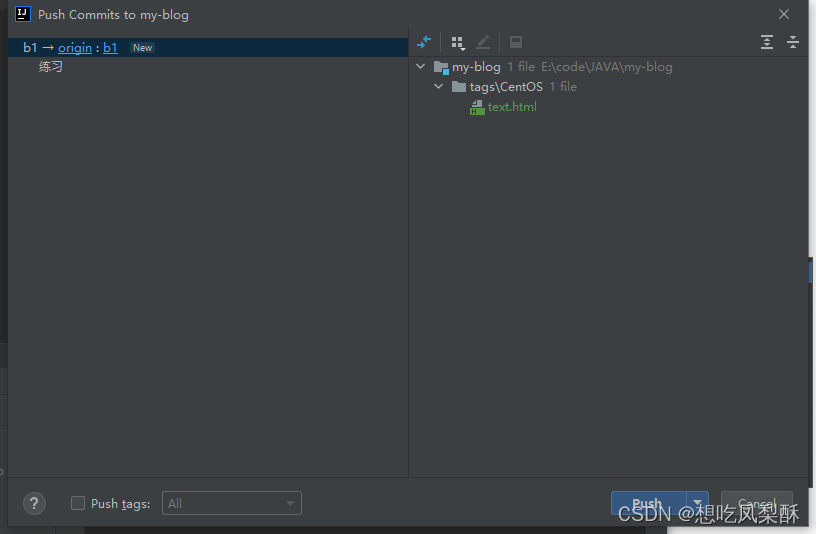
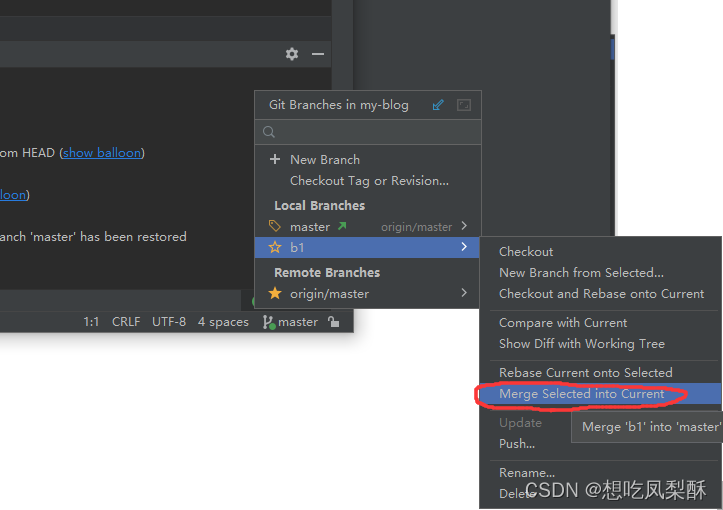
- 合并分支
