1 初始化本地库
本文以一个例子来说明本地库与远程库如何进行交互。
首先随便建立一个文件夹,作为我们自己的本地仓库,这里我以在E盘下创建文件夹GitResp为例

在该文件夹下打开Git Bash Here命令窗口(在该文件夹下右击鼠标,选择Git Bash Here),输入命令git init初始化本地仓库。

在该文件夹中新建一个文件demo.txt,该文件模拟我们要向远程库提交的文件,并且在其中输入一段文字:橘猫吃不胖。

将该文件提交到暂存区git add demo.txt,再提交到本地库git commit -m "增加了demo.txt文件" demo.txt,如下所示。

2 创建Github远程库
首先你需要有一个Github的账号,注册地址:https://github.com/
接下来以我的Github账号为例说明。注册好账号之后,进入自己的Github里面,点击右上角的+号,选择New respository。第一次创建仓库时会验证邮箱,跟着提示验证即可。

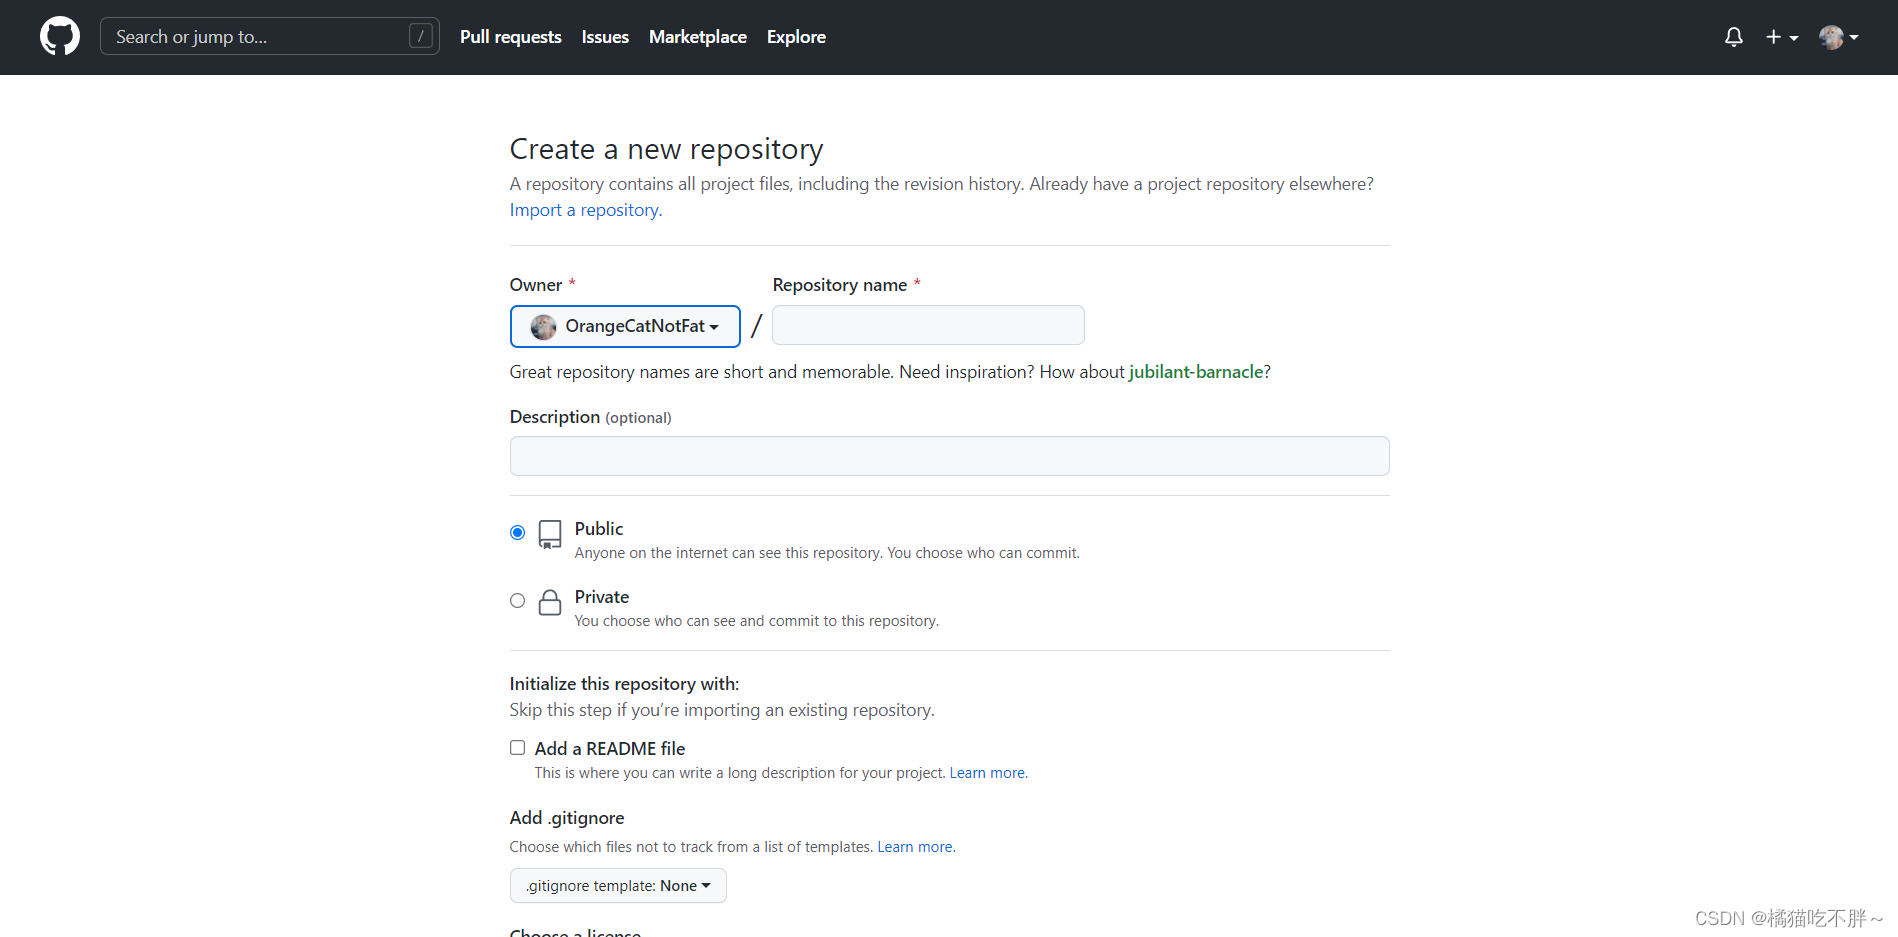
接下来进入了下面这个页面,在该页面就可以创建仓库了。

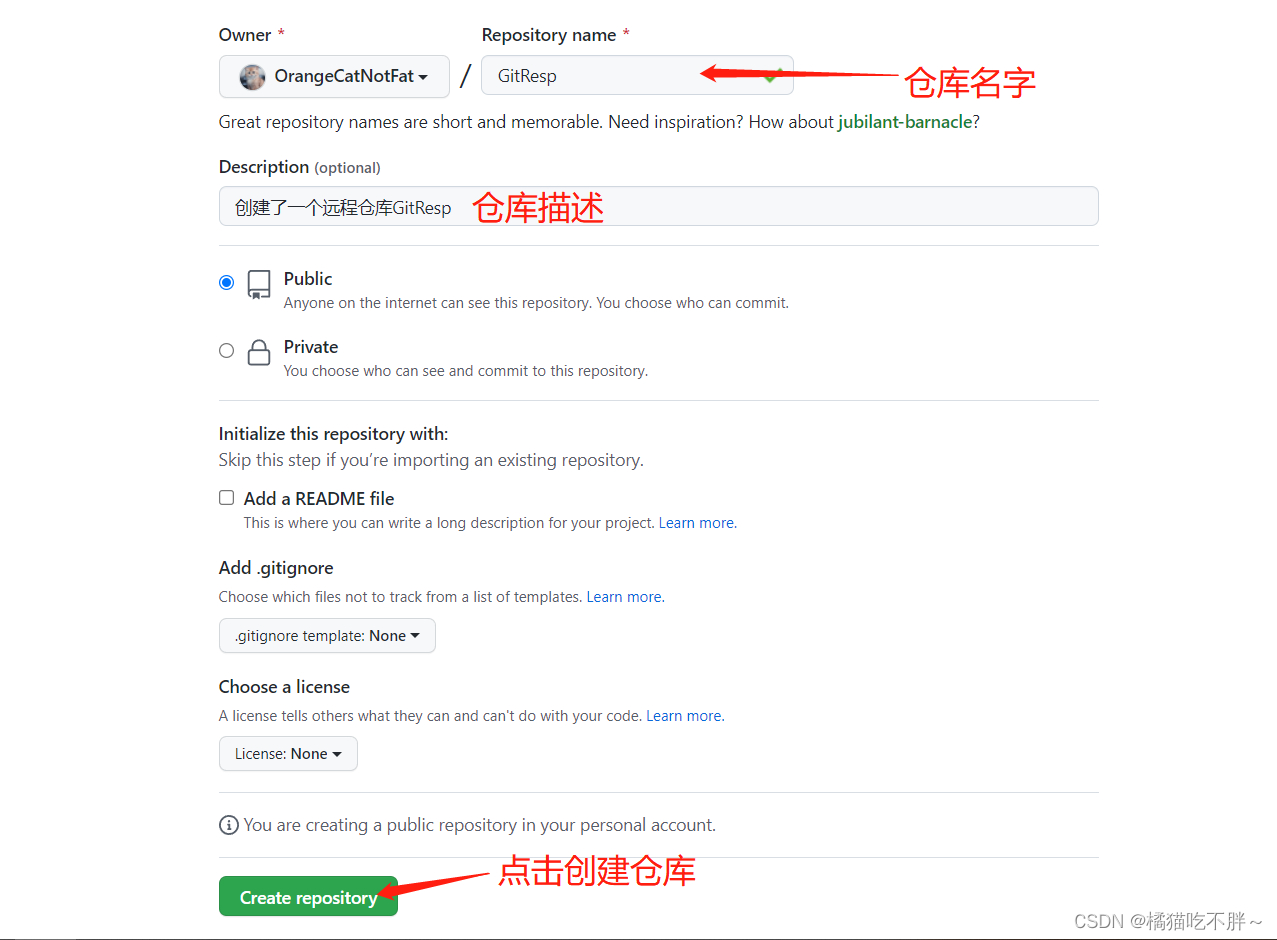
Owner # 表示当前仓库的拥有者
Repository name # 仓库名称,一般是和本地库一样的名字
Description # 仓库描述介绍,可以初步介绍你的仓库,写不写都可以
Public/Private # 仓库权限,公开就是所有人都可以看见,私有就是自己看
Initialize this repository with a README # 添加一个README.md,可以不选
gitignore # 不需要进行版本管理的仓库类型,对应生成文件.gitignore
license # 证书类型,对应生成文件LICENSE
根据上面的描述,我创建了一个自己的本地仓库,如下所示:

3 在本地创建远程库地址的别名
创建好远程库之后,我们就可以将本地库的内容上传到远程库了。上传之前,首先我们要知道远程库的地址。在上一步,我们点击创建之后,会自动进入以下页面,Git给了我们两个地址,一个是HTTPS,一个是SSH。

我们可以看到远程库的地址很长,每次拉取的时候一长串的地址不容易记忆,于是Git在本地为我们提供了一个以别名代替地址的方法。
首先我们要在本地查看一下远程库有没有别名,命令为:
git remote -v # 查看别名

可以看到没有任何的返回,这表示它没有别名。那我们接下来就可以给它起一个别名了,命令为:
git remote add 别名 远程仓库地址 # 给远程仓库起别名,别名可以随意起

这时我们再查看一下远程仓库的别名git remote -v,我们发现它出现了两条,其中fetch表示我们可以从这个地址取回我们的文件,push表示我们可以从该地址推送数据。

4 将本地库中内容推送到远程库
git push 远程库地址 分支名
# 远程库地址就是Github为我们提供的地址,或者在上一步我们修改了别名之后写别名也可以
# 分支名表示我们要向哪个分支上面推送内容
在上一步中我们为远程库起了个别名origin,接下来我们将本地库中的demo.txt文件推送到远程库git push origin master。输入密码点击回车之后,它可能让我们输入一下Github的账号密码,根据提示输入即可,输入完成之后,或者不用输入账号密码,也会直接显示下面的效果:

这时我们再到远程库上面刷新一下,发现我们的文件已经在上面了。

5 将远程库的内容克隆到本地
上一步中我们将本地库中的文件上传到了远程库中,那么这时我们要模拟另一个人的操作,另一个人如果想要获取到远程库中的内容,可以使用以下命令:
git clone 远程库地址 # 将远程库的内容拉取到本地
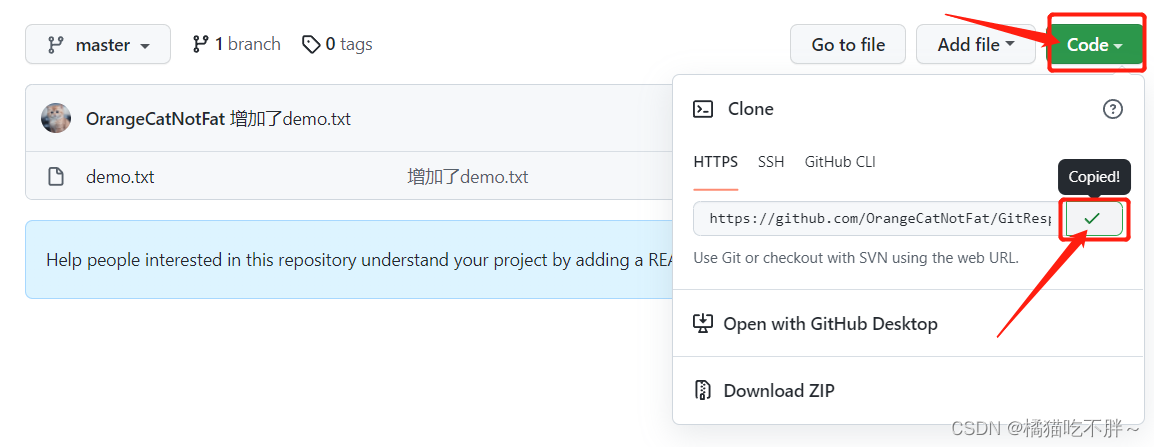
我们首先要在Github上面找到远程库的地址,可以在远程库的右边点击Code,这时看到了它的地址,直接复制即可。

然后在想要存放这个文件的地方(比如说D盘下),打开Git Bash Here窗口,输入命令git clone https://github.com/OrangeCatNotFat/GitResp.git。

在克隆时我们可能会遇到报错:fatal: unable to access 'https://github.com/OrangeCatNotFat/GitResp.git/': Failed to connect to github.com port 443 after 21084 ms: Timed out,多克隆几遍就行。
克隆完之后,我们再查看D盘,发现D盘下出现了这个文件:

