文章目录
问题
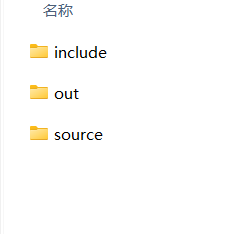
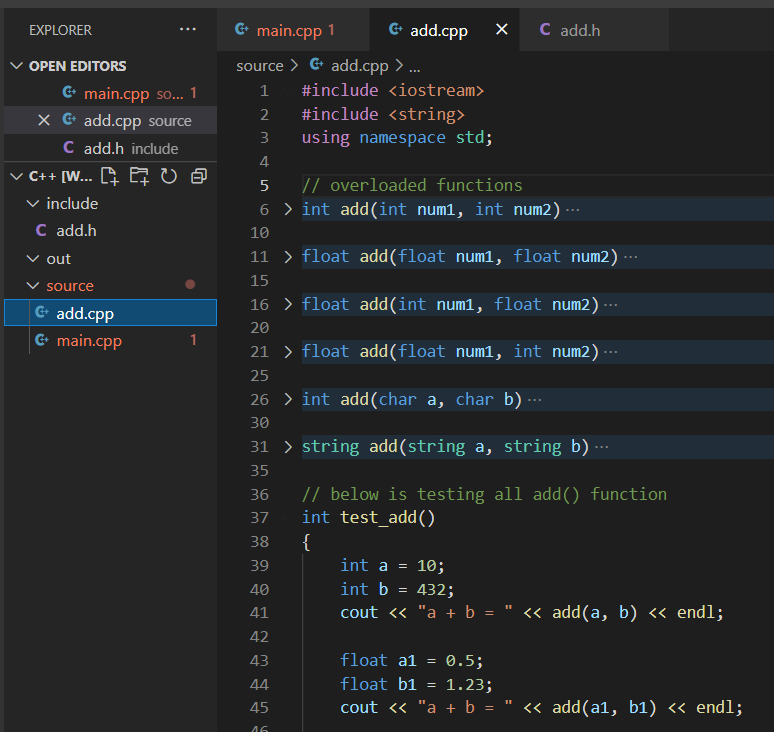
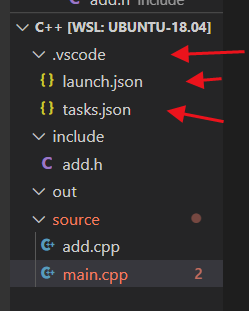
如下图文件夹
> include: *.h文件
> out: 编译后的输出文件夹
> source:*.cpp文件
先看看我们的几个文件夹里有什么文件,还有文件里有什么内容。
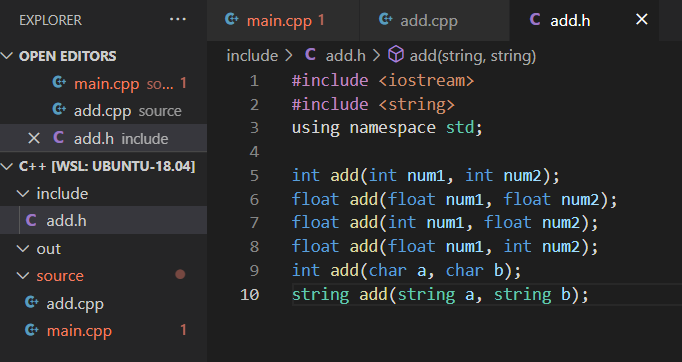
include
- add.h
- 这里就是add()函数的声明
- 还需要要加上 int test_add();这个声明
source
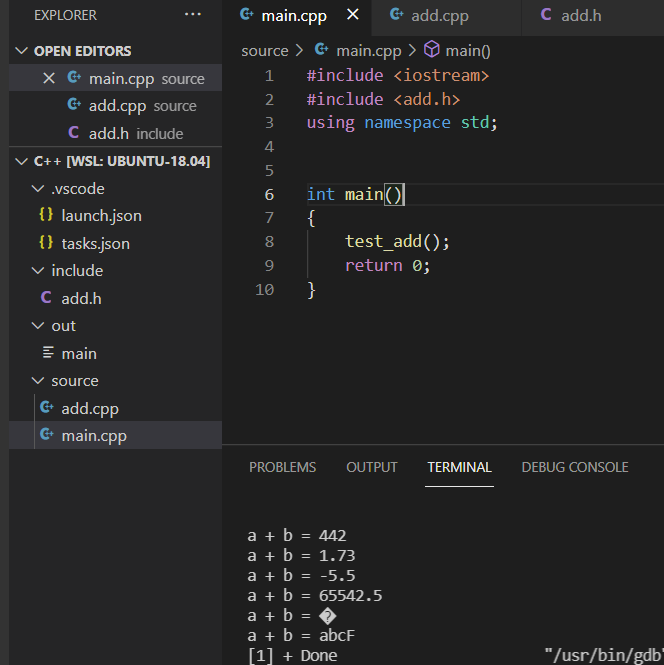
- main.cpp
- 简单的一个程序入口
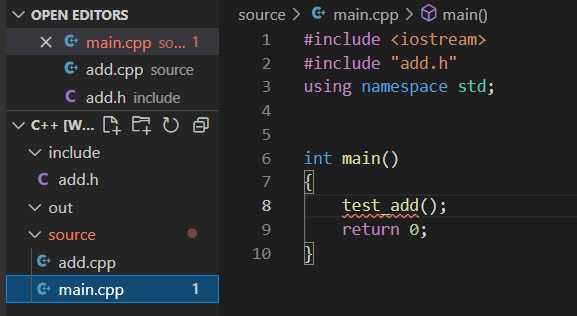
- 简单的一个程序入口
- add.cpp
- 这里是我们主要的程序部分,定义了几个add()函数。还有test_add()函数
- 还需要#include “add.h”
out
- 现在还没有编译过,所以为空
那我们要怎样配置vscode里的一些环境呢?
配置过程遇到的问题与解决
遇到的问题1
identifier "test_add" is undefinedC/C++(20)
说白了,就是test_add这个标识符不能识别(没有定义),可我们从上面的文件里看到了,该函数都是有的。再往下看,我们一个一个来解决。
解决步骤
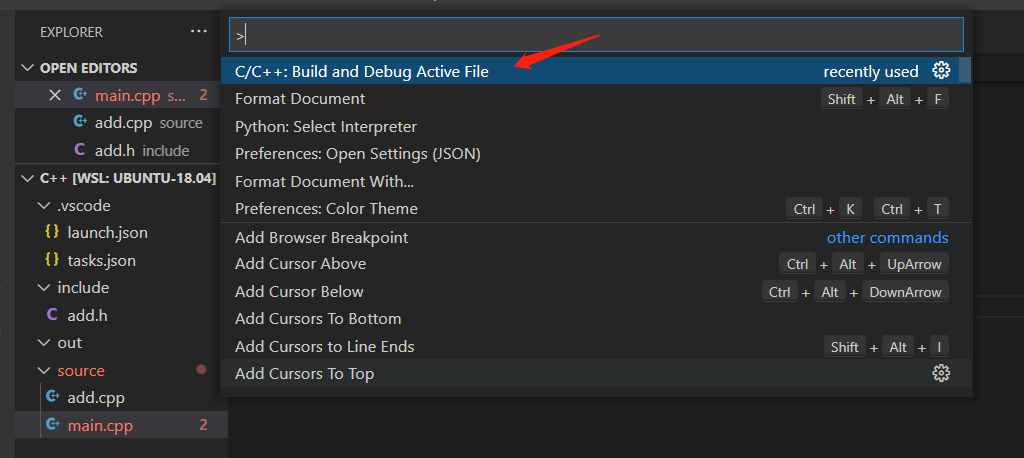
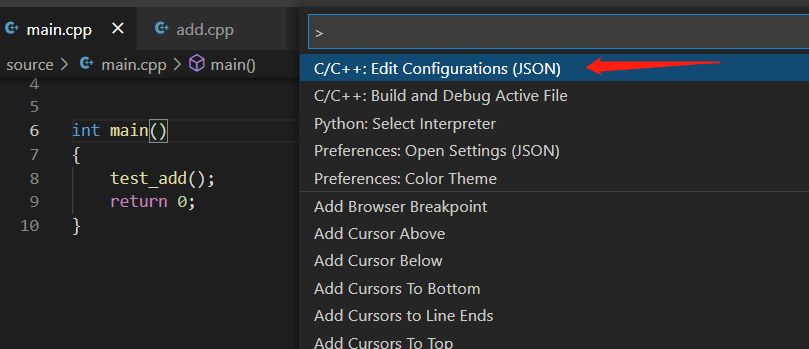
1. ctrl + shift + p
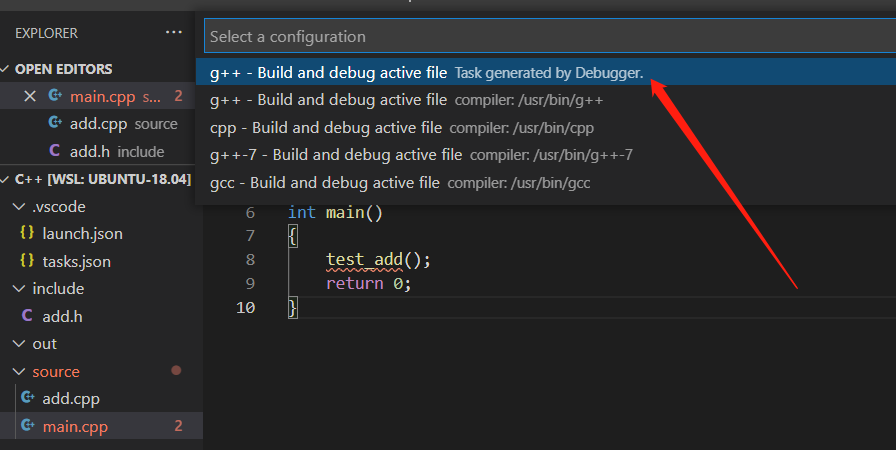
然后选择如下箭头所指示
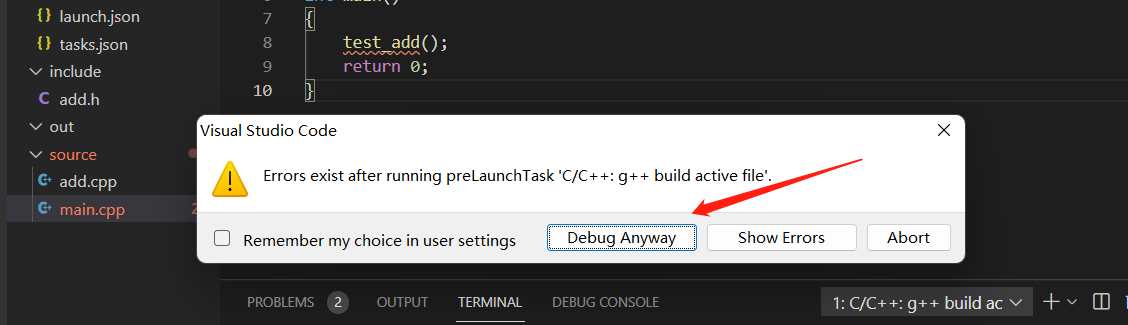
出现如下,选择Debug Anyway
完成这一步了,我们可以参文件下面,会有一个.vscode的文件夹,还有两个.json的文件。
2. 配置json文件
修改task.json文件
默认的如下,主要要修改三个地方
- 添加 -I,及-I对应的文件夹 (include)
- 修改 -o,及-o对文件夹 (out)
- 修改-g,及-g对应的文件(source)
{
    "tasks": [
        {
            "type": "cppbuild",
            "label": "C/C++: g++ build active file",
            "command": "/usr/bin/g++",
            "args": [
                "-g",
                "${file}",
                "-o",
                "${fileDirname}/${fileBasenameNoExtension}"
            ],
            "options": {
                "cwd": "${fileDirname}"
            },
            "problemMatcher": [
                "$gcc"
            ],
            "group": {
                "kind": "build",
                "isDefault": true
            },
            "detail": "Task generated by Debugger."
        }
    ],
    "version": "2.0.0"
}
修改如下
{
    "tasks": [
        {
            "type": "cppbuild",
            "label": "C/C++: g++ build active file",
            "command": "/usr/bin/g++",
            "args": [
                "-g",
                "${workspaceFolder}/source/*.cpp", //all cpp from source
                "-I", //include
                "${workspaceFolder}/include", //include path
                "-o",
                "${workspaceFolder}/out/${fileBasenameNoExtension}" //out path
            ],
            "options": {
                "cwd": "${fileDirname}"
            },
            "problemMatcher": [
                "$gcc"
            ],
            "group": {
                "kind": "build",
                "isDefault": true
            },
            "detail": "Task generated by Debugger."
        }
    ],
    "version": "2.0.0"
}
修改launch.json
默认的launch.json如下,
只需要修改2版主即可
- “program” 后的属性,修改成与tasks.json -o 后的属性一样
- “cwd”: 属性修改为 “${workspaceFolder}/out”
{
    // Use IntelliSense to learn about possible attributes.
    // Hover to view descriptions of existing attributes.
    // For more information, visit: https://go.microsoft.com/fwlink/?linkid=830387
    "version": "0.2.0",
    "configurations": [
        {
            "name": "g++ - Build and debug active file",
            "type": "cppdbg",
            "request": "launch",
            "program": "${fileDirname}/${fileBasenameNoExtension}",
            "args": [],
            "stopAtEntry": false,
            "cwd": "${fileDirname}",
            "environment": [],
            "externalConsole": false,
            "MIMode": "gdb",
            "setupCommands": [
                {
                    "description": "Enable pretty-printing for gdb",
                    "text": "-enable-pretty-printing",
                    "ignoreFailures": true
                }
            ],
            "preLaunchTask": "C/C++: g++ build active file",
            "miDebuggerPath": "/usr/bin/gdb"
        }
    ]
}
修改如下,都已经加注释了
{
    // Use IntelliSense to learn about possible attributes.
    // Hover to view descriptions of existing attributes.
    // For more information, visit: https://go.microsoft.com/fwlink/?linkid=830387
    "version": "0.2.0",
    "configurations": [
        {
            "name": "g++ - Build and debug active file",
            "type": "cppdbg",
            "request": "launch",
            "program": "${workspaceFolder}/out/${fileBasenameNoExtension}", //program output name, same as tasks.json -o path
            "args": [],
            "stopAtEntry": false,
            "cwd": "${workspaceFolder}/out", //out here is the folder named out
            "environment": [],
            "externalConsole": false,
            "MIMode": "gdb",
            "setupCommands": [
                {
                    "description": "Enable pretty-printing for gdb",
                    "text": "-enable-pretty-printing",
                    "ignoreFailures": true
                }
            ],
            "preLaunchTask": "C/C++: g++ build active file",
            "miDebuggerPath": "/usr/bin/gdb"
        }
    ]
}
保存以上文件后,已经不报错了
- F5: 调试程序
- CTRL+F5:运行程序
- ctrl + shift + B (build)
可能遇到的错误
1. collect2: error: ld returned 1 exit status
/usr/bin/g++ -g /mnt/d/tmp/c++/source/main.cpp -I /mnt/d/tmp/c++/include -o /mnt/d/tmp/c++/out/main
/tmp/ccBwxewk.o: In function `main':
/mnt/d/tmp/c++/source/main.cpp:8: undefined reference to `test_add()'
collect2: error: ld returned 1 exit status
tasks.json -g 后面的参数改为 “${workspaceFolder}/source/*.cpp”
2. /mnt/d/tmp/c++/source/add.cpp:3:10: fatal error: add.h: No such file or directory
Starting build...
/usr/bin/g++ -g /mnt/d/tmp/c++/source/*.cpp -o /mnt/d/tmp/c++/out/main
/mnt/d/tmp/c++/source/add.cpp:3:10: fatal error: add.h: No such file or directory
 #include "add.h"
          ^~~~~~~
compilation terminated.
/mnt/d/tmp/c++/source/main.cpp:2:10: fatal error: add.h: No such file or directory
 #include <add.h>
          ^~~~~~~
compilation terminated.

Build finished with error(s).
The terminal process failed to launch (exit code: -1).
tasks.json 加上"-I", “${workspaceFolder}/include”,
c_cpp_properties.json
c_cpp_properties.json配置文件默认是不会产生的,ctrl+shift+p 再输入configuration选择后便会出现。
在这里我们可以设置 includePath
{
    "configurations": [
        {
            "name": "Linux",
            "includePath": [
                "${workspaceFolder}/**",
                "${workspaceFolder}/include/**"  //your include path
            ],
            "defines": [],
            "compilerPath": "/usr/bin/gcc",
            "cStandard": "gnu11",
            "cppStandard": "gnu++14",
            "intelliSenseMode": "linux-gcc-x64"
        }
    ],
    "version": 4
}
注:请注意,这里使用是的WSL环境下的g++。