glibc-all-in-one
glibc-all-in-one下载
sudo git clone https://github.com/matrix1001/glibc-all-in-one.git #也可以自行去官网下载然后解压
cd glibc-all-in-one/
glibc-all-in-one安装
sudo python3 update_list
[+] Common list has been save to "list"
[+] Old-release list has been save to "old_list"
下载glibc
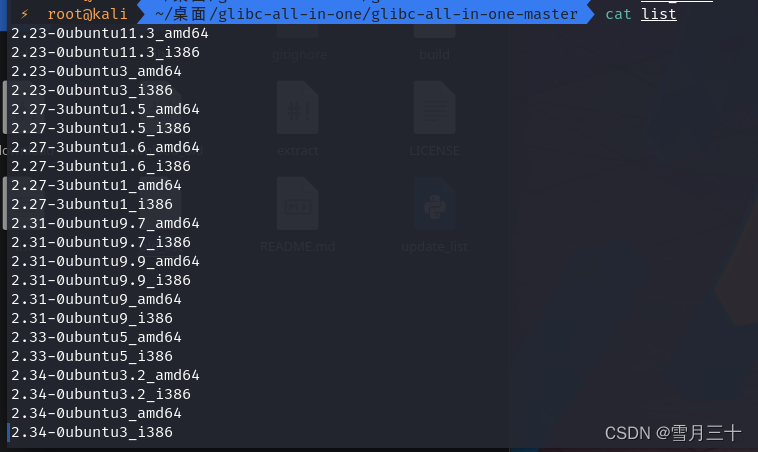
list
查看可以安装的glibc版本

下载所需要的glibc版本
sudo ./download 2.34-0ubuntu3_amd64 #这个因人而异了 看你需要哪个版本
patchelf
patchelf下载
git clone https://github.com/NixOS/patchelf.git   #也可以去官网直接去下载
cd patchelf
patchelf安装
./bootstrap.sh
如果报错
./bootstrap.sh: 2: autoreconf: not found
执行这个
sudo apt-get install autoconf automake libtool
继续安装
./configure
make
make check
sudo make install
编译报错
mkdir: 无法创建目录"/usr/local/share/man/man1": 文件已存在
解决
sudo mv /usr/local/share/man/man1 /usr/local/share/man/man1.bak
应用
让elf文件使用特定的glibc版本去运行
解决 :version `GLIBC_2.34’ not found 报错
进入all in one文件夹打开终端
cat list
找到我们需要的glibc版 下载
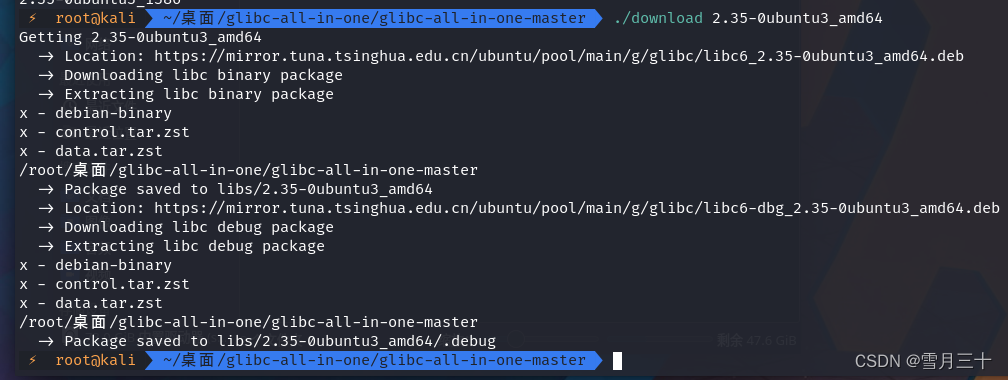
sudo ./download 2.34-0ubuntu3_amd64
这里拿2.35做例子

可以看到在all in one 目录中生成2.35-0ubuntu3_amd64文件夹
里面就是我们需要用到的glibc环境了
然后找到我们想要运行的软件 在该软件目录下运行终端
执行以下命令
配置ld.so
patchelf --set-interpreter /root/桌面/glibc-all-in-one/glibc-all-in-one-master/libs/2.35-0ubuntu3_amd64/ld-linux-x86-64.so.2 ./bin
#bin为你想运行的elf文件  第一个参数是ld.so的目录

配置环境
patchelf --set-rpath  /root/桌面/glibc-all-in-one/glibc-all-in-one-master/libs/2.35-0ubuntu3_amd64/ ./bin
# 第一个参数是libc所在目录 bin你想运行的elf文件

再次运行

会发现可以正常使用了
参考:
https://trick.ink/article/glibc-all-in-one/
https://www.cnblogs.com/z2yh/p/13881605.html
