第一步:下载安装git
Git下载链接:https://www.git-scm.com/download/
安装时选择哪些选项,建议百度,或者照着视频安装。
码云官网:https://gitee.com/
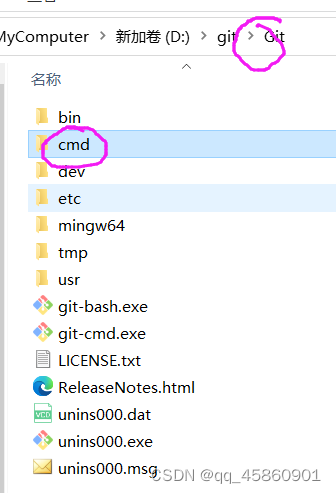
第二步:建议将git配置到环境变量,直接在cmd使用更方便。
将Git的cmd文件夹配置到path环境变量即可。
直接在当前目录打开控制台cmd 。
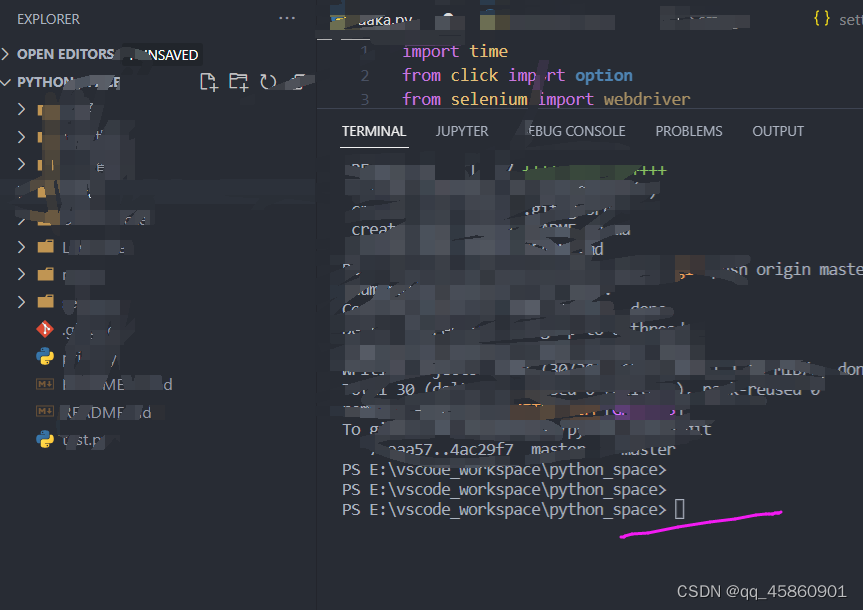
第三步:生成ssh公钥/私钥对(以gitee为例,github配置基本相同)。
(1)先查看之前是否已经生成过公钥,私钥对。
打开文件夹 : C:\Users\用户名.ssh
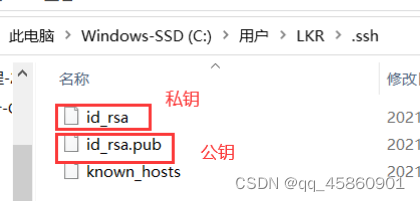
如果有上面三个文件,说明已经生成过。则不需要再生成。不需执行下面的步骤。
(2)配置Git的用户名,邮箱名。
git config --global user.name "用户名(最好是gitee的用户名)"

git config --global user.email "邮箱(gitee注册的邮箱)"
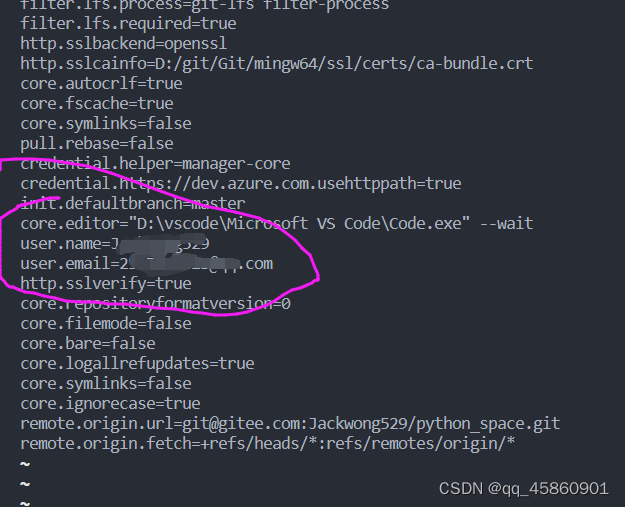
然后执行下面命令,查看是否配置成功:
git config --list
出现配置的结果成功。
(3)执行生成密钥对命令。
ssh-keygen -t rsa -C "邮箱"
执行命令,并按回车3下(有提示你是否需要设置密码,所以直接回车跳过,如果设置了每次使用Git会提示输入密码)
然后去C:\Users\用户名.ssh文件夹下会有这三个文件

(4)打开id_rsa.pub的公钥文件,复制里面的内容

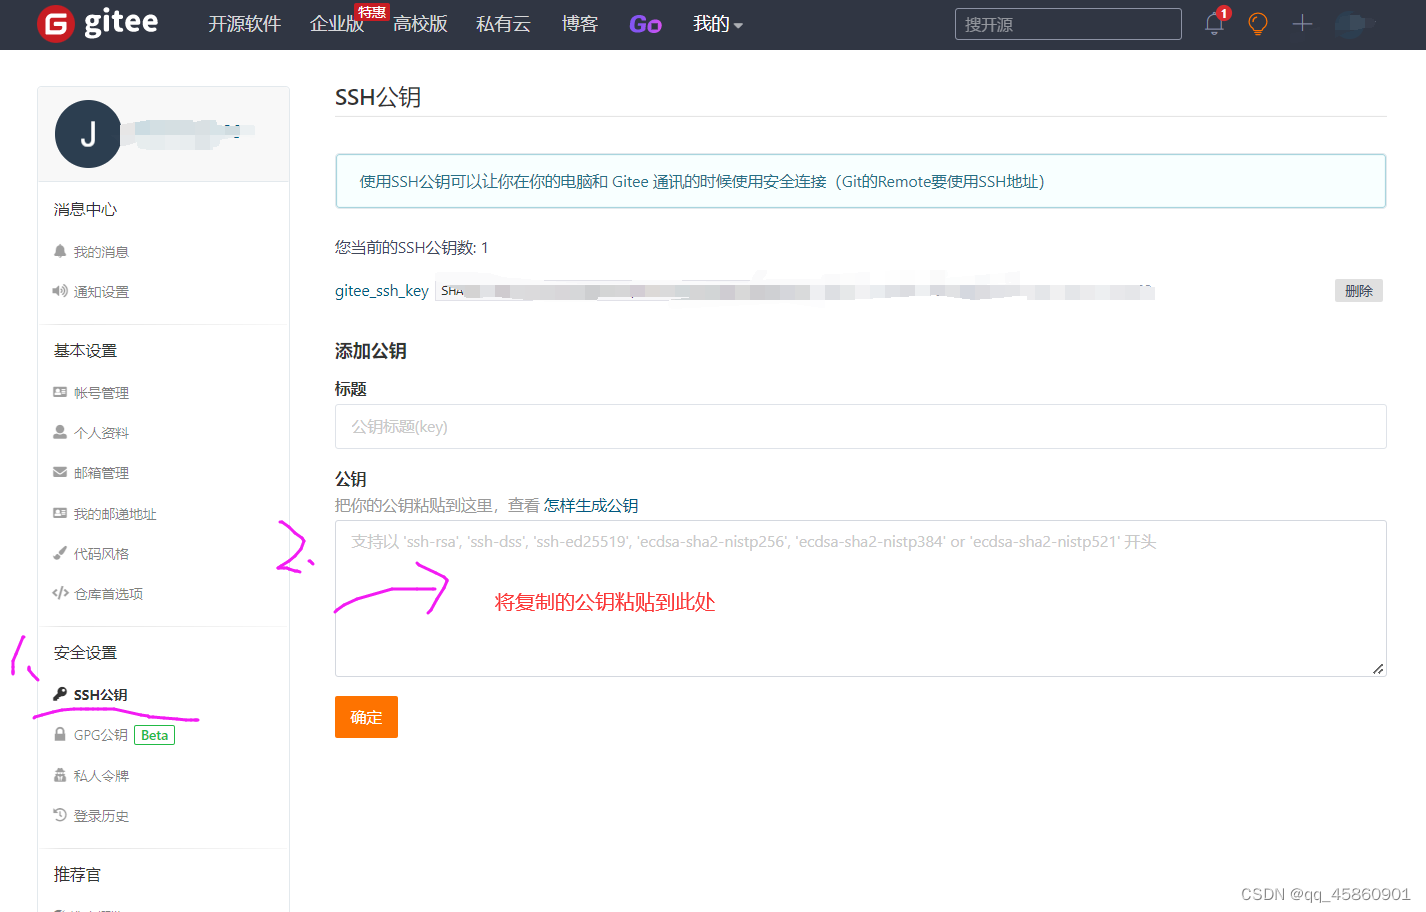
(5)打开Gitee的个人设置界面,点击左下方的ssh公钥:
粘贴公钥,填写标题,点击确定。
ssh登录整个详细过程介绍,可参考:
https://www.jianshu.com/p/a3c3628d710b
https://www.jianshu.com/p/9998d4d3ba04
https://blog.csdn.net/qq_23167527/article/details/80614454
https://blog.csdn.net/weixin_42201180/article/details/117809437
第四步:使用git推送到远程库。
这里以gitee为例。
(1)在gitee创建仓库
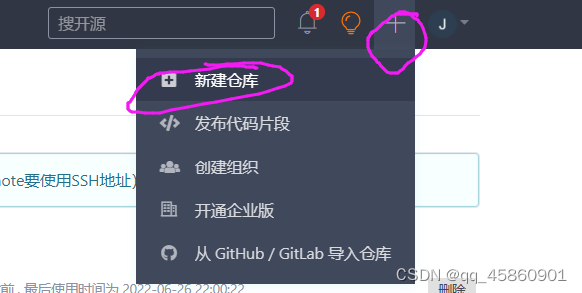
然后,按如下方式创建仓库:
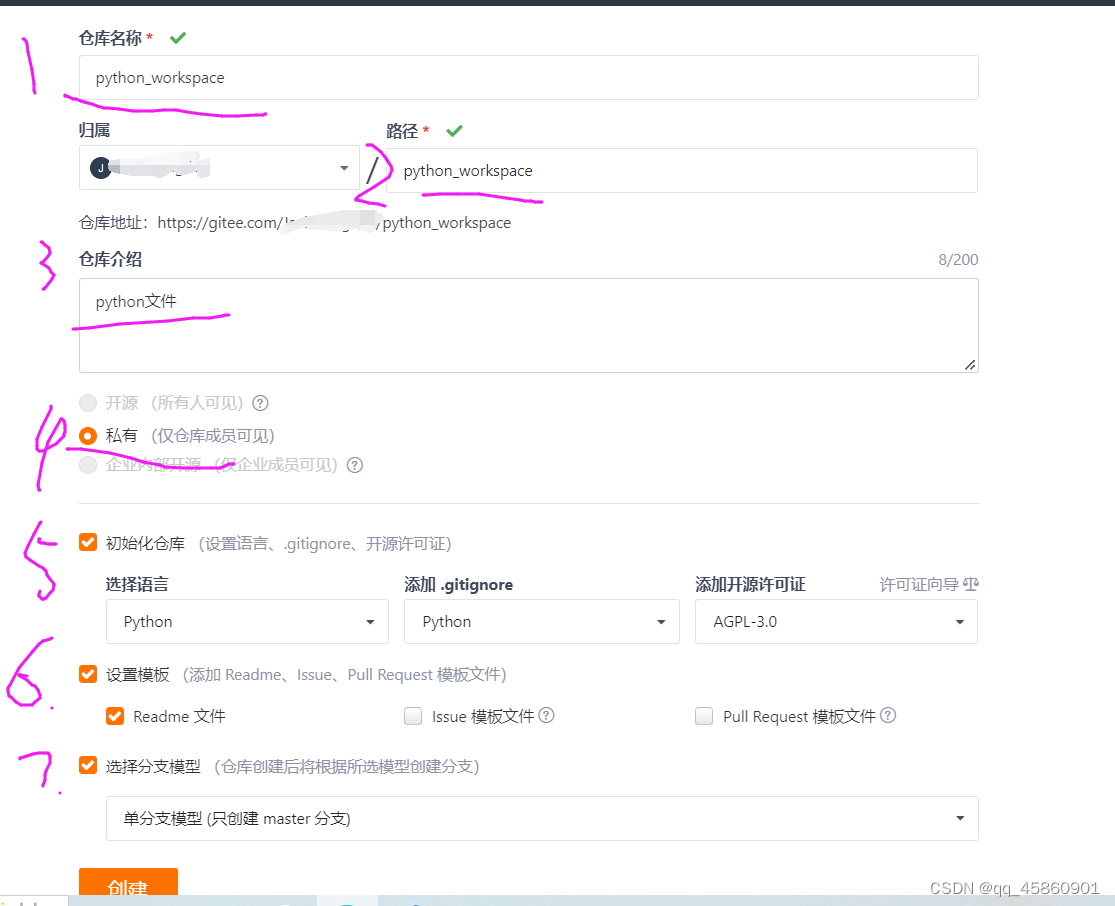
(2)在当前工作目录打开cmd,初始化为git本地库。
这个工作目录是要推送的文件所在的文件夹。
使用命令(注意有个 .):
git init .

(3)使用命令查看本地仓库git是否配置过远程仓库。
git remote -v

(4)没有配置过远程仓库。
打开上面Gitee创建的仓库,按照下图复制ssh地址。
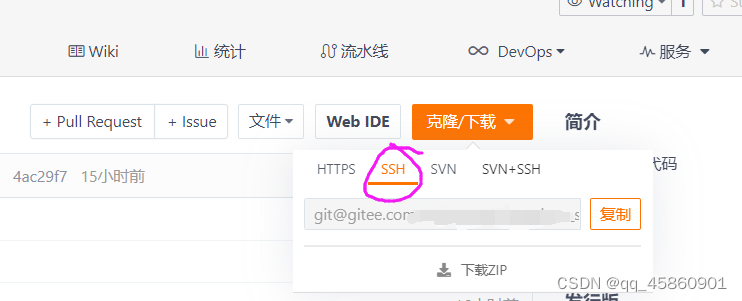
然后,在cmd控制台添加远程仓库命令
git remote add origin <你的项目地址>
//注:项目地址形式为:https://gitee.com/xxx/xxx.git或者 git@gitee.com:xxx/xxx.git
这里的origin是给远程仓库起的一个别名,可以随便起名,方便记忆就好。

(5)最后就是基本的推送命令了。
git add .
git commit -m "第一次提交"
git push origin master
直接执行push命令会出问题:


因为gitee创建的和本地的不是同一个库,所以冲突。如果使用git clone不会出这个问题。可使用下面的命令解决:
git pull origin master --allow-unrelated-histories
然后再执行push命令:
git push origin master