ЮФеТФПТМ
ВйзїЯЕЭГЁЂвРРЕЛЗОГ
Лљгкubuntu 18.04ТуЛњ
sudo apt-get update
sudo apt-get upgrade
# жиЦєЗўЮёЦї
sudo apt-get install build-ess* python3.8 python3.8-dev llvm-10 llvm-10-dev llvm-10-runtime llvm-10-tools python3-setuptools libtinfo-dev zlib1g-dev libedit-dev libxml2-dev liblapack-dev
# ЯТди cmake
wget -c https://github.com/Kitware/CMake/releases/download/v3.22.5/cmake-3.22.5-linux-x86_64.tar.gz
tar -zxvf cmake-3.22.5-linux-x86_64.tar.gz
cp -R cmake-3.22.5-linux-x86_64/* ~/.local/
rm -rf cmake-3.22.5-linux-x86_64 cmake-3.22.5-linux-x86_64.tar.gz
# дк .bashrc зюКѓЬэМгЯТУцФкШн:
# export PATH=$HOME/.local/bin:$PATH
# export TVM_LOG_DEBUG="ir/transform.cc=1,relay/ir/transform.cc=1"
source .bashrc
# ЯЕЭГздДјpython3ЮЊ 3.6.9 АцБО,НЋ /usr/bin/python3.8 ШэСДНгжС ~/.local/bin/python3
ln -s /usr/bin/python3.8 $HOME/.local/bin/python3
# ИќаТ pip
python3 -m pip install --upgrade pip
# жиЦєЗўЮёЦї
ЯТдидДДњТы
# cwd $HOME/workspace/tvm_workspace
git clone https://github.com/apache/tvm tvm
cd tvm
git submodule init
git submodule update
Брвы
# cwd $HOME/workspace/tvm_workspace/tvm
mkdir build
cd build
cp ../cmake/config.cmake .
# аоИФ config.cmake ЮФМўжаЕФЯрЙиХфжУ
# set(USE_RELAY_DEBUG ON)
# set(USE_LLVM llvm-config-10)
cmake -DCMAKE_BUILD_TYPE="Debug" ..
make -j 4
PythonХфжУTVMФЃПщ
# дк ~/.bashrc жаЬэМгЯТУцСНИіЛЗОГБфСП
# ЩшжУ TVM_HOME ЛЗОГБфСПЮЊ tvmдДТыФПТМ
# export TVM_HOME=$HOME/workspace/tvm_workspace/tvm
# pythonФЃПщЫбЫїТЗОЖжаЬэМг tvm/python
# export PYTHONPATH=$TVM_HOME/python:$PYTHONPATH
source ~/.bashrc
cpptestбщжЄ
АВзАgoogletest
# cwd $HOME/workspace/tvm_workspace
git clone https://github.com/google/googletest
cd googletest
mkdir build
cd build
cmake -DBUILD_SHARED_LIBS=ON -DCMAKE_INSTALL_PREFIX=$HOME/.local ..
make -j 4
sudo make install
жДааtvmЕФcppВтЪдНХБО,ЮоБЈДэОЭЫЕУїУЛЮЪЬт
# cwd $HOME/workspace/tvm_workspace/tvm
./tests/scripts/task_cpp_unittest.sh
vscodeАВзАВхМў
ЭЈЙ§remote sshВхМўСЌНгПЊЗЂЗўЮёЦїКѓ,АВзАЯТСаВхМў
- Python Extension Pack
- C/C++ Extension Pack
- CodeLLDB
- FFI Navigator
АВзАКѓ,КіТдFFI NavigatorВхМўЕФБЈДэ,ЭЈЙ§ЯТУцЕФУќСюАВзАFFI NavigatorЕФPythonФЃПщ:
pip3 install --user git+https://github.com/tqchen/ffi-navigator.git#subdirectory=python
АВзАКѓ,жиЦєvscode
ЭЈЙ§PythonНгПкБрвыЁЂгХЛЏФЃаЭ
АВзАPythonФЃПщ
# АВзАвРРЕЕФpythonФЃПщ,АќРЈ auto-tuning вРРЕЕФФЃПщ
pip3 install --user cython
pip3 install --user numpy
pip3 install --user decorator attrs tornado psutil
pip3 install --user pybind11 pythran
pip3 install --user xgboost cloudpickle ninja pytest
pip3 install --user torch torchvision torchaudio --extra-index-url https://download.pytorch.org/whl/cpu
pip3 install --user onnx onnxruntime
# onnxЛсздДјprotobufФЃПщ
# ЮвУЧашвЊИќаТ protoc ЕФАцБО,ШЗБЃСНепвЛжТ
pip3 show protobuf
# ЮвЕФЯдЪОЪЧ Version: 3.20.1
/usr/bin/protoc --version
# ЮвЕФЯдЪОЪЧ
# Дг https://github.com/protocolbuffers/protobuf/releases ЯТди 3.20.1 АцБОЕФ protoc
wget -c https://github.com/protocolbuffers/protobuf/releases/download/v3.20.1/protoc-3.20.1-linux-x86_64.zip
mkdir protoc
mv protoc-3.20.1-linux-x86_64.zip protoc/
cd protoc
unzip protoc-3.20.1-linux-x86_64.zip
cp -R bin include ~/.local/
cd ..
rm -rf protoc
pip3 uninstall onnx onnxruntime
pip3 install --user onnx onnxruntime
ЭЈЙ§TVMЕФPython APIЭъГЩШчЯТШЮЮё:
- Compile a pre-trained ResNet-50 v2 model for the TVM runtime.
- Run a real image through the compiled model, and interpret the output and model performance.
- Tune the model that model on a CPU using TVM.
- Re-compile an optimized model using the tuning data collected by TVM.
- Run the image through the optimized model, and compare the output and model performance.
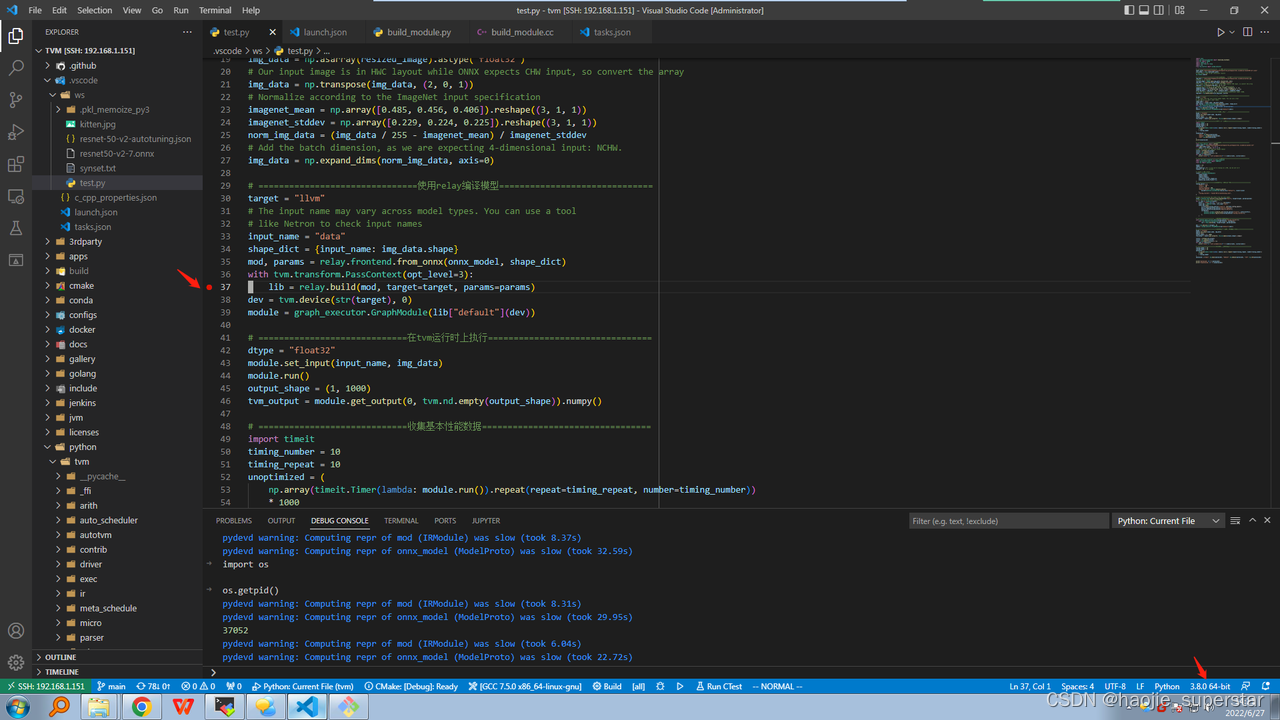
ЯТУцЪЧЭъГЩетаЉШЮЮёЕФPythonДњТыЮФМўtest.pyЕФФкШн:
import onnx
from tvm.contrib.download import download_testdata
from PIL import Image
import numpy as np
import tvm.relay as relay
import tvm
from tvm.contrib import graph_executor
# ==============================Мгди ONNX ФЃаЭ================================
model_path="/home/ubuntu/workspace/tvm_workspace/tvm/.vscode/ws/resnet50-v2-7.onnx"
onnx_model = onnx.load(model_path)
# Seed numpy's RNG to get consistent results
np.random.seed(0)
# =============================ЯТдиЁЂдЄДІРэКЭМгдиВтЪдЭМЯё==========================
img_path = "/home/ubuntu/workspace/tvm_workspace/tvm/.vscode/ws/kitten.jpg"
# Resize it to 224x224
resized_image = Image.open(img_path).resize((224, 224))
img_data = np.asarray(resized_image).astype("float32")
# Our input image is in HWC layout while ONNX expects CHW input, so convert the array
img_data = np.transpose(img_data, (2, 0, 1))
# Normalize according to the ImageNet input specification
imagenet_mean = np.array([0.485, 0.456, 0.406]).reshape((3, 1, 1))
imagenet_stddev = np.array([0.229, 0.224, 0.225]).reshape((3, 1, 1))
norm_img_data = (img_data / 255 - imagenet_mean) / imagenet_stddev
# Add the batch dimension, as we are expecting 4-dimensional input: NCHW.
img_data = np.expand_dims(norm_img_data, axis=0)
# ===============================ЪЙгУrelayБрвыФЃаЭ==============================
target = "llvm"
# The input name may vary across model types. You can use a tool
# like Netron to check input names
input_name = "data"
shape_dict = {input_name: img_data.shape}
mod, params = relay.frontend.from_onnx(onnx_model, shape_dict)
with tvm.transform.PassContext(opt_level=3):
lib = relay.build(mod, target=target, params=params)
dev = tvm.device(str(target), 0)
module = graph_executor.GraphModule(lib["default"](dev))
# =============================дкtvmдЫааЪБЩЯжДаа================================
dtype = "float32"
module.set_input(input_name, img_data)
module.run()
output_shape = (1, 1000)
tvm_output = module.get_output(0, tvm.nd.empty(output_shape)).numpy()
# =============================ЪеМЏЛљБОадФмЪ§Он=================================
import timeit
timing_number = 10
timing_repeat = 10
unoptimized = (
np.array(timeit.Timer(lambda: module.run()).repeat(repeat=timing_repeat, number=timing_number))
* 1000
/ timing_number
)
unoptimized = {
"mean": np.mean(unoptimized),
"median": np.median(unoptimized),
"std": np.std(unoptimized),
}
print(unoptimized)
# ============================КѓДІРэЪфГі========================================
from scipy.special import softmax
labels_path = "/home/ubuntu/workspace/tvm_workspace/tvm/.vscode/ws/synset.txt"
with open(labels_path, "r") as f:
labels = [l.rstrip() for l in f]
# Open the output and read the output tensor
scores = softmax(tvm_output)
scores = np.squeeze(scores)
ranks = np.argsort(scores)[::-1]
for rank in ranks[0:5]:
print("class='%s' with probability=%f" % (labels[rank], scores[rank]))
# ===================================ЕїећФЃаЭ===================================
import tvm.auto_scheduler as auto_scheduler
from tvm.autotvm.tuner import XGBTuner
from tvm import autotvm
number = 10
repeat = 1
min_repeat_ms = 0 # since we're tuning on a CPU, can be set to 0
timeout = 10 # in seconds
# create a TVM runner
runner = autotvm.LocalRunner(
number=number,
repeat=repeat,
timeout=timeout,
min_repeat_ms=min_repeat_ms,
enable_cpu_cache_flush=True,
)
# =========================ЖЈвхгХЛЏЫуЗЈ ЩшжУtuneВЮЪ§==============================
tuning_option = {
"tuner": "xgb",
"trials": 20,
"early_stopping": 100,
"measure_option": autotvm.measure_option(
builder=autotvm.LocalBuilder(build_func="default"), runner=runner
),
"tuning_records": "resnet-50-v2-autotuning.json",
}
# begin by extracting the tasks from the onnx model
tasks = autotvm.task.extract_from_program(mod["main"], target=target, params=params)
# Tune the extracted tasks sequentially.
for i, task in enumerate(tasks):
prefix = "[Task %2d/%2d] " % (i + 1, len(tasks))
tuner_obj = XGBTuner(task, loss_type="rank")
tuner_obj.tune(
n_trial=min(tuning_option["trials"], len(task.config_space)),
early_stopping=tuning_option["early_stopping"],
measure_option=tuning_option["measure_option"],
callbacks=[
autotvm.callback.progress_bar(tuning_option["trials"], prefix=prefix),
autotvm.callback.log_to_file(tuning_option["tuning_records"]),
],
)
# =========================ЪЙгУЕїећЪ§ОнБрвыгХЛЏФЃаЭ================================
with autotvm.apply_history_best(tuning_option["tuning_records"]):
with tvm.transform.PassContext(opt_level=3, config={}):
lib = relay.build(mod, target=target, params=params)
dev = tvm.device(str(target), 0)
module = graph_executor.GraphModule(lib["default"](dev))
# ===========================бщжЄгХЛЏФЃаЭЪЧЗёдЫааВЂВњЩњЯрЭЌЕФНсЙћ=====================
dtype = "float32"
module.set_input(input_name, img_data)
module.run()
output_shape = (1, 1000)
tvm_output = module.get_output(0, tvm.nd.empty(output_shape)).numpy()
scores = softmax(tvm_output)
scores = np.squeeze(scores)
ranks = np.argsort(scores)[::-1]
for rank in ranks[0:5]:
print("class='%s' with probability=%f" % (labels[rank], scores[rank]))
# ============================БШНЯЕїећКЭЮДЕїећЕФФЃаЭ===============================
timing_number = 10
timing_repeat = 10
optimized = (
np.array(timeit.Timer(lambda: module.run()).repeat(repeat=timing_repeat, number=timing_number))
* 1000
/ timing_number
)
optimized = {"mean": np.mean(optimized), "median": np.median(optimized), "std": np.std(optimized)}
print("optimized: %s" % (optimized))
print("unoptimized: %s" % (unoptimized))
ХфжУЙЄГЬ
ЯТЮФФЌШЯвбЪЙгУvscodeЕФRemote SSHВхМўСЌНгжСдЖГЬЗўЮёЦї,ВЂДђПЊСЫTVMЙЄГЬЁЃ
Ctrl + ~ПЩвддкvscodeжаДђПЊвЛИіжеЖЫ
# cwd $HOME/workspace/tvm_workspace/tvm
mkdir -p .vscode/ws
# .vscode/wsЪЧЮвЕФЙЄзїФПТМ
# НЋ test.py ЗХЕН .vscode/ws ЯТ
# ЯТди resnet50-v2-7.onnx ФЃаЭ,ЗХЕН .vscode/ws ЯТ
# https://media.githubusercontent.com/media/onnx/models/main/vision/classification/resnet/model/resnet50-v2-7.onnx
# ЯТди kitten.jpg ЭМЦЌ,ЗХЕН .vscode/ws ЯТ
# https://s3.amazonaws.com/model-server/inputs/kitten.jpg
# ЯТди synset.txt ЗХЕН .vscode/ws ЯТ
# https://s3.amazonaws.com/onnx-model-zoo/synset.txt
.vscode/launch.json
{
// ЪЙгУ IntelliSense СЫНтЯрЙиЪєадЁЃ
// аќЭЃвдВщПДЯжгаЪєадЕФУшЪіЁЃ
// гћСЫНтИќЖраХЯЂ,ЧыЗУЮЪ: https://go.microsoft.com/fwlink/?linkid=830387
"version": "0.2.0",
"configurations": [
{
"name": "Python: Current File",
"type": "python",
"request": "launch",
"program": "${file}",
"console": "integratedTerminal",
"justMyCode": true,
"cwd": "${workspaceFolder}/.vscode/ws"
}
]
}
дЫааЙЄГЬ
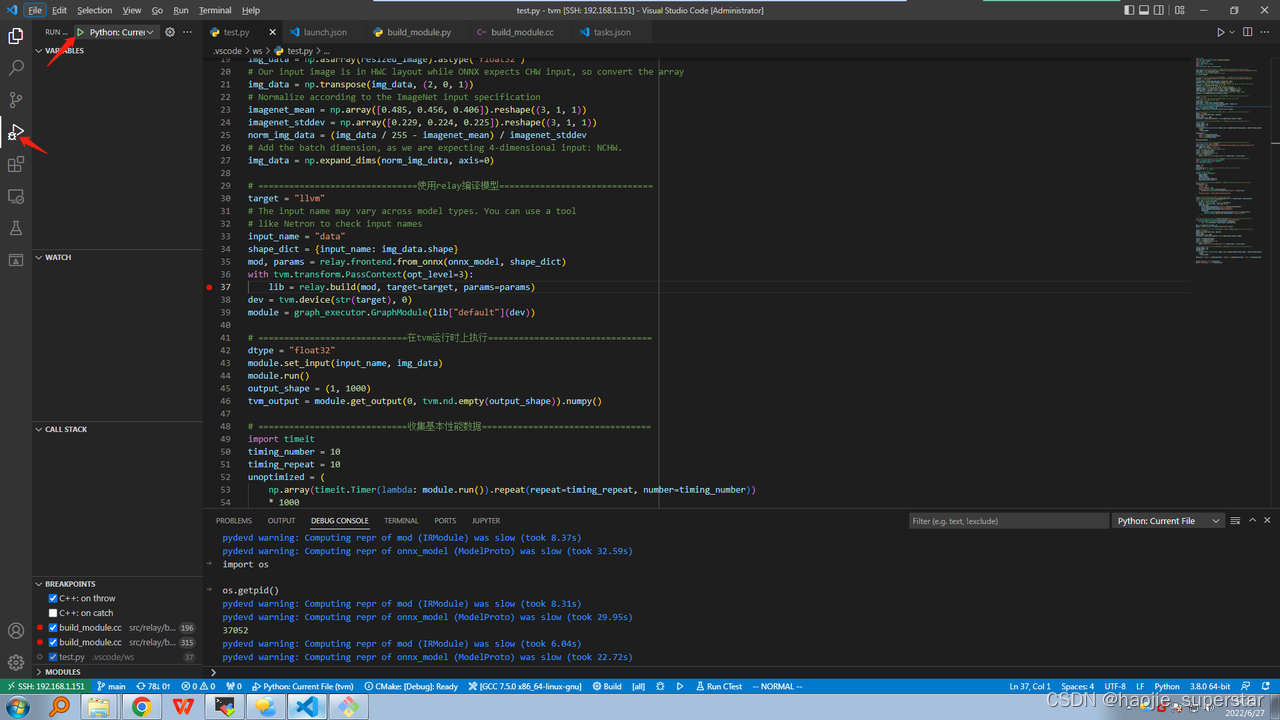
ДђПЊtest.pyЮФМў,F5дЫааГЬађ
ВтЪдPythonЁЂC++ЛЅЯрЬјзЊ
PythonЬјзЊC++
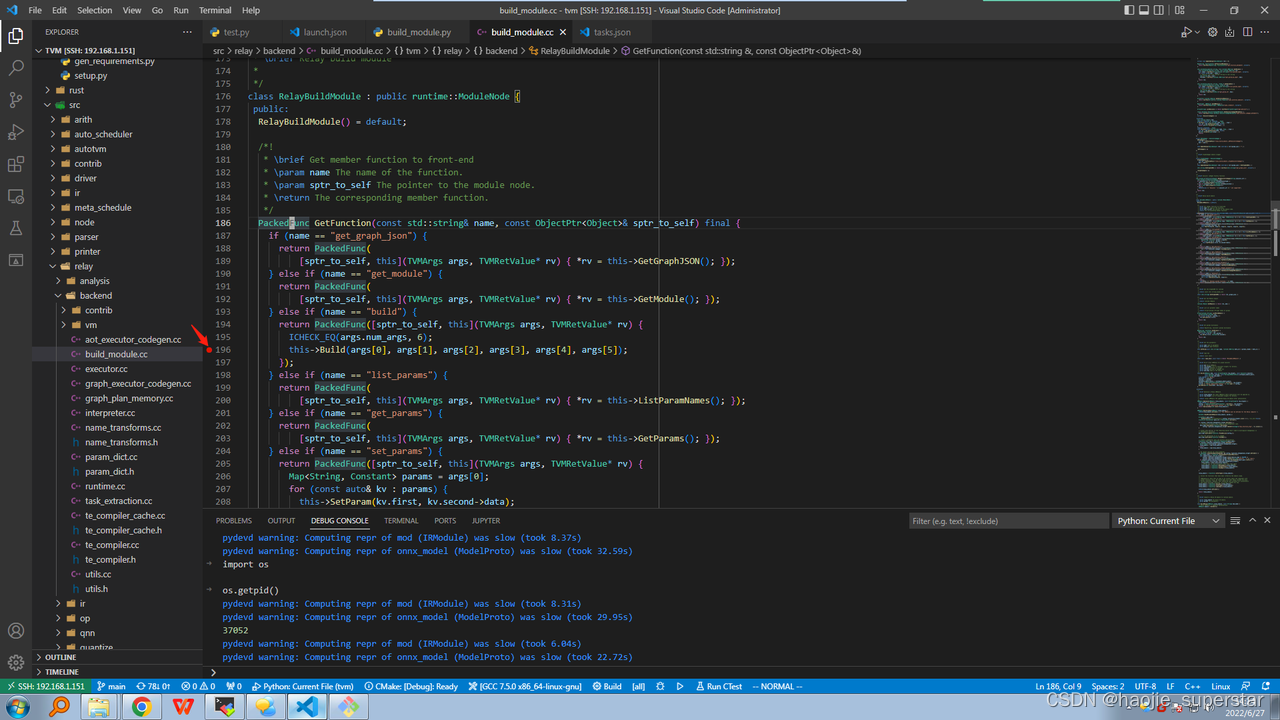
ДђПЊpython/tvm/relay/build_module.pyЮФМў,ЖЈЮЛЕНЯТУцЮЛжУ:
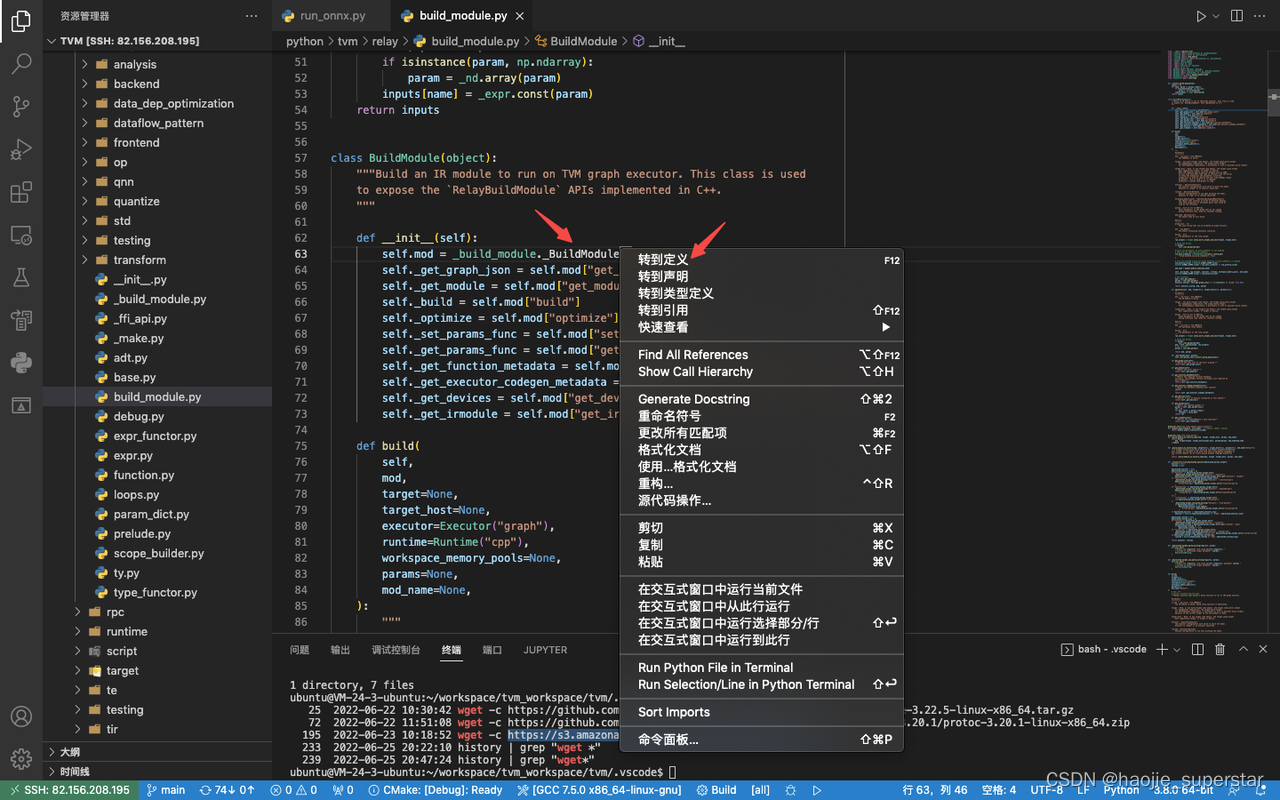
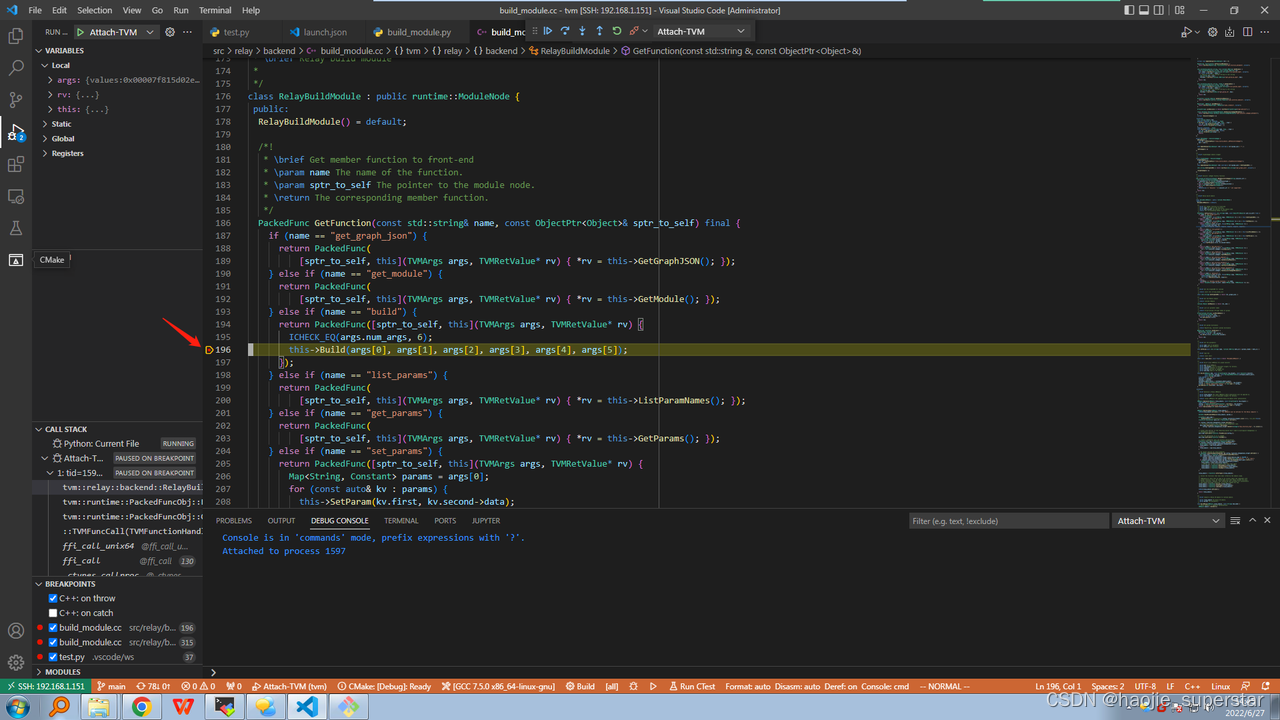
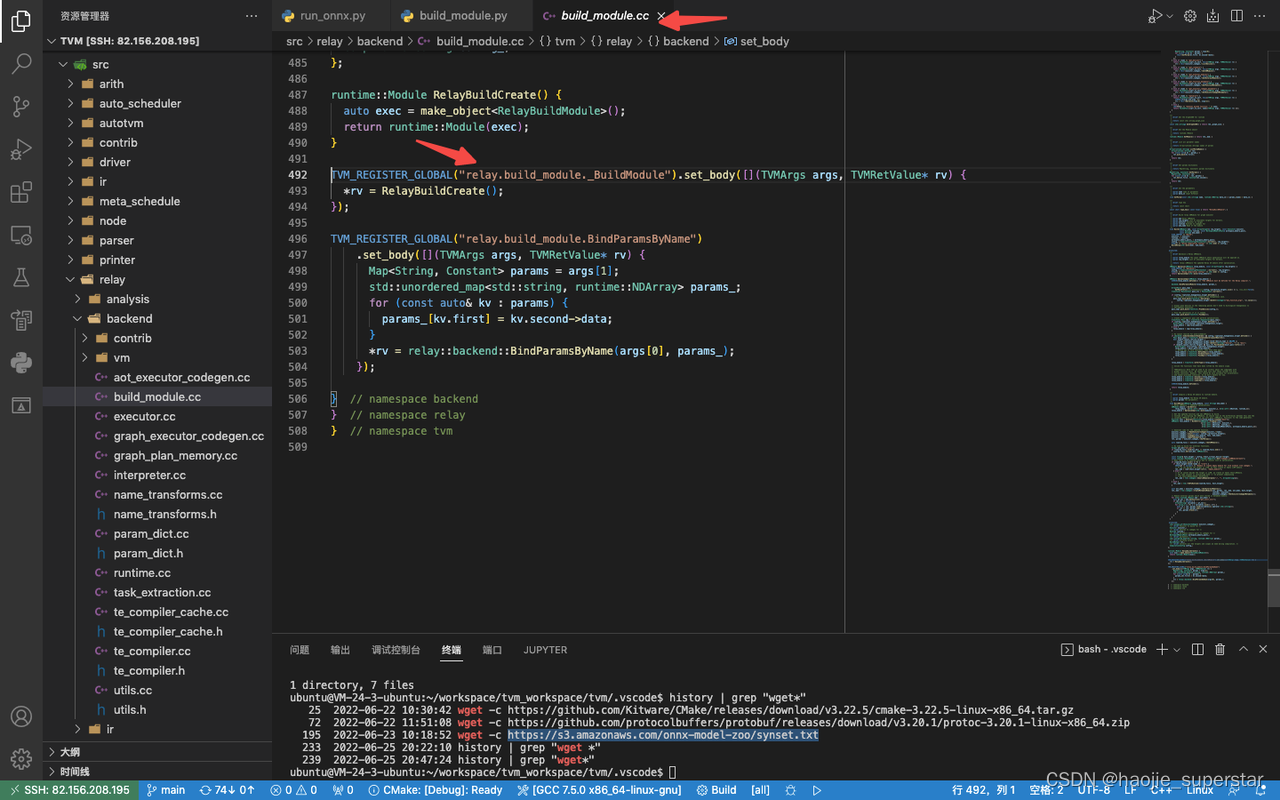
ЕуЛїзЊЕНЖЈвхКѓ,ЬјзЊЕНsrc/relay/backend/build_module.ccЮФМў,ЖЈЮЛдкЯТУцЮЛжУ,ЬјзЊГЩЙІ:
C++ЬјзЊPython
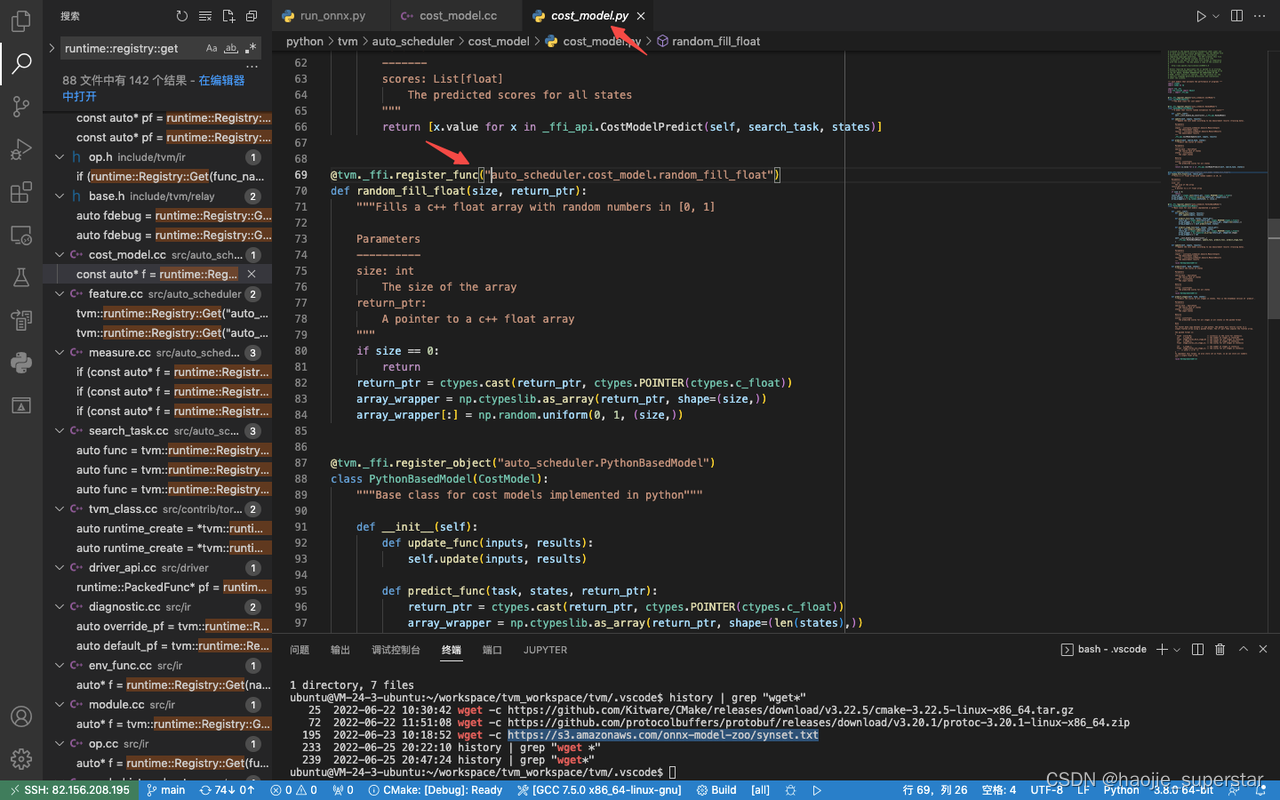
ДђПЊsrc/auto_scheduler/cost_model.ccЮФМў,ЖЈЮЛЕНЯТУцЮЛжУ:
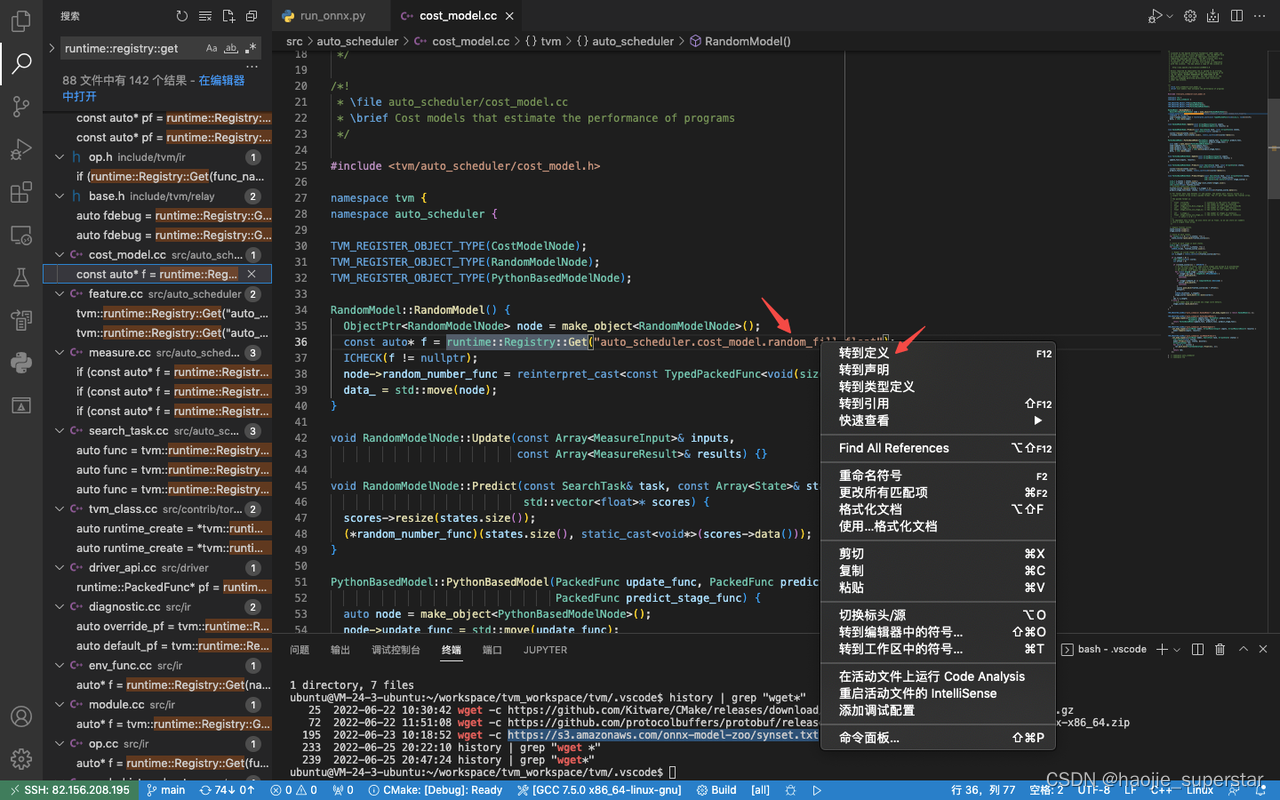
ЕуЛїзЊЕНЖЈвхКѓ,ЬјзЊЕНpython/tvm/auto_scheduler/cost_model/cost_model.pyЮФМў,ЖЈЮЛдкЯТУцЮЛжУ,ЬјзЊГЩЙІ:
ЕїЪд test.py ЬјзЊЕНC++ДњТыЖЯЕу
еЫЛЇашвЊОпга
sudoШЈЯо
vscodeжаctrl + pПЩвдФЃК§ЫбЫїЮФМў
.vscode/launch.json
{
// ЪЙгУ IntelliSense СЫНтЯрЙиЪєадЁЃ
// аќЭЃвдВщПДЯжгаЪєадЕФУшЪіЁЃ
// гћСЫНтИќЖраХЯЂ,ЧыЗУЮЪ: https://go.microsoft.com/fwlink/?linkid=830387
"version": "0.2.0",
"configurations": [
{
"name": "Python: Current File",
"type": "python",
"request": "launch",
"program": "${file}",
"console": "integratedTerminal",
"justMyCode": true,
"cwd": "${workspaceFolder}/.vscode/ws",
"preLaunchTask": "myShellCmd"
},
{
"type": "lldb",
"request": "attach",
"name": "Attach-TVM",
"pid": "${command:pickMyProcess}"
}
]
}
.vscode/tasks.json
{
    "version": "2.0.0",
    "tasks": [
        {
            "label": "myShellCmd",
            "type": "shell",
            "command":"echo 0 | sudo tee /proc/sys/kernel/yama/ptrace_scope"
        }
    ]
}
.vscode/c_cpp_properties.json
{
    "configurations": [
        {
            "name": "Linux",
            "includePath": [
                "${workspaceFolder}/include"
            ],
            "defines": [],
            "compilerPath": "/usr/bin/gcc",
            "cStandard": "c11",
            "cppStandard": "gnu++14",
            "intelliSenseMode": "linux-gcc-x64",
            "configurationProvider": "ms-vscode.cmake-tools"
        }
    ],
    "version": 4
}
ЕїЪд
дкtest.pyЮФМўЕФrelay.buildааЩшжУЖЯЕу:
дкsrc/relay/backend/build_module.ccЮФМўЕФbuildааЩшжУЖЯЕу:
ЧаЕНtest.pyЮФМў,ЕуЛїТЬЩЋШ§НЧКѓ,ПЊЪМЕїЪд:
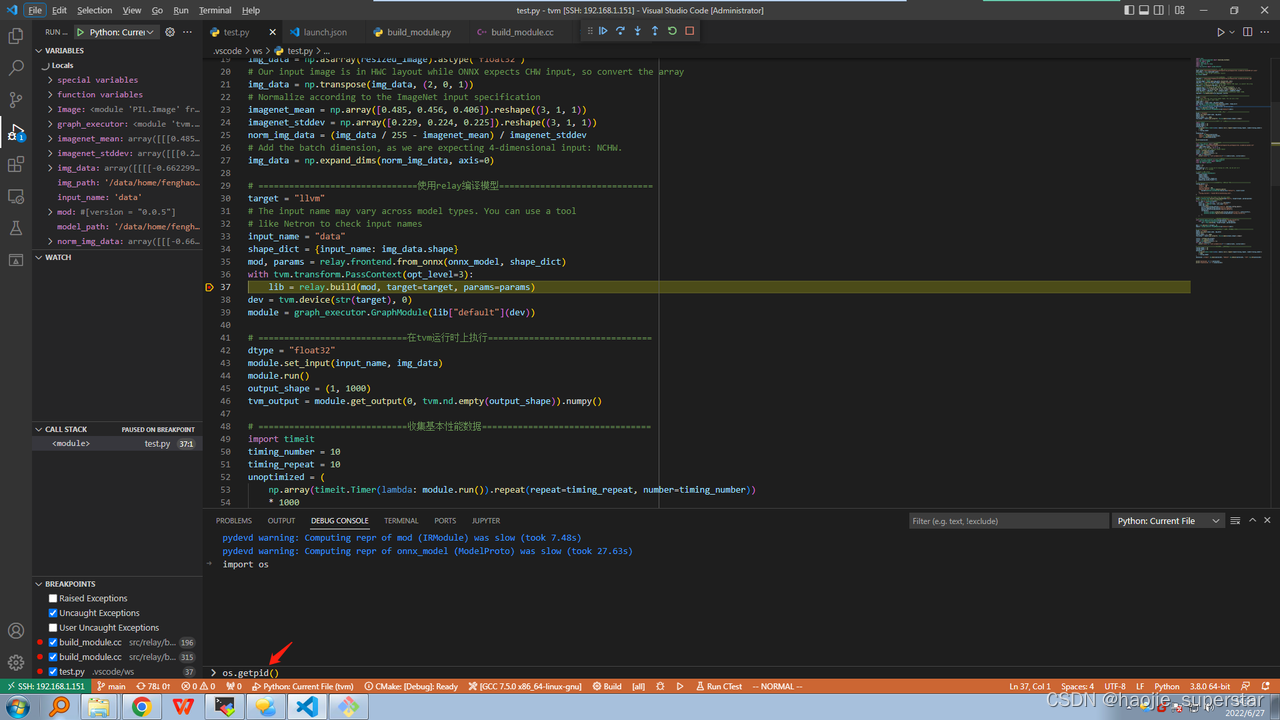
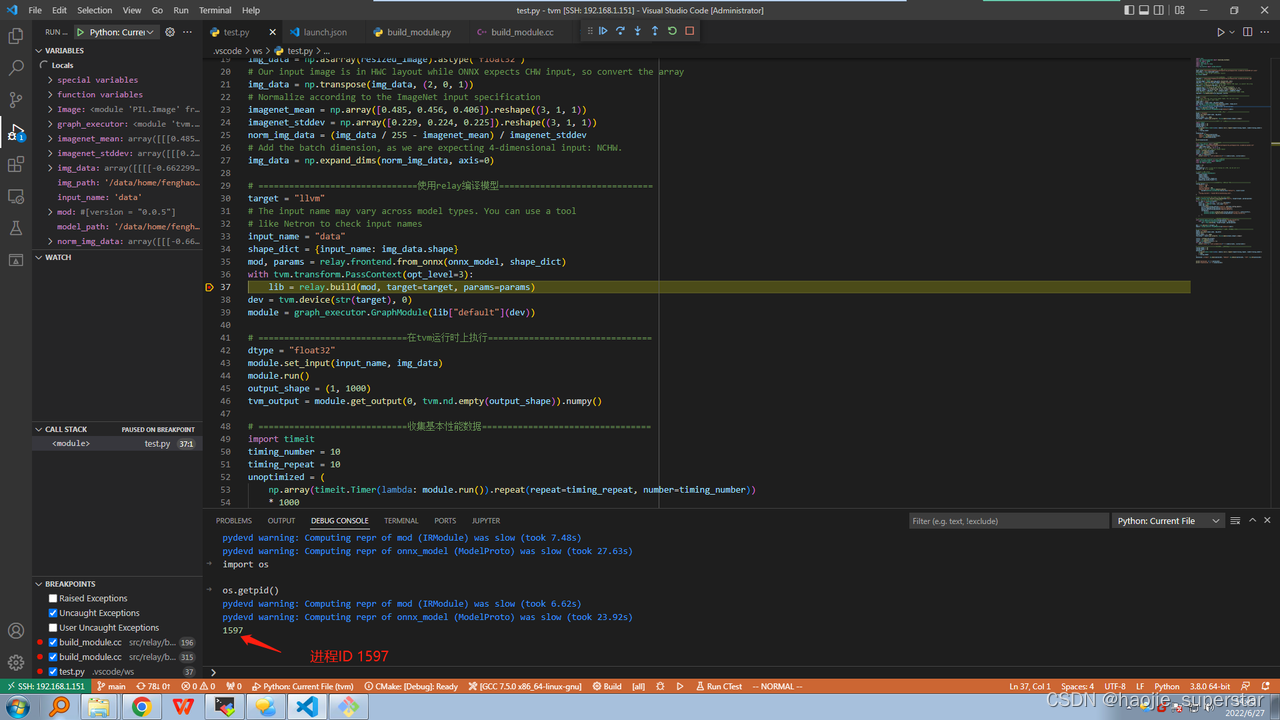
Уќжаtest.pyЮФМўЕФЖЯЕу,ДЫДІашвЊЕШКѓЬЈМЦЫуЭъЕїЪдаХЯЂ:
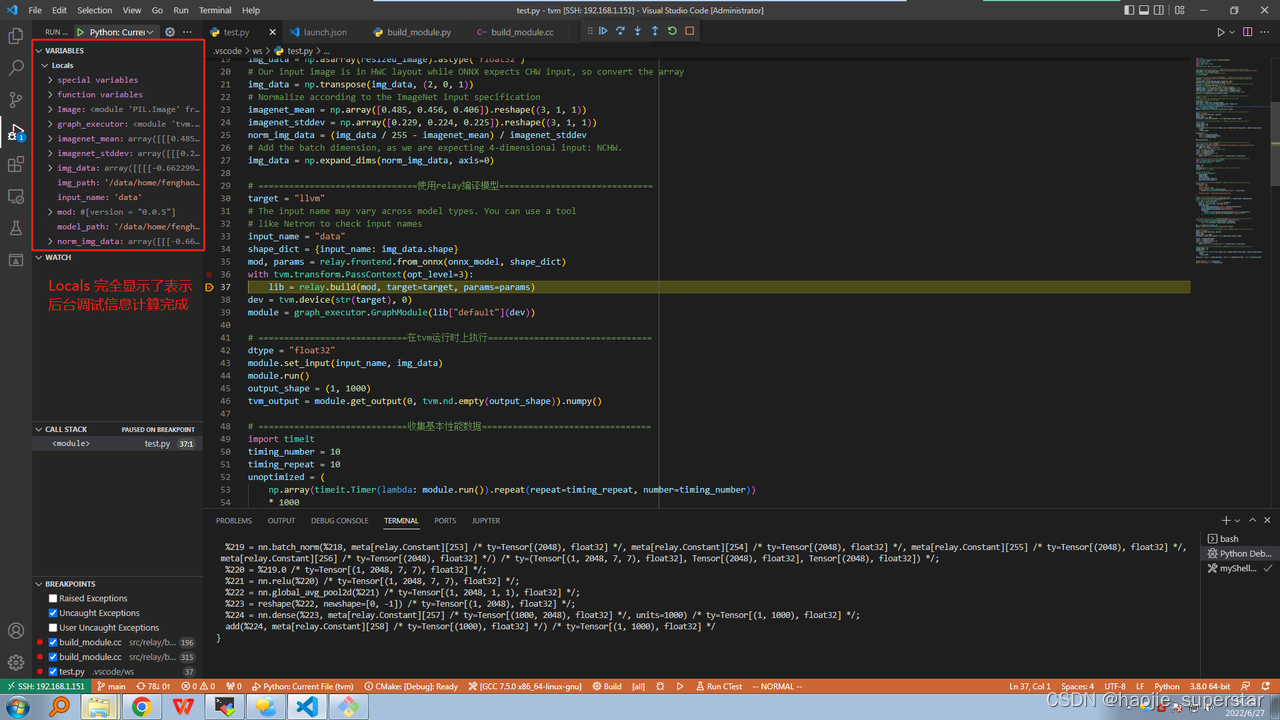
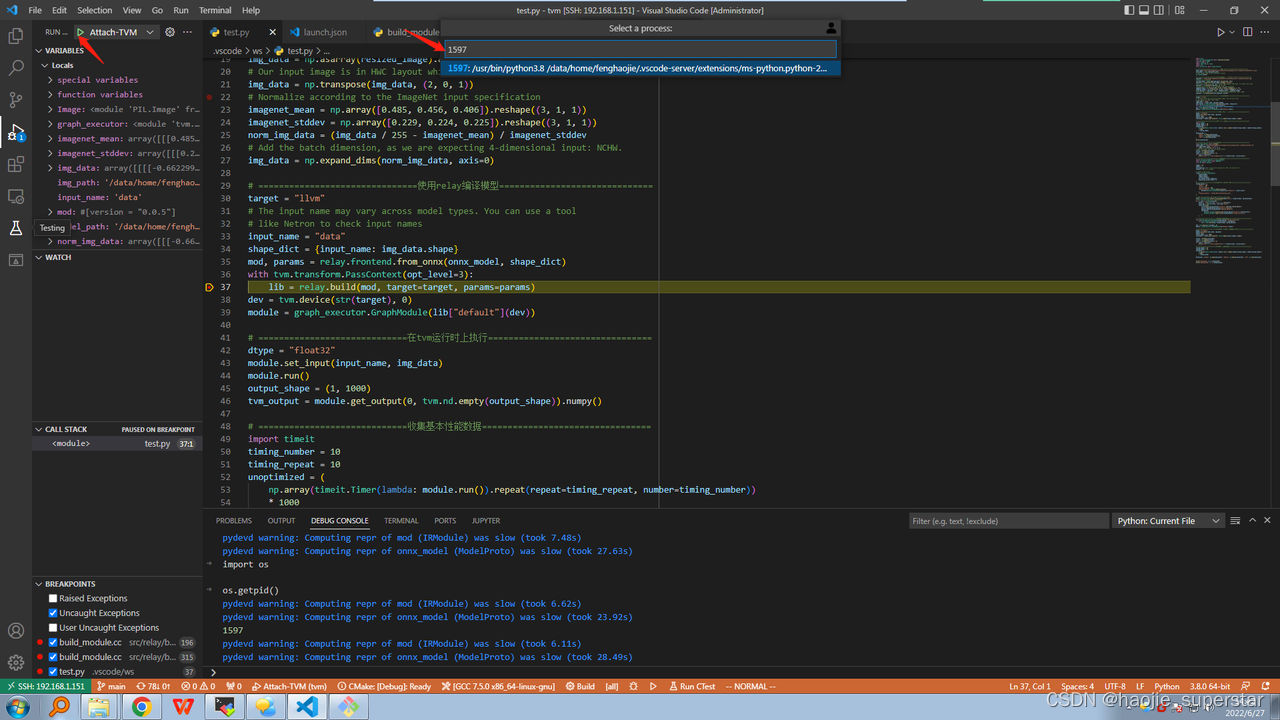
ЕуЛїЪфГіЧјЕФ DEBUG CONSOLE,ЭЈЙ§PythonНХБОЛёШЁЕїЪдНјГЬID:


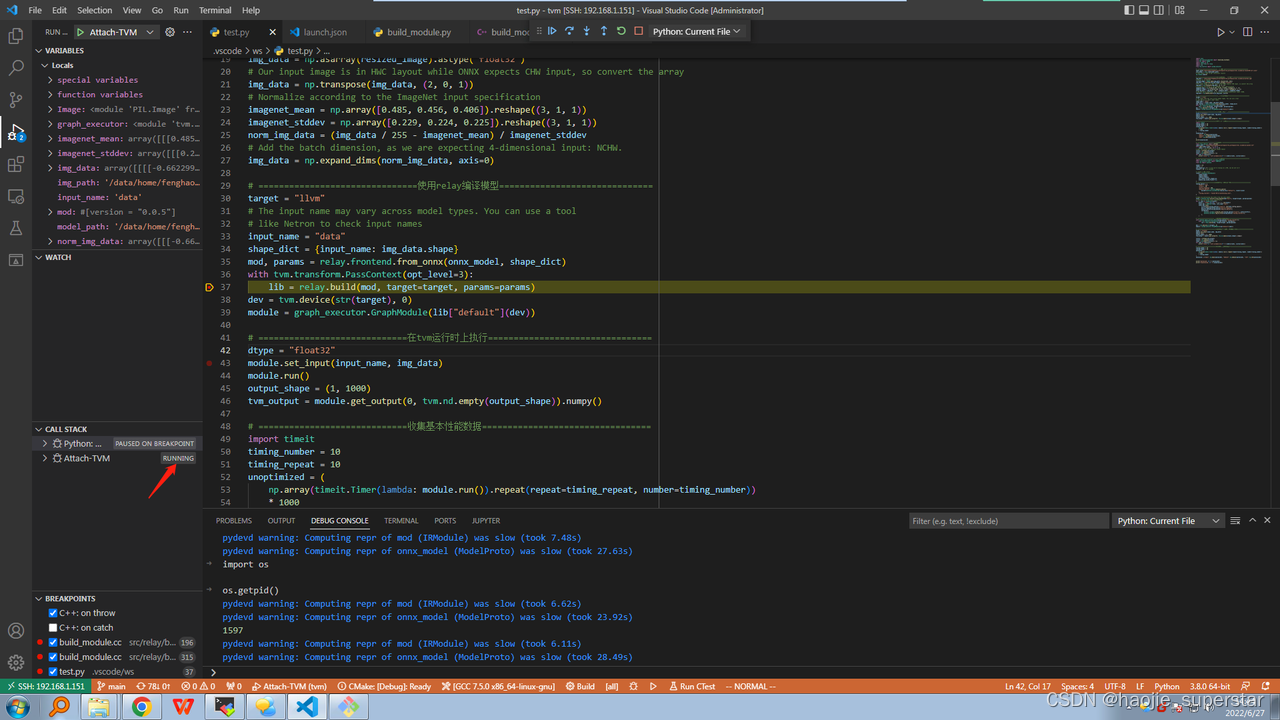
ЧаЛЛЕН lldb ЕїЪдЦї:
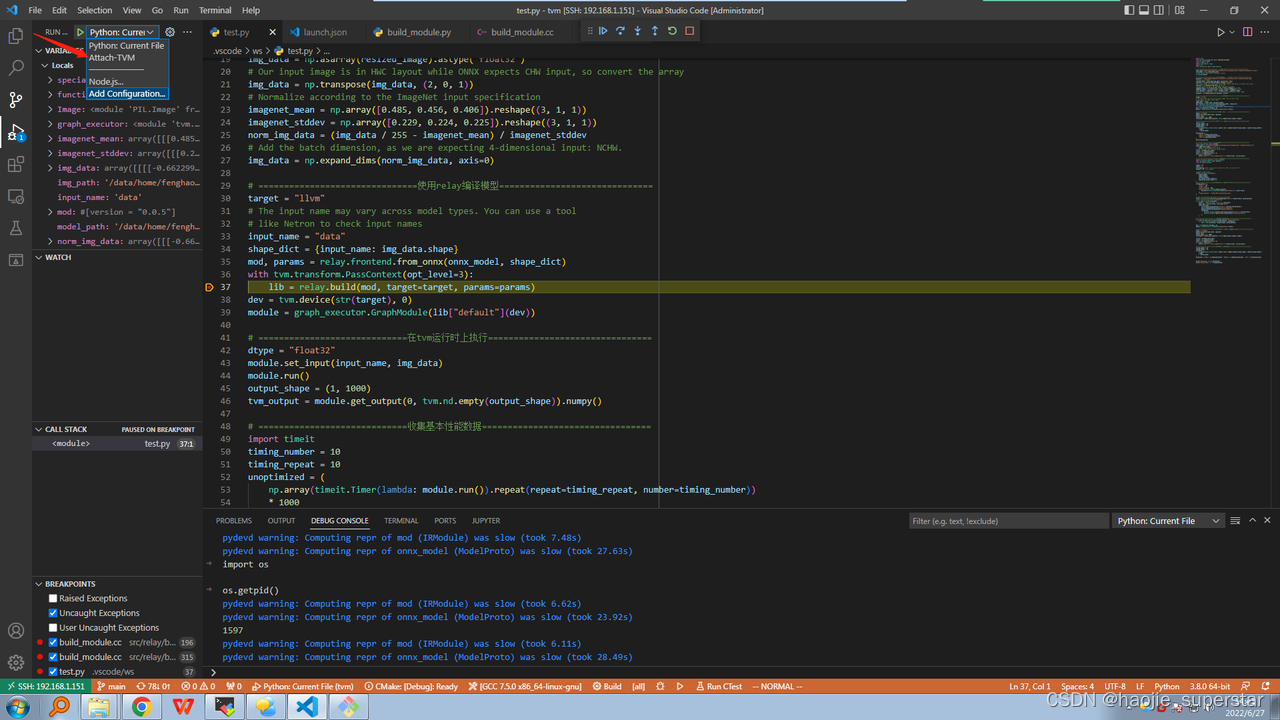
ЕуЛїТЬЩЋШ§НЧ,дЫааЕїЪдЦї,ЪфШыНјГЬID:
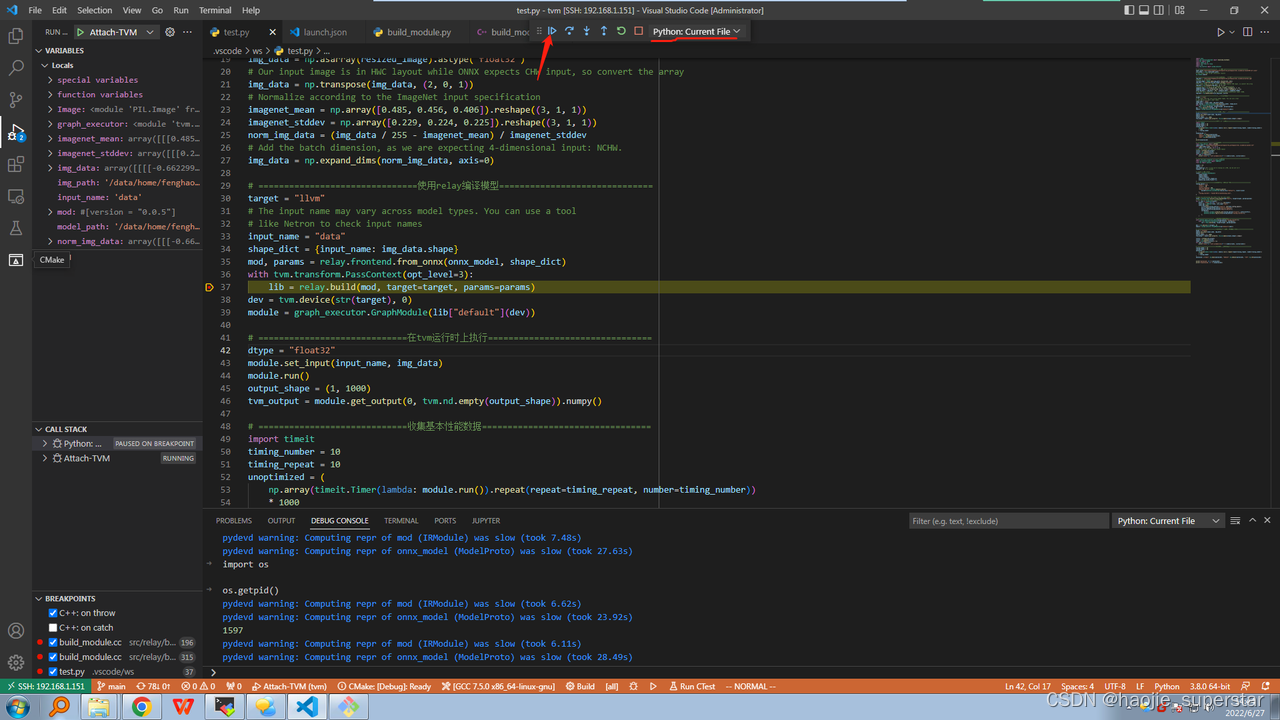
lldbЕїЪдЦївбДІгкдЫаазДЬЌ:
МЬајдЫааГЬађ:
Уќжаc++ЖЯЕу: