1111
注册成功之后,我们进入github需要做一件事情就是配置ssh。ssh是安全外壳协议,它本身和git没什么关系,主要是为了使用它来进行安全验证。说白了为了证明你是你,为了方便根据账号做权限管理。比如阻止你clone你没有权限的代码,阻止你push代码到没有权限的远程等等。说白了,这是一个安全工具,通过它可以让我们的账号和代码更加安全。
?
直接上图先
Windows环境下配置Git SSH
配置全局用户名和邮箱
git config --global user.name "自定义用户名"
git config --global user.email "邮箱"
查看当前的全局变量
git config --global --list
取消全局设置命令
git config --global --unset user.name
git config --global --unset user.email
生成SSH Key
查看本地是否有SSH设置
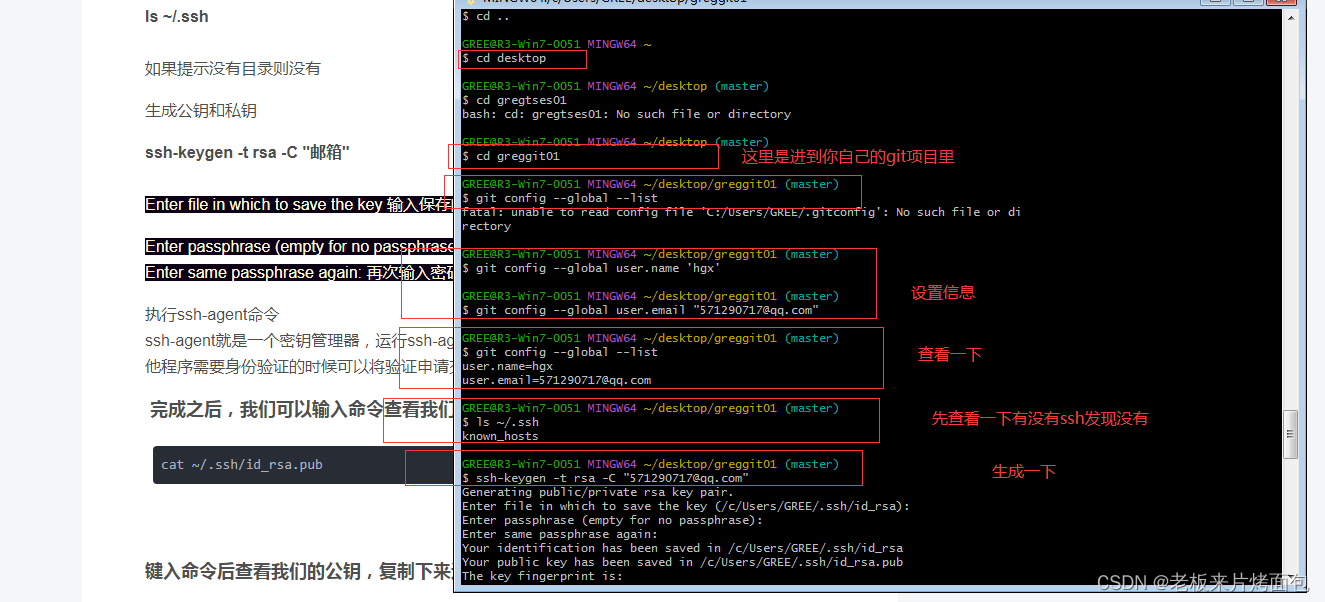
ls ~/.ssh
如果提示没有目录则没有
生成公钥和私钥
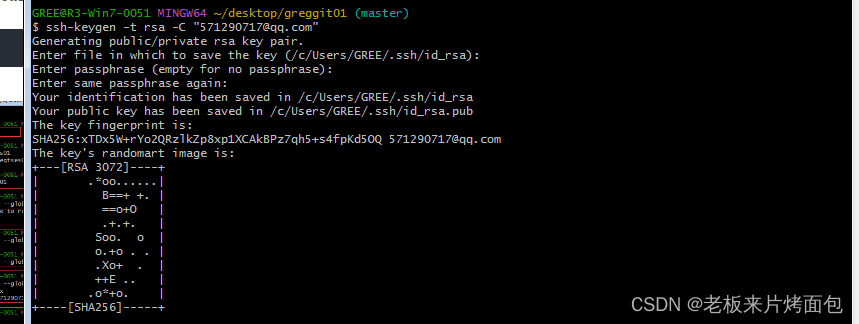
ssh-keygen -t rsa -C "邮箱"
Enter file in which to save the key 输入保存的目录,默认用户目录下
Enter passphrase (empty for no passphrase): 输入密码,回车默认没有
Enter same passphrase again: 再次输入密码
执行ssh-agent命令
ssh-agent就是一个密钥管理器,运行ssh-agent以后,使用ssh-add将私钥交给ssh-agent保管,其他程序需要身份验证的时候可以将验证申请交给ssh-agent来完成整个认证过程
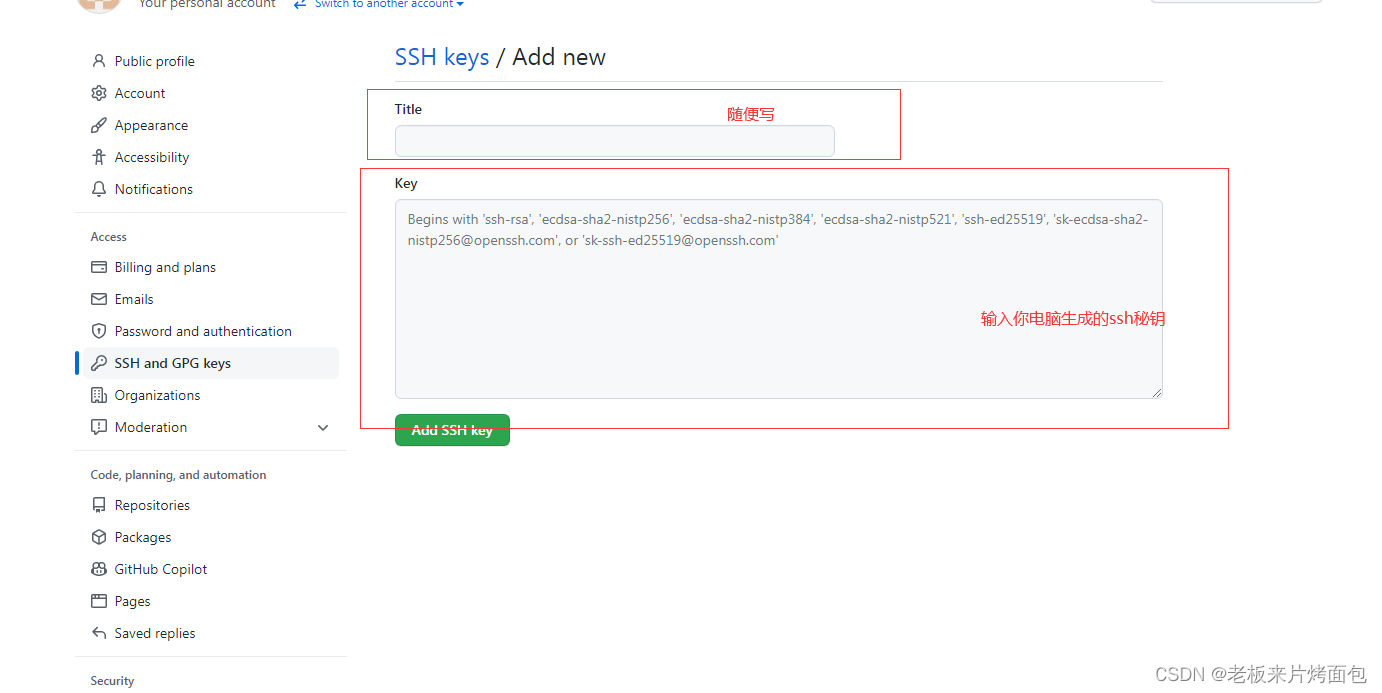
??完成之后,我们可以输入命令查看我们的公钥:
cat ~/.ssh/id_rsa.pub注意是(这个是一个提醒):
cat ~/.ssh/id_rsa.pub

?(复制生成的一堆)
键入命令后查看我们的公钥,复制下来进行配置
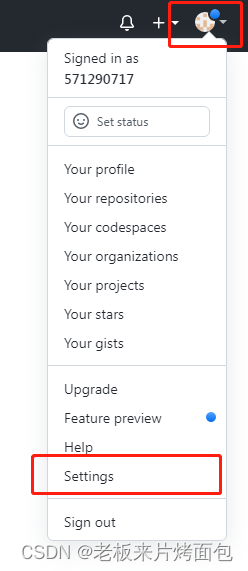
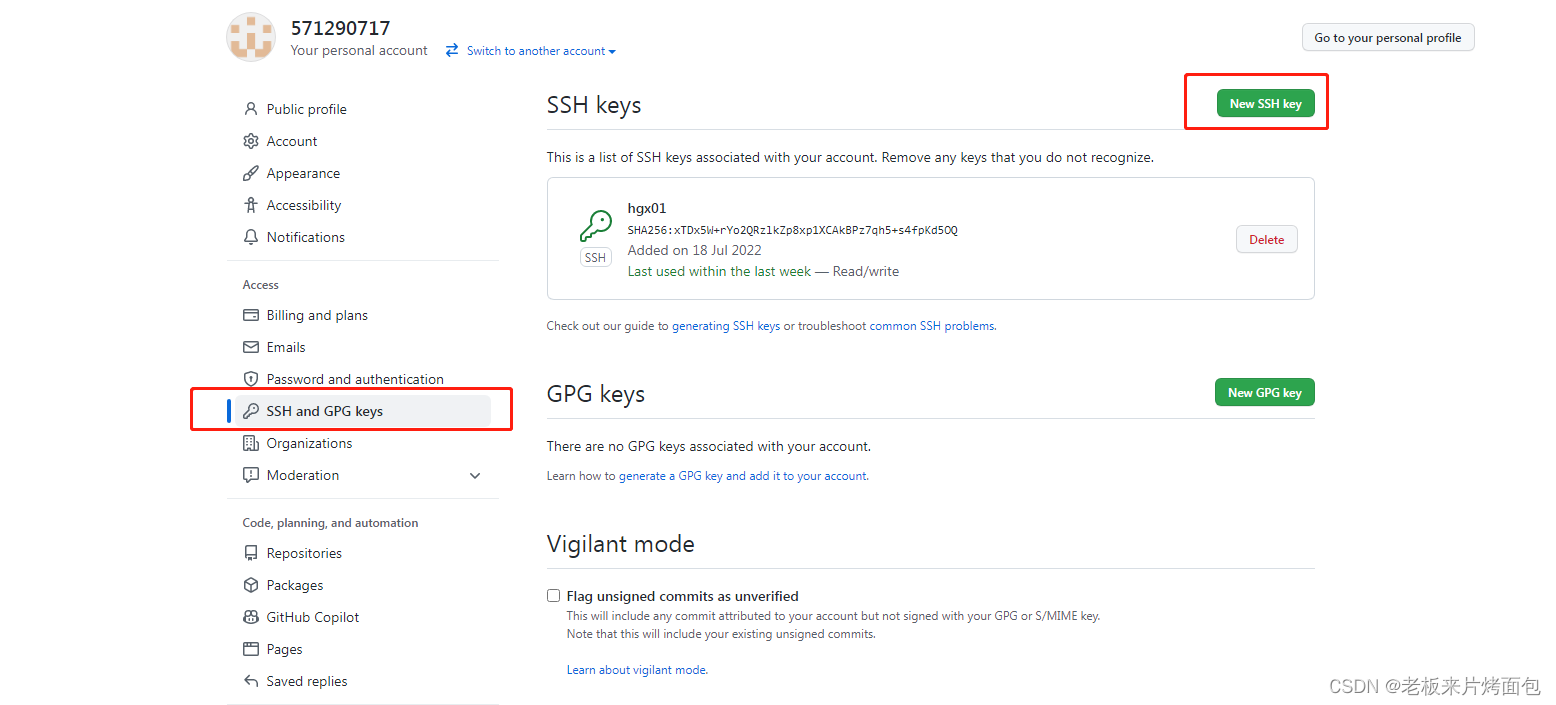
登录上我们的Git***,不管GitHub还是Gitlab…点击头像――>settings
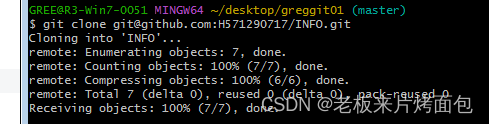
配置成功把GitHub上项目下载到了本地(实现了本地电脑和github的数据传递)?
出现问题(传送门):