目录
?2.2 第二步:点击VCS之后选择import下方的Create git repository点击它
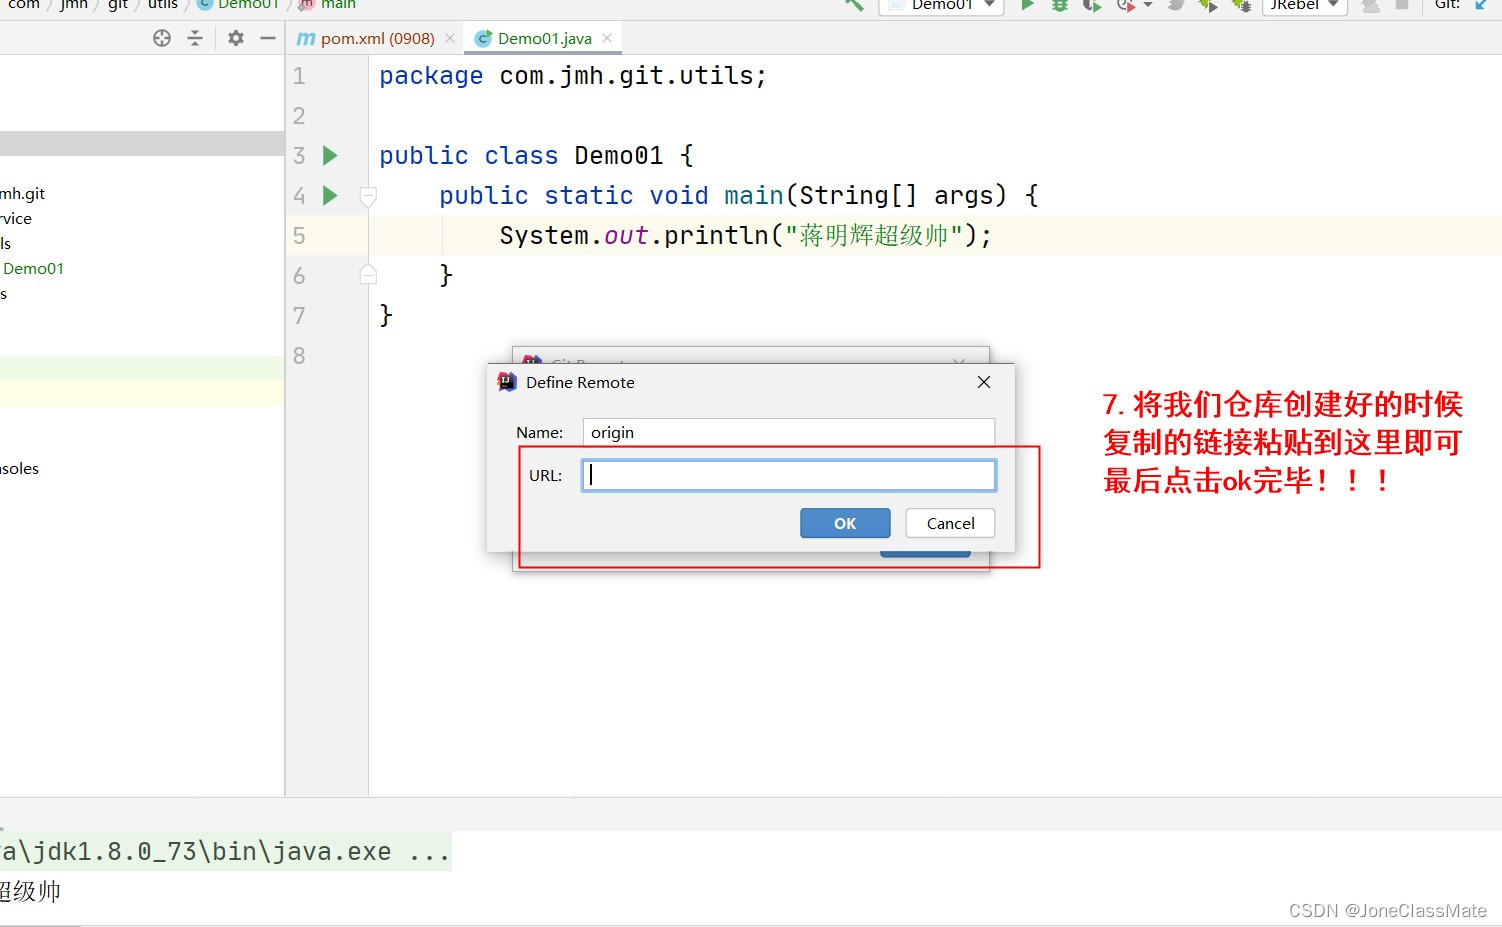
?2.4 第四步:点击VCS选择Git下方的Remotes点击它
?2.6 第六步:将在Git仓库创建好的时候复制的连接粘贴到图中实例中即可
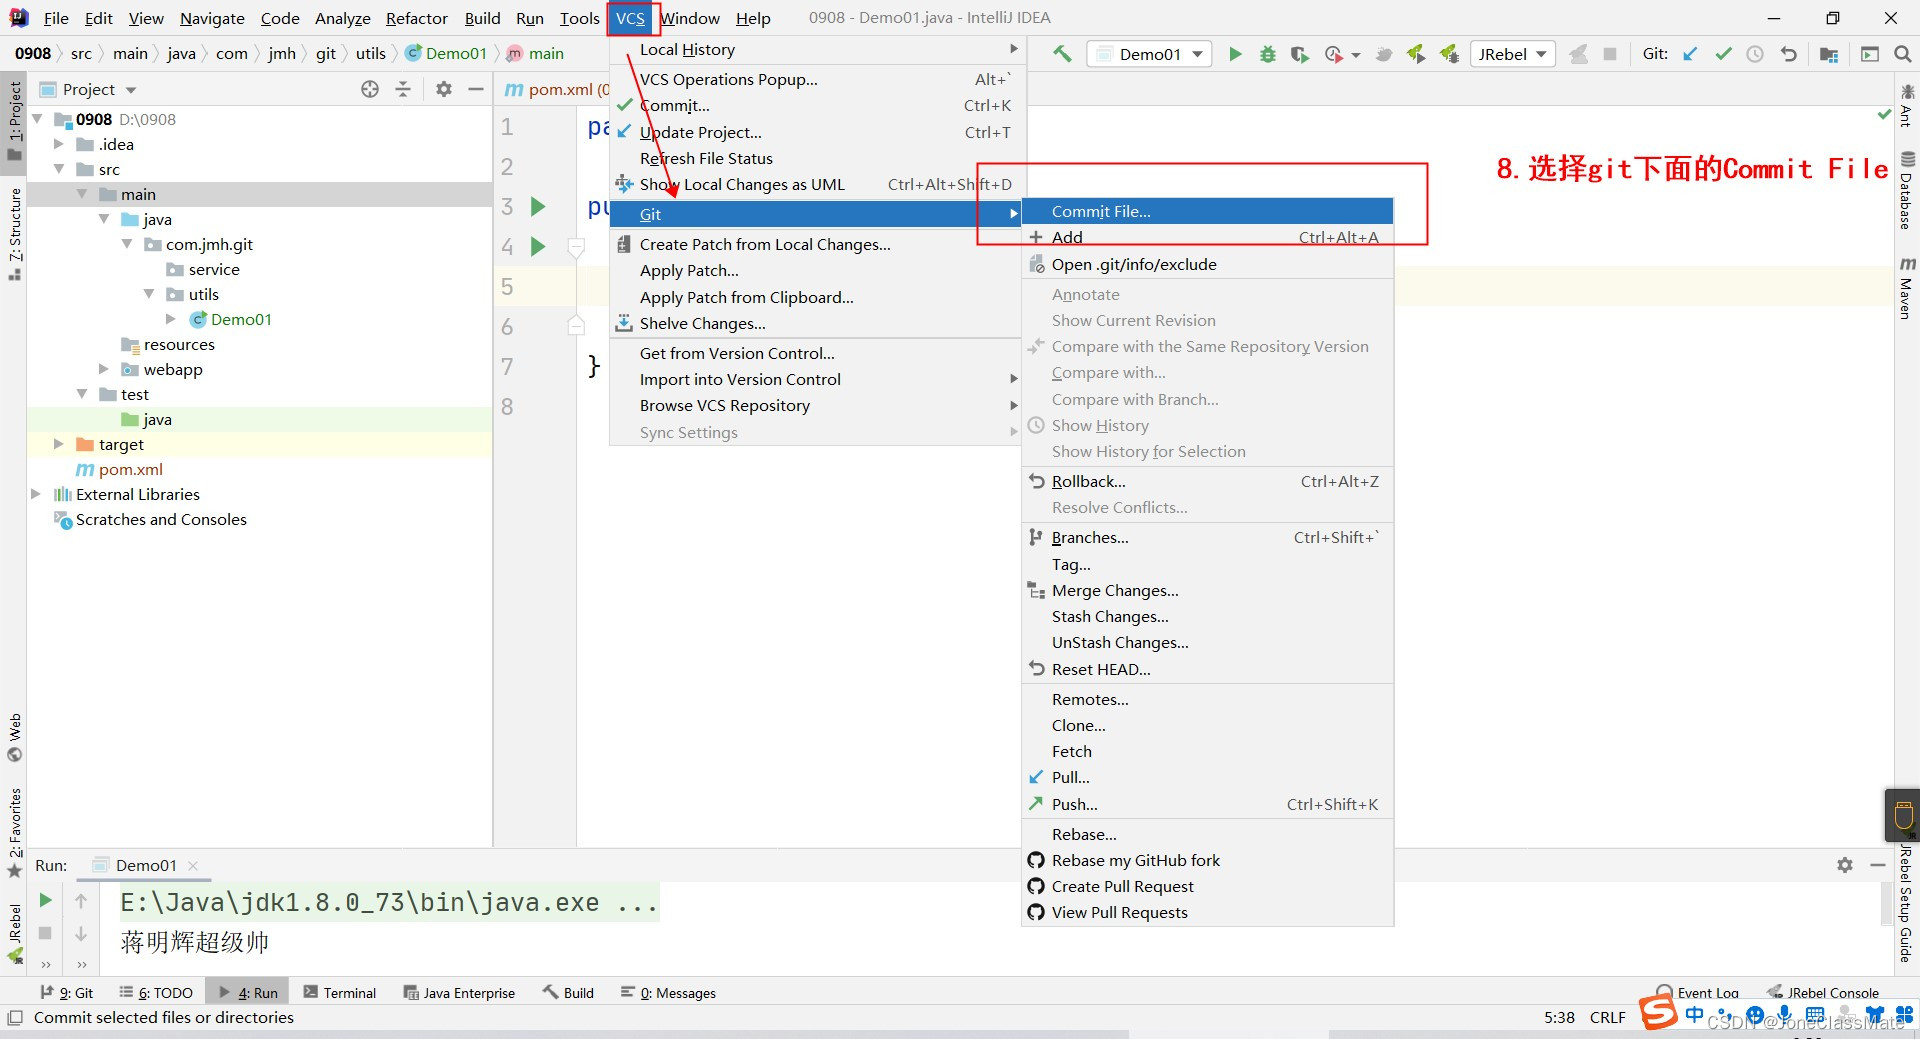
?2.7 第七步:点击VCS选中Git下方的Commit File点击它
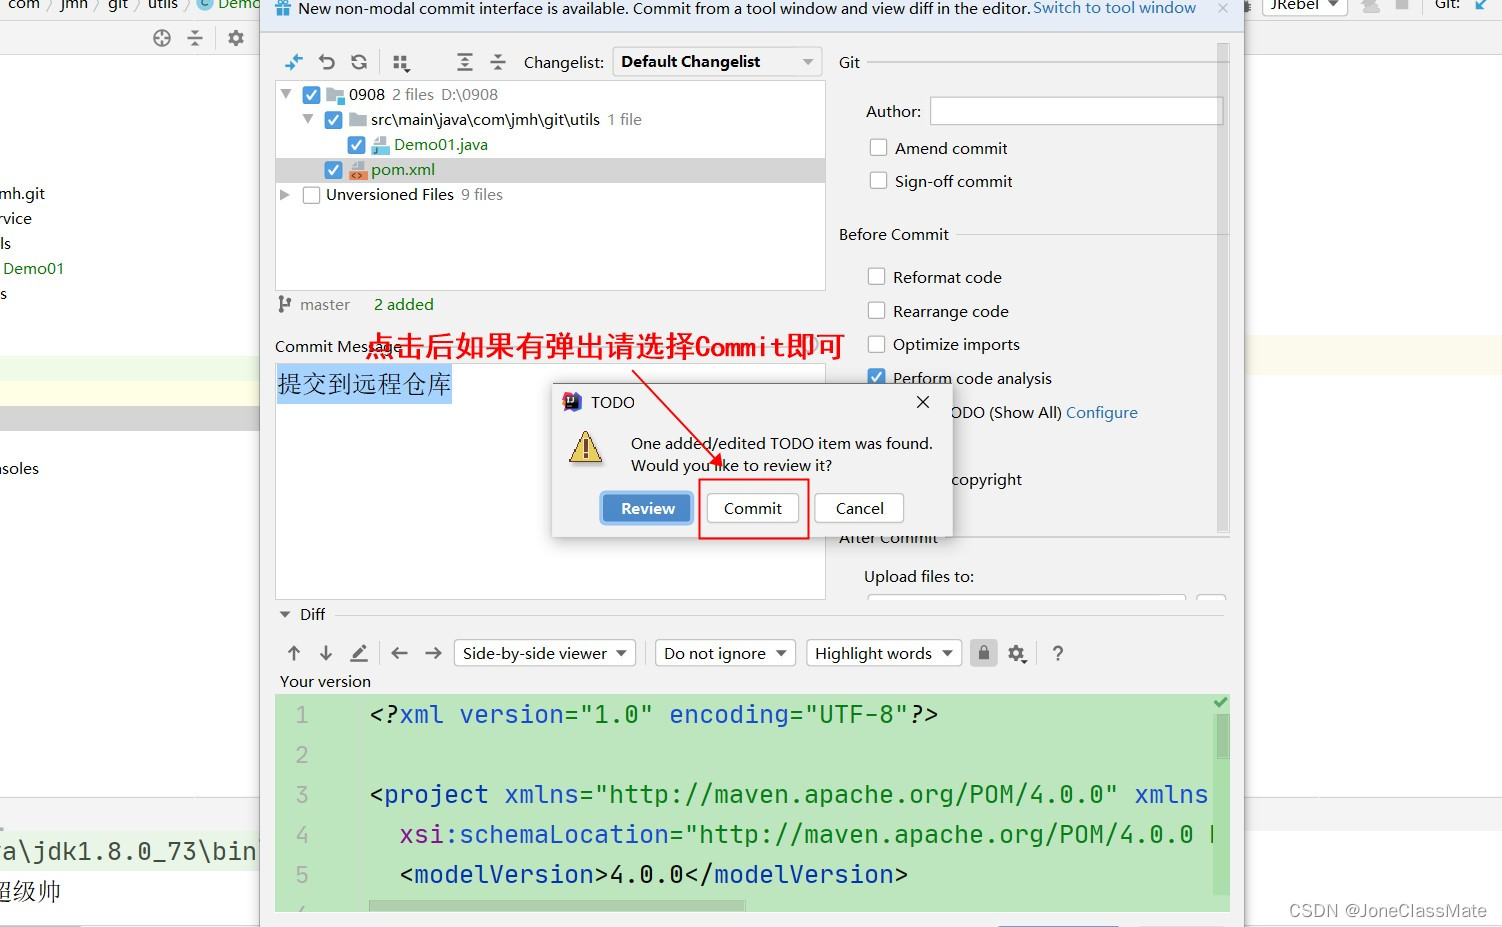
?2.9 第九步:如点击Commit按钮弹框的话就看下方图中教程
?2.10 第十步:选择VCS选择Git下面的Push推送到远程
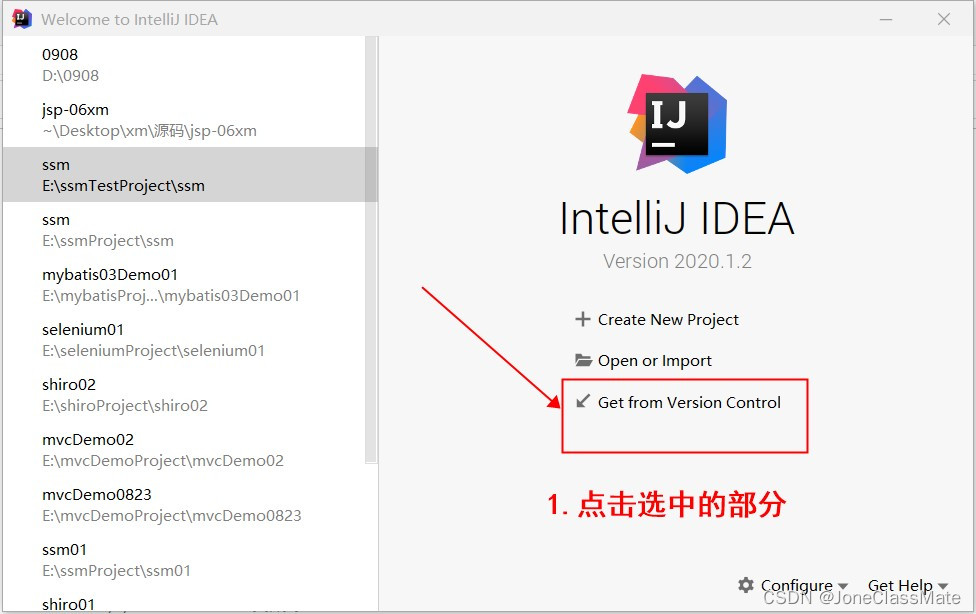
?3.1 第一步:我们打开idea选择Get from Version Control?
?3.3 点击Clone按钮后我们就成功将仓库里面的数据Clone到我们项目里面啦
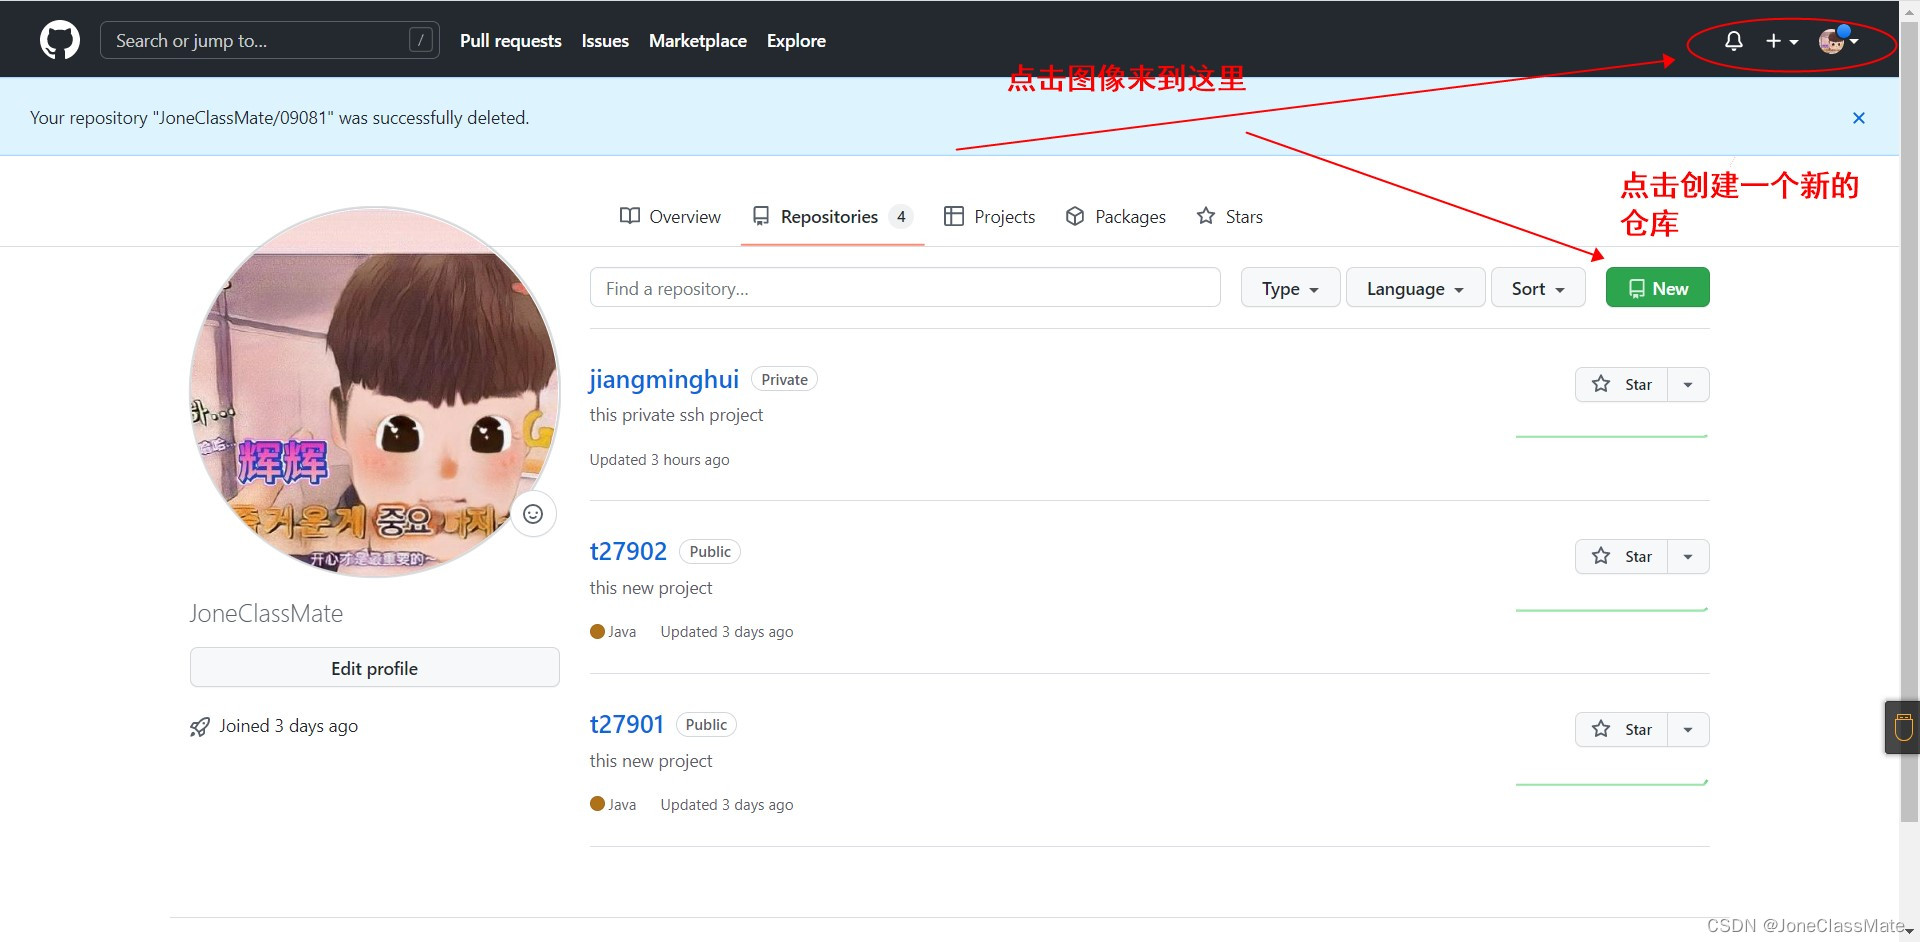
1. 创建一个Git仓库来保存idea要推送的项目
- 步骤如下:?
 ?
?
 ?
?
?
 ?
?
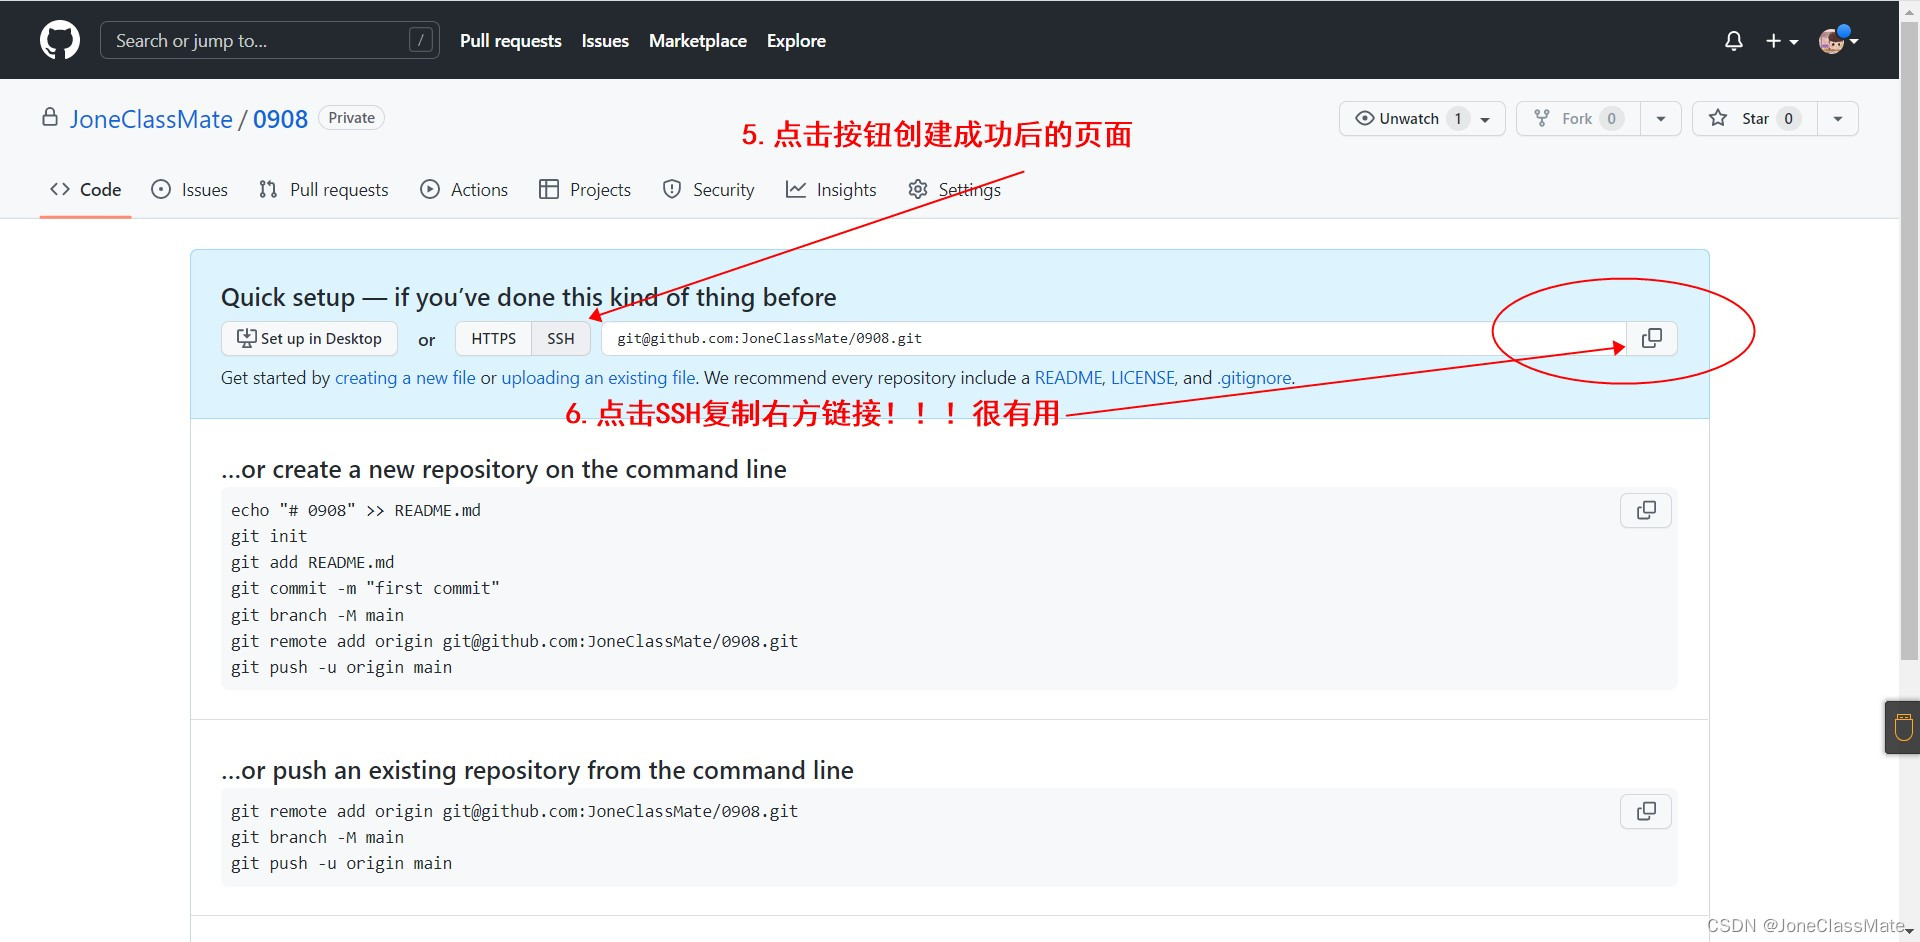
- 注意!!!上方图中复制链接哦?
?2. 在idea中将项目推送到Git仓库中
? 2.1 第一步:点击VCS?
 ?
?
?2.2 第二步:点击VCS之后选择import下方的Create git repository点击它
 ?
?
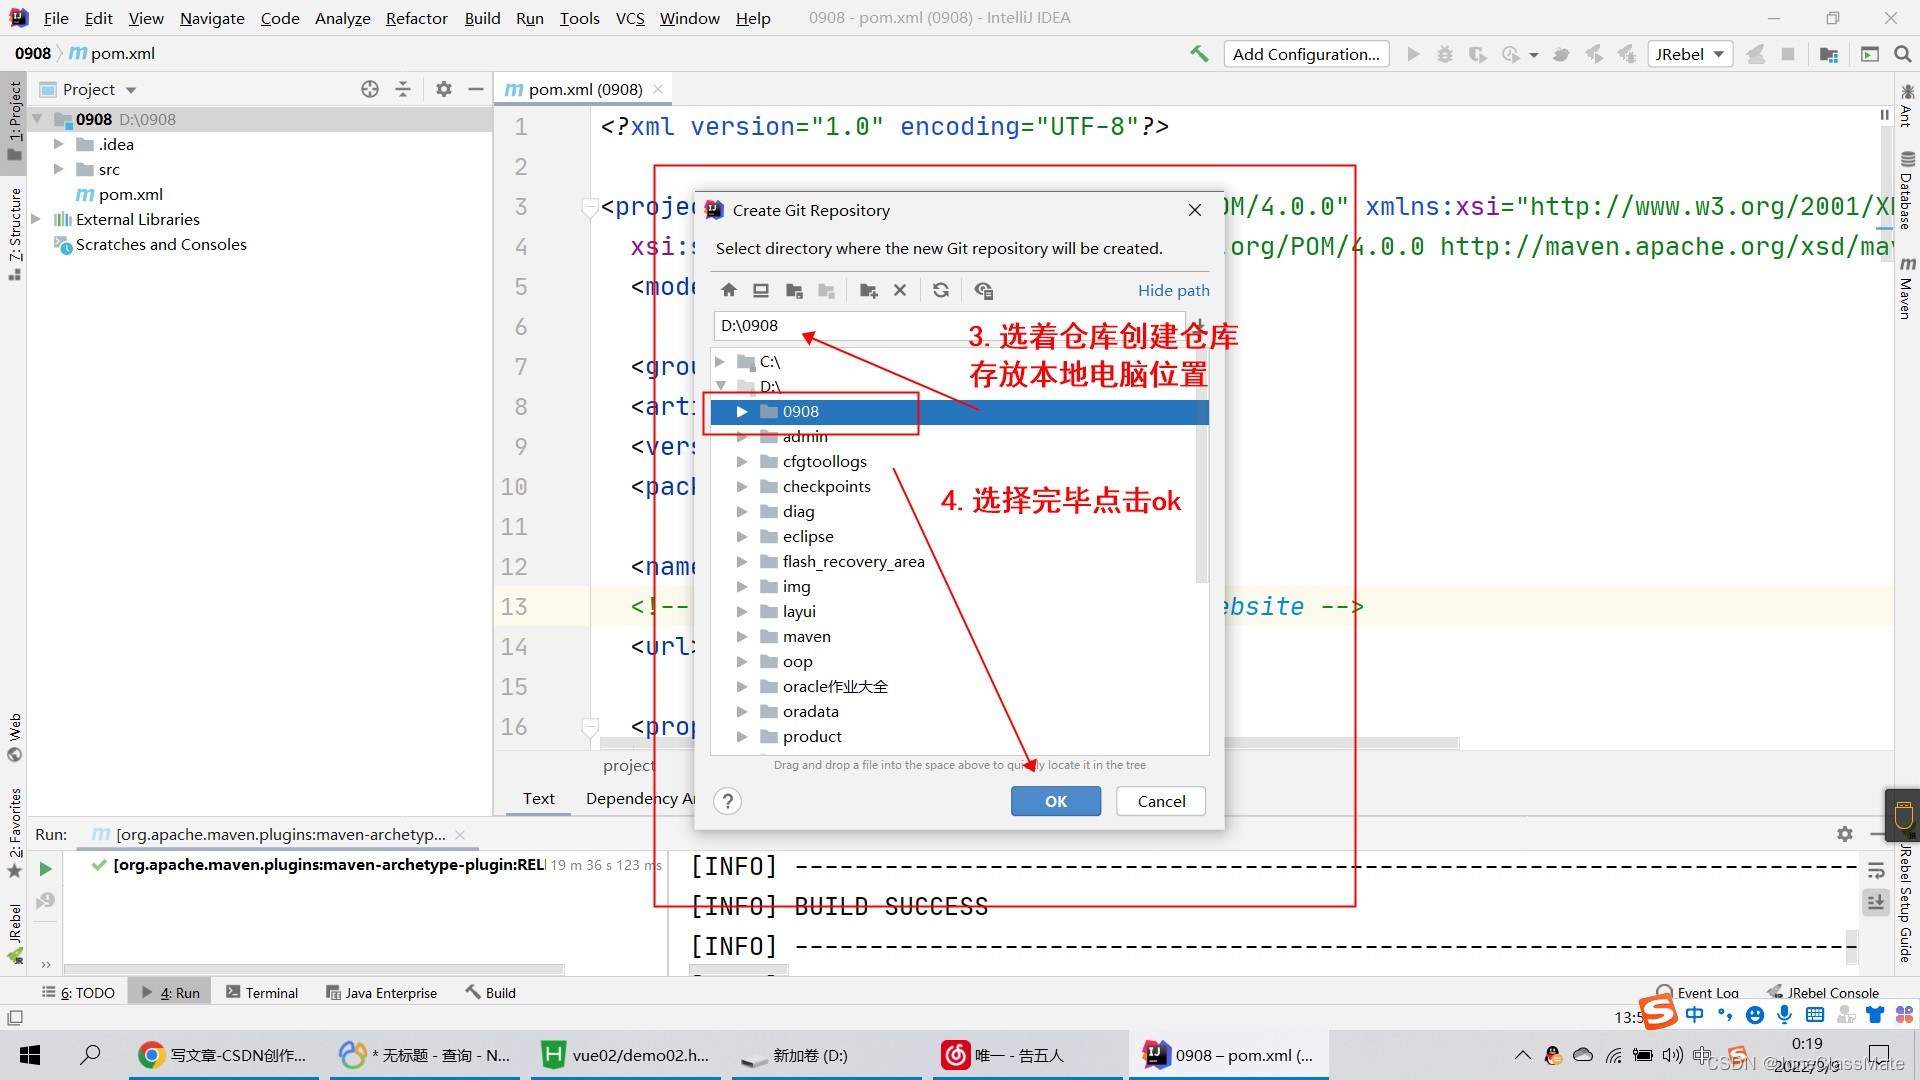
? 2.3 第三步:选择你创建的仓库存放电脑位置
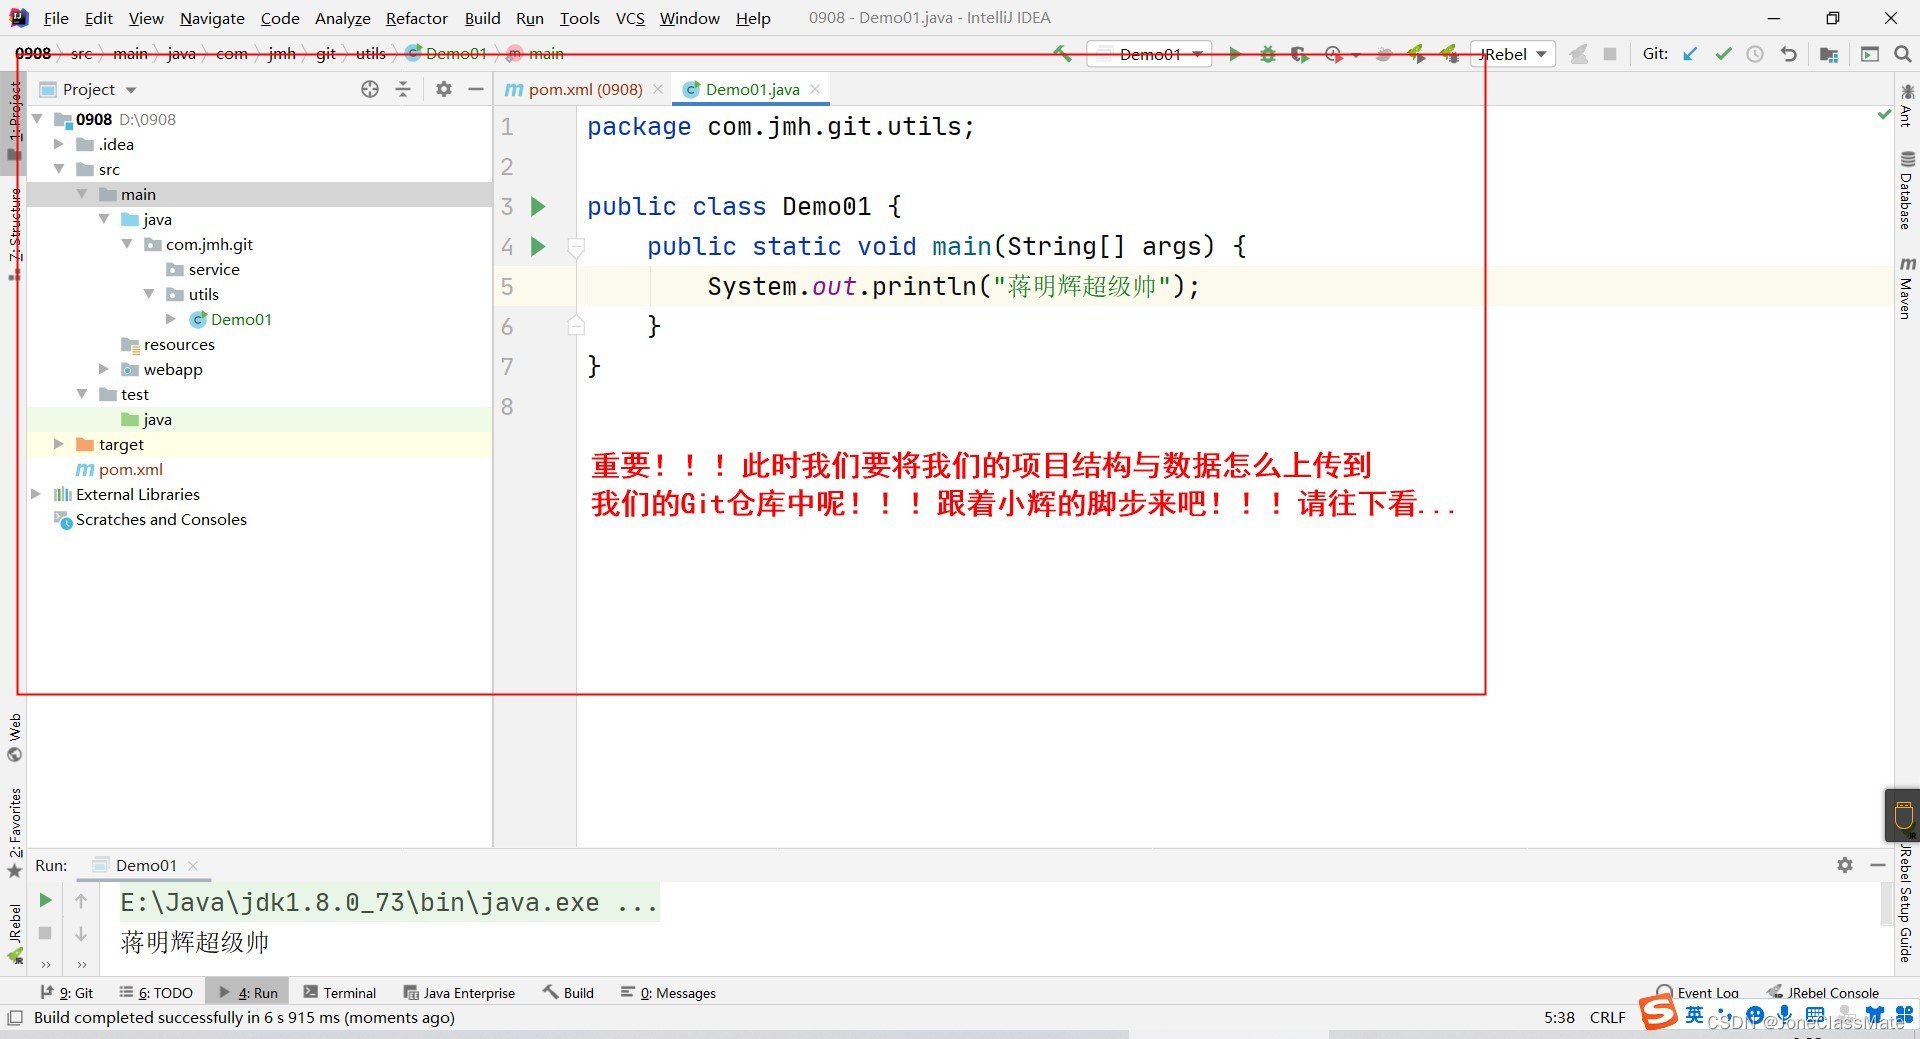
? 现在我们该怎么把项目结构与数据推送到Git仓库中呢 !!!往下看不要眨眼了
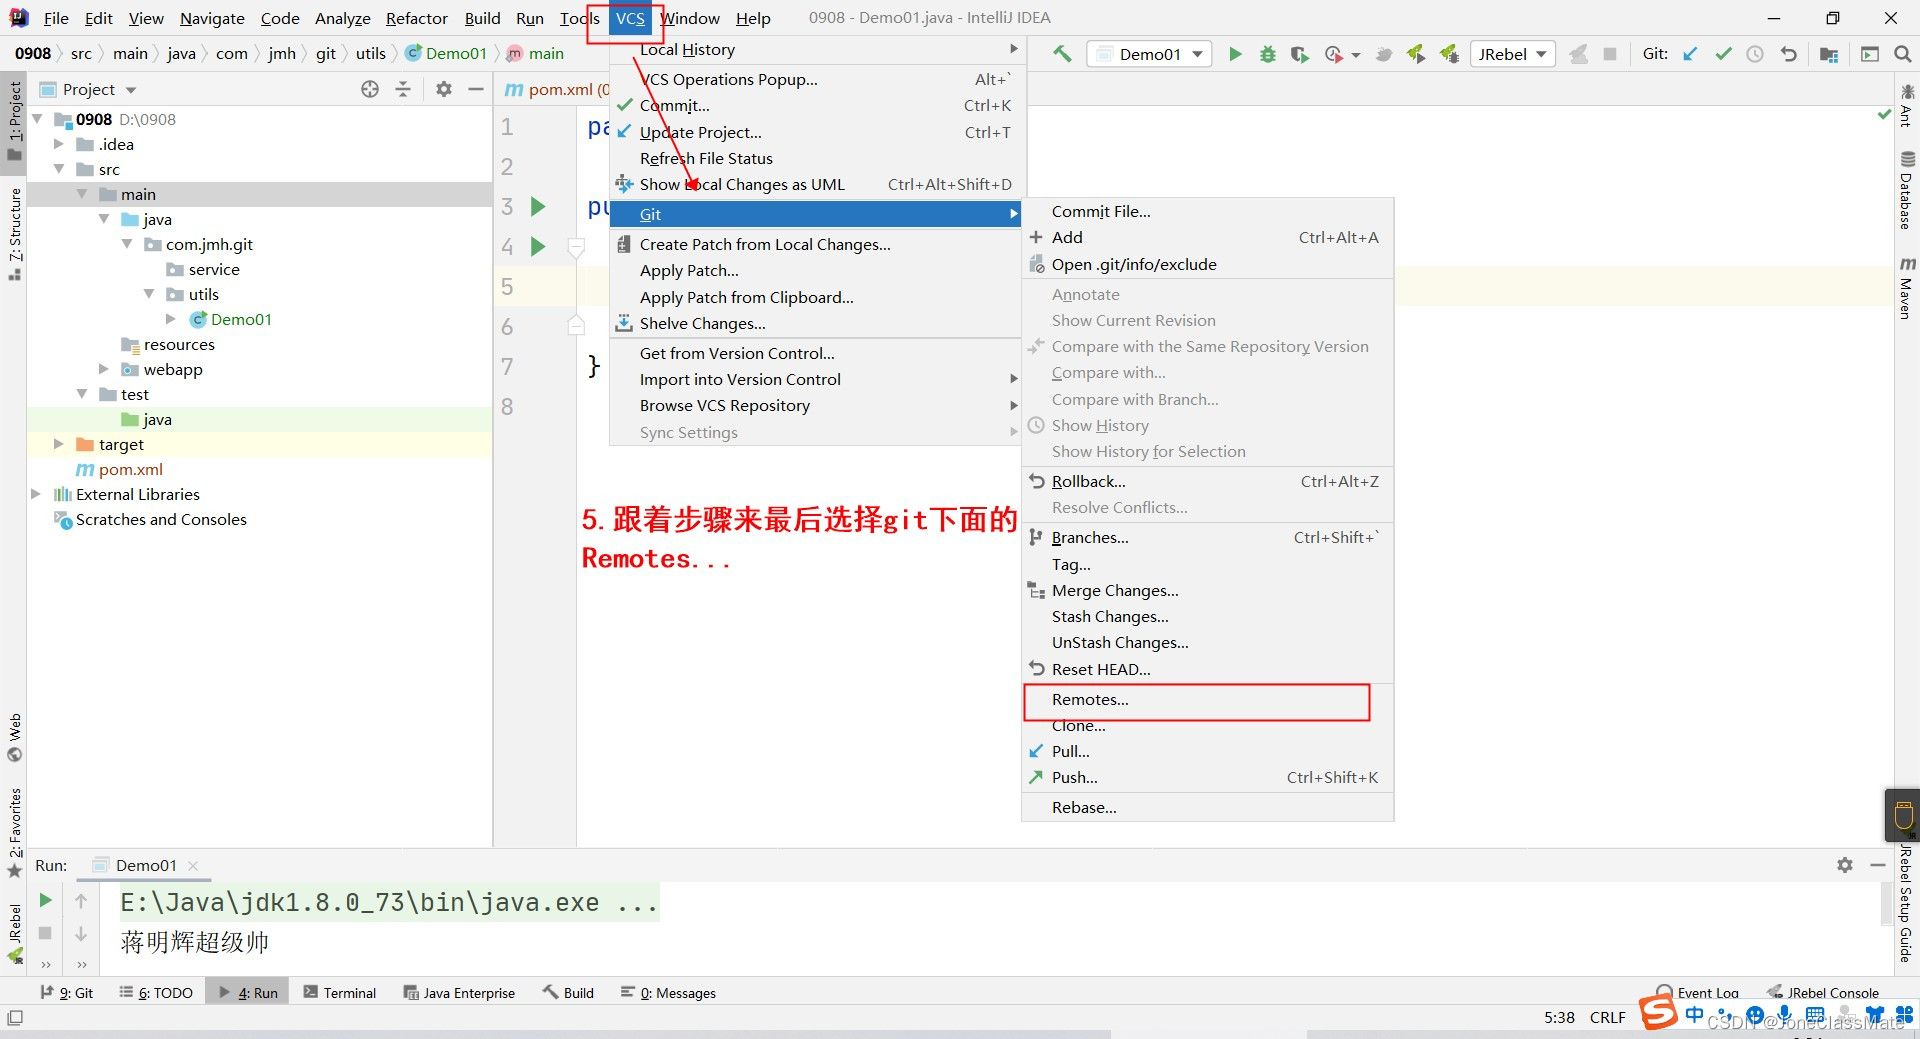
?2.4 第四步:点击VCS选择Git下方的Remotes点击它
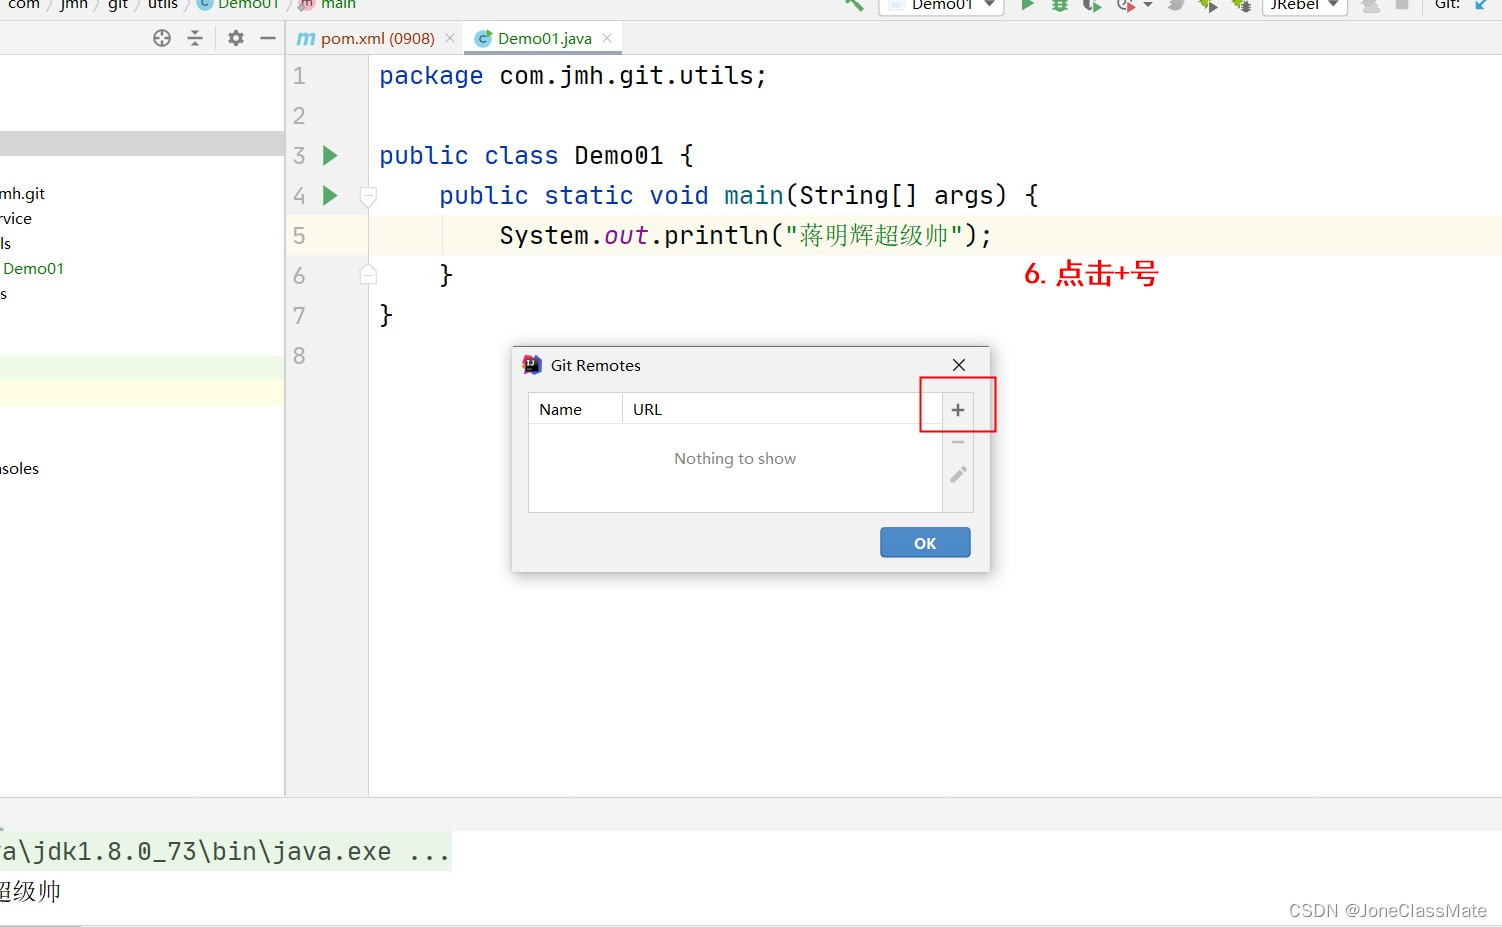
?2.5 第五步:点击+号
?2.6 第六步:将在Git仓库创建好的时候复制的连接粘贴到图中实例中即可
?2.7 第七步:点击VCS选中Git下方的Commit File点击它
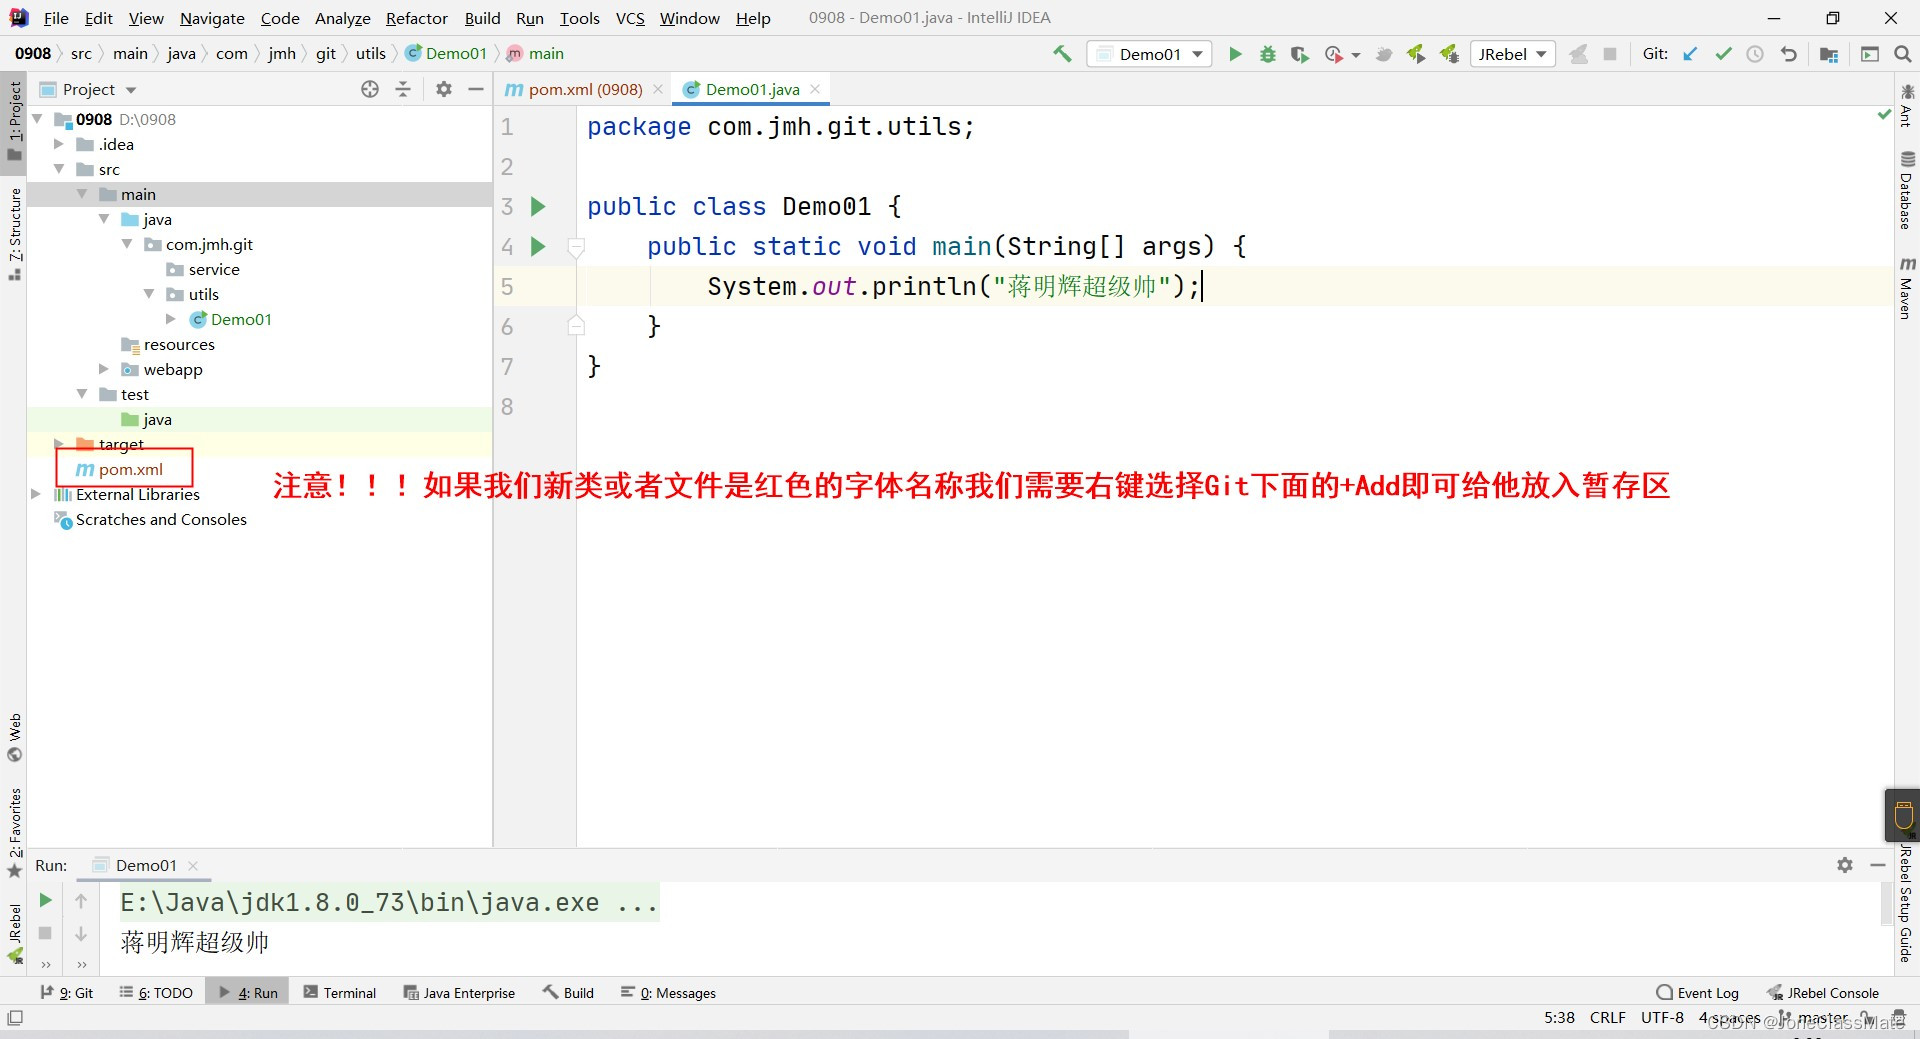
注意!!!如果我们发现我们要想要推送到Git仓库里面的数据文件或者类名称字体是红色的表示此文件是新建状态我们要点击文件右键选择Git下面的+Add才可操作上方流程!!!?
?2.8 第八步:选择我们要推送到Git仓库的结构与数据
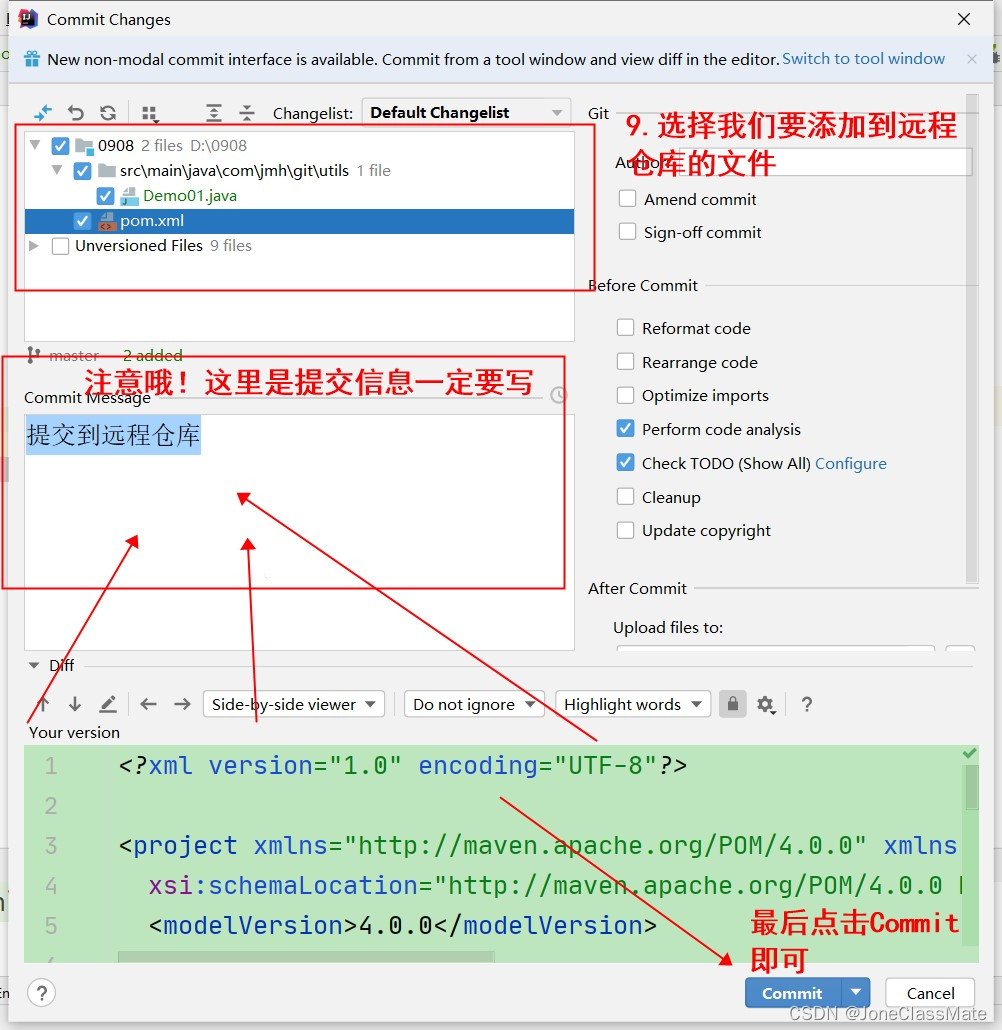
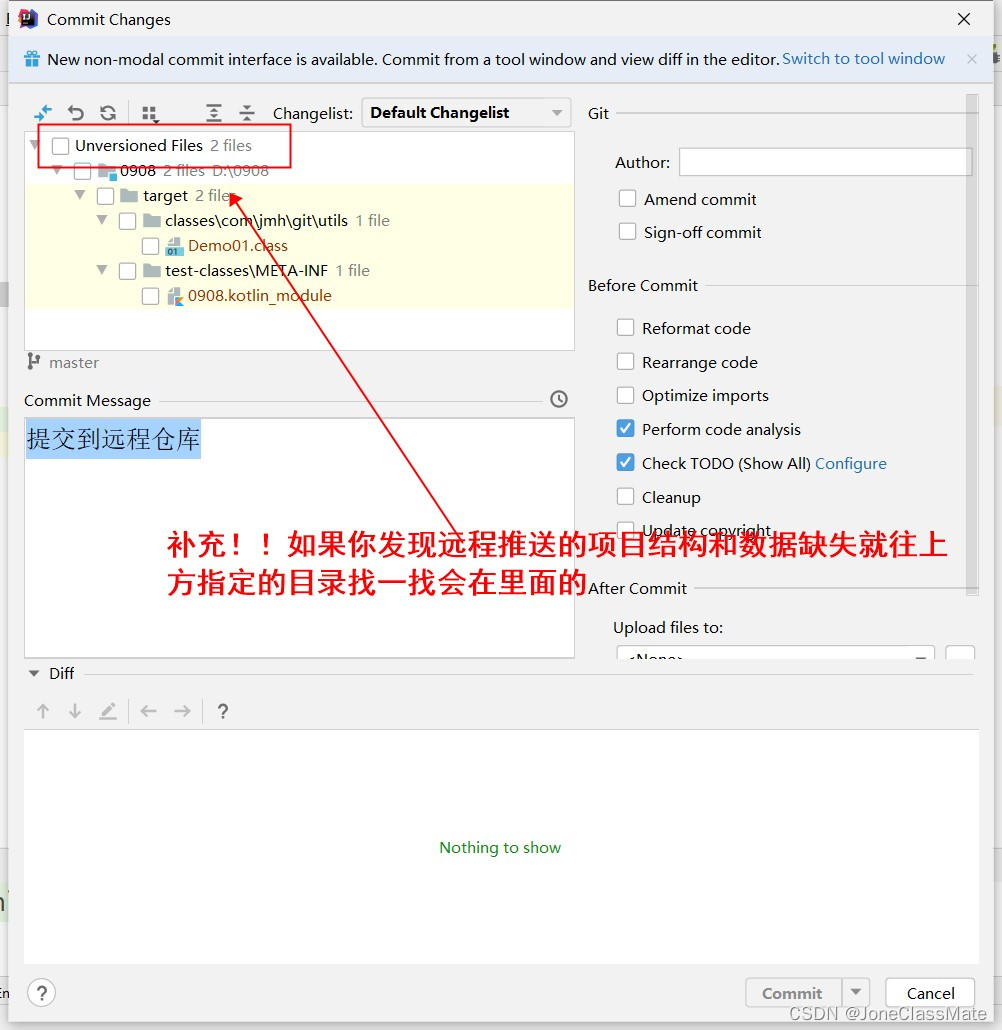
?2.9 第九步:如点击Commit按钮弹框的话就看下方图中教程
?2.10 第十步:选择VCS选择Git下面的Push推送到远程
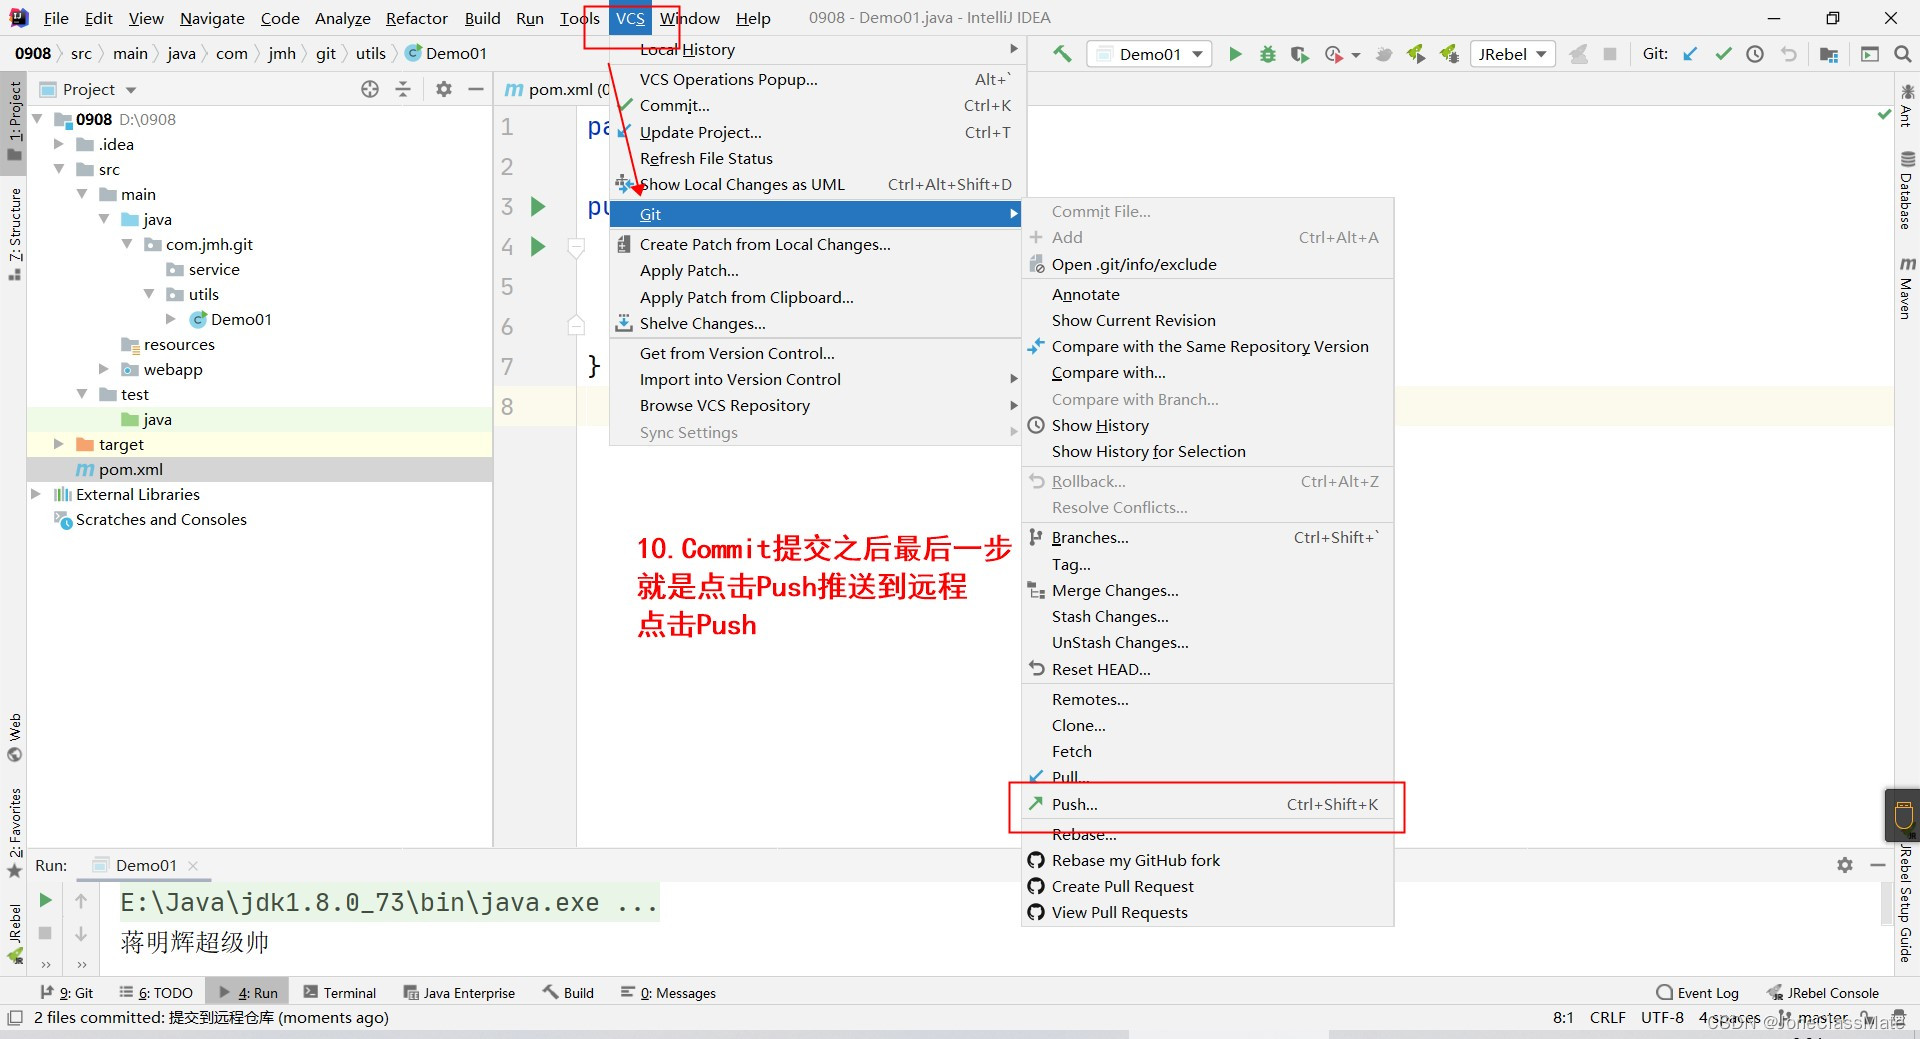
2.11 第十一步:如图所示:最后点击Push推送?
 ??
??
现在我们去我们远程仓库看看!!!已经成功啦
 ?
?
2.12 补充!!!
 ?
?
3.?idea如何cloneGit远程仓库
?3.1 第一步:我们打开idea选择Get from Version Control?
?3.2 第二步:如图所示
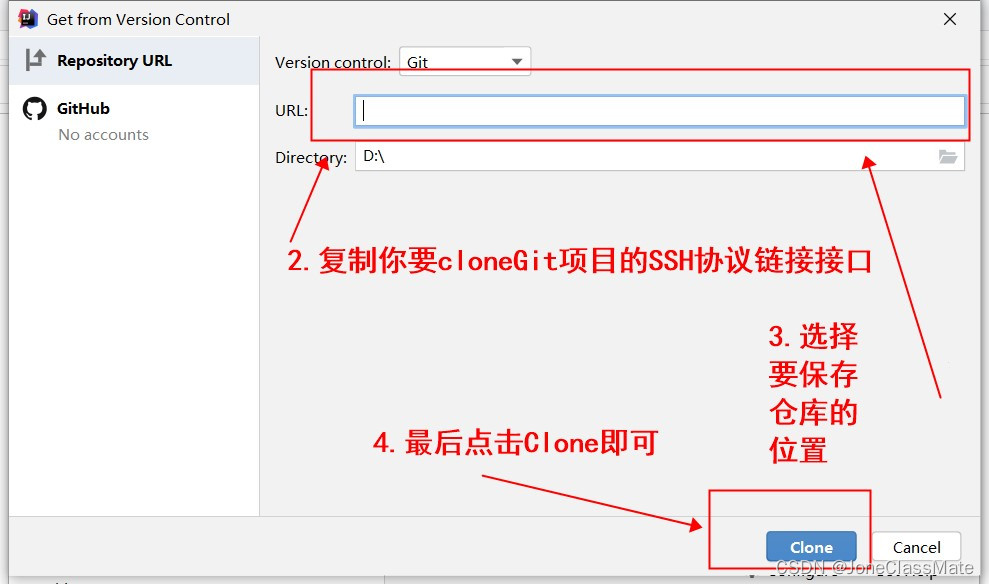
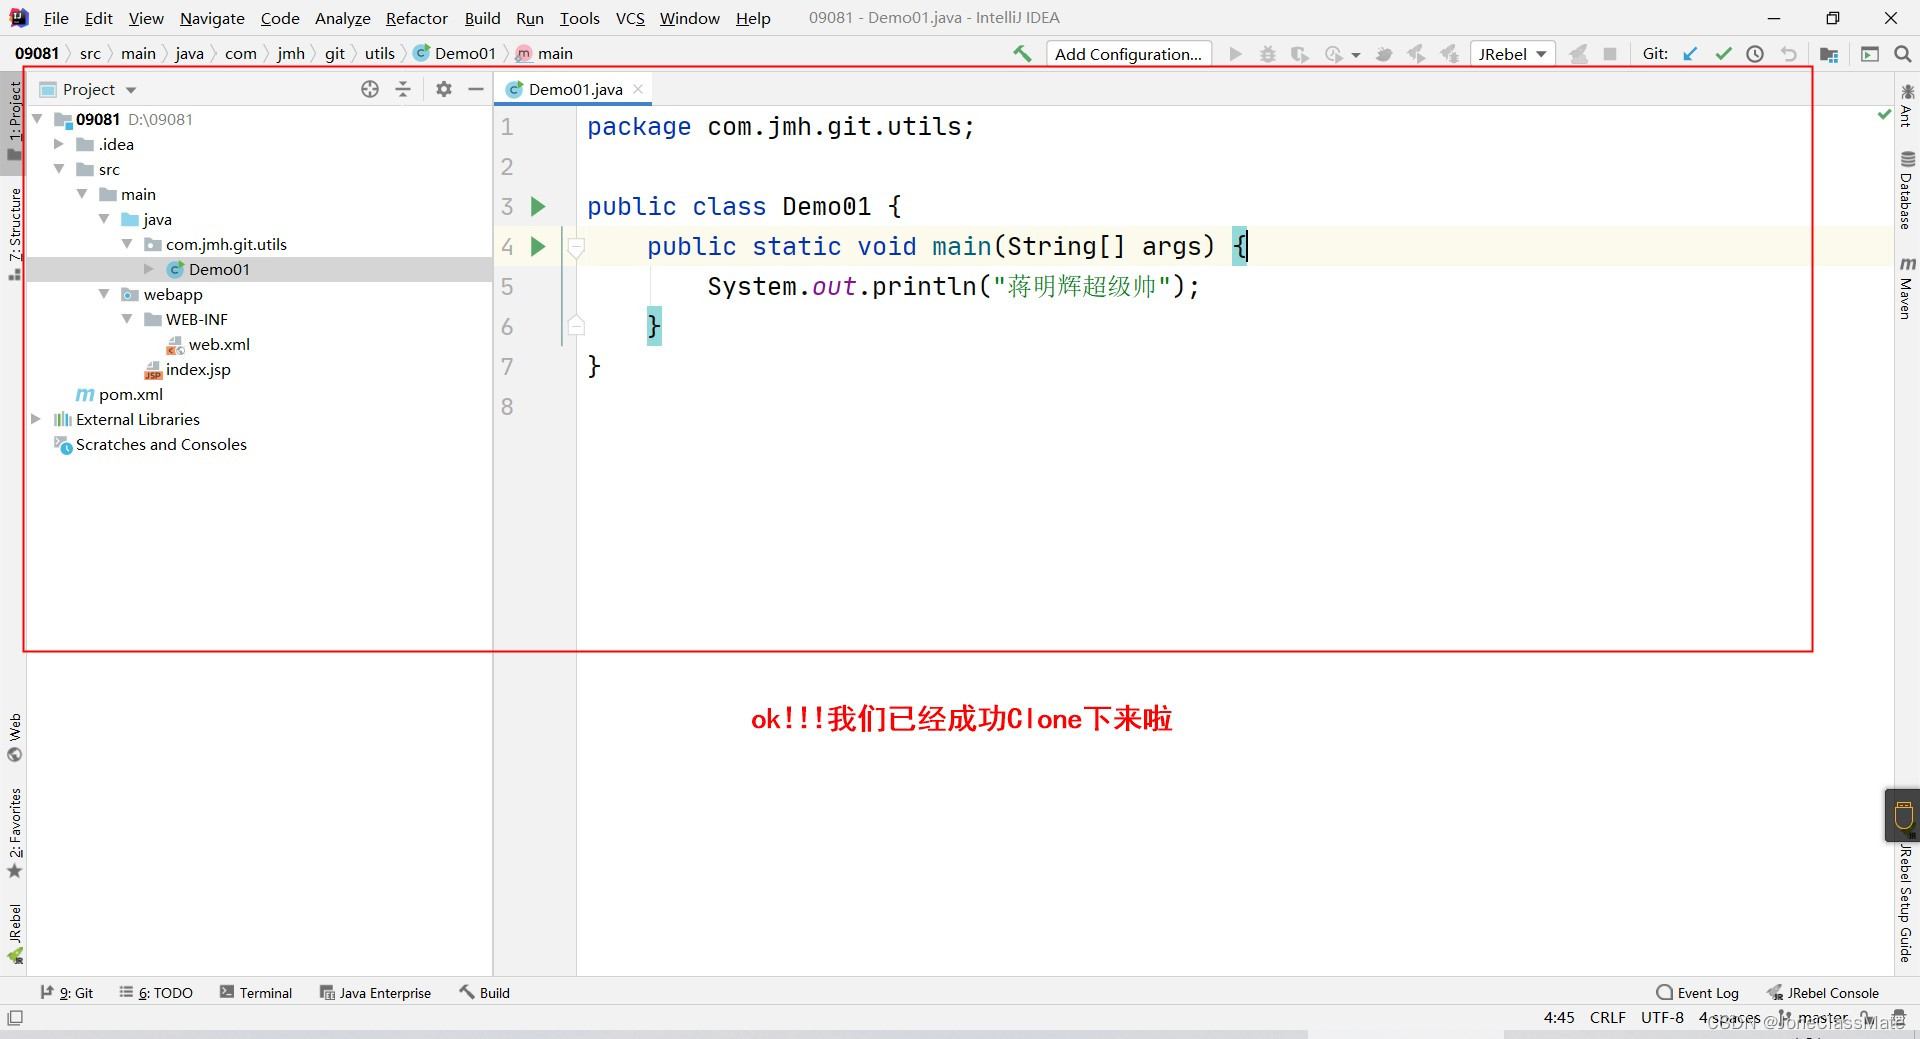
?3.3 点击Clone按钮后我们就成功将仓库里面的数据Clone到我们项目里面啦
- 下方图是我们要CloneGit仓库的数据结构?
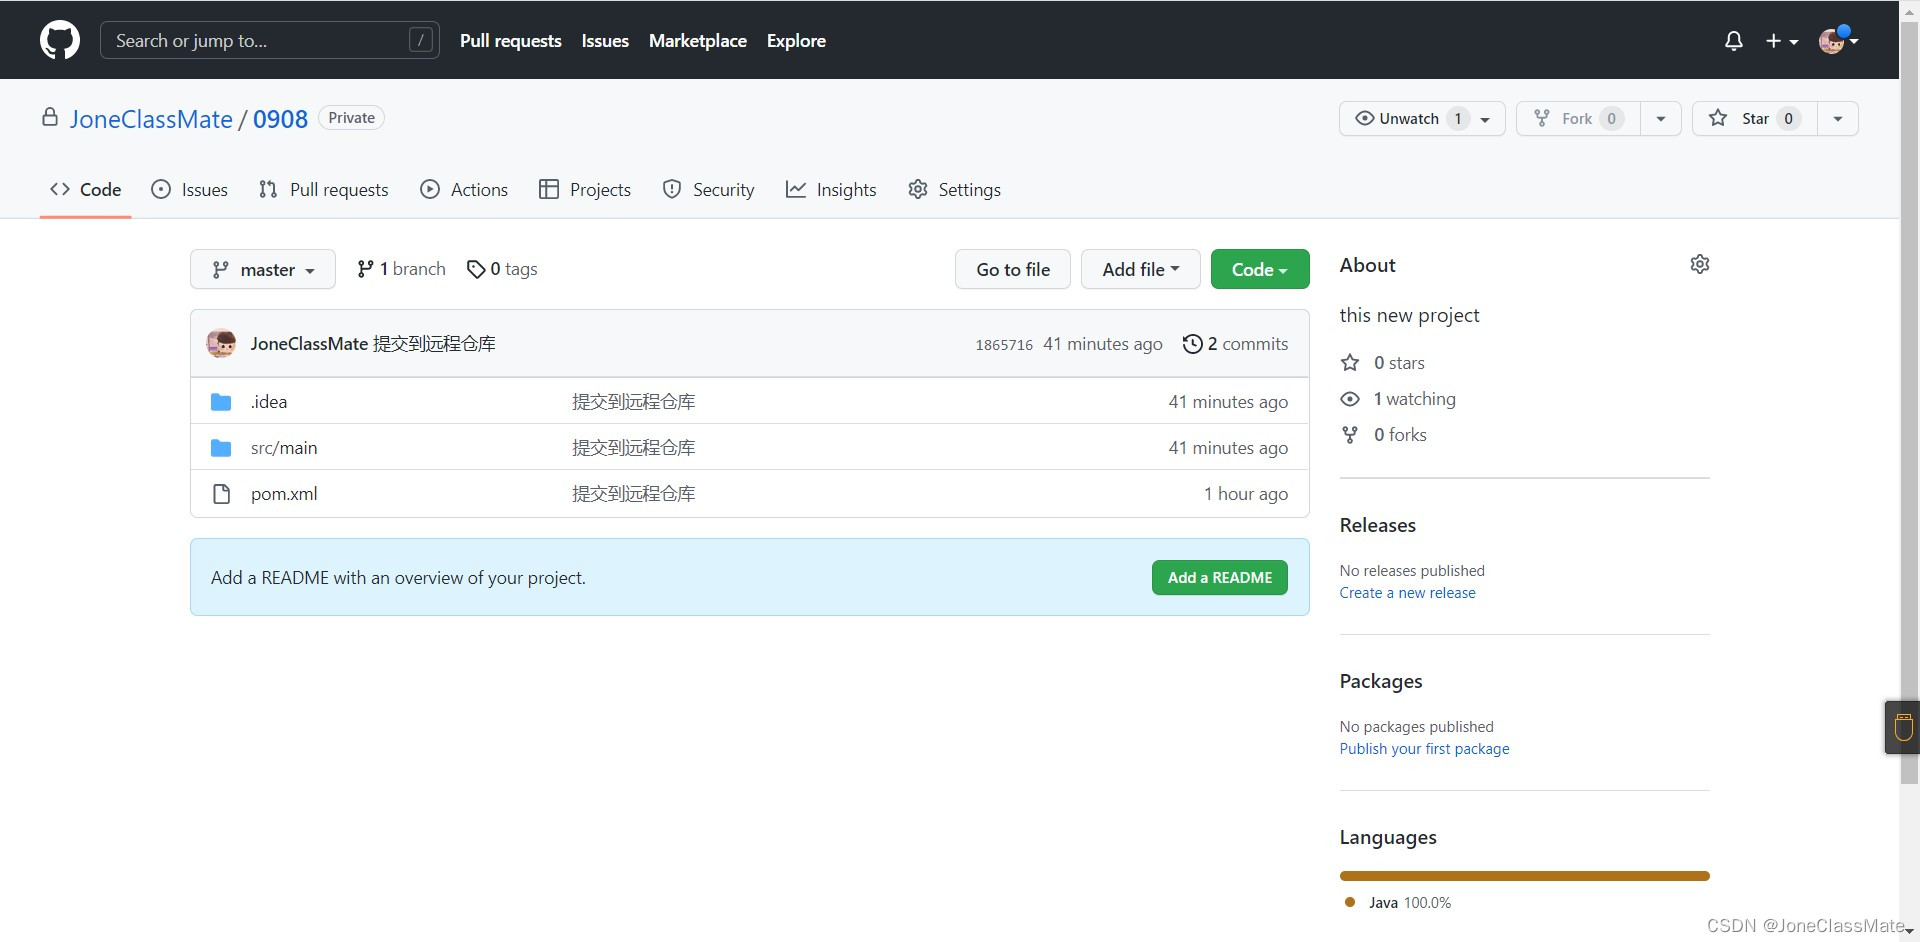
- ok !!!已成功Clone到idea里面的项目中?
再见啦!!!帮助到你们就点点赞吧?
?
?
?
?
