VSCode下载安装
VSCode下载安装(链接:https://code.visualstudio.com/)特别简单,就如同普通软件安装到自己指定文件即可。
Fortran环境安装
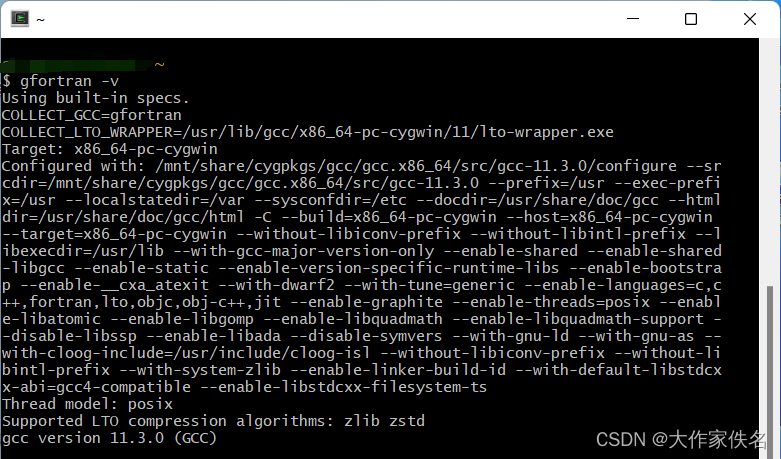
通过Cygwin安装gfortran,可以参考博文Cygwin安装教程和Cygwin及Wget安装。博文VScode中配置使用fortran有更全面的介绍。
VSCode安装Fortran相关插件
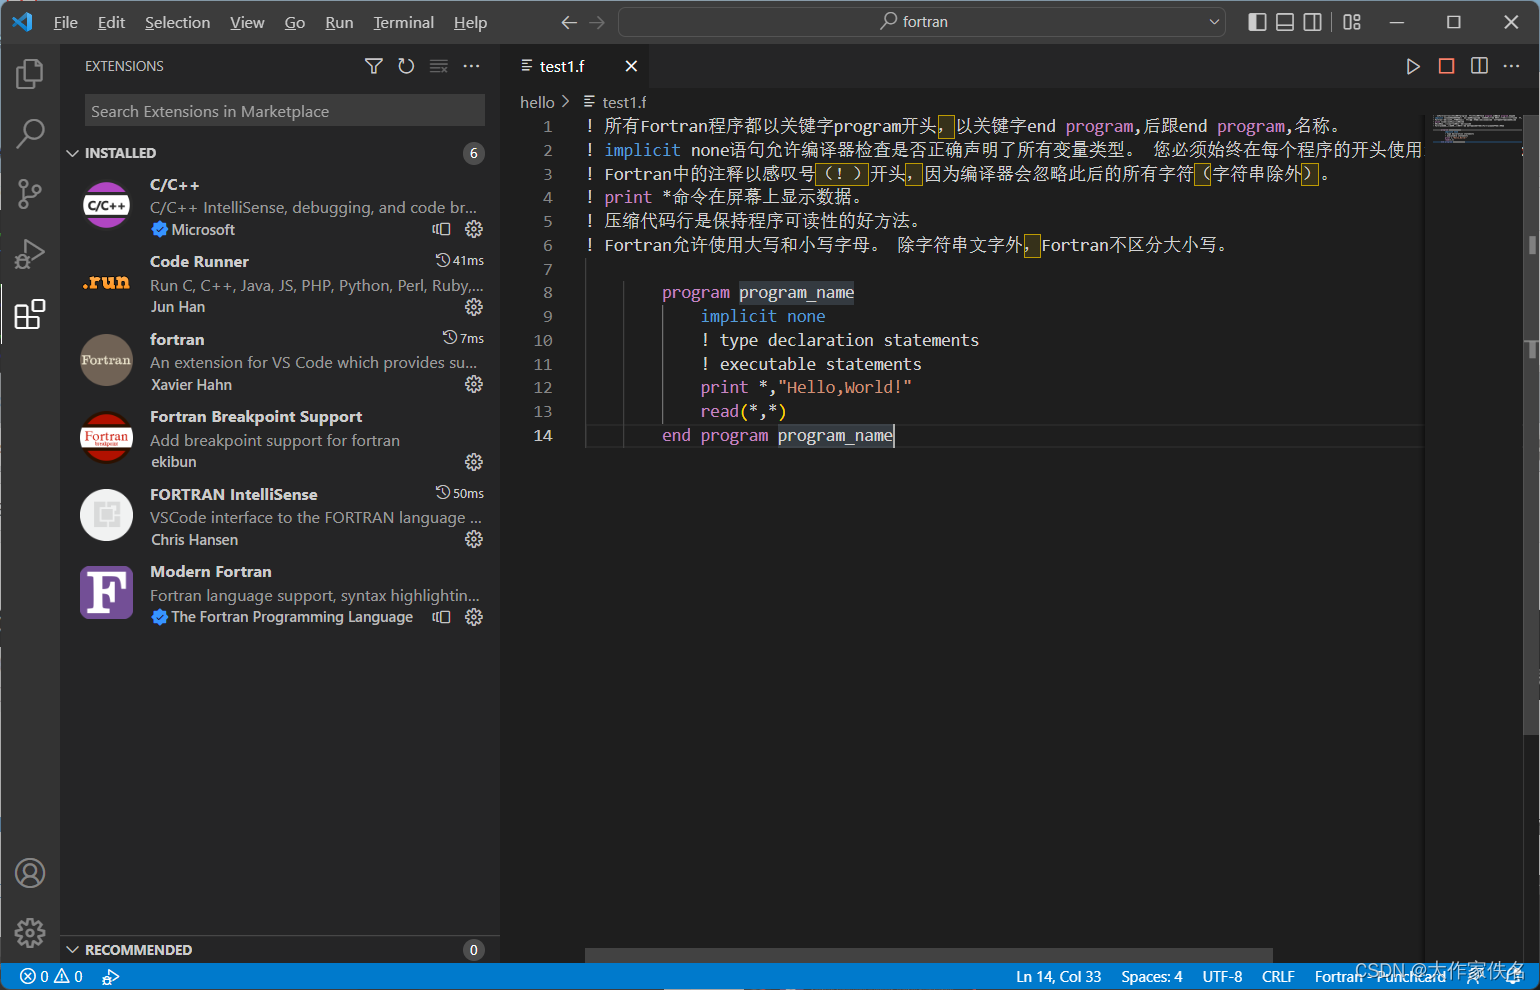
四个插件:Fortran,Modern Fortran, Fortran IntelliSense, Code Runner, Fortran Breakpoint Support,其中Fortran Breakpoint Support插件是必须的,另一个插件是代码高亮的。还会有很多有趣插件,以后根据使用再进行添加。
利用VSCode编写第一个Fortran程序
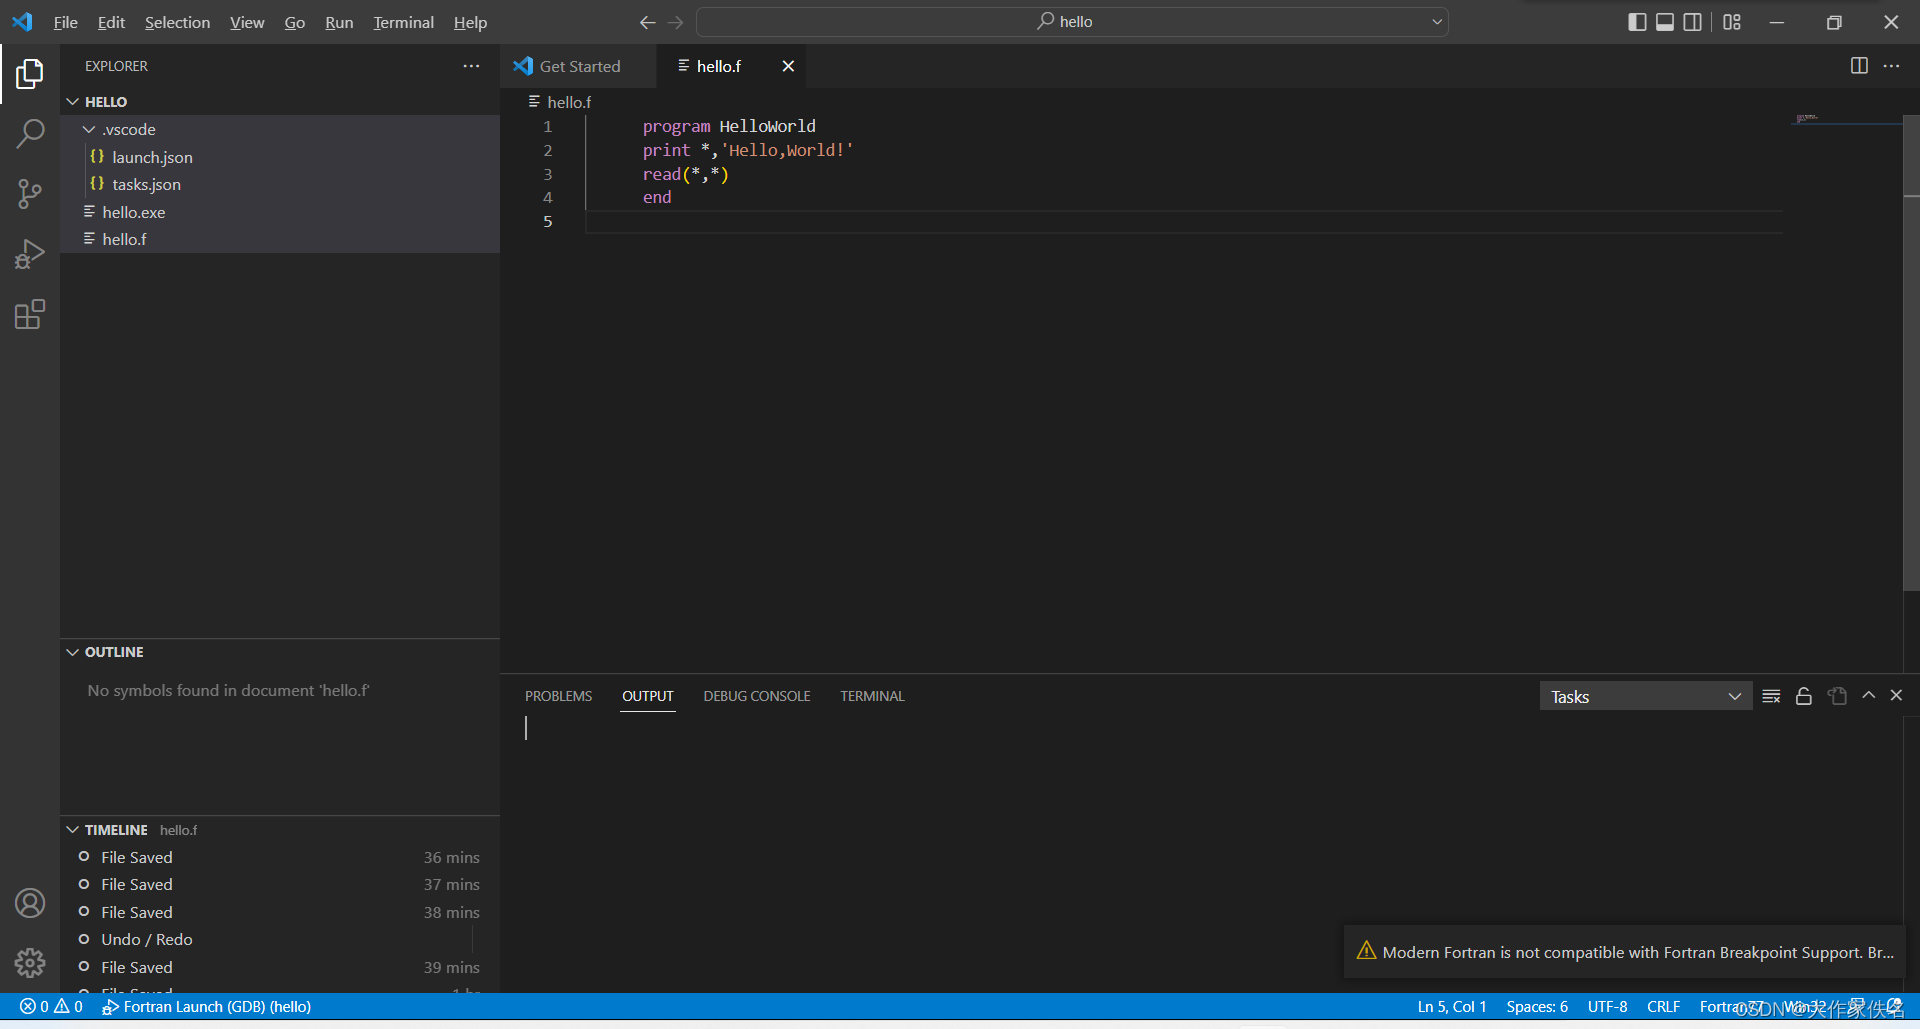
找个地方新建一个文件夹,文件结构如下:
└── hello
    ├── hello.f
    └── .vscode
        ├── launch.json
        └── tasks.json
在hello文件夹中新建一个.vscode的文件夹,注意文件夹前面的“点”,然后在.vscode文件夹中新建两个文件launch.json和tasks.json(源自:Guide_VSCode-fortran)。内容分别如下,launch.json:
{
  "version": "2.0.0",
  "configurations": [
    {
      "name": "Debug Fortran & build",
      "type": "cppdbg",
      "request": "launch",
      "targetArchitecture": "x86",
      "program": "${workspaceRoot}\\${fileBasenameNoExtension}.exe",
      "miDebuggerPath": "gdb.exe",
      "args": [],
      "stopAtEntry": false,
      "cwd": "${workspaceRoot}",
      "externalConsole": true,
      "preLaunchTask": "build_gfortran"
    }
  ]
}
tasks.json:
{
  "version": "2.0.0",
  "_runner": "terminal",
  "tasks":[
    {
      "label": "build_gfortran",
      "type": "shell",
      "windows": {
        "command": "gfortran"
      },
      "linux": {
        "command": "gfortran"
      },
      "osx": {
        "command": "gfortran"
      },
      "args": [
        "-g",
        "${file}",
        "-o",
        "${workspaceRoot}\\${fileBasenameNoExtension}.exe"
      ]
    }
  ],
}
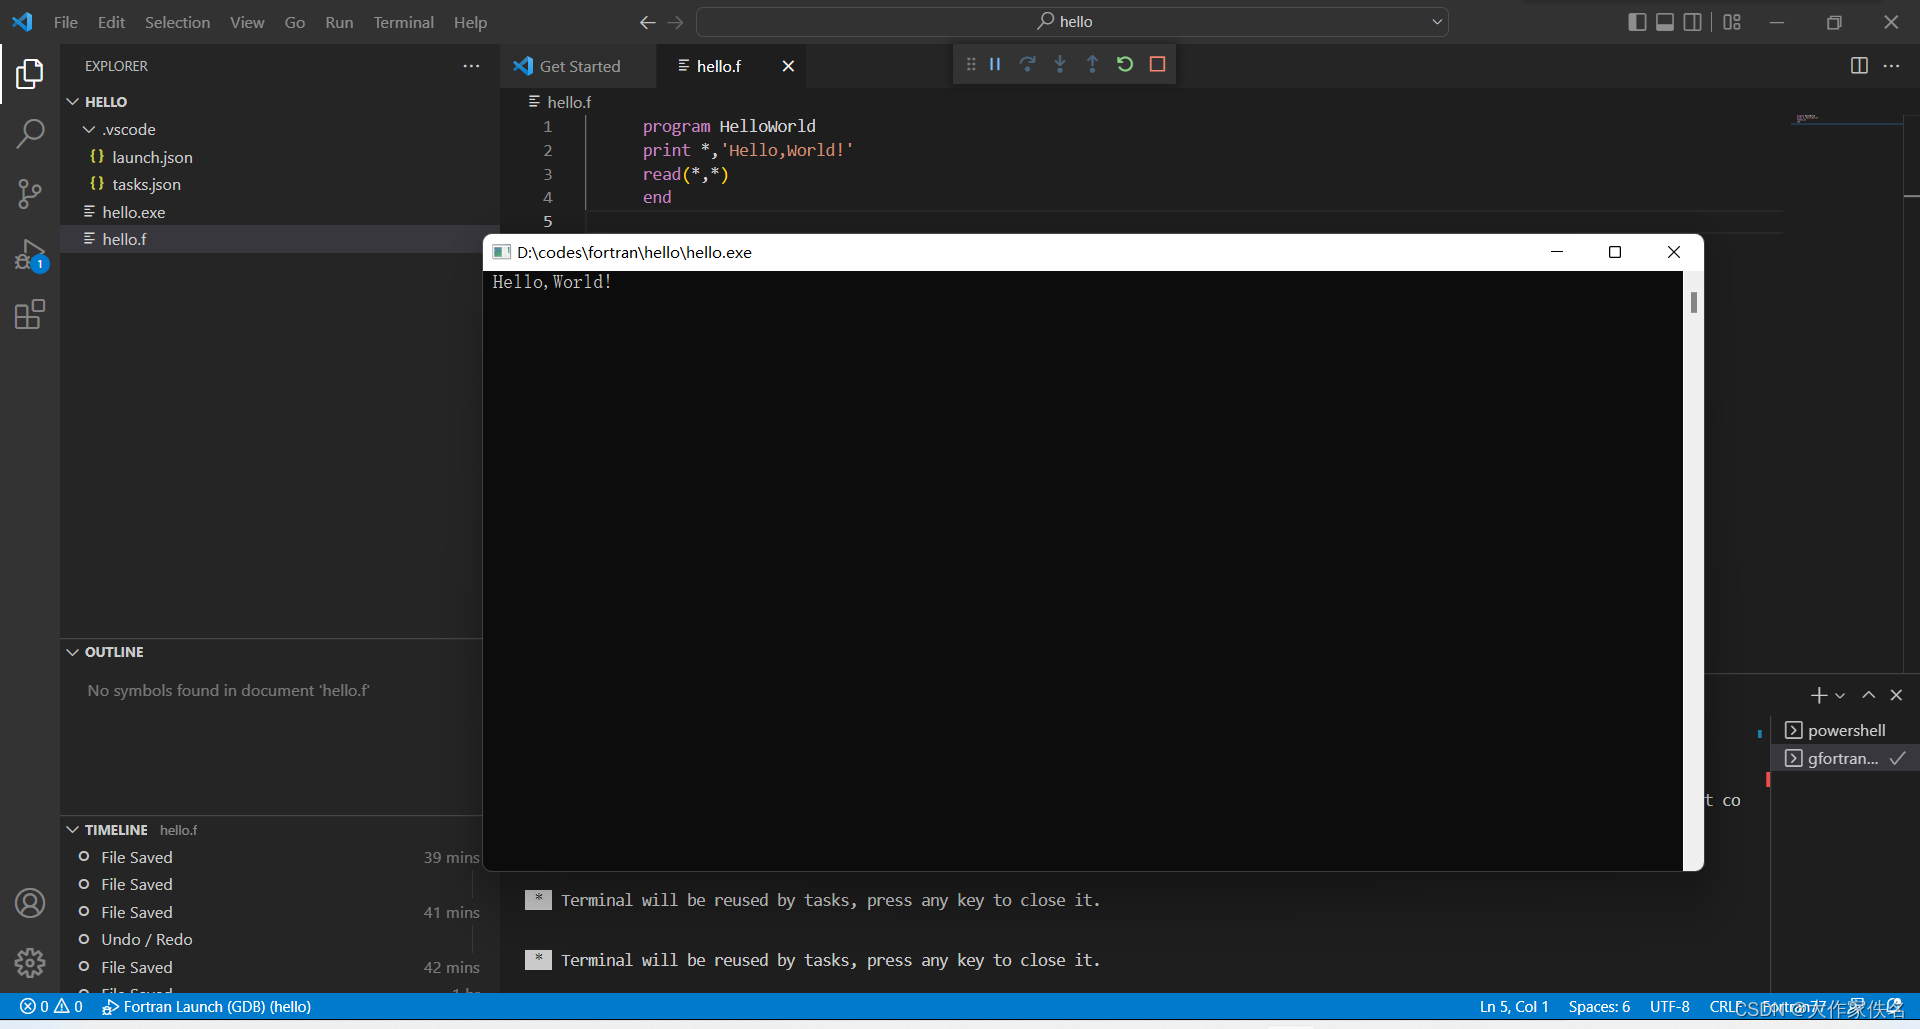
在hello目录新建一个文件hello.f,这个文件也可以在VSCode新建。
      program HelloWorld
      print *,'Hello,World!'
      read(*,*)
      end
运行,Run或者Ctrl+F5