step0.1. 我感觉已经装好了conda,查看是否安装好了anaconda
- 在键盘左下角找到win键(位于fn与alt中间)
- 输入
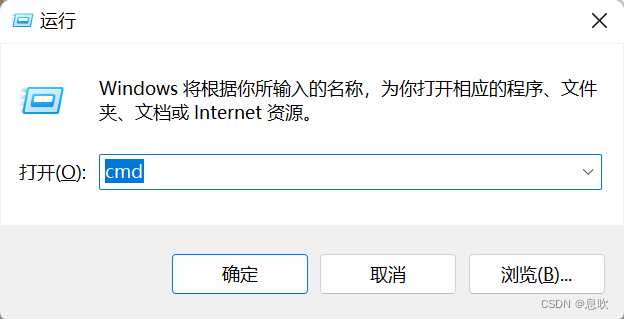
win+R进入下图界面,并输入cmd
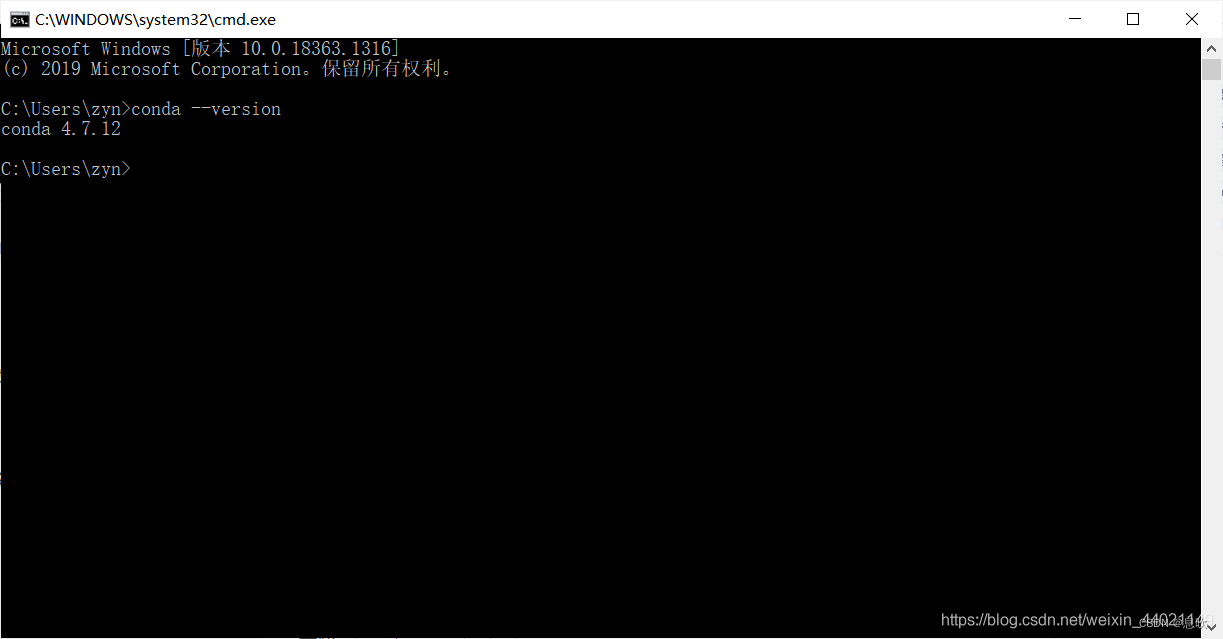
- 输入
conda --version,出现版本号即代表安装成功
(PS:conda与python的版本不影响python基础课程的学习,只要别装个2.7的python就行)
Step0.2. 我安装过anaconda,但是因为路径中或是用户名中出现中文导致conda安装失败或者jupyter内核崩溃
- 卸载anaconda
- 删掉anaconda所在文件夹
- 安装python
- 在这里下载python安装包
- 选择自定义安装,记得勾选最后一行的Add Python to PATH

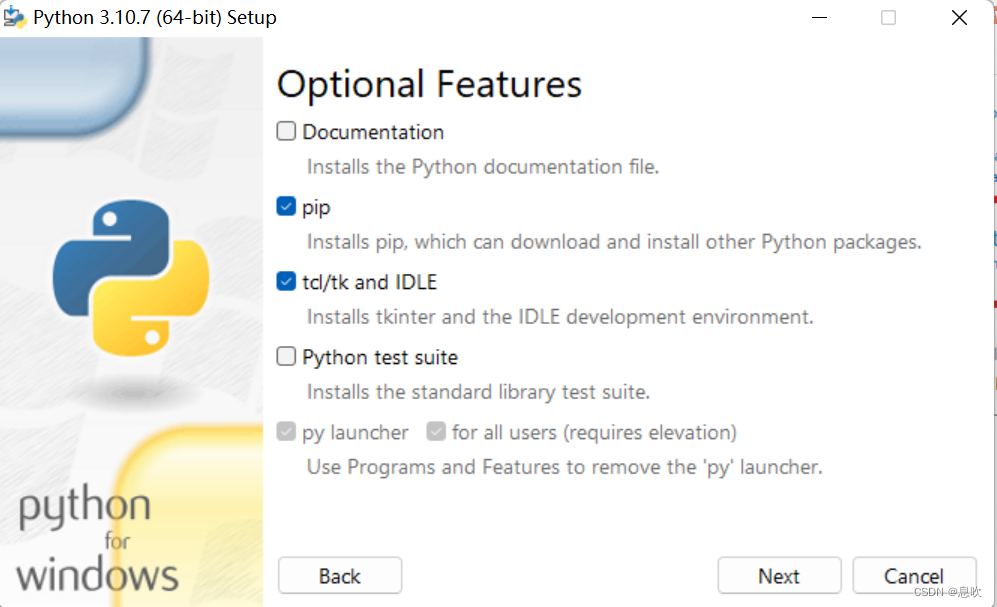
- 自行选择是否安装说明文件等,我是如下安装的
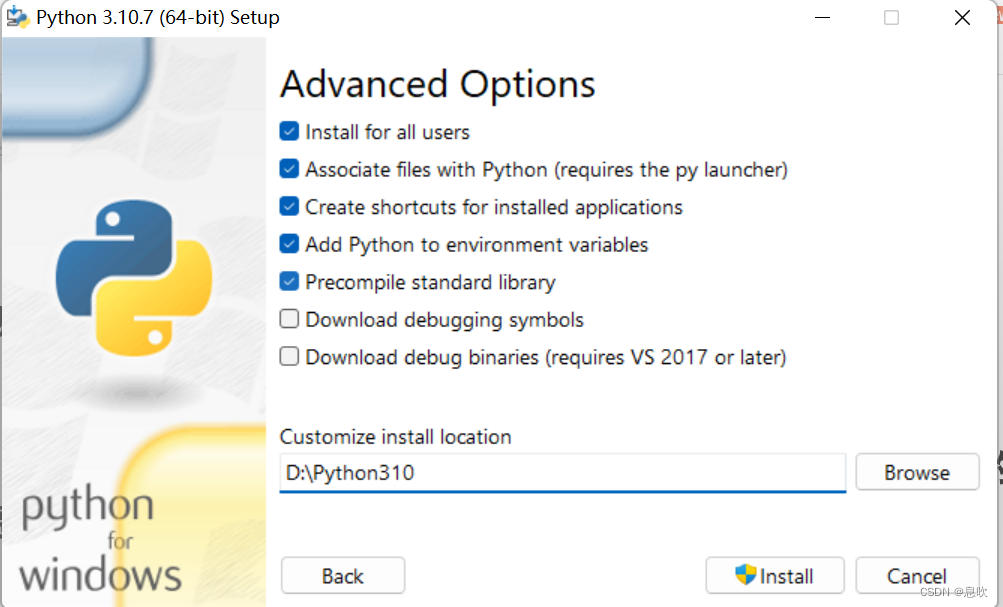
- 选择安装路径,推荐别装在系统盘下,且安装路径中不要出现中文字符
- 安装过程可能会持续5-10分钟,Disable path limit选不选都行,无明显影响

- 检验python安装情况,进入cmd,输入python,下图就是安装成功

step2. 如何安装python包
- pip换源(有些python包的下载源在墙外,下载速度较慢,因此需要换至国内源)
- 在cmd中输入下方命令,将pip源换到清华源
pip config set global.index-url https://pypi.tuna.tsinghua.edu.cn/simple

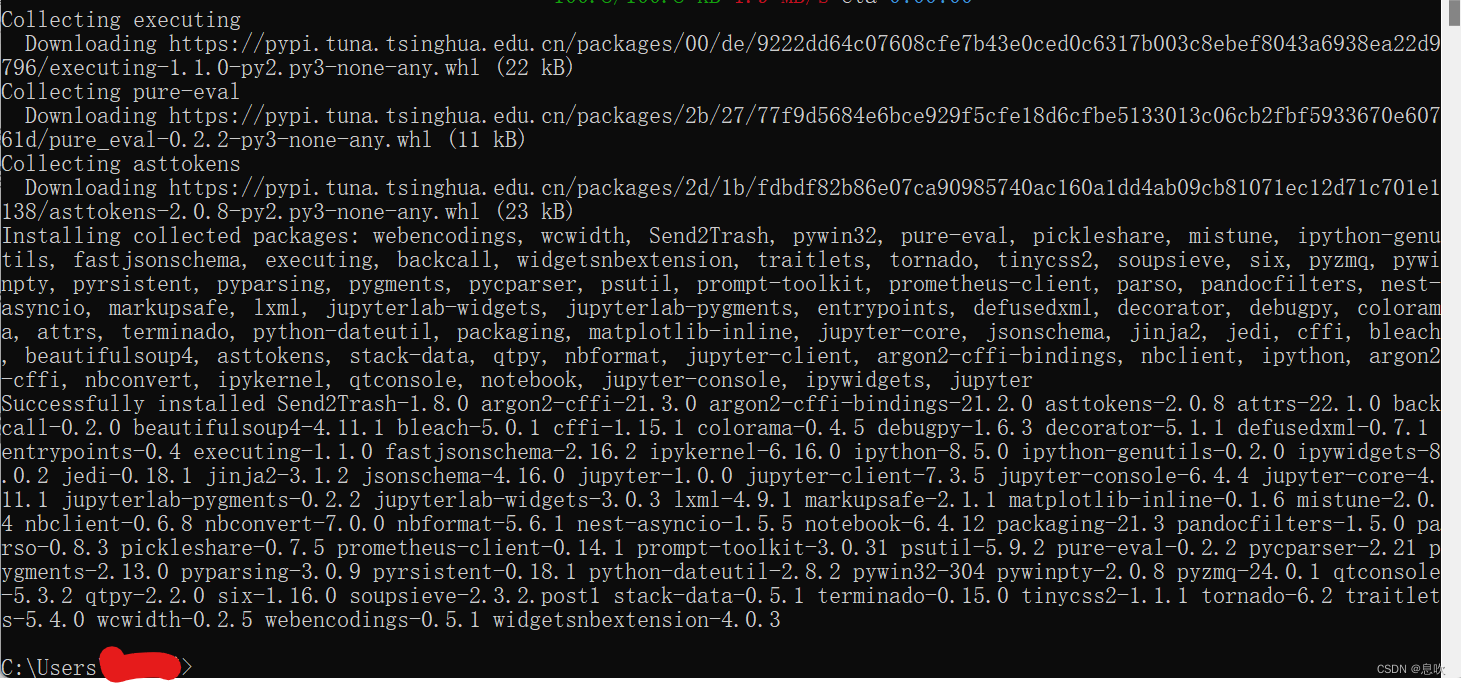
- 安装示例(以jupyter安装为例)
- 在cmd中输入下方命令开始自动安装jupyter notebook,安装过程约持续5分钟
pip install jupyter notebook
安装结束如下图
4. 检查jupyter是否安装
- 在cmd中输入
jupyter notebook, 一般会直接跳转到浏览器中出现下图

- 无法正常跳转的情况下,在cmd中输入下方命令
jupyter notebook --generate-config
在C:\Users\用户名\.jupyter\这个文件夹中找到jupyter_notebook_config.py这个文件
使用记事本打开

- 输入
ctrl+F进入搜索功能,搜索#c.NotebookApp.browser
将#c.NotebookApp.browser=“”改为下图的语句,使用ctrl+S保存

使用edge的同学可以直接把下面的代码粘贴过去
c.NotebookApp.browser = 'edge'
import webbrowser
webbrowser.register("edge",None,webbrowser.GenericBrowser
(u"C:\Program Files (x86)\Microsoft\Edge\Application\msedge.exe"))
事实上,上述语句指定了jupyter默认使用edge浏览器打开。
如果想要使用chrome等浏览器,需要修改对应浏览器所在的路径,下方是一个使用chrome打开的示例
c.NotebookApp.browser = 'Chrome'
import webbrowser
webbrowser.register("Chrome",None,webbrowser.GenericBrowser
(u"改为chrome.exe所在的路径"))
- 如果提示jupyter 不是内部或外部命令,则需要按如下步骤为jupyter增加环境变量
1.

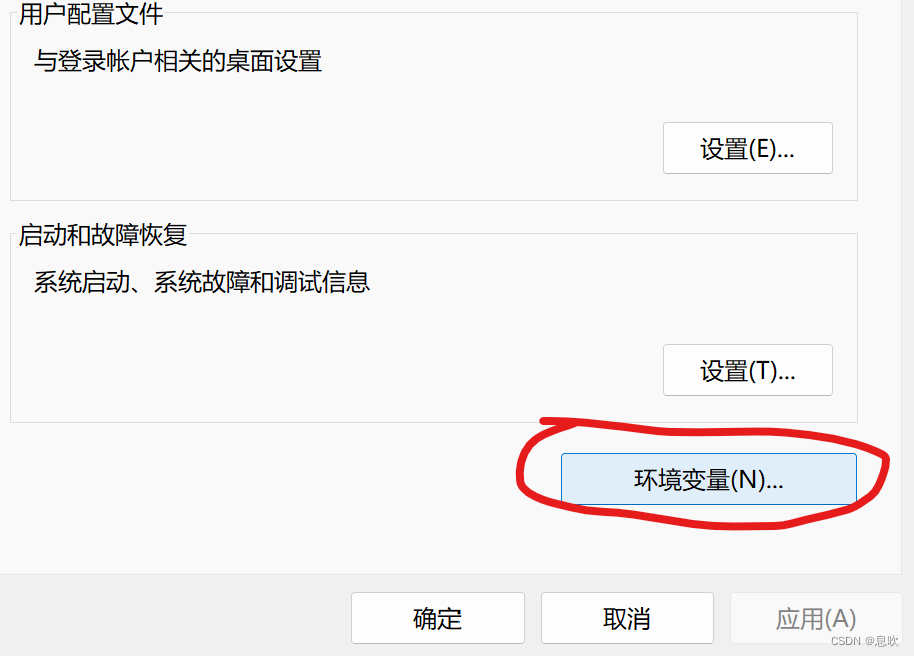

- 这里增加的
D:\Python310即为开始安装python所定义的路径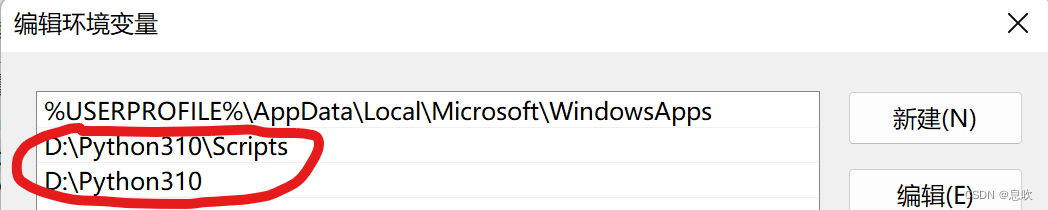
step3. (可选)安装Vscode
- 安装vscode
在这里下载vscode,并开始安装
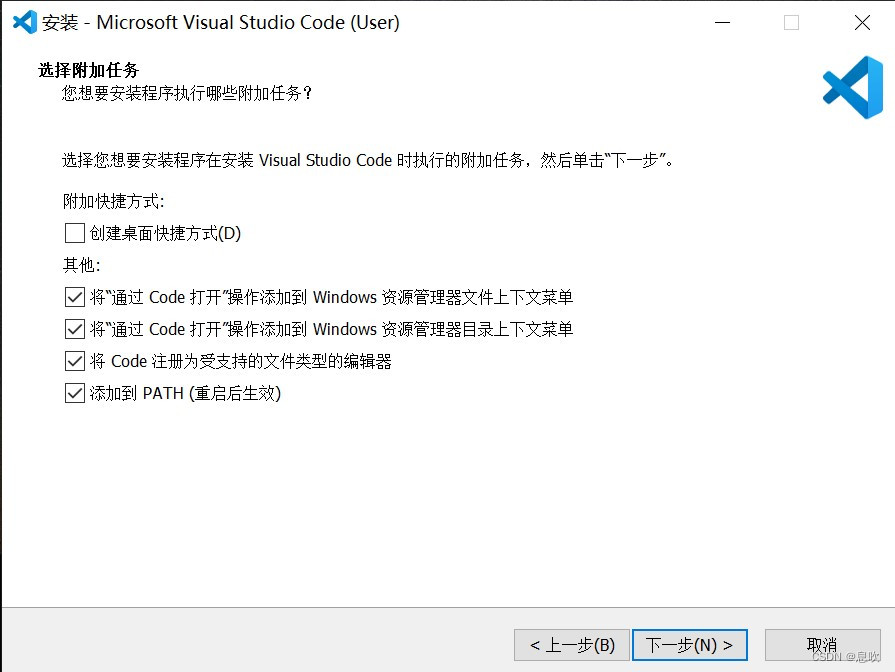
- 在vscode中搜索中文与python插件并安装,重启vscode后才会生效


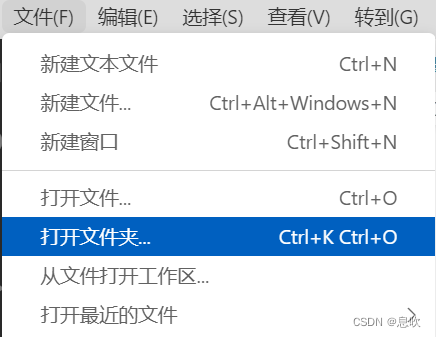
- 打开工作区(例如可以新建一个python基础文件夹,便于后续管理代码)
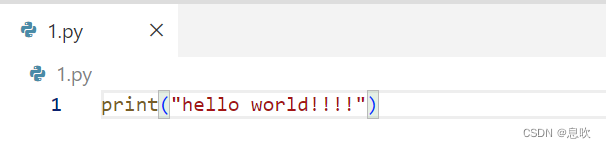
- 新建python文件(点击右边第一个加号)

- Hello world!
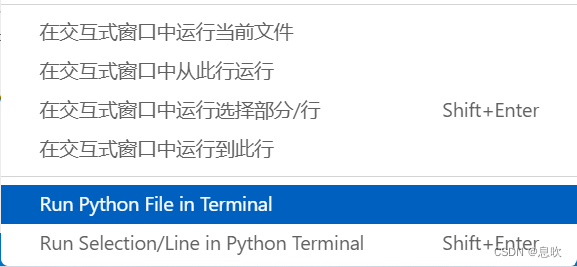
- 右键Run in terminal即可获得输出

- Vscode功能强大,自行发掘吧