提示:以下是本篇文章正文内容,下面案例可供参考
基本环境配置
安装Git
登录码云
没有的可以注册一下
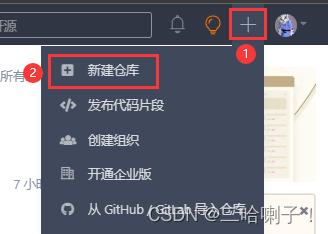
新建仓库
选择头像旁边的加号,选择新建仓库
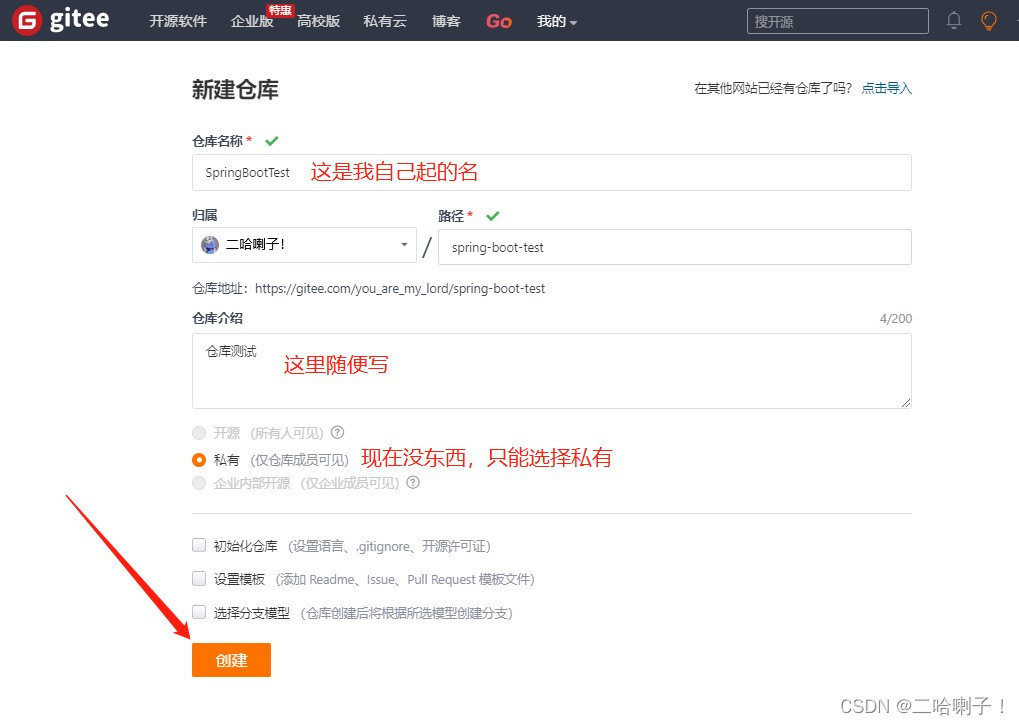
然后把仓库信息填写一下,最后点击创建
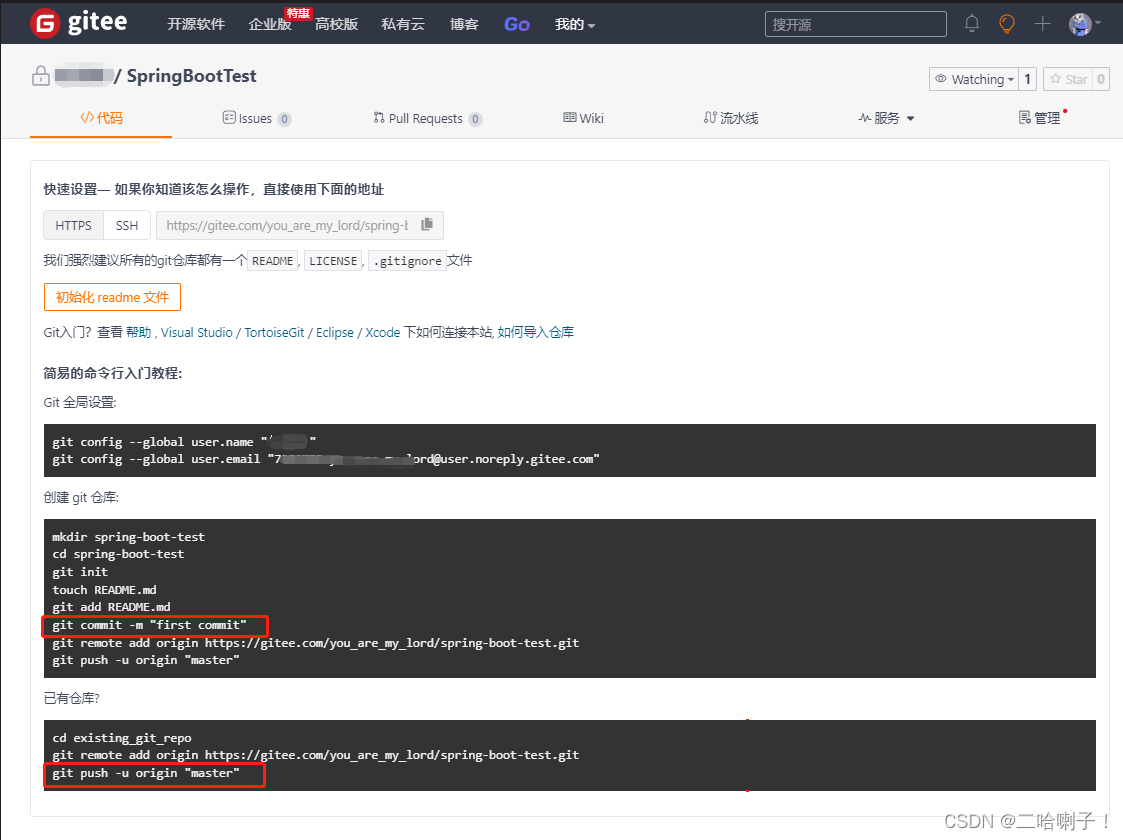
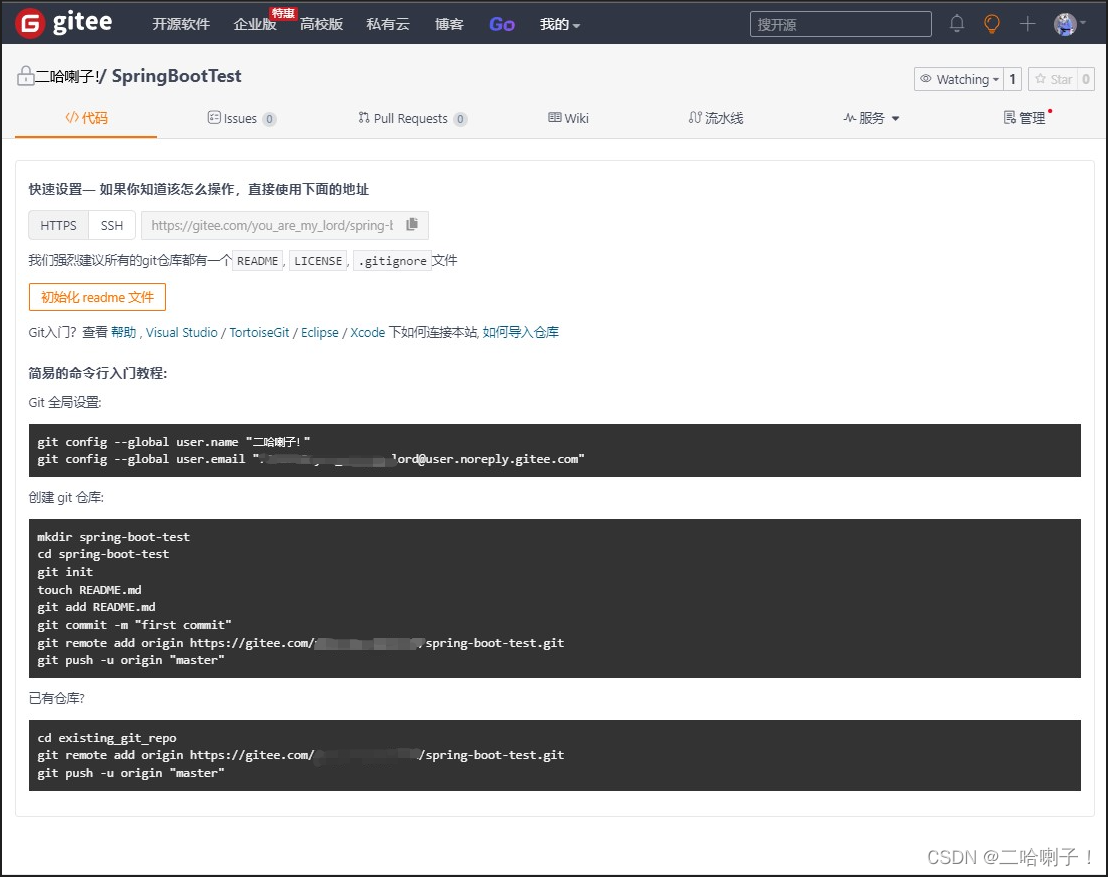
然后会出现一个新页面:
设置SSH公钥
加密:公钥加密私钥解密
认证:私钥加密公钥解密
1、B将自己公钥给A
2、B将文件用自己私钥加密传送给A
3、A根据B的公钥解密,如果成功则为真实身份用户
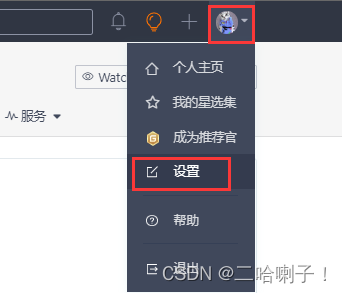
点击头像选择设置
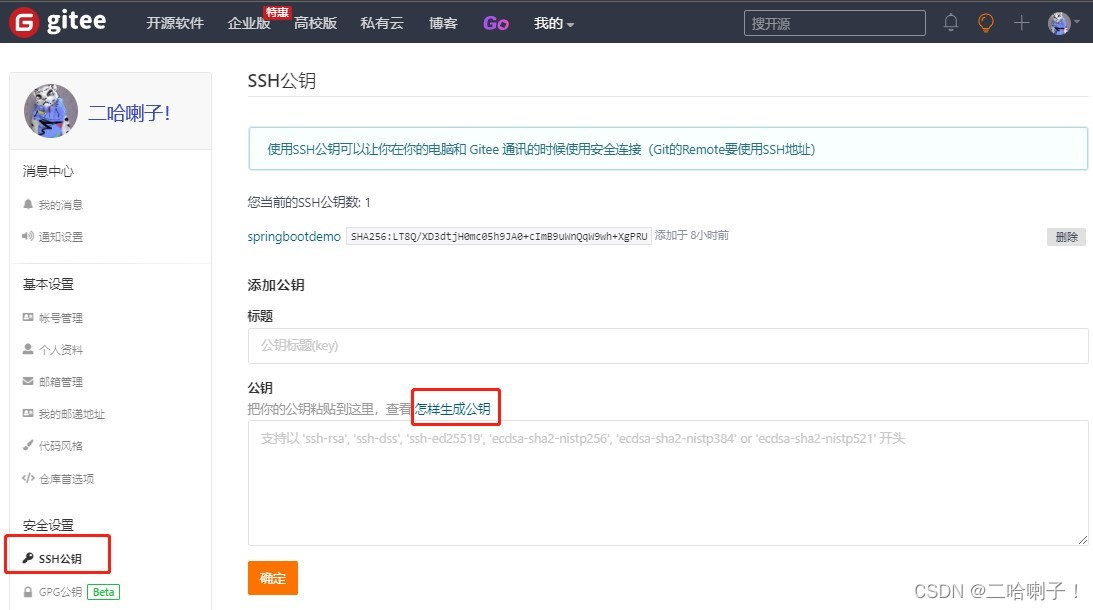
选择SSH公钥,点击右边【怎样生成公钥】
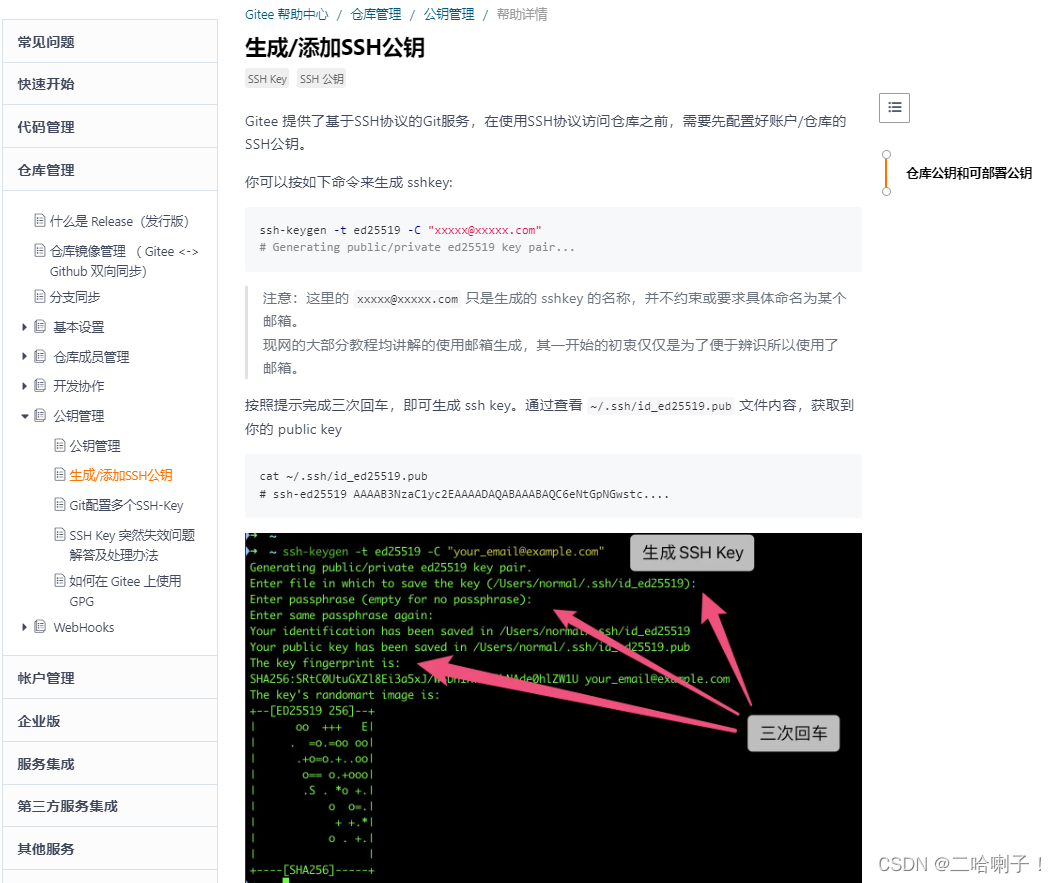
这上面写得也很清楚怎么操作
下面我来用 cmd 演示下
首先win+r 打开 cmd,输入ssh-keygen -t ed25519 -C "xxxxx@xxxxx.com"
按照要求三次回车
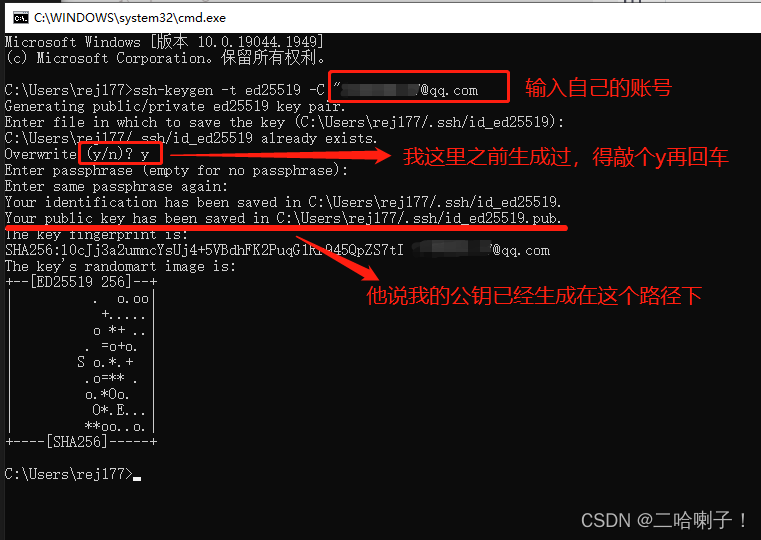
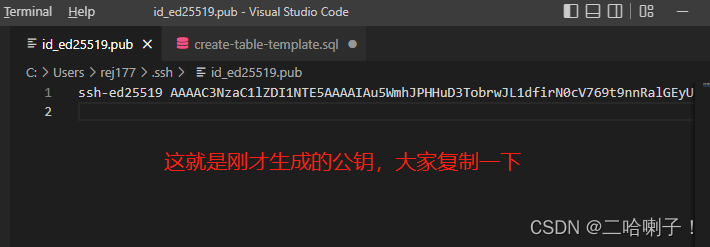
接下来我们在电脑里找到这个公钥

然后用工具打开,我用的是VS Code,大家也可以用Idea或者Eclipse
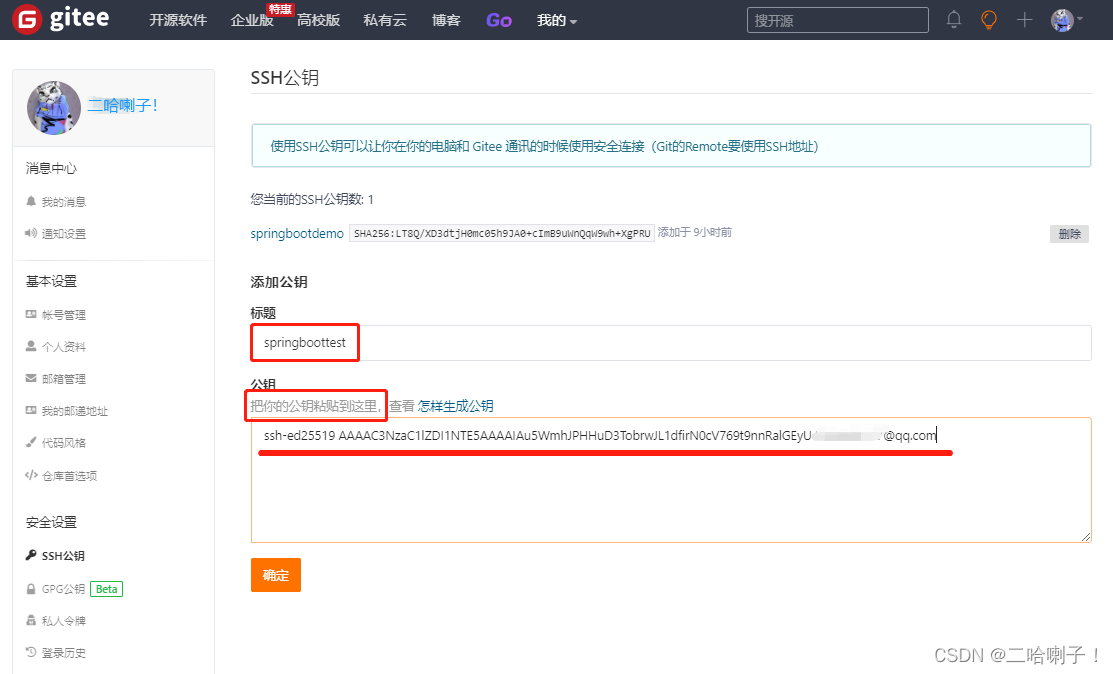
然后回到 gitee上的SSH公钥页面,把公钥粘贴在他指定的位置,标题随便起
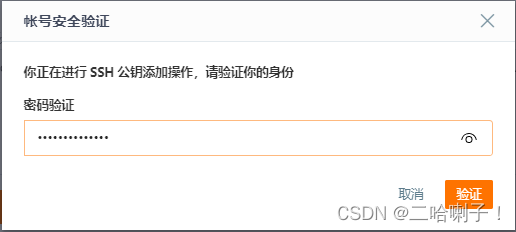
然后通过密码验证即可

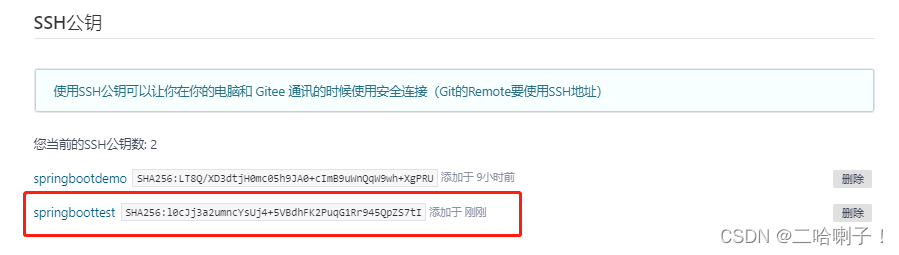
然后就可以看到SSH公钥已经被添加进来了
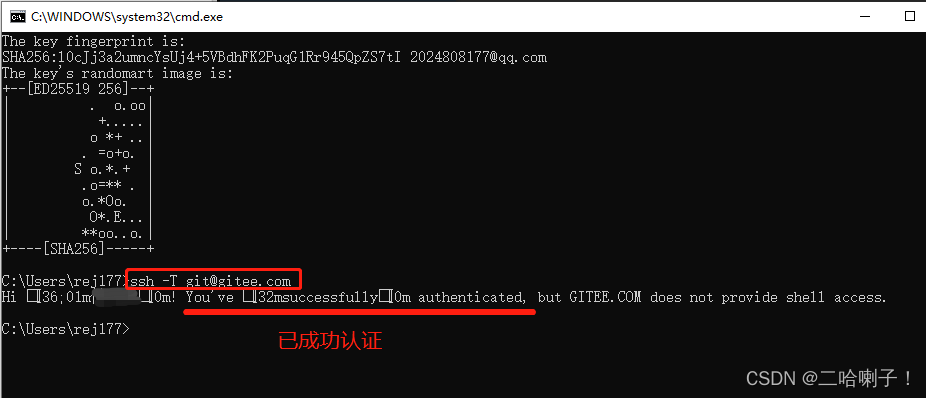
测试:
在刚才的命令行上输入:ssh -T git@gitee.com,看生成是否成功
现在我们就已经在码云上创建了一个工程,接下来我们在本地也创建一个工程
我们通过命令把代码上传到码云上
通过命令把代码上传到码云
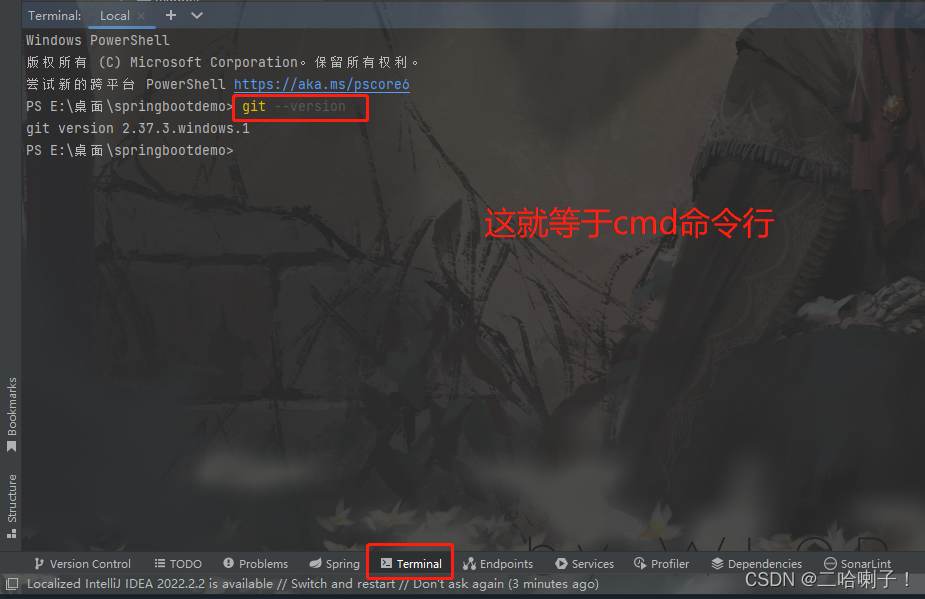
首先打开idea调出项目(项目里面有东西,哪怕是hello world,这样更方便我们看)
选择下面的 Terminal,输入:git --version
选择就可以通过命令行把刚才写的代码传到Gitee上
传之前回到springbootdemo这个Gitee上来
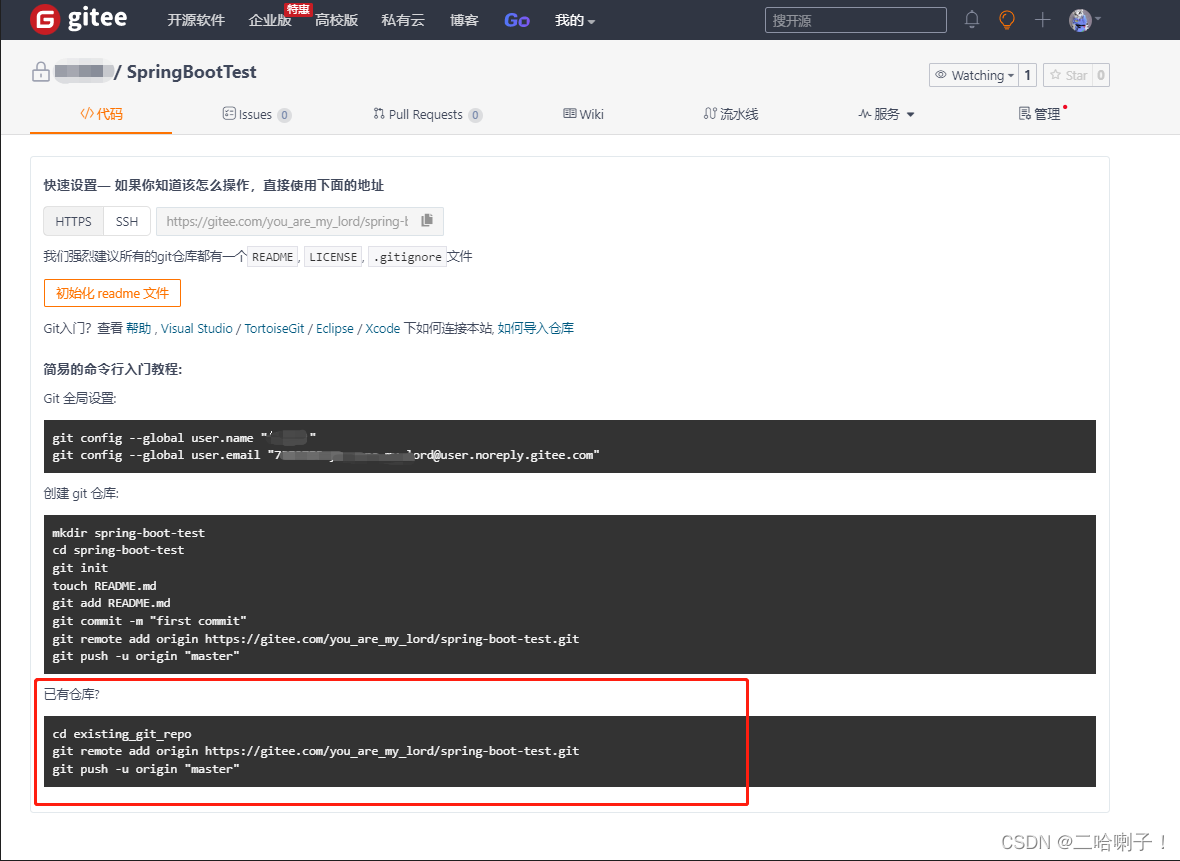
现在我们已经有仓库了
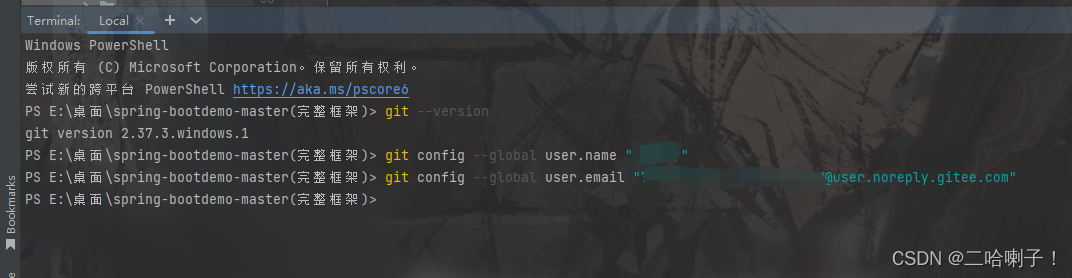
首先我们先对Git 全局设置:

依次复制这两行在IDEA上
然后因为我们现在已经有仓库了
就把当前的项目加入到/spring-boot-test.git这个路径下
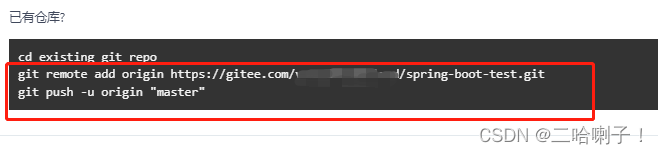
回车后他说我这个不是个git项目
添加:git init
然后再执行已有仓库那句话

推送到缓冲区
查看当前的分支:git status
添加到缓冲区:git add .
将所有代码提交到本地仓库git commit -m "提交m消息"――“提交m消息” 这里可以随便起名
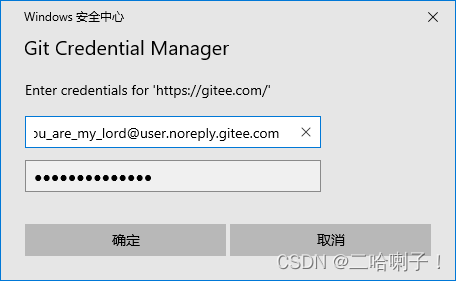
执行完上面命令提交到本地仓库之后就可以远程推送了git push -u origin "master"
然后我弹出一个消息,让我填用户名密码
用户名:注册时候的邮箱或者进到码云设置中看邮箱管理中的邮箱
回到 IDEA看到:
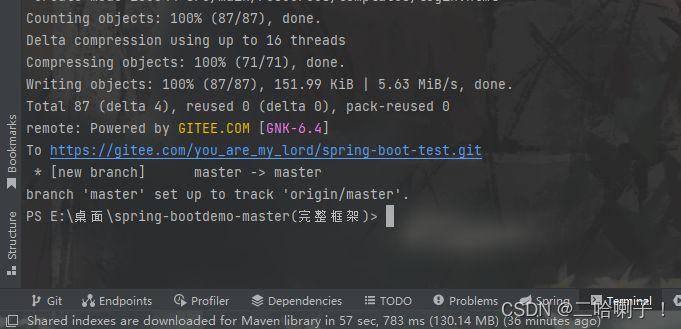
现在我就已经把当前文件夹的东西推送到远程的git仓库了
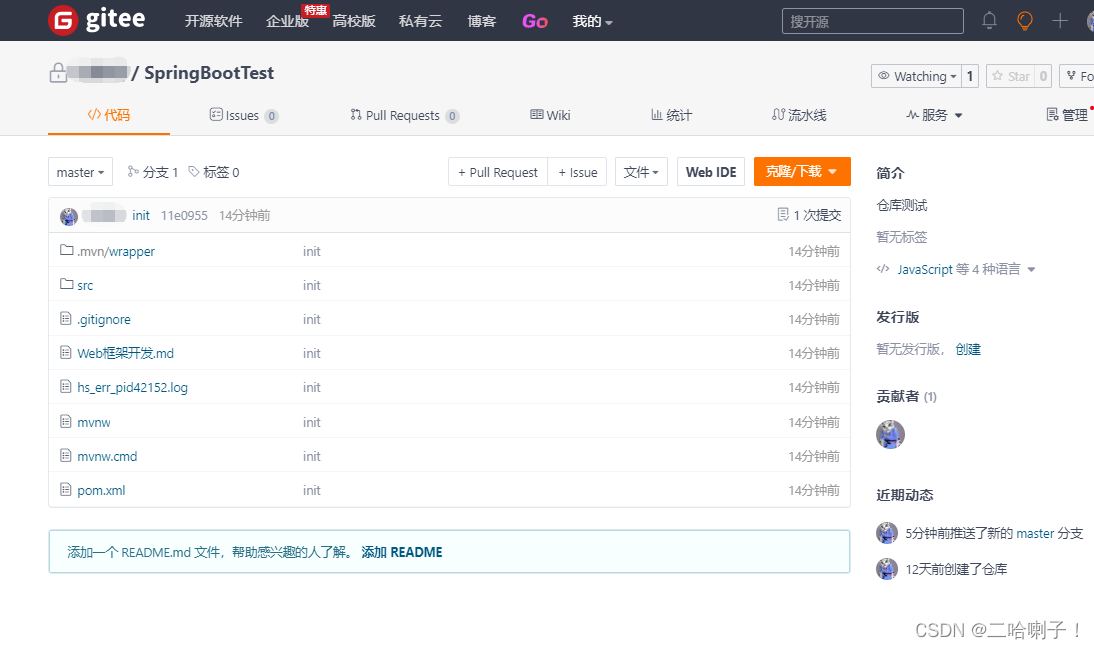
回到码云刷新页面
git config --global user.name 用户名 设置全局用户名
git config --global user.email 邮箱 设置全局用户邮箱
总结
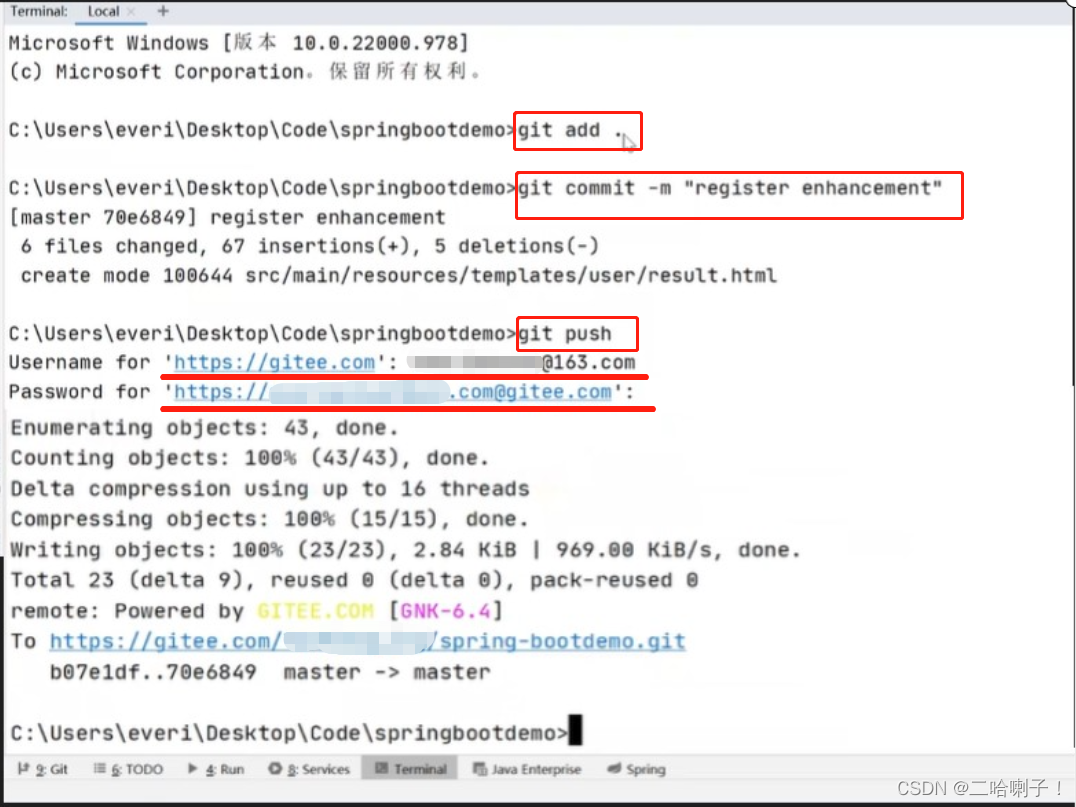
首先使用git status 看看当前有啥东西改了
先把他加到缓冲区git add .
提交到本地仓库git commit -m "随便起个名"
再push到码云上git push
输入用户名和密码
可能出现的错误
致命错误:当前分支主机没有上游分支。
要推送当前分支并将远程设置为上游,请使用
git push―设置上游源主机:
fatal: The current branch master has no upstream branch.
To push the current branch and set the remote as upstream, use

    git push --set-upstream origin master
解决办法:先输入:git commit -m "first commit" 再输入:git push -u origin "master"
这两处代码在: