Gitee仓库导入到Github
由于Gitee的个人私有仓库最多允许5名成员,而Github没有限制,因此有时需要将Gitee仓库导入到Github
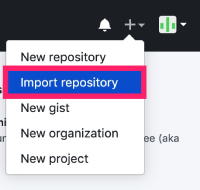
步骤一:导入设置
先在GitHub导航的右上角找到Import repository菜单,链接:Import repository
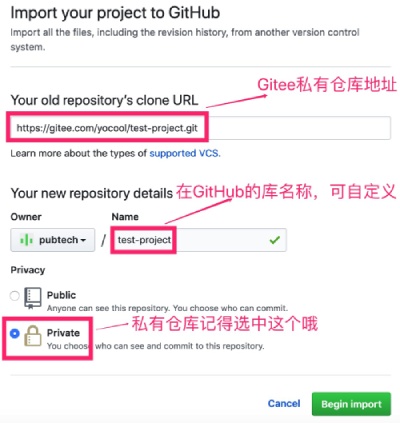
进入仓库导入页面,在页面中输入Gitee私有库地址和新库的名称,记得选中Private,设置为私有仓库。
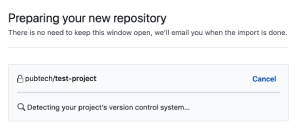
步骤二:进度提示
当在步骤一中点击Begin import按钮后,我们将进入导入进度条页面,截图如下:
稍等一会儿我们将看到如下提示信息:
There was an error detecting the repository at https://gitee.com/yocool/test-project.git. Please check the URL and try again.
截图如下:
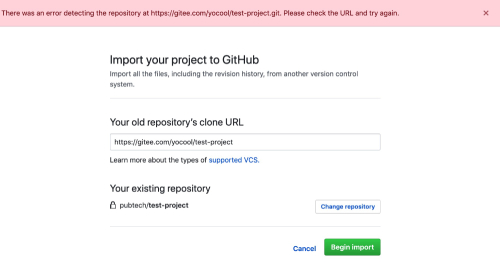
不用着急,我们再次输入Gitee私有库地址,并点击Begin import即可。同时会再次进入进度条页面:

步骤三:Gitee授权
第二次进入进度条页面后,我们需要稍等一会儿,将会出现要求输入Gitee账号进行授权(因为是私有库,所以需要授权),提示和截图如下:
Your old project requires credentials for read-only access.We will only temporarily store them for importing.
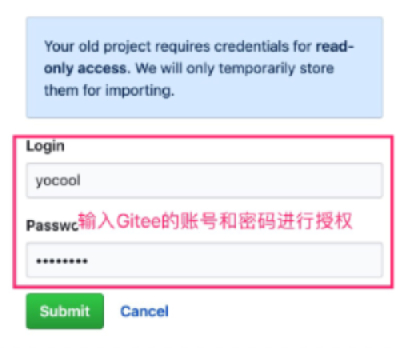
我们在这个界面==输入Gitee账号==(GitHub不会保存你的账号信息,只是在导入的时候临时使用),输入正确的话,就开始导入了。
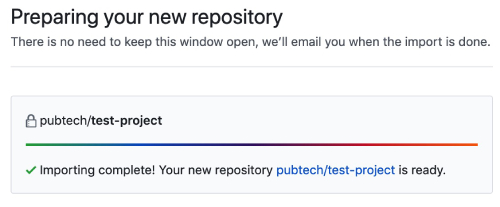
步骤四:完成导入
当导入完成后我们将看到高亮的彩色进度条和类似Import complete!...的提示,截图如下:
同时将收到如下的邮件提示:
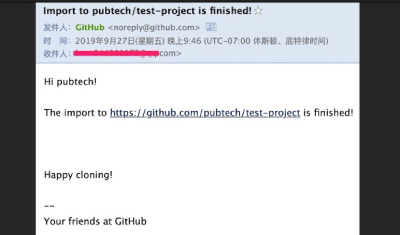
这样我们就完成了私有库的导入。