工欲善其事必先利其器(一) —— Visual Studio Code
1、安装vscode

- 根据系统选择vscode版本,直接下载
.zip文件即可。教程使用系统为windows11


- 解压完成之后,直接就可以打开,可以右键发送快捷方式到桌面 (注意解压位置,这里推荐解压到D盘)

- 在扩展程序里,分别搜索这三个插件,并install。最后重启vscode。 PS:可根据自己喜好安装其它插件
2、安装MinGW
下载官网 服务器在国外下载可能会相对较慢,推荐科学上网


- 等待5秒左右就会自动下载
注意:解压这个文件需支持.7z格式的解压工具,教程使用的360压缩

- 将解压之后的
mingw64文件夹复制到D盘根目录下。这里建议与教程同步
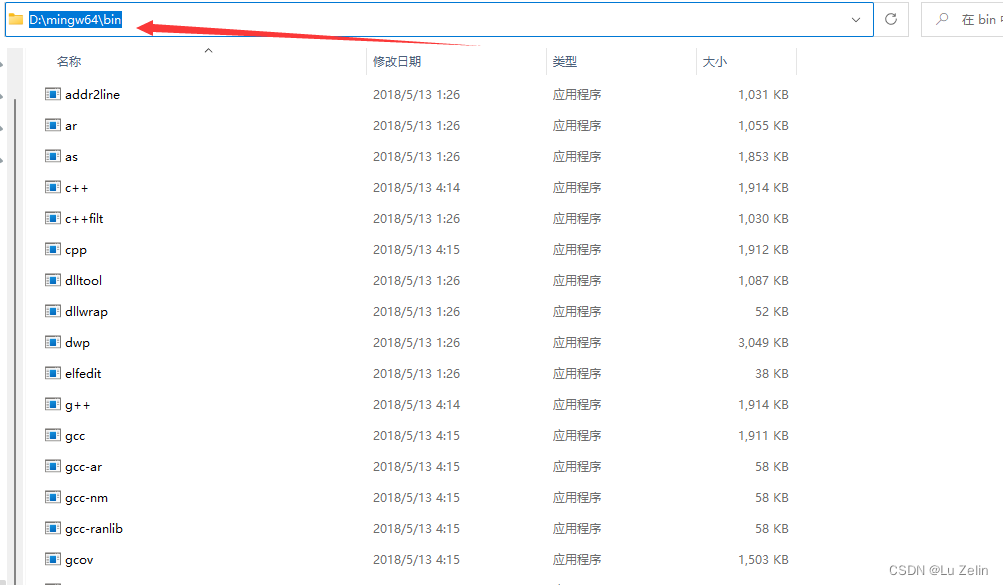
- 复制下此目录路径下面会用到
3、配置环境变量


- windows的不同版本只是系统设置页的位置不一样,仔细观察页面都能找到
4、配置vscode

- 在vscode安装目录下,新建空的文件夹
Code
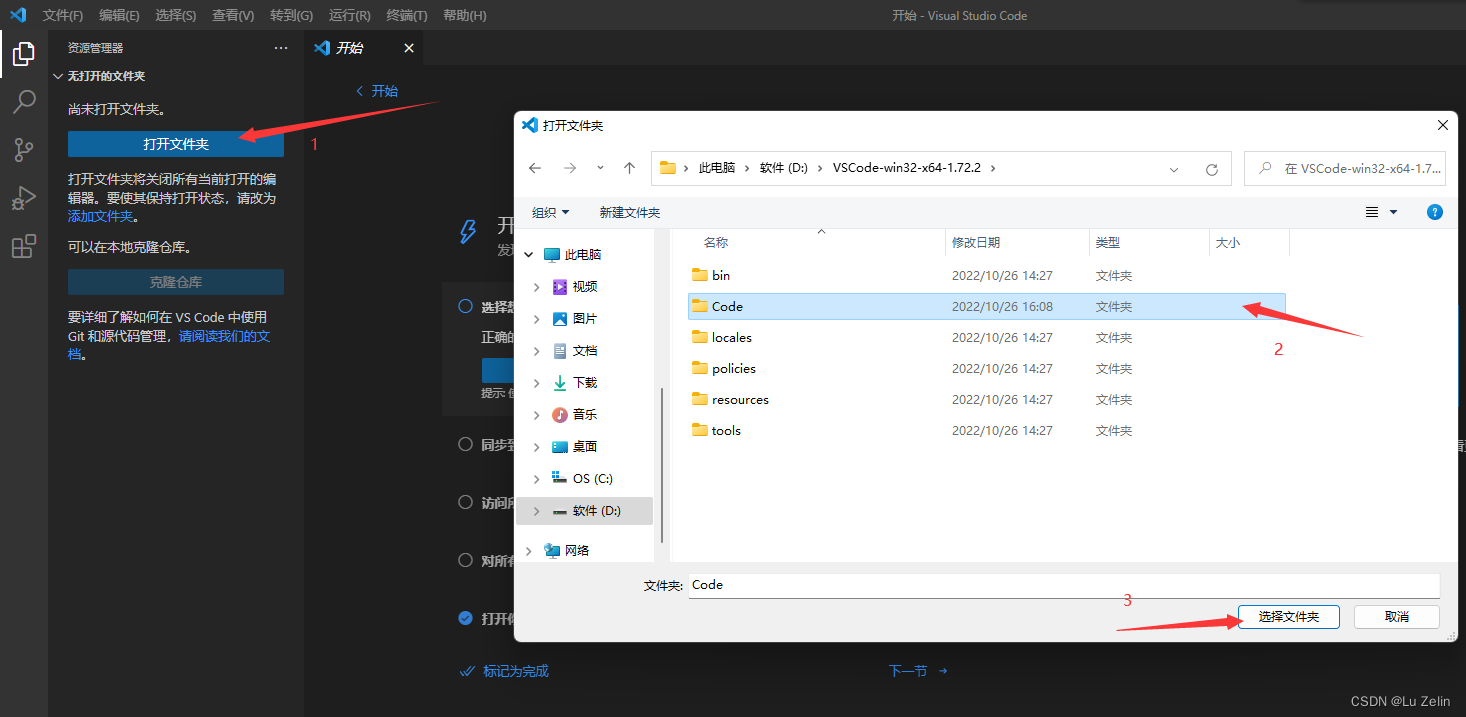
- 在vscode中打开这个文件夹

- 在
Code文件夹中新建.vscode文件夹
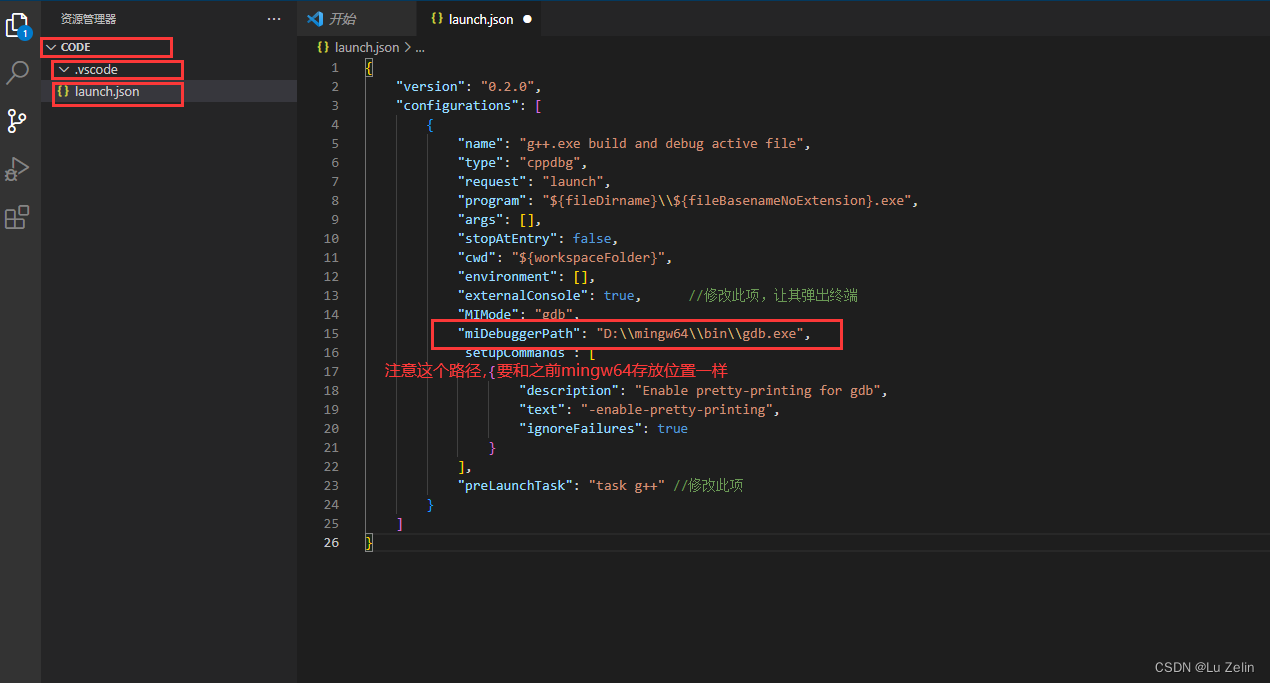
- 在
.vscode中新建(右键.vscode)文件launch.json,并复制下文到文件中,Ctrl + s保存
{
    "version": "0.2.0",
    "configurations": [
        {
            "name": "g++.exe build and debug active file",
            "type": "cppdbg",
            "request": "launch",
            "program": "${fileDirname}\\${fileBasenameNoExtension}.exe",
            "args": [],
            "stopAtEntry": false,
            "cwd": "${workspaceFolder}",
            "environment": [],
            "externalConsole": true,      //修改此项,让其弹出终端
            "MIMode": "gdb",
            "miDebuggerPath": "D:\\mingw64\\bin\\gdb.exe",
            "setupCommands": [
                {
                    "description": "Enable pretty-printing for gdb",
                    "text": "-enable-pretty-printing",
                    "ignoreFailures": true
                }
            ],
            "preLaunchTask": "task g++" //修改此项
        }
    ]
}
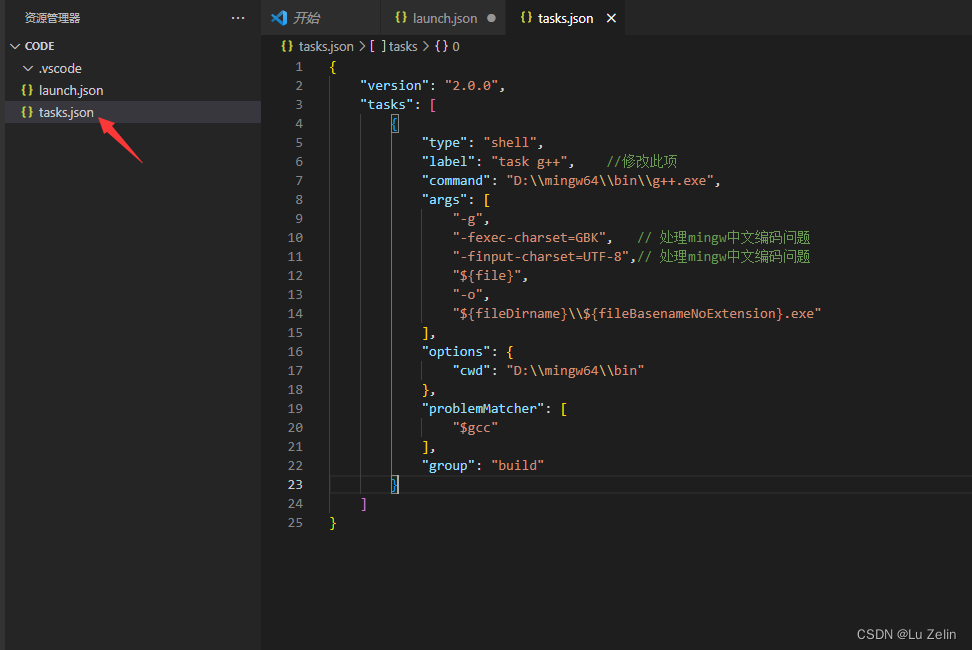
同理新建tasks.json 文件,并复制下面内容保存
{
    "version": "2.0.0",
    "tasks": [
        {
            "type": "shell",
            "label": "task g++",    //修改此项
            "command": "D:\\mingw64\\bin\\g++.exe",
            "args": [
                "-g",
                "-fexec-charset=GBK",   // 处理mingw中文编码问题
                "-finput-charset=UTF-8",// 处理mingw中文编码问题
                "${file}",
                "-o",
                "${fileDirname}\\${fileBasenameNoExtension}.exe"
            ],
            "options": {
                "cwd": "D:\\mingw64\\bin"
            },
            "problemMatcher": [
                "$gcc"
            ],
            "group": "build"
        }
    ]
}

- 新建一个DEMO文件夹,以后所有的C/C++程序都可以放在这里
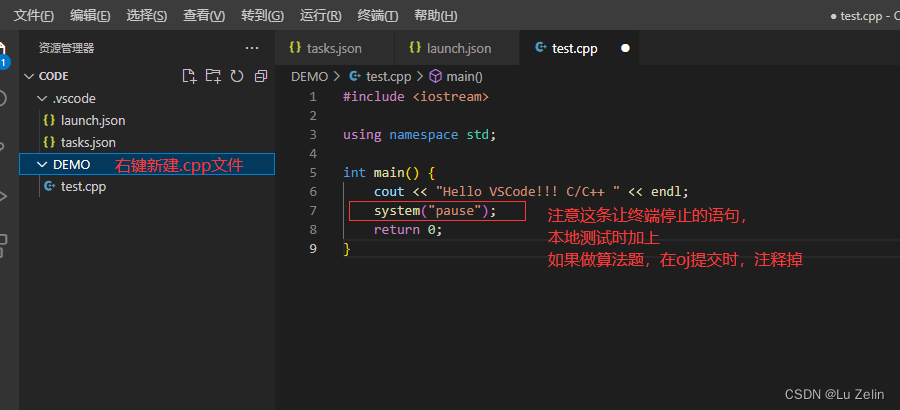

- F5 运行
注意最后一点:需要将vscode的自动更新关闭,因为vscode更新时新版本覆盖整个文件夹,就会删除掉我们之前创建的配置文件以及写的cpp程序。我们把自动更新关闭后,如需更新新版本,把配置文件(整个Code文件夹)备份好,再在vscode设置中手动更新后,将备份的文件copy回原位置即可
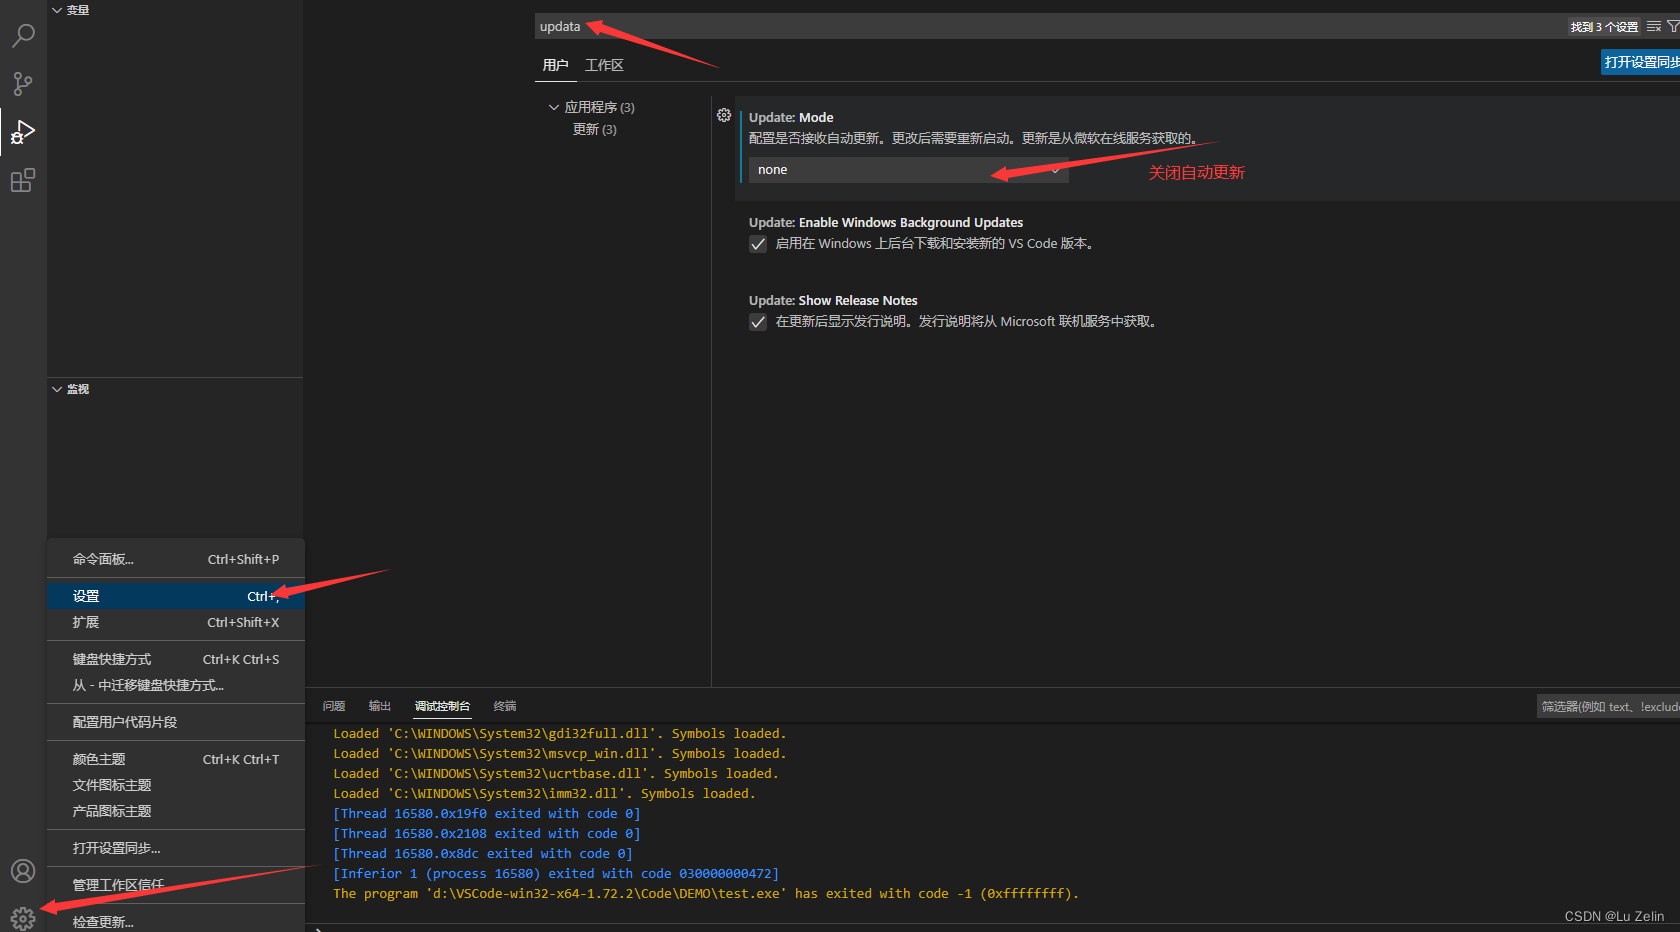
5、vscode的代码调试功能
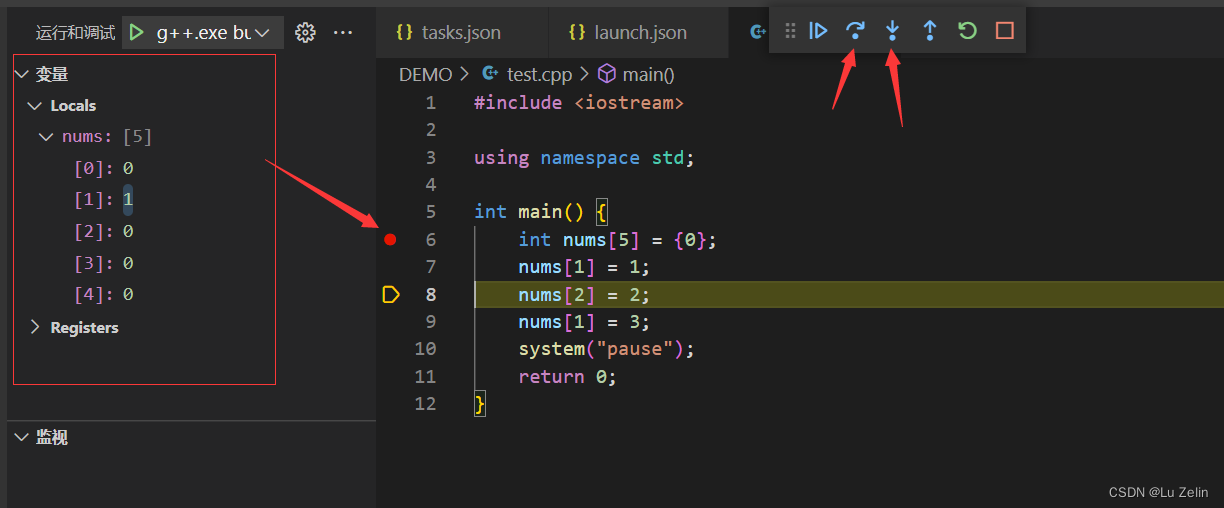
- 设置断点后,程序执行到这条语句就会停止,让我手动控制程序的运行。同时左侧会同步程序中个变量的值。非常方便排查Bug