一、链表反转思想
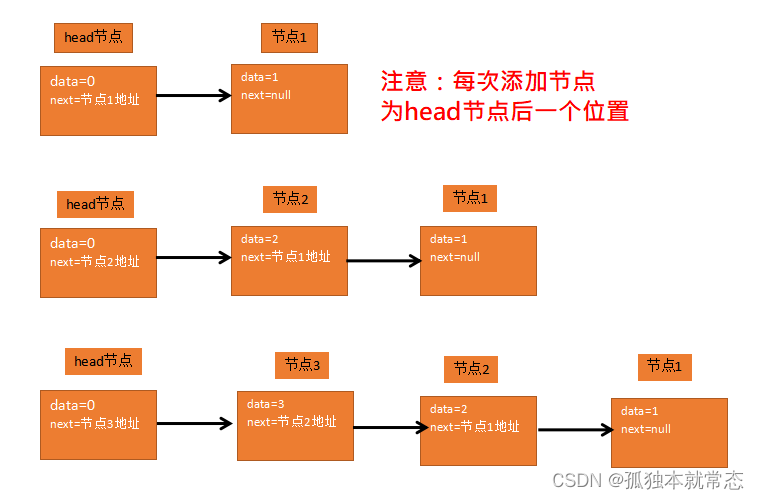
1.创建一个新的链表
2.遍历旧链表
3.将旧链表的节点添加到新链表上(每次添加到新链表head节点的后一节点)
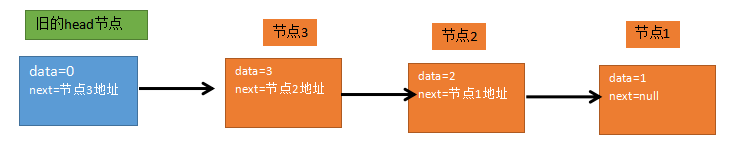
4.最后将旧链表的head指向新链表的第一个节点
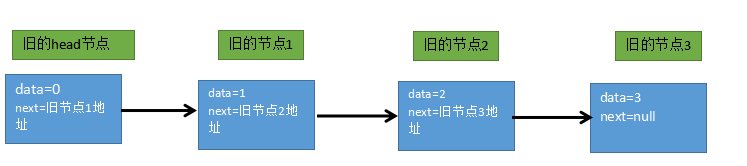
旧链表:
反转过程:
最后:
二、实现代码
创建节点类:
class Node{
public int no;
public Node next;
public Node(int no) {
this.no = no;
}
@Override
public String toString() {
return "Node{" +
"no=" + no +
'}';
}
}
创建方式实现类:
class LinkedList{
private Node head=new Node(0); //创建的head节点
public Node getHead() {
return head;
}
//显示链表
public void showNode(){
if (head.next==null){
System.out.println("链表为空!");
return;
}
Node temp=head.next;
while (temp!=null){
System.out.print(temp.no+" ");
temp=temp.next;
}
}
//添加元素
public void addNode(Node node){
Node temp=head;
while (true){
if (temp.next==null){
node.next=temp.next;
temp.next=node;
break;
}
temp=temp.next;
}
}
//链表反转
public void reverseNode(){
//表示链表为空或者链表只有一个节点的时候 就不需要反转
if (head.next==null||head.next.next==null){
System.out.println("链表无需反转!");
return;
}
Node newNode=new Node(0); //创建一个新链表
Node temp=head.next; //辅助指针
Node node;
while (temp!=null){
node=temp.next; //表示先保存旧链表的下一个节点
temp.next=newNode.next;
newNode.next=temp;
temp=node;//旧链表往后移
}
head.next=newNode.next; //将旧链表的head指向newNode的第一个节点
}
}
测试:
LinkedList linkedList=new LinkedList();
Node n1=new Node(1);
Node n2=new Node(2);
Node n3=new Node(3);
linkedList.addNode(n1);
linkedList.addNode(n2);
linkedList.addNode(n3);
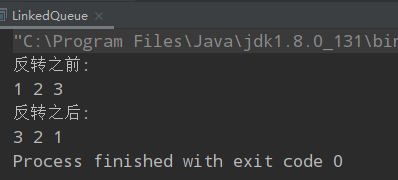
System.out.println("反转之前:");
linkedList.showNode();
System.out.println();
System.out.println("反转之后:");
linkedList.reverseNode();
linkedList.showNode();
结果: