一、单元测试
1、添加spring-boot-starter-test 测试依赖启动器
在pom.xml 添加依赖 如果使用Spring Initializr创建 会自动生成
<!--测试类依赖-->
<dependency>
    <groupId>org.springframework.boot</groupId>
    <artifactId>spring-boot-starter-test</artifactId>
    <scope>test</scope>
</dependency>
?2、编写单元测试类和测试方法
如果使用Spring Initializr创建 会自动生成
package com.xin.spring_01;

import com.xin.spring_01.controller.FirstController;
import org.junit.jupiter.api.Test;
import org.junit.runner.RunWith;
import org.springframework.beans.factory.annotation.Autowired;
import org.springframework.boot.test.context.SpringBootTest;
import org.springframework.test.context.junit4.SpringRunner;

@RunWith(SpringRunner.class)            //测试运行器,并加载Spring boot测试注解
@SpringBootTest                         //标记单元测试类,并加载项目的上下文环境ApplicationContext
class Spring01ApplicationTests {

    @Test
    void contextLoads() {   //自动创建的单元测试
    }

}
新增单元测试方法
    @Autowired              //自动装填 控制器
    private FirstController firstController;
    @Test
    void firstControllerTest(){
        String text = firstController.first();
        System.out.println(text);
    }
二、热部署
1、添加 spring-boot-devtools 热部署依赖启动器
在pom.xml 添加热部署依赖
<!--        引入热部署依赖-->
        <dependency>
            <groupId>org.springframework.boot</groupId>
            <artifactId>spring-boot-devtools</artifactId>
        </dependency>
2、IDEA工具热部署设置
勾选 自动构建项目
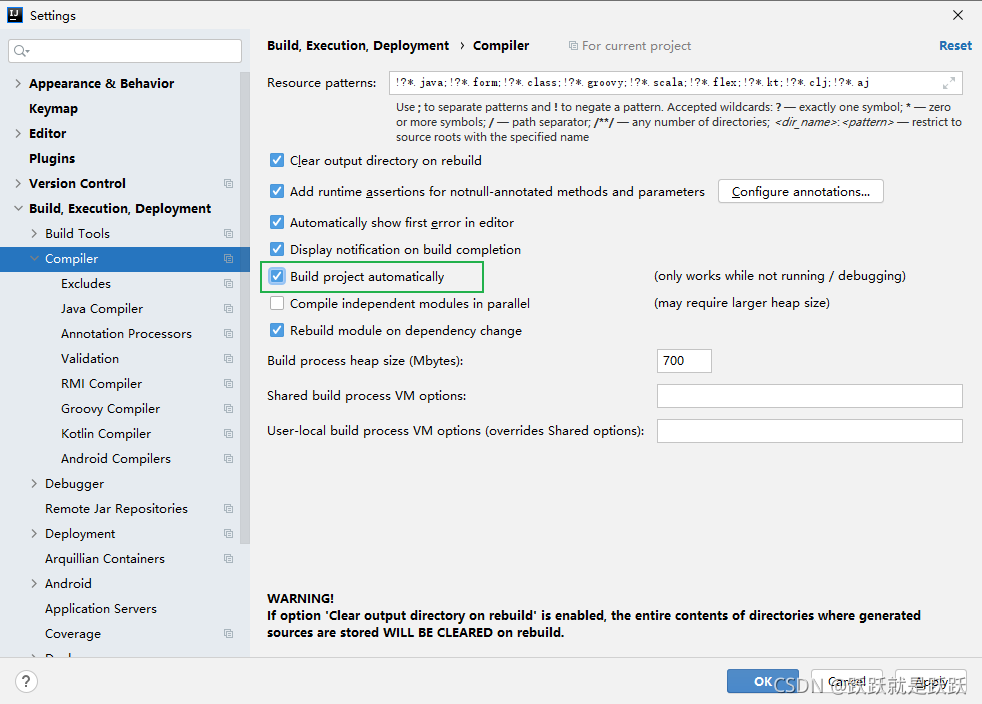
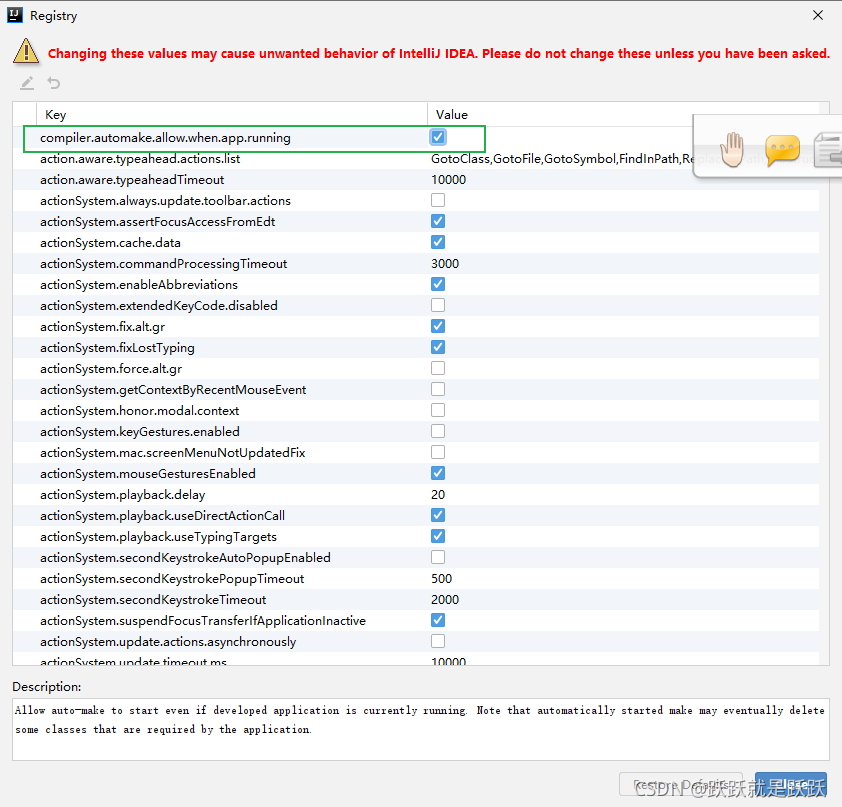
?快捷键 Ctrl+Shift+Alt+/? 选择Registry?
?
