使用 alita/test 测试
简介
在前端开发的时候,可能会写到很多组件,将这多个组件进行封装已做于后期业务的开发。再将这些组件开源供其他开发人员使用,逐渐发现会出现这样那样的 Bug ,这个时候就需要写测试,测试每个已经开发的组件,是否完善。
本次测试是在 alita 框架的基础上,进行测试。
环境的搭建
1、创建 alita 项目
命令: yarn create alita 项目名

2、切换到项目目录,安装依赖
命令:yarn install

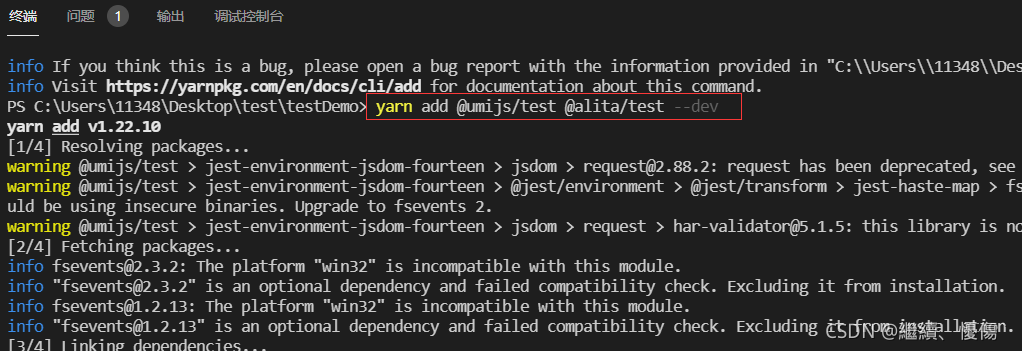
3、下载 alita/test 依赖包
命令:yarn add @umijs/test @alita/test --dev

4、配置 package.json 文件
在 package.json 里面加入两行命令,具体如下
{
    ...
    "scripts":{
        ...
        "test": "umi-test",
    	"test:coverage": "umi-test --coverage",
        ...
    }
    ...
}

二、编写测试 demo
1、目录结构
├── src
│   └── pages
│     ├── index
|		├──index.less
|		├──index.tsx
|		├──service.ts
│   └── app.ts
├── node_modules
├── package.json
├── public
......
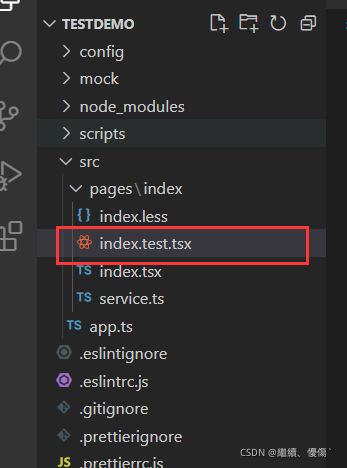
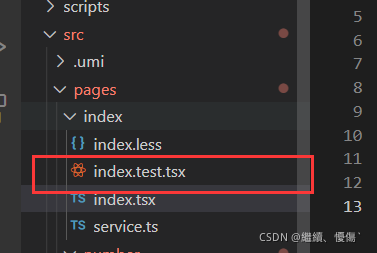
现在的目录结构如上所示,我们要在 index 文件下,建立一个 index.test.tsx 文件

2、编写 index.test.tsx 文件,证明环境没有问题
test("this is testDemi", () => {
  expect(2 + 2).toBe(4)
})

在终端输入命令:yarn test 截图如下

三、语法学习
进入关键的知识学习了,前面死板地粘贴复制就可以了,现在要讲知识点了!!!划重点划重点~~~
1、语法小知识
- 只要以
.test.js||.test.jsx||.test.ts||.test.tsx结尾,jest 自动化测试会自动找到这个文件,不用额外的处理 - test 方法是 jest 提供的一个方法,接受两个参数,第一个参数是描述,第二个参数是函数,执行的判断方法
- expect() 传入的值是函数根据某个例子运行的结果,再利用匹配器进行判断是否一致
2、单元测试术语解析
代码片段:
describe("number test", ()=>{
	it('1 is true', ()=>{
		expect(1).toBeTruthy()
	})
	test('2 is true',()=>{
		expect(2).toBeTruthy()
	})
})
- describe 描述,
decribe会形成一个作用域 - it 断言
- expect 期望
- test 测试,类似
it
3、挂载 dom 节点
使用 @alita/test 中的 render 方法进行渲染测试
(1)编写 inde 文件夹里面的 index.tex
import React, { FC } from 'react';
import styles from './index.less';

const HomePage: FC = () => (
  <>
    <div className={styles.center}>Hello</div>
    <div>欢迎学习测试</div>
  </>
);

export default HomePage;

(2)在 index 文件夹里面创建 index.test.tsx 页面

编写测试内容如下:
// 导入 render 方法
import { render } from '@alita/test'
import React from 'react'
import Page from './index'

it('page text', async () => {
  // 采用 render 方法挂载节点(划重点)
  const { getByText } = render(<Page></Page>)
  expect(getByText("欢迎学习测试")).toBeDefined()
})
4、运行测试用例
(1)使用 yarn test 命令

(2)使用 yarn test:coverage 命令

(3)使用 yarn test +测试文件的相对路径命令

四、知识拓展
1、匹配器
- 在此代码中
expect (2 + 3)返回一个"期望"的对象 - 在此代码中,
.toBe(4)就是一个匹配器 toBe用来测试精确相等,此外还有很多匹配器
//代码直接粘贴复制到.test.tsx结尾的文件或其他测试文件就可以了
test('two plus two is four', () => {
expect(2 + 3).toBe(5);
});
(1)针对 number 类型:
//代码直接粘贴复制到.test.tsx结尾的文件或其他测试文件就可以了
// 针对number类型
test("number test", async () => {
  // 期望值比匹配器大
  expect(2 + 3).toBeGreaterThan(4.5);
  expect(2 + 3).toBeGreaterThanOrEqual(5);
  // 期望值比匹配器小
  expect(2 + 3).toBeLessThan(6);
  expect(2 + 3.5).toBeLessThanOrEqual(5.5);
  expect(2 + 3).toBe(5);
  expect(2 + 3).toEqual(5);
  // 浮点数使用toBeCloseTo进行匹配,不用toEqual
  expect(0.1 + 0.2).toBeCloseTo(0.3);
})
(2)针对 string 类型
//代码直接粘贴复制到 .test.tsx 结尾的文件或其他测试文件就可以了
// 字符串的匹配
test('string test', async () => {
  // toMatch 可以使用正则表达式去匹配字符串
  expect('team').toMatch(/t/);
})
(3)针对数组类型:
//代码直接粘贴复制到.test.tsx结尾的文件或其他测试文件就可以了
// 数组类型匹配
test('Array test', async () => {
  const shoppingList = [
    'apple',
    'banana',
    'orange',
    'watermelon',
    'hami',
  ];
  expect(shoppingList).toContain('orange');
  expect(new Set(shoppingList)).toContain('banana');
})
(4)针对方法是否执行:
//测试代码在第三点
const onFinish = jest.fn();
const { getByText, getAllByText } = render(
   //Submit文本按钮上,绑定了一个触发事件
   <BasicTest onFinish={onFinish} />
);
//点击触发事件
fireEvent.click(getByText('Submit'));
//判断是否触发`onFinish`事件,未触发则报错
expect(onFinish).toBeCalled();
(5)另外还有:
//测试代码在第三点
//判断 dom 节点有 class 的 `radio-wrapper-checked` 属性
expect(getAllByText("男")[1]).toHaveClass(
     "radio-wrapper-checked"
)
//判断 dom 节点存在
expect(getByText("确定")).toBeDefined()
//使用 .not 将匹配器反转
expect(2+3).not.toBe(6);
expect(getByText("取消")).not.toBeDefined()
2、模拟点击事件、 input 输入事件(测试代码在第三点):
//点击'百元'内容的 dom 节点
fireEvent.click(getByText('百元'));
//获取 input 标签输入'10'的容
//getByLabelText 方法是获取 aria-label 属性为 'minLength' 的 input 标签
fireEvent.change(getByLabelText('minLength'), { target: { value: '10' } });
3、测试小代码
(1) index.tsx 代码:
import React, { FC } from 'react';

interface FunctionPageProps {
  onFinish: any;
}
const Function: FC<FunctionPageProps> = ({ onFinish }) => {
  const [str, setStr] = React.useState("")
  return (
    <>
      <div className="testDemo">
        <input type="text"
          aria-label="myInput"
          onChange={(e: any) => { setStr(e.target.value) }}
        />
        <button type='button' className="myBut" onClick={() => { console.log(str); onFinish() }}>
          consoleLog
        </button>
        <div>您输入的内容是:{str}</div>
      </div>
    </>
  );
};

export default Function;
(2) index.test.tsx 代码:
import { render, fireEvent, waitFor, testA11y } from '@alita/test'
import React from 'react'
import Page from './index'

test("function test", async () => {
  // 赋值一个 jest 的方法
  const onFinish = jest.fn();
  const { container, getByText, getByLabelText } = render(
    <Page onFinish={onFinish} />
  );
  await testA11y(container);
  // 判断内容为 'consoleLog' 的节点存在
  expect(getByText('consoleLog')).toBeDefined();
  // 判断内容为 'consoleLog' 的节点 class 属性含有 'myBut'
  expect(getByText('consoleLog')).toHaveClass('myBut');
  // 判断内容为'consoleLog' 的节点 class 属性不含有 'But'
  expect(getByText('consoleLog')).not.toHaveClass('But');
  // 获取 dom 树里面的 input 标签
  const input: any = getByLabelText('myInput')
  // 修改 input 标签里面的 value 值
  fireEvent.change(input, { target: { value: '函数测试' } })
  await waitFor(() => {
    expect(getByText('您输入的内容是:函数测试'))
  })
  // 点击内容为 'consoleLog' 的按钮
  fireEvent.click(getByText('consoleLog'))
  // 等待响应
  await waitFor(() => {
    // 判断 onFinish 方法执行了一次
    expect(onFinish).toBeCalled()
  })
})
五、 最后说一下
- 所有测试代码存放在:https://github.com/Dreamljy/studyTest
- 匹配器可参考jest官方文档:https://www.jestjs.cn/docs/using-matchers
pect(getByText('您输入的内容是:函数测试'))
  })
  // 点击内容为 'consoleLog' 的按钮
  fireEvent.click(getByText('consoleLog'))
  // 等待响应
  await waitFor(() => {
    // 判断 onFinish 方法执行了一次
    expect(onFinish).toBeCalled()
  })
})
五、 最后说一下
- 所有测试代码存放在:https://github.com/Dreamljy/studyTest
- 匹配器可参考jest官方文档:https://www.jestjs.cn/docs/using-matchers