Selenium 爬取画师通Top50二次元图片
环境Pycharm +Selenium
如果你已经有一定的爬虫基础,熟悉使用request 模块获取网页请求,并通过 正则 ,BeautifulSoup, Xpath 等方法对html进行处理获取数据。
本文介绍的是使用selenium进行网页的爬取,相比于request有更多的优势。

我们都知道,request获得的是网页源代码html
但是它并不包含我们在页面看到的很多数据或者图片,这些都是后来的请求传输到页面上的,而通过F12我们会发现这些页面显示的元素Events才是我们的目标,Selenium就可以直接获取到这里的文本内容。这就是Selenium的优势了

让程序链接浏览器 ,让浏览器来完成各种操作,我们只接受最终结果,因为反爬虫总不能反用户吧?
简述环境搭建:具体找教程,主要为以下几步:
#环境搭建:1. pip install selenium
安装selenium模块
2.下载浏览器驱动,并拷贝到python解释器当前所在文件夹(针对于pycharm用户),如果你用的是VScode什么的,那还要配置环境变量。
那么我们开始干活吧!
import requests
from selenium.webdriver import Chrome
from selenium.webdriver.common.action_chains import ActionChains #事件链
from selenium.webdriver.chrome.options import Options   #导入浏览器的参数包
from selenium.webdriver.support.select import Select
import time
from lxml import etree
from bs4 import BeautifulSoup


#准备好参数配置
opt=Options()   #创建对象
opt.add_argument("--headless")  #无头
opt.add_argument('==disable-gpu')

web=Chrome(options=opt)    #把参数设置到浏览器中
temp=Chrome(options=opt)
web.get("https://www.huashi6.com/rank")
这样我们就相当于——打开了网页
#如何拿到页面代码Elementls(经过处理后展现在网页的数据)
time.sleep(2)
web.execute_script("window.scrollBy(0,8000)")
time.sleep(5)
web.execute_script("window.scrollBy(0,8000)")
time.sleep(5)
web.execute_script("window.scrollBy(0,8000)")
time.sleep(5)
web.execute_script("window.scrollBy(0,18000)")
time.sleep(5)
web.execute_script("window.scrollBy(0,18000)")
coding=web.page_source
coding就是我们获取到的F12下的文本,下一步就是定位元素:

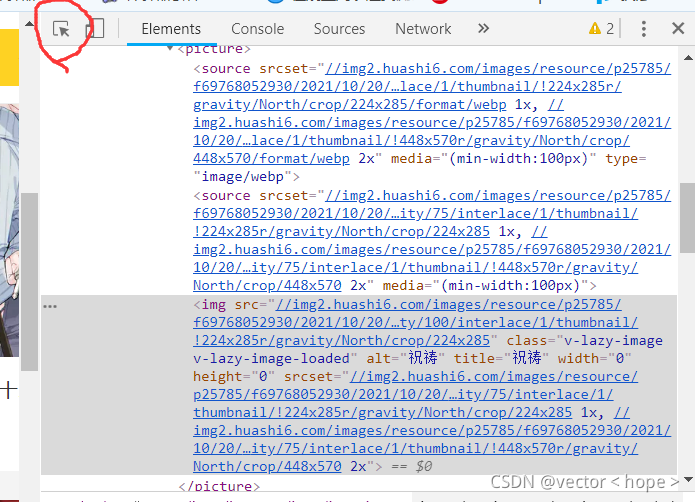
现在定定位到了随便一张图片上面,最后我们复制它的Xpath,再找几张,我们会发现它们都有一样的前缀,哦吼~
tree=etree.HTML(coding)
img_list=tree.xpath('//*[@id="app"]/div[2]/div[2]/a/@href')
接下来就是点击进入每个子页面,通过request 在每个源代码中找到这个图片的url,就可以下载到高清的图片啦。
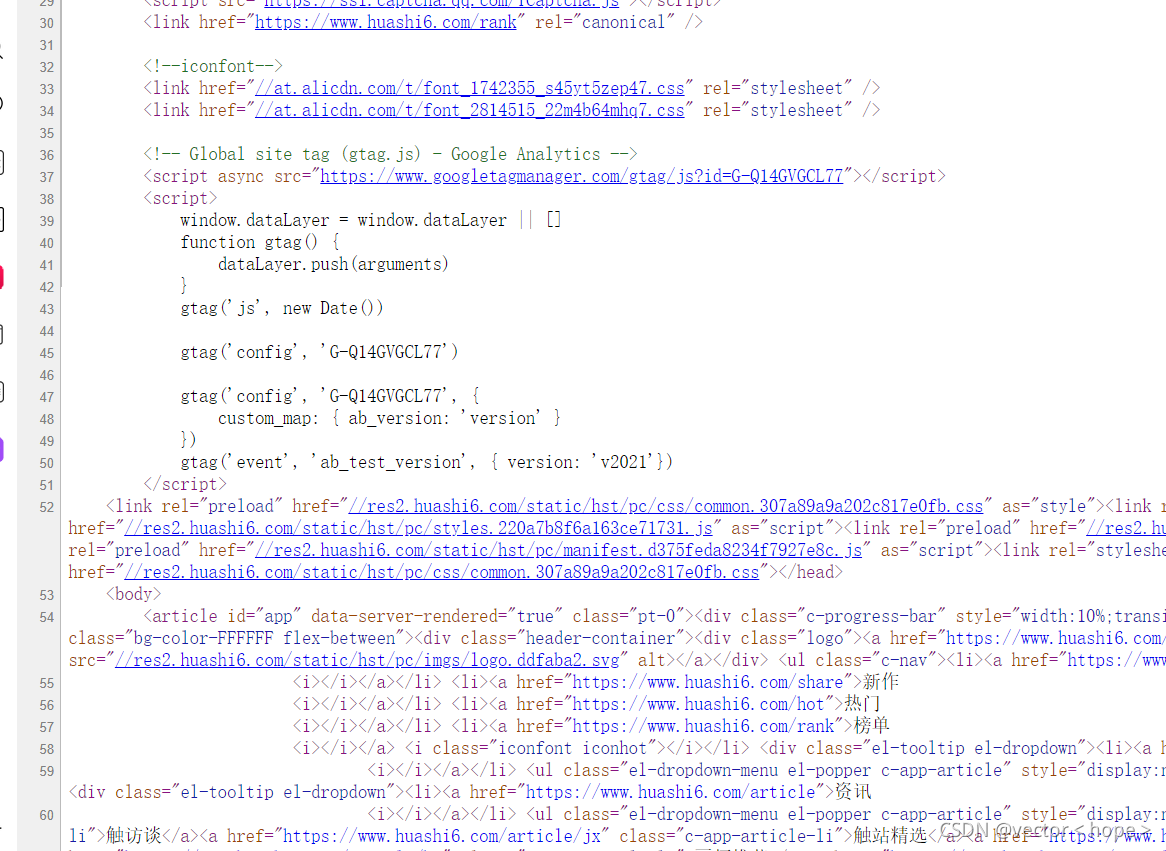
在每个子页面的源代码中都有这么一段
我们可以随便用我们熟悉的文本处理的手段把它截取出来就可以了,这里使用的是beautifulsoup。
细心的人可能发现了就是我们在 之前的F12页面下好像也有一个img链接,为什么不用它呢,因为那个不是高清的啦,大小就只有你在那个Top榜上看到的那么大。所以只有点进页面之后爬取的才是高清的。
for i in range(len(img_list)):
    resp=requests.get(img_list[i])
    resp.encoding='utf-8'
    main_page = BeautifulSoup(resp.text, "html.parser")
    img_in_dict= main_page.find("script", type="application/ld+json").string
    a = img_in_dict.split('[')[-1]
    temp = a.split(']')[0].strip()
    urlforimg=temp.split(",")[0].strip('"')
    #print(urlforimg)
    resp.close()
    with open(f"../imgll/{i}.jpg","wb") as f:
        res = requests.get('http:'+urlforimg)
        f.write(res.content)
        print(f"下载图片成功!!")
        res.close()
    time.sleep(1)

#print(img_list)  #获取到子链接
web.close()
至于Selenium的使用大家自行学习啦,这里不过多介绍了,主要是整个爬取的思路,下面是完整的源码(榜单每日更新后仍可用)
import requests
from selenium.webdriver import Chrome
from selenium.webdriver.common.action_chains import ActionChains #事件链
from selenium.webdriver.chrome.options import Options   #导入浏览器的参数包
from selenium.webdriver.support.select import Select
import time
from lxml import etree
from bs4 import BeautifulSoup


#准备好参数配置
opt=Options()   #创建对象
opt.add_argument("--headless")  #无头
opt.add_argument('==disable-gpu')

web=Chrome(options=opt)    #把参数设置到浏览器中
temp=Chrome(options=opt)
web.get("https://www.huashi6.com/rank")

#定位到下拉列表  拿到元素
#sel_el=web.find_element_by_xpath('//*[@id="OptionDate"]')
#把元素包装成下拉列表
#sel=Select(sel_el)
#让浏览器
'''for i in range(len(sel.options))
    sel.select_by_index()
    sel.select_by_value()
    sel.select_by_visible_text()
'''
#如何拿到页面代码Elementls(经过处理后展现在网页的数据)
time.sleep(2)
web.execute_script("window.scrollBy(0,8000)")
time.sleep(5)
web.execute_script("window.scrollBy(0,8000)")
time.sleep(5)
web.execute_script("window.scrollBy(0,8000)")
time.sleep(5)
web.execute_script("window.scrollBy(0,18000)")
time.sleep(5)
web.execute_script("window.scrollBy(0,18000)")
coding=web.page_source
#print(coding)

tree=etree.HTML(coding)
img_list=tree.xpath('//*[@id="app"]/div[2]/div[2]/a/@href')


for i in range(len(img_list)):
    resp=requests.get(img_list[i])
    resp.encoding='utf-8'
    main_page = BeautifulSoup(resp.text, "html.parser")
    img_in_dict= main_page.find("script", type="application/ld+json").string
    a = img_in_dict.split('[')[-1]
    temp = a.split(']')[0].strip()
    urlforimg=temp.split(",")[0].strip('"')
    #print(urlforimg)
    resp.close()
    with open(f"../imgll/{i}.jpg","wb") as f:
        res = requests.get('http:'+urlforimg)
        f.write(res.content)
        print(f"下载图片成功!!")
        res.close()
    time.sleep(1)

#print(img_list)  #获取到子链接
web.close()