【网络爬虫和数据处理】---selenium第一章 【基础篇】
第一章 selenium 基础
selenium简介
Selenium 是使用最广泛的开源 Web UI(用户界面)自动化测试套件之一。
它最初由 Jason Huggins 于 2004 年开发,Selenium 支持跨不同浏览器、平台和编程语言的自动化
Selenium安装:
? Selenium 的web驱动Google Chrome 版本
? https://chromedriver.chromium.org/
? 课程中的样例网站:testautomationpractice.blogspot.com
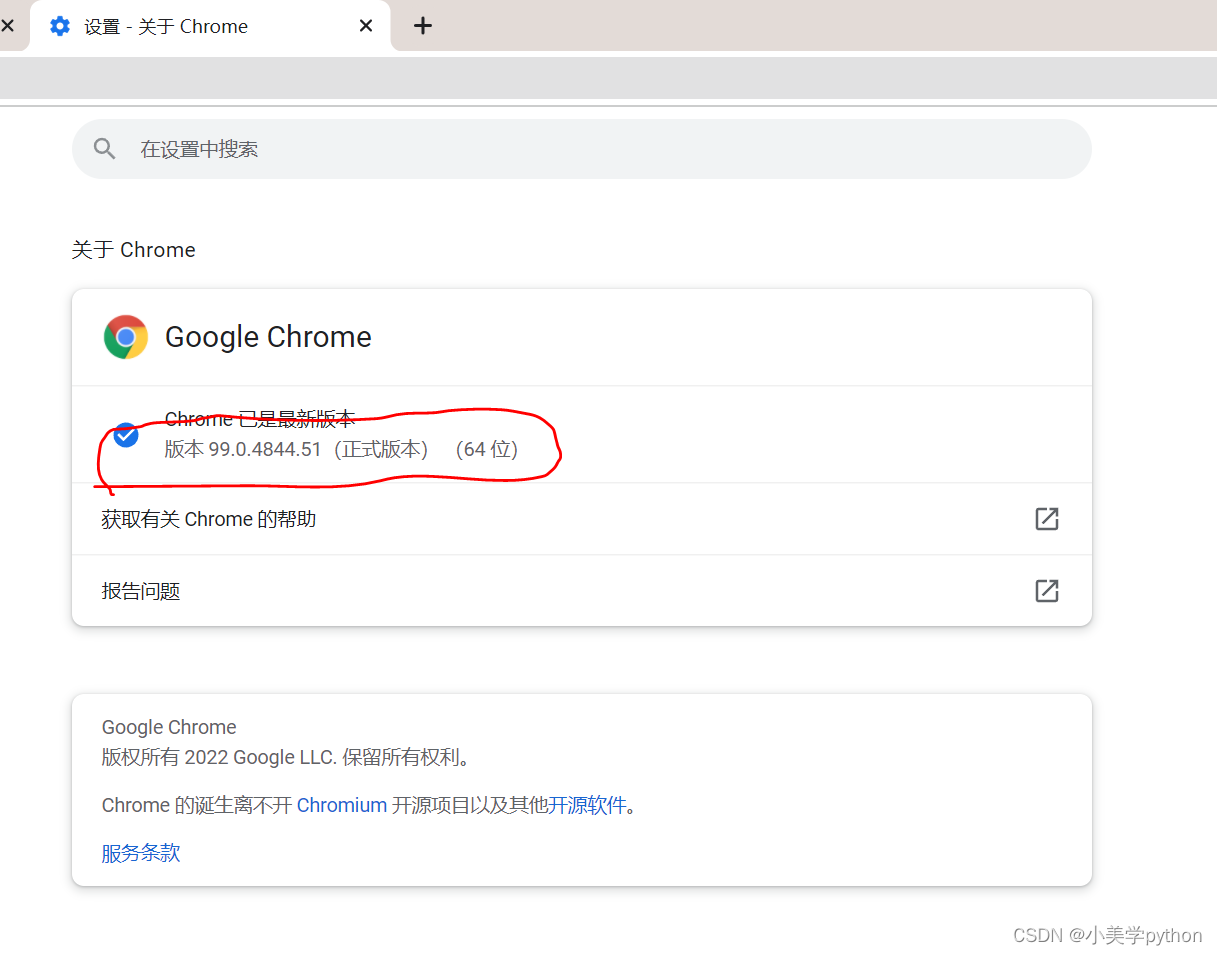
注:我们所用的浏览器为99版本,所以谷歌驱动选择99版本。


Selenium操作:
1.安装Selenium依赖库
pycharm中 文件 设置中安装。
2.配置Web驱动
executable_path='D:/driver/chromedriver.exe’
from selenium import  webdriver
import  time
# 由于使用了selenium 所以在当前目录中不可以出现同名的文件
# 定义一个驱动
driver = webdriver.Chrome(
    executable_path='D:/driver/chromedriver.exe')
# 增加驱动的一些功能 比如最大化网站
driver.maximize_window()  # 最大化网站
# 使用get方法可以打开网站
driver.get("https://baidu.com") # 访问
time.sleep(3)  # 等待3秒钟 然后关闭浏览器
driver.close() # 关闭浏览器
3.常见Selenium命令演示
使用flask框架搭建一个本地的网页,启动webapp.py后使用 http://127.0.0.1:5000/ 可以直接访问网页。
from flask import Flask,render_template,flash
app = Flask(__name__) # 创建网站 名字叫app

@app.route('/')
def index():
    return  render_template('index.html')

if __name__ == '__main__':
    app.run()  #启动网站

使用如下可以获得网站的标题、当前url、 源代码等信息。
print(driver.title)
print(driver.current_url)
print(driver.page_source)
4.使用导航按钮访问页面
- 定位元素
使用chropath插件定位元素。
绿色的1表示可以找到唯一的元素;黄色的20表示可以找到20个这样的元素不唯一。
driver.back()# 后退
driver.forward()# 前进
# 导航测试
from selenium import  webdriver
import  time
from selenium.webdriver.common.by import By

driver = webdriver.Chrome(
    executable_path='c:/driver/chromedriver.exe')
driver.maximize_window()
driver.get("https://image.baidu.com/") # 访问
# driver.get("http://localhost:5000") # 访问
time.sleep(2)
elm = driver.find_element(By.XPATH,"//a[contains(text(),'地图')]") #寻找输入框
elm.click()  # 点击
time.sleep(5)
driver.back()  # 后退
time.sleep(3)
driver.forward() # 前进
5.使用条件命令进行操作
index04.html
radio_elm.is_displayed() 是否显示
radio_elm.is_enabled() 是否可用
radio_elm.is_selected() 是否已经被选中
6. 隐式等待法
index05.html
driver.implicitly_wait(5) 这是浏览器等待,time.sleep是系统等待。
本次填写了个5,其实只要要找的元素不出来就一直等待。比较适合于逻辑性不强,只需要等待一段时间的情况下。
本例中用了填写用户名和密码的案例。用户名密码为admin时登录成功进行跳转,其他则显示错误,如下:

# 隐式等待法
from selenium import  webdriver
import  time
from selenium.webdriver.common.by import By

driver = webdriver.Chrome(
    executable_path='c:/driver/chromedriver.exe')
driver.maximize_window()
# driver.get("https://testautomationpractice.blogspot.com") # 访问
driver.get("http://localhost:5000/05") # 访问
time.sleep(4)
user_elm = driver.find_element(By.XPATH,"//body/div[1]/form[1]/input[1]") #寻找输入框
print(user_elm.is_displayed())
print(user_elm.is_enabled())
user_elm.send_keys('admin')
pass_elm = driver.find_element(By.XPATH,"//body/div[1]/form[1]/input[2]")
print(pass_elm.is_displayed())
print(pass_elm.is_enabled())
pass_elm.send_keys('admin')
login_elm = driver.find_element(By.XPATH,"//body/div[1]/form[1]/input[3]")
login_elm.click()
try: #这段发生就走 不发生就过 经典,可以好好看看
    #用户名密码错误的提示
    check_elm= driver.find_element(By.XPATH,"//strong[contains(text(),'Error:')]")
    if (check_elm.is_displayed()):
        print("登录失败")
except Exception as e:
    pass
#隐式等待
driver.implicitly_wait(5)
#登录成功跳转到另一个页面
content_elm= driver.find_element(By.XPATH,"//body")
print(content_elm.text)
7.显式等待法
from selenium.webdriver.support import expected_conditions as EC
# 创建一个等待器  设置最长超时
wait=WebDriverWait(driver,30)
login_elm = wait.until(EC.element_to_be_clickable (
    (By.XPATH,"//body/div[1]/form[1]/input[3]")))
8. 操作输入框和文本框
send_keys
message_elm = driver.find_element(By.XPATH,"//body/div[1]/form[1]/textarea[1]")
message_elm.send_keys('1234')
9.使用单选框和复选框
radio1 = driver.find_element(By.XPATH,"//input[@id='RESULT_RadioButton-7_1']")
radio1.click()
check1= driver.find_element(By.XPATH,"//input[@id='RESULT_CheckBox-8_2']")
check1.click()
10. 操作下拉列表
Select(list_radio)
from selenium.webdriver.support.ui import  Select
#选择下拉列表框
list_radio = driver.find_element(By.XPATH,"//select[@id='RESULT_RadioButton-9']")
print(list_radio)
# 增加一个叫Drop对象 访问下拉列表内的内容
drp = Select(list_radio)
print(drp)
# 手工选择其中的一个  共三种方法
drp.select_by_index(2) #id法
drp.select_by_visible_text('Evening')
drp.select_by_value('Radio-0') #value是js页面上元素的value <option value="Radio-0">moring</option>

# 为了搞清楚 一共有多少元素  我们来进行枚举测试
options =drp.options
print(len(options))
for i in options:
    print(i)
    print(i.text)
11. 快速访问链接
links_elm = driver.find_elements(By.TAG_NAME,"a") #寻找输入框
print(links_elm)
print("当前网页中有tag a的数量一共是{}".format(len(links_elm)))
for i in links_elm:
    if i.get_attribute('href'):
        print(i.text)
        print(i.get_attribute('href'))
12.处理弹出框和警告框
弹出框不是页面上的元素。那怎么处理呢?
同意:driver.switch_to.alert.accept()
拒绝:driver.switch_to.alert.dismiss()
#点击我 ,出现弹出框
elm = driver.find_element(By.XPATH,"//button[contains(text(),'Click Me')]")
elm.click()
time.sleep(3)
driver.switch_to.alert.accept()
time.sleep(3)
elm.click()
time.sleep(3)
driver.switch_to.alert.dismiss()
13.在不同的Frame框体间切换
在同一个网页里面的不同框体。
driver.switch_to.frame
driver.switch_to.parent_frame()
# 增加switch 功能  切换到另一个frame中 来寻找元素
driver.switch_to.frame("frame-one1434677811")
elm2 = driver.find_element(By.XPATH,"//h1[contains(text(),'Volunteer Sign Up')]")
print(elm2.text)
elm3 = driver.find_element(By.XPATH,"//input[@id='RESULT_TextField-1']")
elm3.send_keys("Mars")
driver.switch_to.parent_frame()
14. 在不同的Window框体间切换
用js脚本打开第二个网页。
# 此处是我们的第一个网站
driver.get("https://testautomationpractice.blogspot.com")
elm = driver.find_element(By.XPATH,"//h2[contains(text(),'Date Picker')]")
print (elm.text)
# 如何访问第二个网站
driver.execute_script("window.open('http://127.0.0.1:5000/create/')")
# 安置一个数组来存放不同的页面
handles= driver.window_handles
dict1={}  #建立字典用于存放网页信息。
for i in handles:
    print(i)
    driver.switch_to.window(i)
    print(driver.title)
    str1=driver.title
    dict1[str1]=i
print(dict1)
title='a'
# 到第一个网页上 获取xxx
if title == 'Automation Testing Practice':
    driver.switch_to.window(dict1['Automation Testing Practice'])
# 到第二个网页上 获取yyy
if title == 'Add a New Message - FlaskApp':
    driver.switch_to.window(dict1['Add a New Message - FlaskApp'])
# 到第一个网页上 获取 zzz
if title == 'Automation Testing Practice':
    driver.switch_to.window(dict1['Automation Testing Practice'])
# 到第二个网页上 获取aaa
if title == 'Add a New Message - FlaskApp':
    driver.switch_to.window(dict1['Add a New Message - FlaskApp'])
15. 处理网页中表格
获取表格内容没有简单方法,只有摸清楚表格的元素的规律后按规律获取表格数据。
行的情况下://tbody/tr[i] 是i在变化就显示几行

列的情况下: //tbody/tr[2]/td[j] 是j在变化就显示第几列。

driver.get("http://localhost:5000/15")
#1.find_elements 复数  2./html[1]/body[1]/div[1]/div[1]/div[1]/table[1]/tbody[1]/tr 绝对位置
elm_row_s = driver.find_elements(By.XPATH,"/html[1]/body[1]/div[1]/div[1]/div[1]/table[1]/tbody[1]/tr")
print (len(elm_row_s))
elm_col_s  = driver.find_elements(By.XPATH,"/html[1]/body[1]/div[1]/div[1]/div[1]/table[1]/tbody[1]/tr[1]/th")
print(len(elm_col_s))

#因为 tbody[1]/tr[1] 从1开始,不从0开始。
for i in range(1,len(elm_row_s)+1):  #行
    for j  in range(1,len(elm_col_s)+1):   #列
        print(i,j)
       #相对路径
        str1="//tbody/tr["+str(i)+"]/td["+str(j)+"]"
        # print(str1)
        #tr["+str(i)+"]/th["+str(j)+"]"
        # driver.find_element(By.XPATH,str1).text
        print(driver.find_element(By.XPATH,str1).text)
16. 如何滚动网页
1.向下滚动固定位置
driver.execute_script("window.scrollBy(0,100)","") driver.execute_script("window.scrollBy(0,1000)","")
2.#滚动到特定元素位置
滚动的地方下方必须还有元素,因为滚动到的地方在网页最上方
elm = driver.find_element(By.XPATH,"//empid[contains(text(),'101')]") driver.execute_script("arguments[0].scrollIntoView();",elm)
3.滚动到最后位置
driver.execute_script("window.scrollBy(0,document.body.scrollHeight)") #与1 类似
17. 如何在网页上控制鼠标的动作—ActionChains
(1)交互式操作
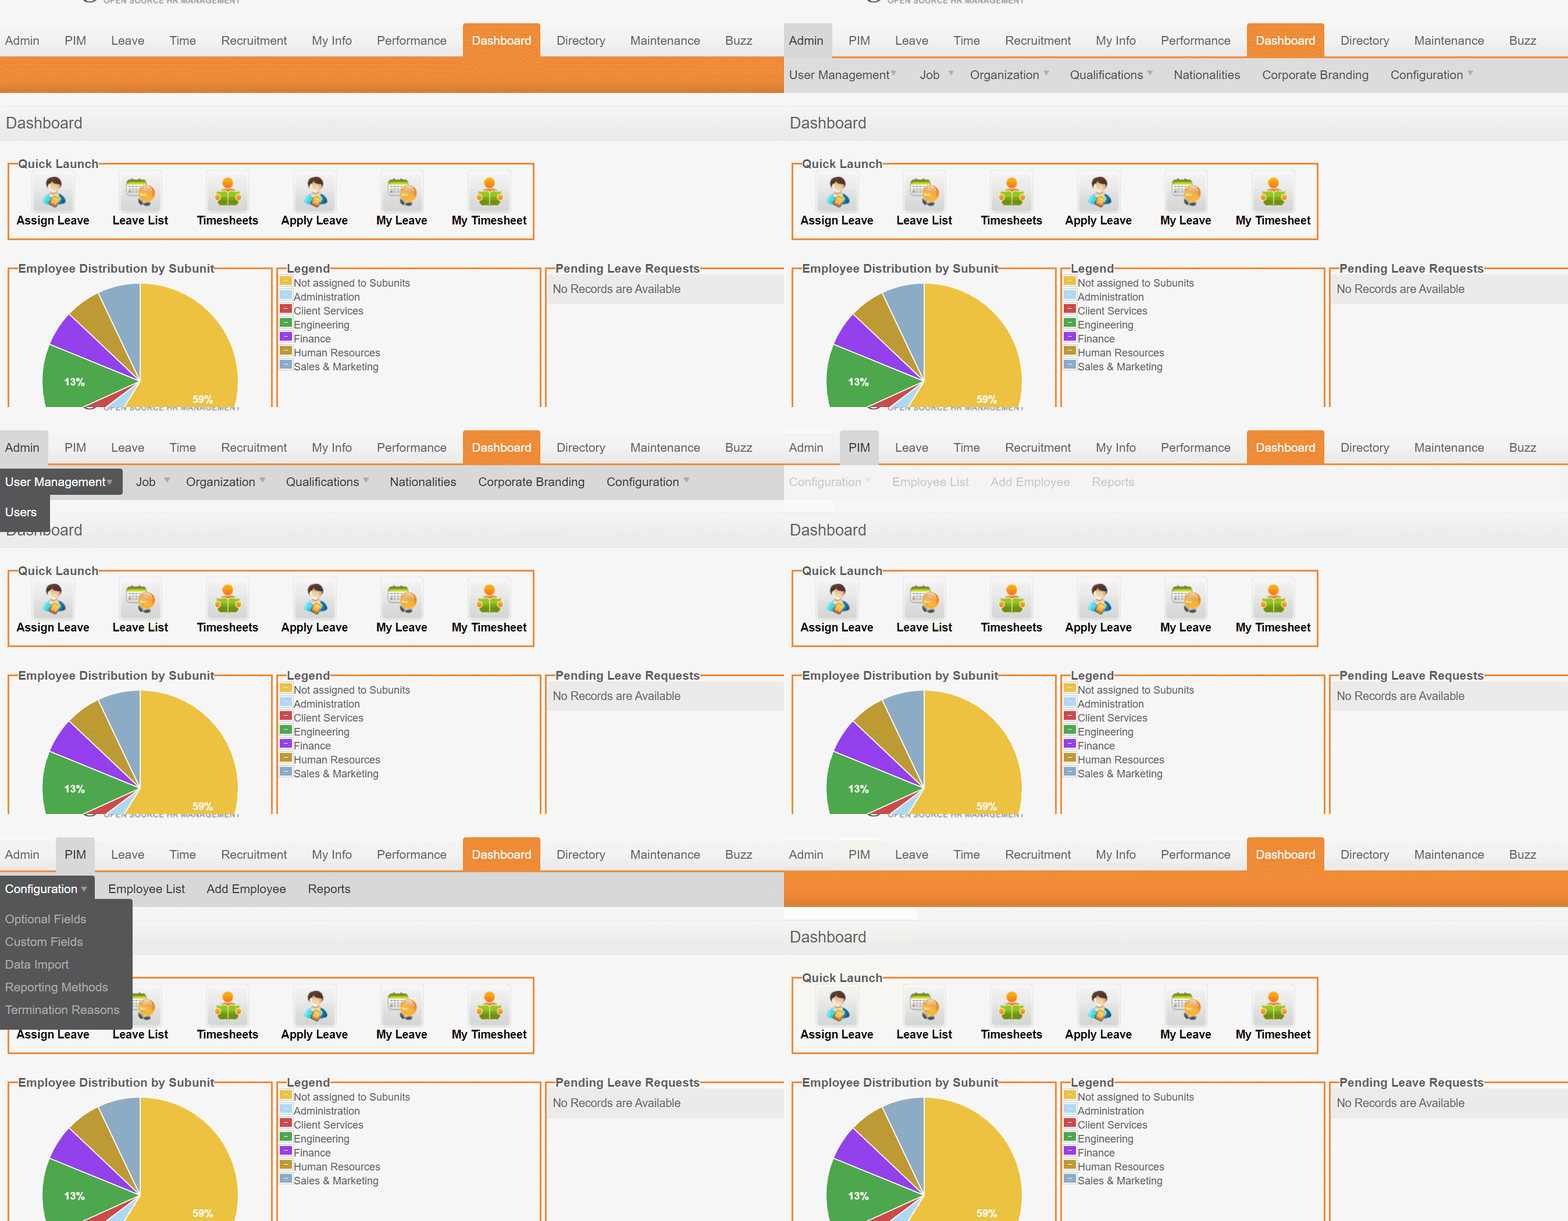
为什么要用鼠标操作,因为有的网页中有些交互式菜单,只有是鼠标的时候放上才显示。把定位器放上无法定位。测试网址:https://opensource-demo.orangehrmlive.com/

1.分三步找到 Admin下的 User Management 以及 Users
2.建立动作池ActionChains,放入浏览器。
3.鼠标移动到Admin移动到User Management移动到Users, 然后click,最后perform。click之前都是动作,perform才真正执行。
step1= driver.find_element(By.XPATH,"//b[contains(text(),'Admin')]")
step2 = driver.find_element(By.XPATH,"//a[@id='menu_admin_UserManagement']")
step3 = driver.find_element(By.XPATH,"//a[@id='menu_admin_viewSystemUsers']")

actions = ActionChains(driver)
time.sleep(1)
actions.move_to_element(step1).move_to_element(step2)\
    .move_to_element(step3).click().perform()
(2)鼠标操作(双击 | 右键点击 | 拖拽)
双击:double_click
# 访问元素  然后进行双击
elm= driver.find_element(By.XPATH,"//button[contains(text(),'Copy Text')]")
actions = ActionChains(driver)
actions.double_click(elm).perform()
右键点击:context_click
# 访问元素  然后进行双击
elm= driver.find_element(By.XPATH,"//span[contains(text(),'right click me')]")
actions = ActionChains(driver)
actions.context_click(elm).perform()
拖拽:drag_and_drop
1.源目标移动
# 访问元素  然后进行双击
elm1= driver.find_element(By.XPATH,"//div[@id='draggable']") #源
elm2 = driver.find_element(By.XPATH,"//div[@id='droppable']")  #目标
actions = ActionChains(driver)
actions.drag_and_drop(elm1,elm2).perform()
2.按坐标移动
actions.drag_and_drop_by_offset(elm1,150,30).perform()
18.上传文件
找到元素,给个路径就可以。
elm = driver.find_element(By.XPATH,"//input[@id='RESULT_FileUpload-10']")
elm.send_keys("C:\\Users\\eric\\PycharmProjects\\sele_c\\down\\myfile.txt")
19. 下载文件
配置默认下载路径
from selenium.webdriver.chrome.options import Options
chromeOptions=Options()
dict1={'download.default_directory':'d:\down'}
chromeOptions.add_experimental_option("prefs",dict1)
driver = webdriver.Chrome(
    executable_path='c:/driver/chromedriver.exe',chrome_options=chromeOptions)
点击下载按钮
elm = driver.find_element(By.XPATH,"//a[contains(text(),'下载')]")
elm.click()
20. 如何使用Cookie
1.什么是cookie
利用cookie传递信息。本地和服务器互传。

2.response设置cookie
比如说下次再打开网页视频时候的进度条。是记录在服务器,下次打开时返回给浏览器进度值。
@app.route('/20')
def index20():
    resp = make_response("success")
    resp.set_cookie("name1","value1")
    resp.set_cookie("name2", "value2")
    resp.set_cookie("Teacher", "Mars")
    return  resp

3.request设置cookie
driver.get("http://127.0.0.1:5000/20")
#获取cookie
cockies = driver.get_cookies()
print(cockies)
print(len(cockies))
#  本地设置cockie
cockies = {'name':'Local1','value':'ABCD'}
driver.add_cookie(cockies)
cockies = driver.get_cookies()
print(cockies)
print(len(cockies))

time.sleep(3)
# driver.delete_cookie('Local1')
driver.delete_all_cookies()
cockies = driver.get_cookies()
print(cockies)
print(len(cockies))
21. 如何截屏
1.图片截屏
2.网站反扒,人工获取为乱码,此时截图合适。
# 此处是我们的第一个网站
driver.get("https://testautomationpractice.blogspot.com")
driver.save_screenshot("C:\\Users\\eric\\PycharmProjects\\sele_c\\down\\sc01.jpg")
driver.execute_script("window.scrollBy(0,500)","")
driver.save_screenshot("C:\\Users\\eric\\PycharmProjects\\sele_c\\down\\sc02.jpg")
driver.execute_script("window.scrollBy(0,500)","")
driver.save_screenshot("C:\\Users\\eric\\PycharmProjects\\sele_c\\down\\sc03.jpg")
driver.execute_script("window.scrollBy(0,500)","")
driver.save_screenshot("C:\\Users\\eric\\PycharmProjects\\sele_c\\down\\sc04.jpg")
# driver.get_screenshot_as_file() 效果一样的