大家好,我是bug郭,一名双非科班的在校大学生。对C/JAVA、数据结构、Spring系列框架、测试开发、Linux及MySql、算法等领域感兴趣,喜欢将所学知识写成博客记录下来。 希望该文章对你有所帮助!如果有错误请大佬们指正!共同学习交流
作者简介:
- CSDN java领域新星创作者blog.csdn.net/bug…
- 掘金LV3用户 juejin.cn/user/bug…
- 阿里云社区专家博主,星级博主,developer.aliyun.com/bug…
- 华为云云享专家 bbs.huaweicloud.com/bug…
多层框架/窗口定位
对于一个web 应用,经常会出现框架(
frame) 或窗口(window)的应用,这也就给我们的定位带来了一定的困难!
- 定位一个框架
frame:switch_to.frame(name_or_id_or_frame_element) - 定位一个窗口
window:switch_to.window(name_or_id_or_window_element)
多层框架定位
witch_to.frame(name_or_id_or_frame_element):通过frame的id或者name或者frame自带的其它属性来定位框架,这里switch_to.frame()把当前定位的主体切换了frame里。
switch_to.default_content:从frame中嵌入的页面里跳出,跳回到最外面的默认页面中.
以一下html实例说明:
<html>
<head>
<meta http-equiv="content-type" content="text/html;charset=utf-8" />
<title>frame</title>
<link
href="http://netdna.bootstrapcdn.com/twitter-bootstrap/2.3.2/css/bootstra
p-combined.min.css" rel="stylesheet" />
<script type="text/javascript">$(document).ready(function(){
});
</script>
</head>
<body>
<div class="row-fluid">
<div class="span10 well">
<h3>frame</h3>
<iframe id="f1" src="inner.html" width="800",
height="600"></iframe>
</div>
</div>
</body>
<script
src="http://netdna.bootstrapcdn.com/twitter-bootstrap/2.3.2/js/bootstrap.
min.js"></script>
</html>
inner.html
<html>
<head>
<meta http-equiv="content-type" content="text/html;charset=utf-8" />
<title>inner</title>
</head>
<body>
<div class="row-fluid">
<div class="span6 well">
<h3>inner</h3>
<iframe id="f2" src="http://www.baidu.com"
width="700"height="500"></iframe>
<a href="javascript:alert('watir-webdriver better than
selenium webdriver;')">click</a>
</div>
</div>
</body>
</html>
下面通过switch_to.frame()方法进行定位:
#coding=utf-8
from selenium import webdriver
import time
import os
driver = webdriver.Chrome()
file_path = 'file:///'+os.path.abspath('../seleniumhtml/frame.html')
# 打开frame.html网页
driver.get(file_path)
driver.implicitly_wait(20)
# 从默认页面到 f1 框架页面
driver.switch_to.frame("f1")
#点击click链接
driver.find_element_by_link_text("click").click()
# 回到默认页面
driver.switch_to.default_content()

time.sleep(3)
driver.quit()
多层窗口定位
有可能嵌套的不是框架,而是窗口,还有真对窗口的方法:
switch_to.window用法与switch_to.frame相同:driver.switch_to.window("windowName")
层级定位
有时候我们需要定位的元素没有直接在页面展示,而是需要对页面的元素经过一系列操作之后才展示出来,这个时候我们就需要一层层去定位.
用以下HTML示例说明:
<html>
    <head>
    <meta http-equiv="content-type" content="text/html;charset=utf-8" />
    <title>Level Locate</title>
	<script type="text/javascript" src="http://code.jquery.com/jquery-1.9.1.min.js"></script>
    <link
    href="http://netdna.bootstrapcdn.com/twitter-bootstrap/2.3.2/css/bootstrap-combined.min.css" rel="stylesheet" />
    </head>
    <body>
    <h3>Level locate</h3>
    <div class="span3">
    <div class="well">
    <div class="dropdown">
    <a class="dropdown-toggle" data-toggle="dropdown"
    href="#">Link1</a>
    <ul class="dropdown-menu" role="menu"
    aria-labelledby="dLabel" id="dropdown1" >
    <li><a tabindex="-1" href="#">Action</a></li>
    <li><a tabindex="-1" href="#">Another action</a></li>
    <li><a tabindex="-1" href="#">Something else here</a></li>
    <li class="divider"></li>
    <li><a tabindex="-1" href="#">Separated link</a></li>
    </ul>
    </div>
    </div>
    </div>
    <div class="span3">
    <div class="well">
    <div class="dropdown">
    <a class="dropdown-toggle" data-toggle="dropdown"
    href="#">Link2</a>
    <ul class="dropdown-menu" role="menu"
    aria-labelledby="dLabel" >
    <li><a tabindex="-1" href="#">Action</a></li>
    <li><a tabindex="-1" href="#">Another action</a></li>
    <li><a tabindex="-1" href="#">Something else here</a></li>
    <li class="divider"></li>
    <li><a tabindex="-1" href="#">Separated link</a></li>
    </ul>
    </div>
    </div>
    </div>
    </body>
    <script
    src="http://netdna.bootstrapcdn.com/twitter-bootstrap/2.3.2/js/bootstrap.min.js"></script>
</html>

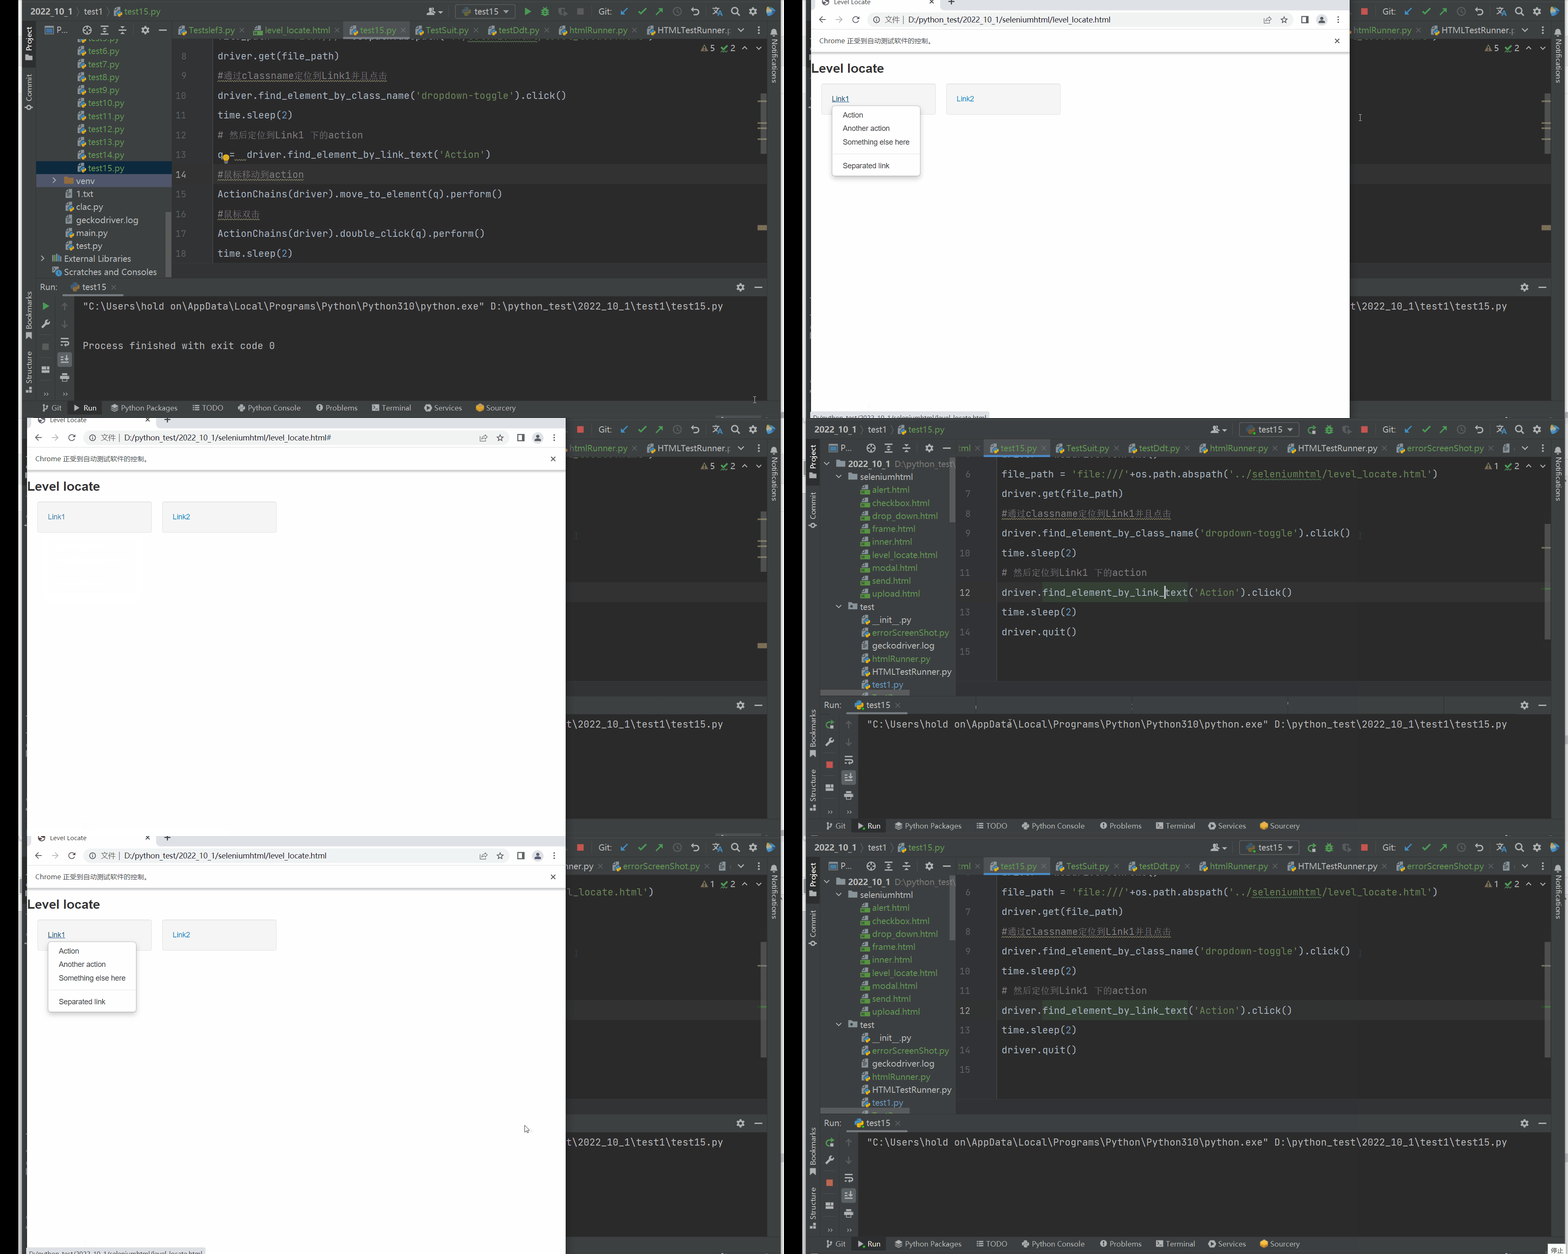
先点击第一个下拉框,然后再点击下拉框所在单元的ul,在定位这个ul下某个具体的链接
import os.path

from selenium import webdriver
import time
from selenium.webdriver.common.action_chains import ActionChains
driver = webdriver.Chrome()
file_path = 'file:///'+os.path.abspath('../seleniumhtml/level_locate.html')
driver.get(file_path)
#通过classname定位到Link1并且点击
driver.find_element_by_class_name('dropdown-toggle').click()
time.sleep(2)
# 然后定位到Link1 下的action
q =  driver.find_element_by_link_text('Action')
#鼠标移动到action
ActionChains(driver).move_to_element(q).perform()
#鼠标双击
ActionChains(driver).double_click(q).perform()
time.sleep(2)
driver.quit()
下拉框处理
下拉框是我们最常见的一种页面元素,对于一般的元素,我们只需要一次就定位,但下拉框里的内容需要进行两次定位,先定位到下拉框对下拉框进行操作后,再定位到下拉框内里的选项。
以下面的html为例:
<html>
<body>
<select id="ShippingMethod"
onchange="updateShipping(options[selectedIndex]);" name="ShippingMethod">
<option value="12.51">UPS Next Day Air ==> $12.51</option>
<option value="11.61">UPS Next Day Air Saver ==> $11.61</option>
<option value="10.69">UPS 3 Day Select ==> $10.69</option>
<option value="9.03">UPS 2nd Day Air ==> $9.03</option>
<option value="8.34">UPS Ground ==> $8.34</option>
<option value="9.25">USPS Priority Mail Insured ==> $9.25</option>
<option value="7.45">USPS Priority Mail ==> $7.45</option>
<option value="3.20" selected="">USPS First Class ==> $3.20</option>
</select>
</body>
</html>
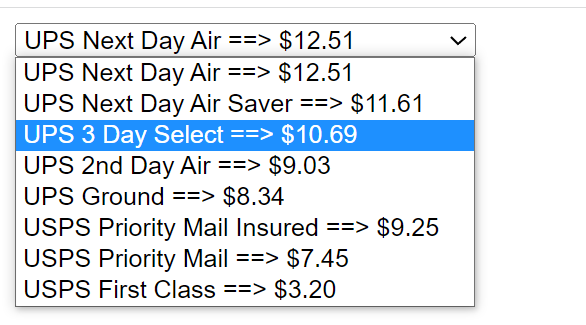
假如我们要选中$9.03
import os.path
from selenium import webdriver
import time
from selenium.webdriver.common.action_chains import ActionChains
driver = webdriver.Chrome()
file_path = 'file:///'+os.path.abspath('../seleniumhtml/drop_down.html')
driver.get(file_path)
time.sleep(1)
#定位到下拉框并且点击
q = driver.find_element_by_id('ShippingMethod')
q.click()
#定位到下拉框下的$9.03
q.find_element_by_xpath('//*[@id="ShippingMethod"]/option[4]').click()
time.sleep(3)
driver.quit()
先定位到下拉框再定位下拉框下的元素
alert、confirm、prompt 的处理
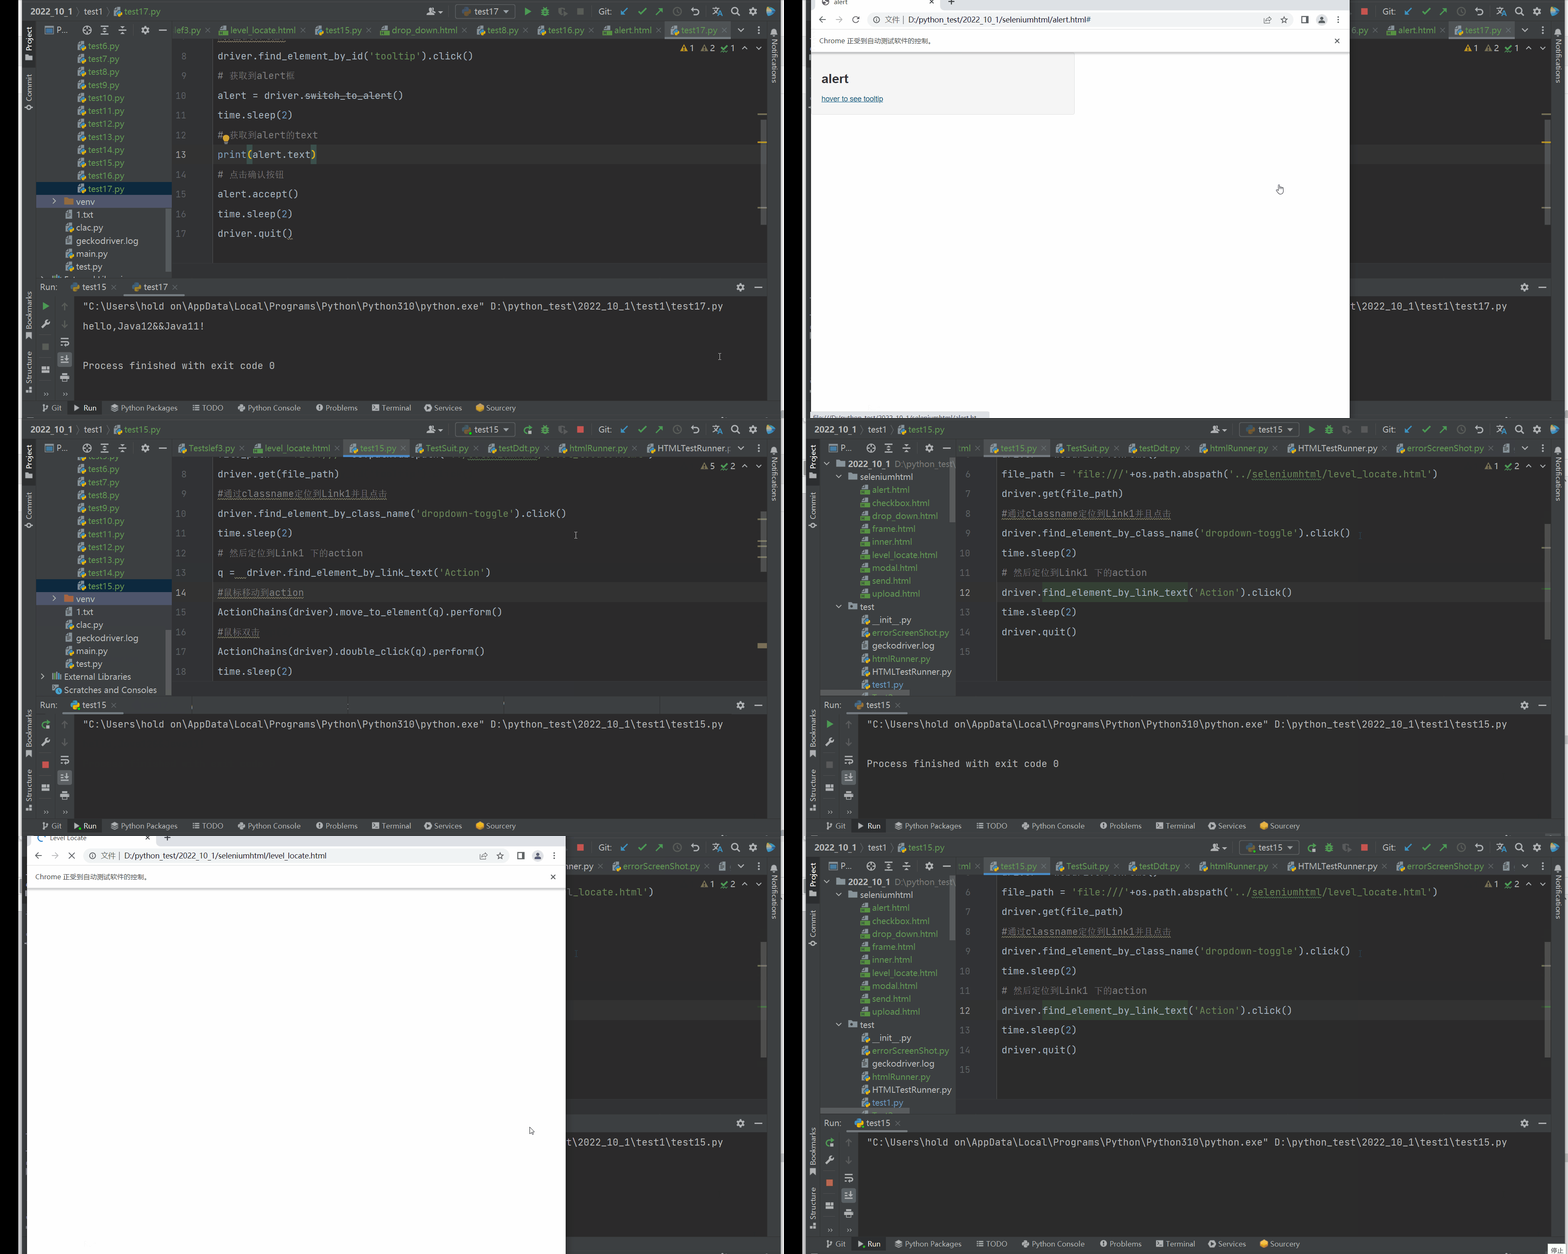
text返回alert/confirm/prompt中的文字信息
accept点击确认按钮
dismiss点击取消按钮,如果有的话
send_keys输入值,如果alert没有对话框就不能用了,不然会报错
注意:switch_to.alert()只能处理原生的alert
用一下的html进行说明:
<html>
<head>
<meta http-equiv="content-type" content="text/html;charset=utf-8" />
<title>alert</title>
<script type="text/javascript" src="http://code.jquery.com/jquery-1.9.1.min.js"></script>
<link href="http://netdna.bootstrapcdn.com/twitter-bootstrap/2.3.2/css/bootstrap-combined.min.css" rel="stylesheet" />
<script type="text/javascript"> $(document).ready(function(){ $('#tooltip').tooltip({"placement": "right"}); $('#tooltip').click(function(){ alert('hello,Java12&&Java11!') }); }); </script>
</head>
<body>
<div class="row-fluid">
<div class="span6 well">
<h3>alert</h3>
<a id="tooltip" href="#" data-toggle="tooltip" title="hello,Java12&&Java11 !">hover to see tooltip</a>
</div>
</div>
</body>
<script src="http://netdna.bootstrapcdn.com/twitter-bootstrap/2.3.2/js/bootstrap.min.js"></script>
</html>

import os.path
from selenium import webdriver
import time
driver = webdriver.Chrome()
file_path = 'file:///'+os.path.abspath('../seleniumhtml/alert.html')
driver.get(file_path)
#弹出alert框!
driver.find_element_by_id('tooltip').click()
# 获取到alert框
alert = driver.switch_to_alert()
time.sleep(2)
#获取警告信息
print(alert.text)
# 点击确认按钮
alert.accept()
time.sleep(2)
driver.quit()
DIV对话框处理
如果页面元素比较多,利用元素的属性无法准确的定位这个元素的时候,我们可以先定位元素所在的div块,再去定位这个元素
以下面的html说明:
<html>
<head>
<meta http-equiv="content-type" content="text/html;charset=utf-8" />
<title>modal</title>
<script type="text/javascript" src="http://code.jquery.com/jquery-1.9.1.min.js"></script>
<link
href="http://netdna.bootstrapcdn.com/twitter-bootstrap/2.3.2/css/bootstrap-combined.min.css"
rel="stylesheet" />
<script type="text/javascript">
$(document).ready(function(){
$('#click').click(function(){
$(this).parent().find('p').text('Click on the link to success!');
});
});
</script>
</head>
<body>
<h3>modal</h3>
<div class="row-fluid">
<div class="span6">
<!-- Button to trigger modal -->
<a href="#myModal" role="button" class="btn btn-primary"
data-toggle="modal" id="show_modal">Click</a>
<!-- Modal -->
<div id="myModal" class="modal hide fade" tabindex="-1"
role="dialog" aria-labelledby="myModalLabel" aria-hidden="true">
<div class="modal-header">
<button type="button" class="close" data-dismiss="modal"
aria-hidden="true">×</button>
<h3 id="myModalLabel">Modal header</h3>
</div>
<div class="modal-body">
<p>Congratulations, you open the window!</p>
<a href="#" id="click">click me</a>
</div>
<div class="modal-footer">
<button class="btn" data-dismiss="modal"
aria-hidden="true">Close</button>
<button class="btn btn-primary">Save changes</button>
</div>
</div>
</div>
</div>
</body>
<script
src="http://netdna.bootstrapcdn.com/twitter-bootstrap/2.3.2/js/bootstrap.min.js"></script>
</html>

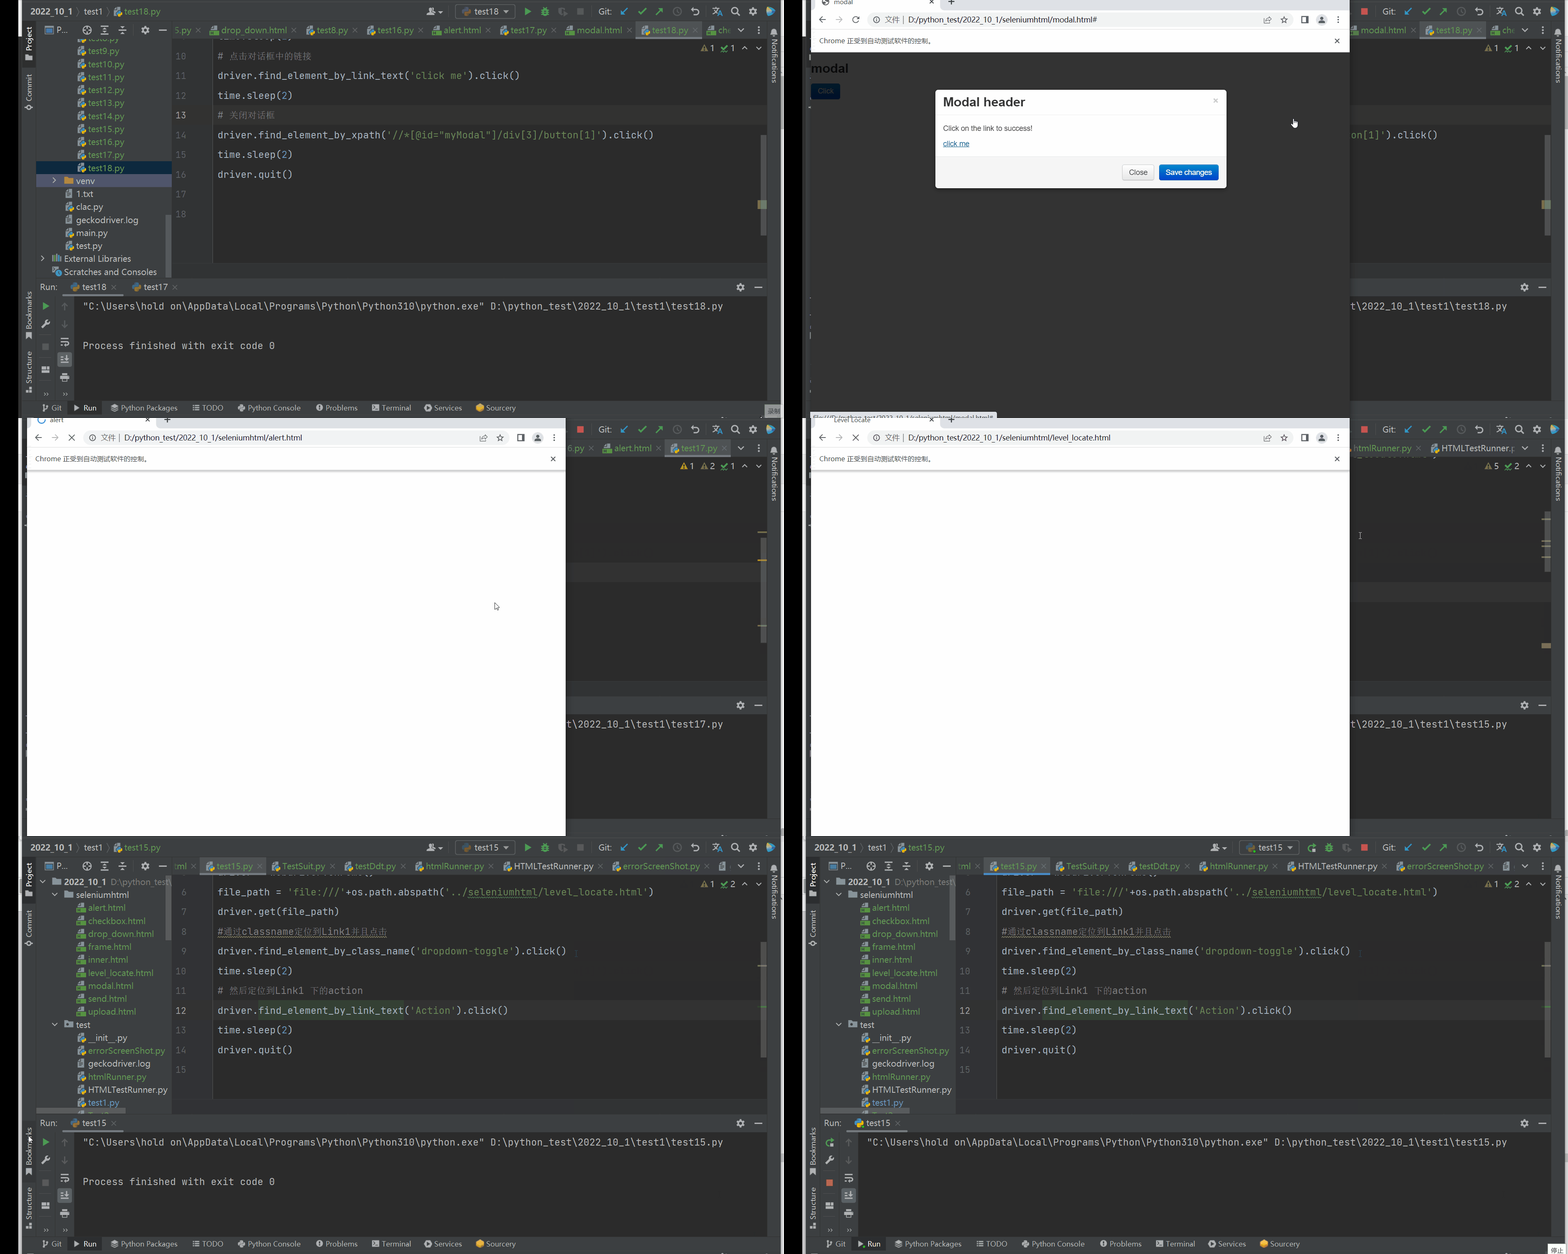
我们需要实现的是先打开对话框,然后点击对话框中的链接,然后关闭对话框!
import os.path
from selenium import webdriver
import time
driver = webdriver.Chrome()
file_path = 'file:///'+os.path.abspath('../seleniumhtml/modal.html')
driver.get(file_path)
# 打开对话框
driver.find_element_by_link_text('Click').click()
time.sleep(2)
# 点击对话框中的链接
driver.find_element_by_link_text('click me').click()
time.sleep(2)
# 关闭对话框
driver.find_element_by_xpath('//*[@id="myModal"]/div[3]/button[1]').click()
time.sleep(2)
driver.quit()
上传文件操作
文件上传操作也比较常见功能之一,上传功能没有用到新有方法或函数,关键是思路。
上传过程一般要打开一个本地窗口,从窗口选择本地文件添加。所以,一般会卡在如何操作本地窗口添加上传文件。
其实,在selenium webdriver 没我们想的那么复杂;只要定位上传按钮,通过send_keys 添加本地文件路径就可以了。绝对路径和相对路径都可以,关键是上传的文件存在。
以下面的html代码进行说明:
<html>
<head>
<meta http-equiv="content-type" content="text/html;charset=utf-8" />
<title>upload_file</title>
<script type="text/javascript" src="http://code.jquery.com/jquery-1.9.1.min.js"></script>
<link
href="http://netdna.bootstrapcdn.com/twitter-bootstrap/2.3.2/css/bootstra
p-combined.min.css" rel="stylesheet" />
<script type="text/javascript">
</script>
</head>
<body>
<div class="row-fluid">
<div class="span6 well">
<h3>upload_file</h3>
<input type="file" name="file" />
</div>
</div>
</body>
<script
src="http://netdna.bootstrapcdn.com/twitter-bootstrap/2.3.2/js/bootstrap.
min.js"></script>
</html>

import os.path
from selenium import webdriver
import time
driver = webdriver.Chrome()
file_path = 'file:///'+os.path.abspath('../seleniumhtml/upload.html')
driver.get(file_path)
#定位到上传文件框!
update = driver.find_element_by_name('file')
time.sleep(2)
#将需要上传的文件路径传入即可!
file = 'E:/Users/hold on/Desktop/表情/祖师爷.jpg'
update.send_keys(file)
time.sleep(2)
driver.quit()
