Unity2020版本和老版本添加虚拟按钮的方式有很大区别,老版本可以直接在prefabs中拖拽即可,
新版本需要先创建image target,然后在其inspector里面添加虚拟按钮

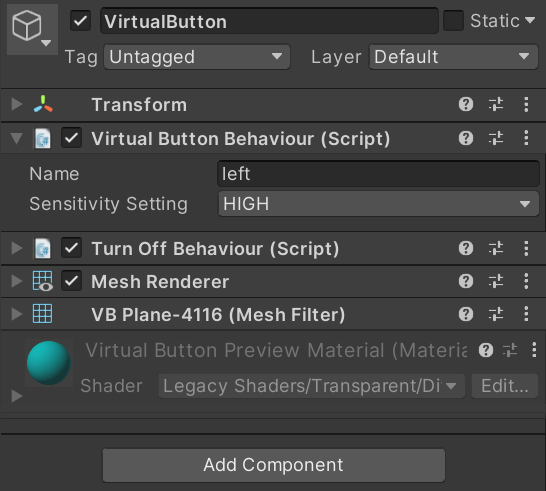
添加好虚拟按钮之后,设置好按钮的名字

由于虚拟按钮是透明的,为方便测试,我们可以在按钮里添加一个plane

然后可以编写脚本了,编写一个VirtualButtonControl.cs,将这个脚本添加到image target中
需要注意的是,以前版本如果想实现虚拟按钮的处理事件的话,要实现IVirtualButtonEventHandler接口,再调用registEventHandler()方法,新版本已经舍弃了这个接口,直接使用
RegisterOnButtonPressed(方法委托)和RegisterOnButtonReleased(方法委托)就可以了
自己工程的组件部署情况。。。

using System;
using System.Collections;
using System.Collections.Generic;
using UnityEngine;
using Vuforia;

public class VirtualButtonControl : MonoBehaviour
{
    // Start is called before the first frame update
    public GameObject cube;
    private VirtualButtonBehaviour[] buttons;

    void Start()
    {
        //获取image target下所有virtual button组件
        buttons = this.GetComponentsInChildren<VirtualButtonBehaviour>();
        //初始状态下cube不可见
        cube.SetActive(false);

        for (int i = 0; i < buttons.Length; i++)
        {
            if (buttons[i].VirtualButtonName=="right")
            {
                //vuforia9.6.3版本和老版本中虚拟按钮注册处理事件的方法有很大不同
                //新版本可以使用RegisterOnButtonPressed(方法委托)
                //直接创建按钮点击/释放的处理事件
                buttons[i].RegisterOnButtonPressed(pressDown);
	            buttons[i].RegisterOnButtonReleased(releaseUp);
            }
        }
    }

    private void releaseUp(VirtualButtonBehaviour obj)
    {
        //要想获取虚拟按钮的名字必须用VirtualButtonName属性
        //obj.name是不行的
        Debug.Log(obj.VirtualButtonName+"release");
        cube.SetActive(false);
    }

    private void pressDown(VirtualButtonBehaviour obj)
    {
        //要想获取虚拟按钮的名字必须用VirtualButtonName属性
        //obj.name是不行的
        Debug.Log(obj.VirtualButtonName+"press");
        cube.SetActive(true);
    }

    // Update is called once per frame
    void Update()
    {

    }


}
参考文章:
https://blog.csdn.net/vv_017/article/details/79522340
https://blog.csdn.net/qq_36942939/article/details/103794122
https://blog.csdn.net/weixin_52800300/article/details/117691871