Decal 是游戏中常见的一个东西,经常被用在 显示弹痕,地面叠加花纹等。
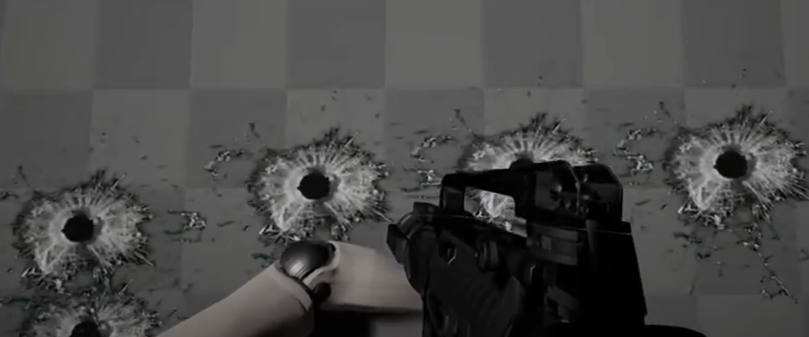
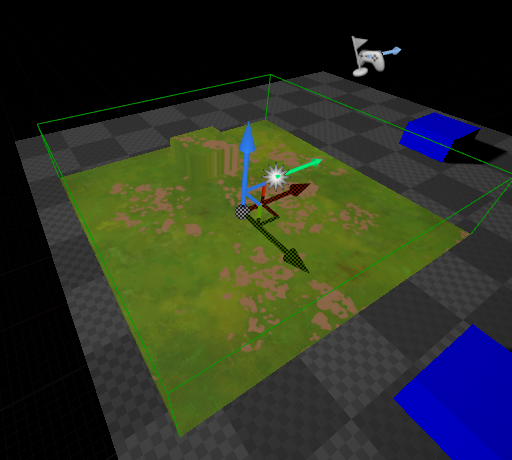
Decal 绘制流程
Decal可以认为是,将一个面的画面沿Decal的Box的X轴方向投影到物体表面。
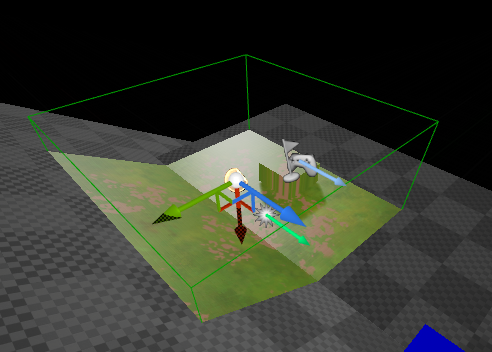
Decal的绘制实际只有一个Box绘制。
RHICmdList.DrawIndexedPrimitive(GetUnitCubeIndexBuffer(), 0, 0, 8, 0, UE_ARRAY_COUNT(GCubeIndices) / 3, 1);
为什么不用一个平面来绘制呢?这样做主要是为了,覆盖不同视角,裁剪也变得简单。
Decal Pass是在Base Pass之后,Translucency Pass之前,Decal只能投射在非透明物体上。
Vertex过程
// from component to clip space (for decal frustum)
float4x4 FrustumComponentToClip;

// decal vertex shader
void MainVS(
    in float4 InPosition : ATTRIBUTE0,
    out float4 OutPosition : SV_POSITION
    )
{
    OutPosition = mul(InPosition, FrustumComponentToClip);
}
Vertex Shader只是乘以FrustumComponentToClip变换矩阵,变换到Clip空间。
FMatrix FDecalRendering::ComputeComponentToClipMatrix(const FViewInfo& View, const FMatrix& DecalComponentToWorld)
{
	FMatrix ComponentToWorldMatrixTrans = DecalComponentToWorld.ConcatTranslation(View.ViewMatrices.GetPreViewTranslation());
	return ComponentToWorldMatrixTrans * View.ViewMatrices.GetTranslatedViewProjectionMatrix();
}
FrustumComponentToClip实际就是WorldViewProjection 组合变换矩阵(包含了DecalSize)
	FTransform GetTransformIncludingDecalSize() const
	{
		FTransform Ret = GetComponentToWorld();
		Ret.SetScale3D(Ret.GetScale3D() * DecalSize);

		return Ret;
	}
Pixel 处理过程
先获取屏幕UV
float2 ScreenUV = SvPositionToBufferUV(In.SvPosition);
SvPosition 是从Vertex Shader里输出,插值后 再传入Pixel Shader,
void MainPS
    (
#if PIXELSHADEROUTPUT_INTERPOLANTS || PIXELSHADEROUTPUT_BASEPASS
        FVertexFactoryInterpolantsVSToPS Interpolants,
#endif
#if PIXELSHADEROUTPUT_BASEPASS
        FBasePassInterpolantsVSToPS BasePassInterpolants,
#elif PIXELSHADEROUTPUT_MESHDECALPASS
        FMeshDecalInterpolants MeshDecalInterpolants,
#endif

        in INPUT_POSITION_QUALIFIERS float4 SvPosition : SV_Position        // after all interpolators
SvPositionToBufferUV函数是将SvPosition变换到屏幕空间UV坐标。
float2 SvPositionToBufferUV(float4 SvPosition)
{
    return SvPosition.xy * View.BufferSizeAndInvSize.zw;
}
注意SvPosition.xy是FrameBuffer像素坐标xy
获取设备Z(深度缓存里Depth值),这样可以还原那个像素点的WorldPosition。
// make SvPosition appear to be rasterized with the depth from the depth buffer
    In.SvPosition.z = LookupDeviceZ(ScreenUV);
转换到Decal Box局部坐标系
float4 DecalVectorHom = mul(float4(In.SvPosition.xyz,1), SvPositionToDecal);
        OSPosition = DecalVectorHom.xyz / DecalVectorHom.w;

        // clip content outside the decal
        // not needed if we stencil out the decal but we do that only on large (screen space) ones
        clip(OSPosition.xyz + 1.0f);
        clip(1.0f - OSPosition.xyz);

        // todo: TranslatedWorld would be better for quality
        WSPosition = SvPositionToWorld(In.SvPosition);
有两个clip,裁剪掉DecalBox以外的东西(不是Decal自己的像素点,前面有个步骤还原获取了原来Scene里的DeviceZ(In.SvPosition.z = LookupDeviceZ(ScreenUV)))
如下图所示
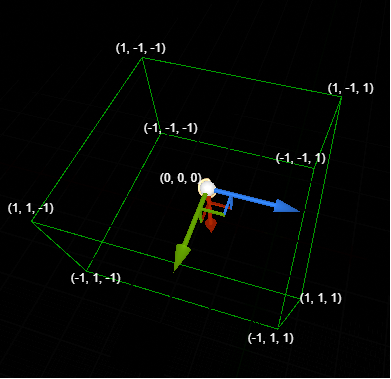
红色是X轴,绿色是Y轴,蓝色是Z轴。中心点坐标是(0, 0, 0)。
			FVector2D InvViewSize = FVector2D(1.0f / View.ViewRect.Width(), 1.0f / View.ViewRect.Height());

			// setup a matrix to transform float4(SvPosition.xyz,1) directly to Decal (quality, performance as we don't need to convert or use interpolator)

			//	new_xy = (xy - ViewRectMin.xy) * ViewSizeAndInvSize.zw * float2(2,-2) + float2(-1, 1);

			//  transformed into one MAD:  new_xy = xy * ViewSizeAndInvSize.zw * float2(2,-2)      +       (-ViewRectMin.xy) * ViewSizeAndInvSize.zw * float2(2,-2) + float2(-1, 1);

			float Mx = 2.0f * InvViewSize.X;
			float My = -2.0f * InvViewSize.Y;
			float Ax = -1.0f - 2.0f * View.ViewRect.Min.X * InvViewSize.X;
			float Ay = 1.0f + 2.0f * View.ViewRect.Min.Y * InvViewSize.Y;

			// todo: we could use InvTranslatedViewProjectionMatrix and TranslatedWorldToComponent for better quality
			const FMatrix SvPositionToDecalValue =
				FMatrix(
					FPlane(Mx,  0,   0,  0),
					FPlane( 0, My,   0,  0),
					FPlane( 0,  0,   1,  0),
					FPlane(Ax, Ay,   0,  1)
				) * View.ViewMatrices.GetInvViewProjectionMatrix() * WorldToComponent;
先将Sv_Position(Scene的Sv_Position,不是Decal Box的)转换到Projection空间,再InvViewProjectionMatrix 转换到WorldSpace,最后WorldToComponent到Decal局部坐标系。
DecalVectorHom.xyz / DecalVectorHom.w 从其次坐标系,到正常的坐标空间。
DecalUV的计算
// can be optimized
    float3 DecalVector = OSPosition * 0.5f + 0.5f;

    // Swizzle so that DecalVector.xy are perpendicular to the projection direction and DecalVector.z is distance along the projection direction
    float3 SwizzlePos = DecalVector.zyx;

    // By default, map textures using the vectors perpendicular to the projection direction
    float2 DecalUVs = SwizzlePos.xy;
首先将-1 到 1范围的,转换到0到1。
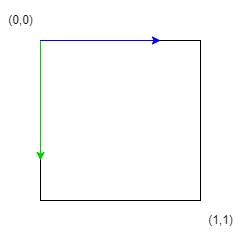
最后是输出颜色和Alpha。
不接受Decal投射的物体处理
不接受Decal的物件,绘制的时候,写入0x80到Stencil Buffer里。
	if (bEnableReceiveDecalOutput)
	{
		const uint8 StencilValue = (PrimitiveSceneProxy && !PrimitiveSceneProxy->ReceivesDecals() ? 0x01 : 0x00);

		DrawRenderState.SetDepthStencilState(TStaticDepthStencilState<
				true, CF_DepthNearOrEqual,
				true, CF_Always, SO_Keep, SO_Keep, SO_Replace,
				false, CF_Always, SO_Keep, SO_Keep, SO_Keep,
				// decals atm are singe user of stencil in mobile base pass
				// don't use masking as it has significant performance hit on Mali GPUs (T860MP2)
				0x00, 0xff /*GET_STENCIL_BIT_MASK(RECEIVE_DECAL, 1)*/ >::GetRHI());

		DrawRenderState.SetStencilRef(GET_STENCIL_BIT_MASK(RECEIVE_DECAL, StencilValue)); // we hash the stencil group because we only have 6 bits.
	}
	else
	{
		// default depth state should be already set
	}
Decal在绘制的时候,设置Read Mask 0x80,和0比较相等,如果不等于就不进行绘制。
						GraphicsPSOInit.DepthStencilState = TStaticDepthStencilState<
							false, CF_DepthNearOrEqual,
							true, CF_Equal, SO_Keep, SO_Keep, SO_Keep,
							false, CF_Always, SO_Keep, SO_Keep, SO_Keep,
							GET_STENCIL_BIT_MASK(RECEIVE_DECAL, 1), 0x00>::GetRHI();